
Great Landscape Plantings Have 3 Levels

After last week’s post, What’s Bugging Your Landscape? complete with pictures of yucky bugs, I’m ready to return to a post with inspirational pictures! As one response last week put it, “this one made my skin crawl a little bit.”
Ever wonder what is the difference between an average landscape planting and a great landscape planting?
Great landscape plantings contain three levels: a front, a middle, and a back.
Let’s start with some basic design math:
Front – No more than 18” in height. Low ground covers, perennials, annual color and small plants.
Middle – Perennials, annual color, and smaller shrubs with enough height to start creating levels. 18” to 3’ in height.
Back – Shrubs and small trees. 3’ or more in height.
Note - Read the plant label and believe what it says about plant height and growing conditions. Remember, plants perform their best if they are allowed to grow to their natural height and form. If you have only 4’ of height for your back level, don’t plant a shrub with a mature height of 10’ with the idea you will keep it pruned. Even if you are diligent with your maintenance, the plant will never look as good as it would if it could grow naturally.

A newly planted landscape with boxwood and hydrangea for the back. Spirea, drift roses and perennials in the middle, and annual color in the front.
Walls and fences don’t count as the third level. To get the full impact, you need three levels in front of the object.
When selecting plants don’t go for all evergreen plants or all flowering plants. A mixture of evergreens with interesting leaf shapes and colors will add more interest.
The levels don’t have to be in a continuous, linear run of all the same plant material. A layer can contain a mixture of plants. Often the middle level works well with a few, specimen plants of interest, or groupings of perennials. Every landscape should include a few surprises.

Even in patio pots, planting for three levels adds interest. This pot contains a variegated euonymus for height, penta for the middle, and trailing periwinkle.
A few ideas to get you started:
Large ornamental grasses in the back, flowering shrubs in the middle, with a ground cover boarder in the front.
Crape myrtle in the back, evergreen shrubs in the middle, and annual color in the front.
Evergreens for the back with a mix of perennials in the middle and ground covers in the front.
A shady area idea is azalea in the back, hosta in the middle, and dwarf mondo in the front.
Garden trends are seeing a resurgence of classical flower plants such as roses, hydrangeas and peonies. With so many new innovations, using these as one of your layers will give a nostalgic feel to your landscape.
A great resource for ideas and plant materials is Monrovia.com. Monrovia has been a leader in landscape plant material for over 90 years. I am sure you will find their website a great resource. The content in this email is a combination of information from Monrovia and our years of experience in the local landscape industry.

Dwarf Globe Blue Spruce used as a mid level shrub adds color and interest to a landscape.

Espaliering a plant, such as Pyracantha, on a wall or fence is a great way to create levels in small spaces.
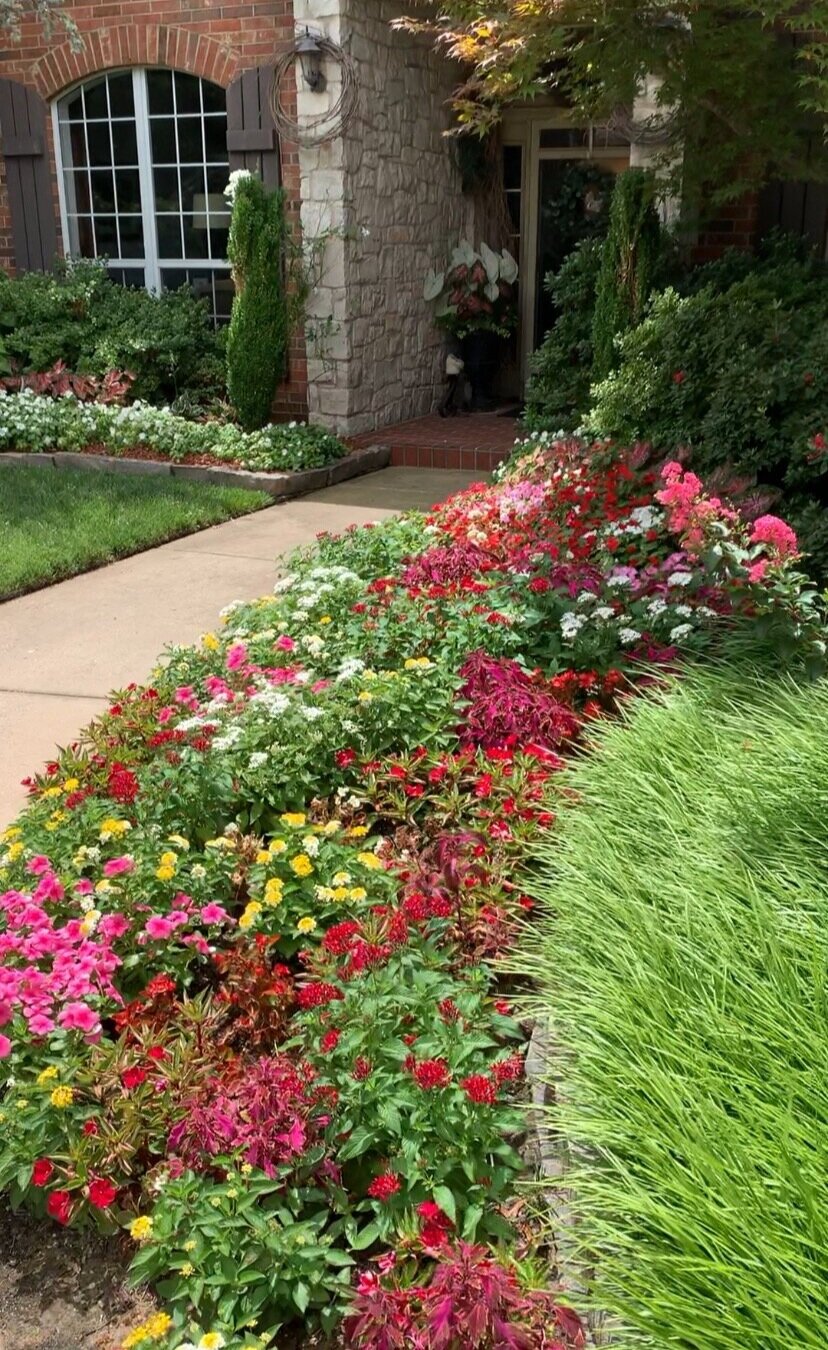
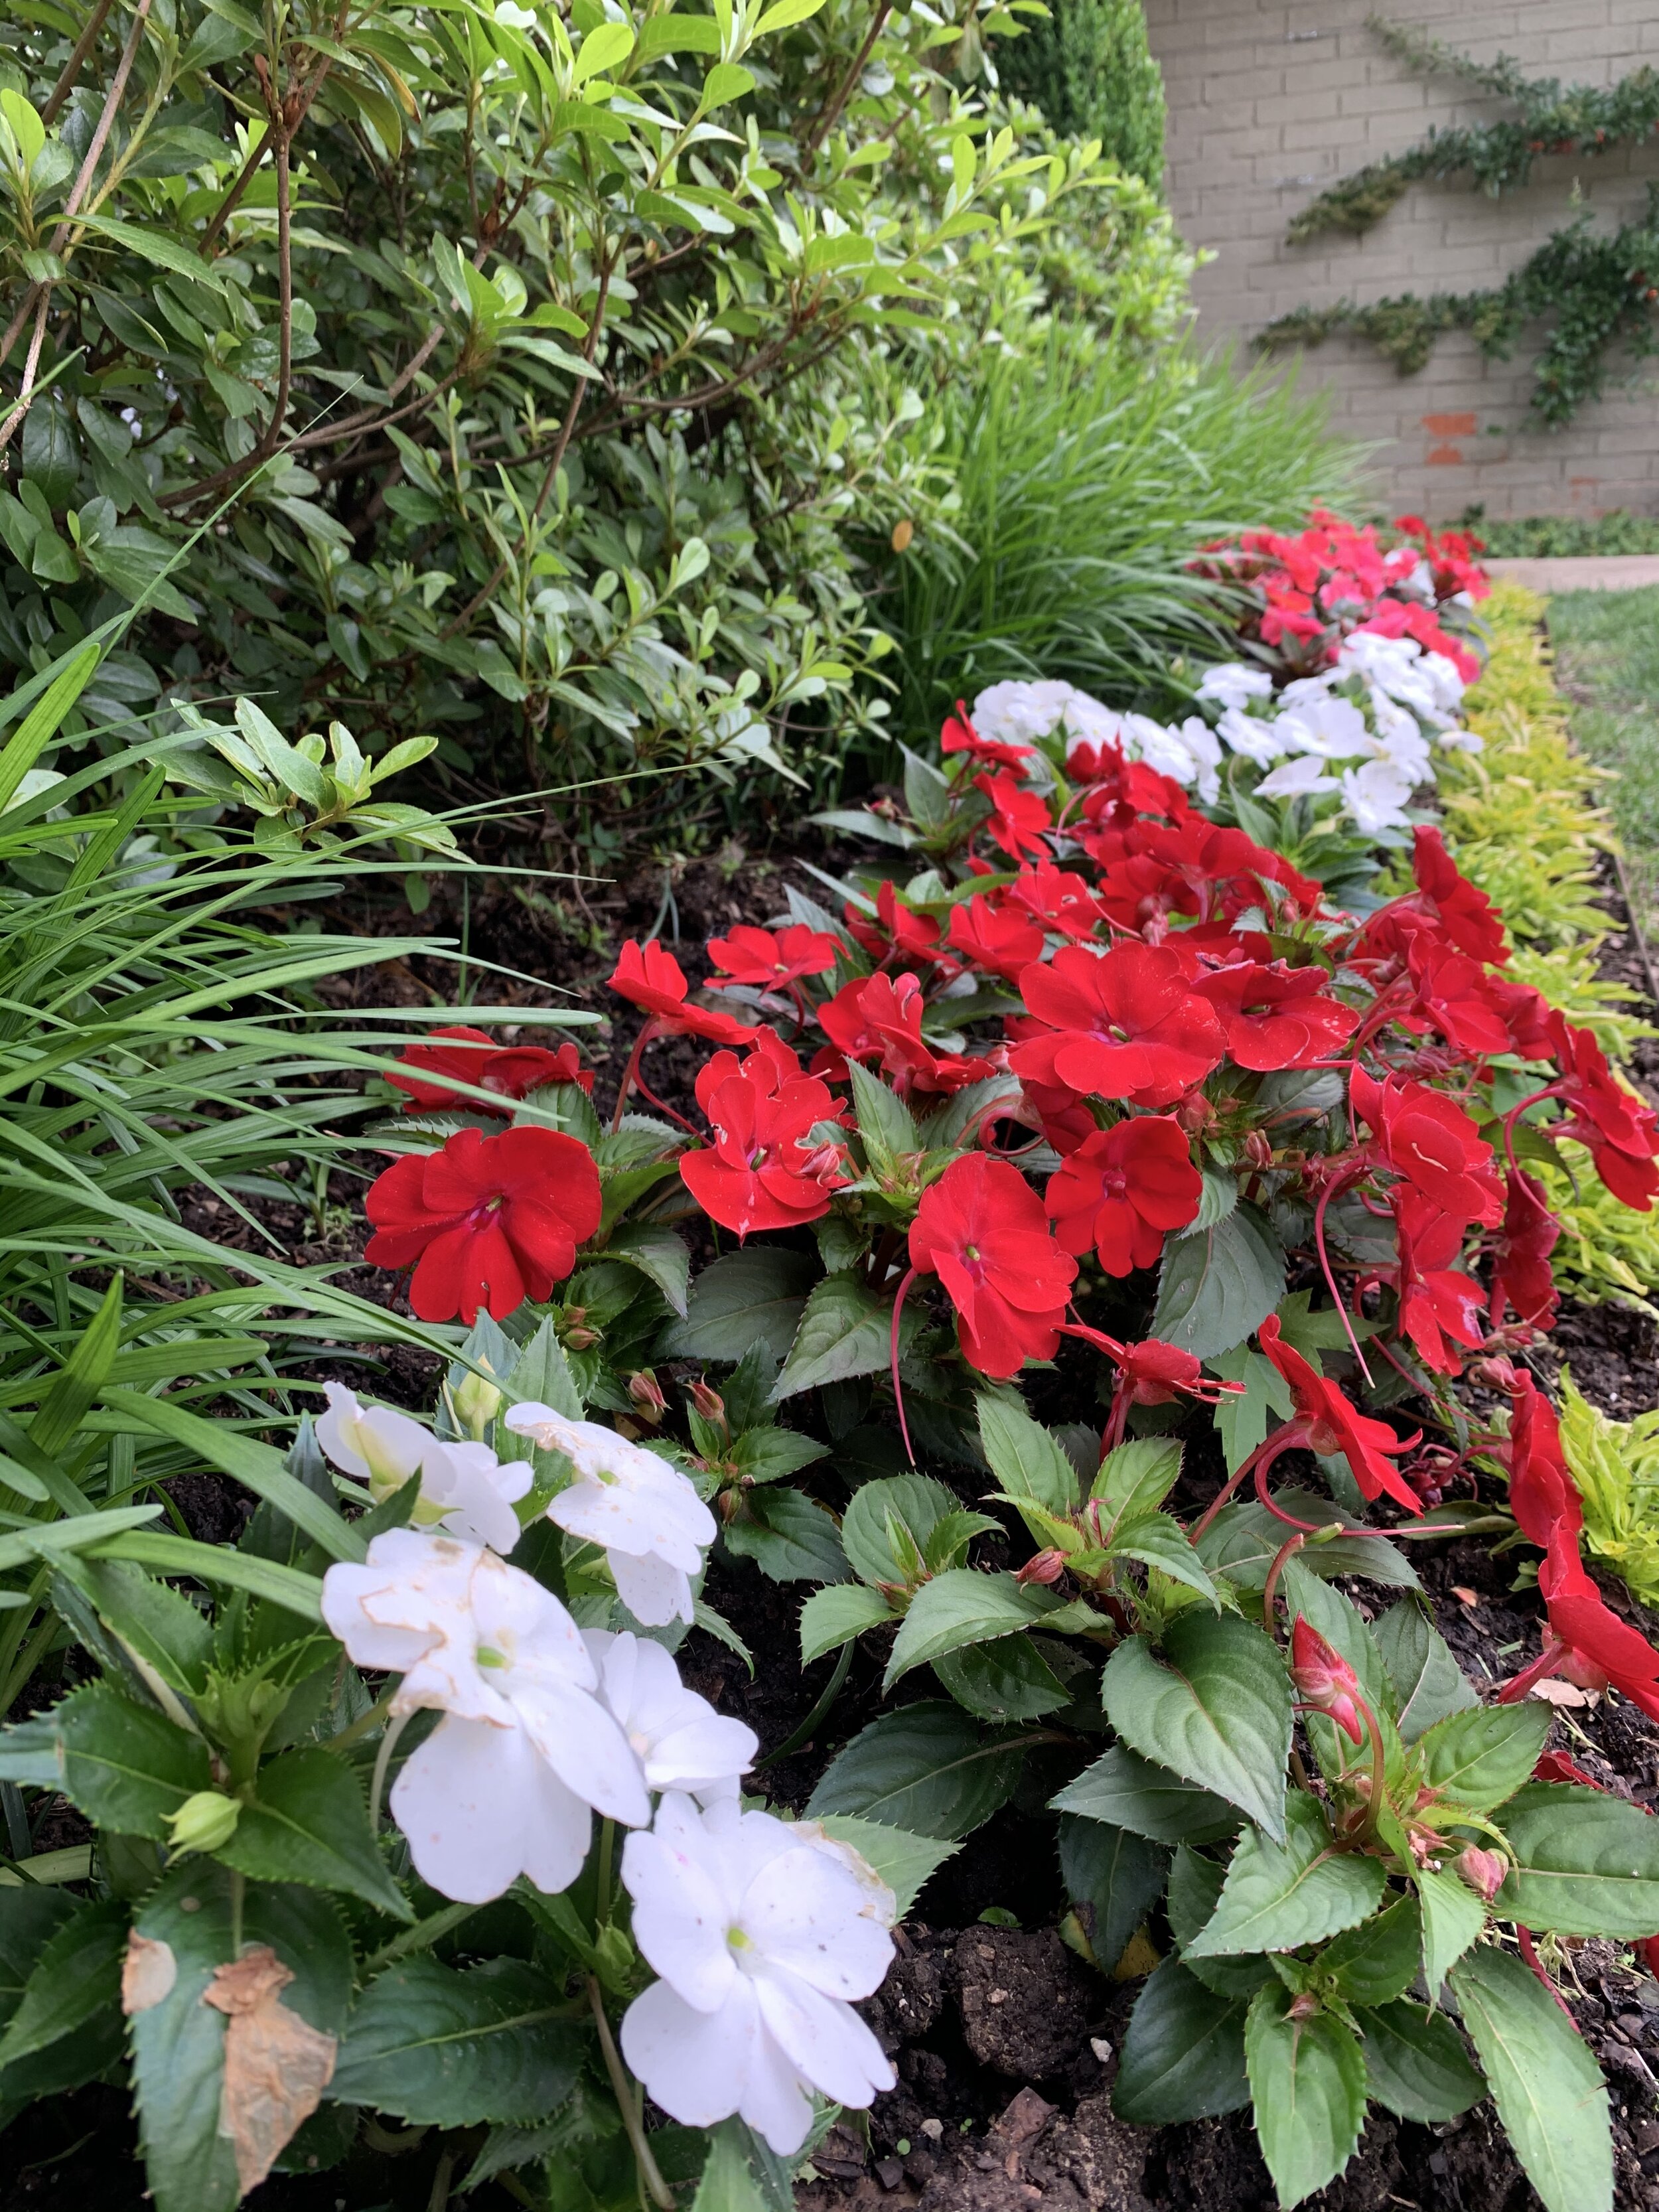
A first level of bright seasonal color creates a welcoming environment to a front door.


Annuals, perennials, flowering shrubs and evergreens planted in levels to add interest.
Height variation in landscape plantings, incorporating a mix of shrubs with different heights, adds depth and dimensions to your landscape.
Larger plants, particularly when you have the room, are great for adding interest and will soften the hard lines of walls and fences. They also are a great way of creating a natural screen or a free-standing boarder. The more space you have the bigger you can go with the back level.
If your space is limited and you still want to gain height, a climbing vine or shrub against a wall or fence is a great solution. Also consider using a flowering tree, boxwood, or pyracantha in an espaliered form.
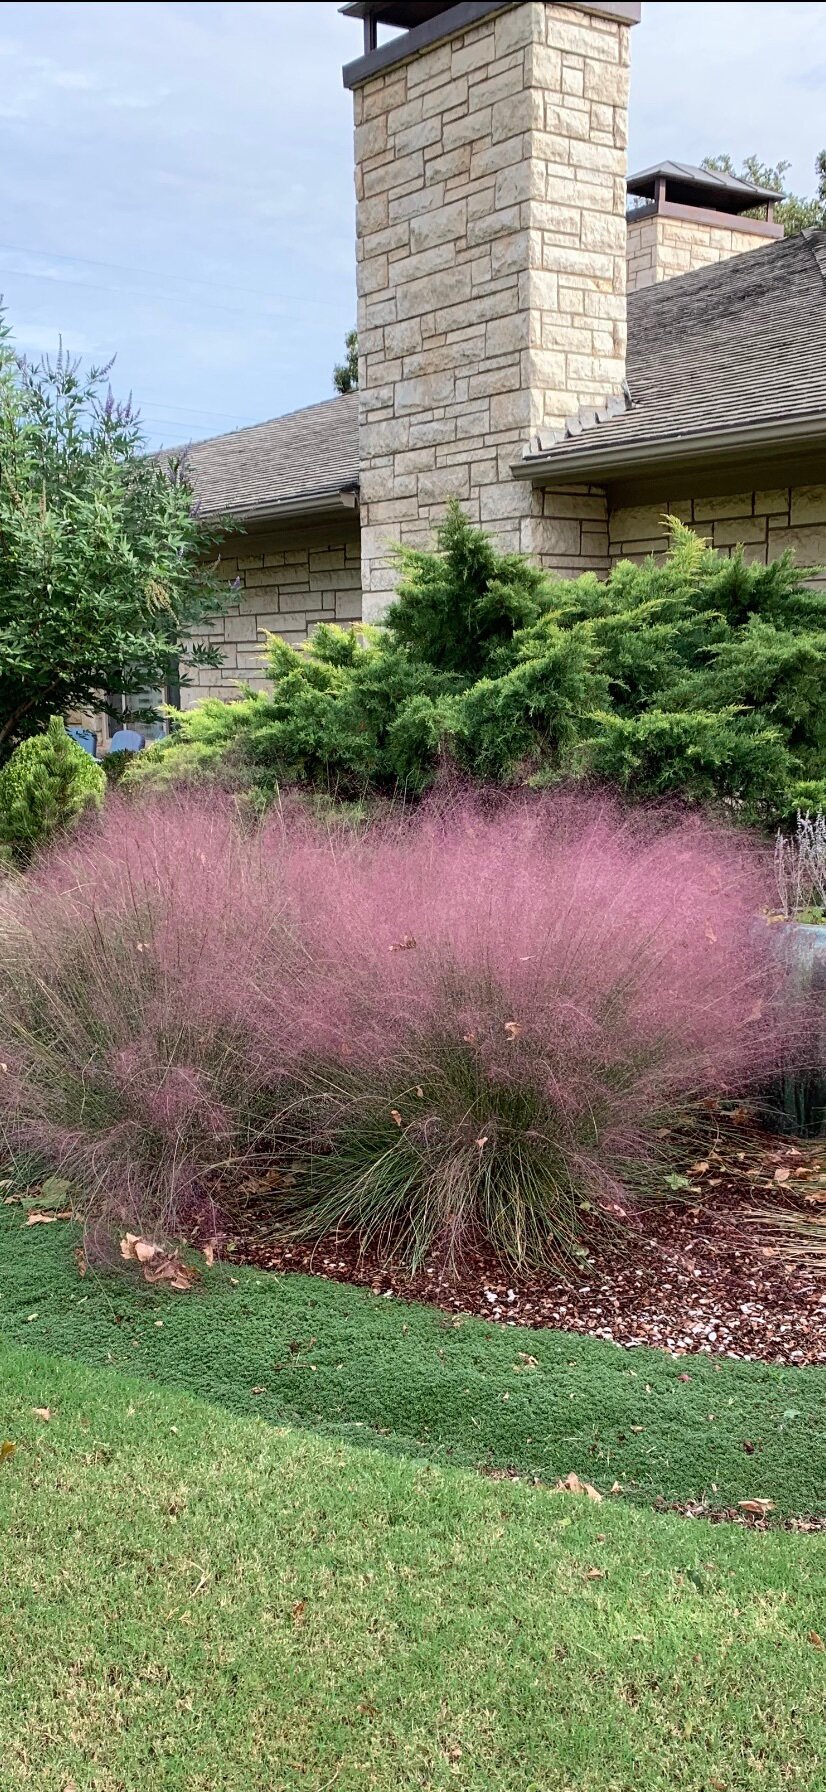
Need a low maintenance landscape option with three levels? Plant Pink Muhly Grass between groundcover and standard Juniper varieties. Little to no trimming will be required.

Large landscape containers are another way to create levels in the landscape.
It is also good to repeat a few shrubs or colors. Even when your goal is an informal landscape, some repetition helps draw all plants together into one landscape planting.
Plantings should have something of interest in every season. Consider one level planted in mostly evergreens, another in perennials, and another in annual color. The higher the visibility, more perennials, seasonal color, or blooming plants are recommended. Curb appeal increases as color increases.
Always welcome guests with flowers. A border of annual color along your front walk with a splash of more color near your front door creates a warm greeting.

Annuals planted in front of perennials to create levels.

Inpatients, Caladiums and Hostas create layers in front of Azalea and Hydrangeas in shady areas.
Best time to plant:
Fall is the best time to plant most plants. In the fall, plant materials benefit from cooler days while the soil temperatures are still warm enough root growth continues. The result is a plant that has a stronger root system the following summer.

Japanese Maple, hydrangea and ferns are a great way to create three levels in shade gardens.

Grasses make a great middle level when creating landscape plantings.
Summer planting:
But, what if you don’t want to just dream about landscapes, you want to plant now. Is it ok to plant during the summer?
Even though fall is the best time to plant new landscaping can be added year-round in central Oklahoma. Avoiding extreme heat (or cold) and drought is best. But, successful planting in the summer is possible with a little extra effort.
Follow these tips when planting in the summer:
Container-grown plants are best for summer planting because there is less transplant shock than with balled and burlaped or bare root plant material.
Dig a whole that is twice as wide as the plant container and 25% deeper.
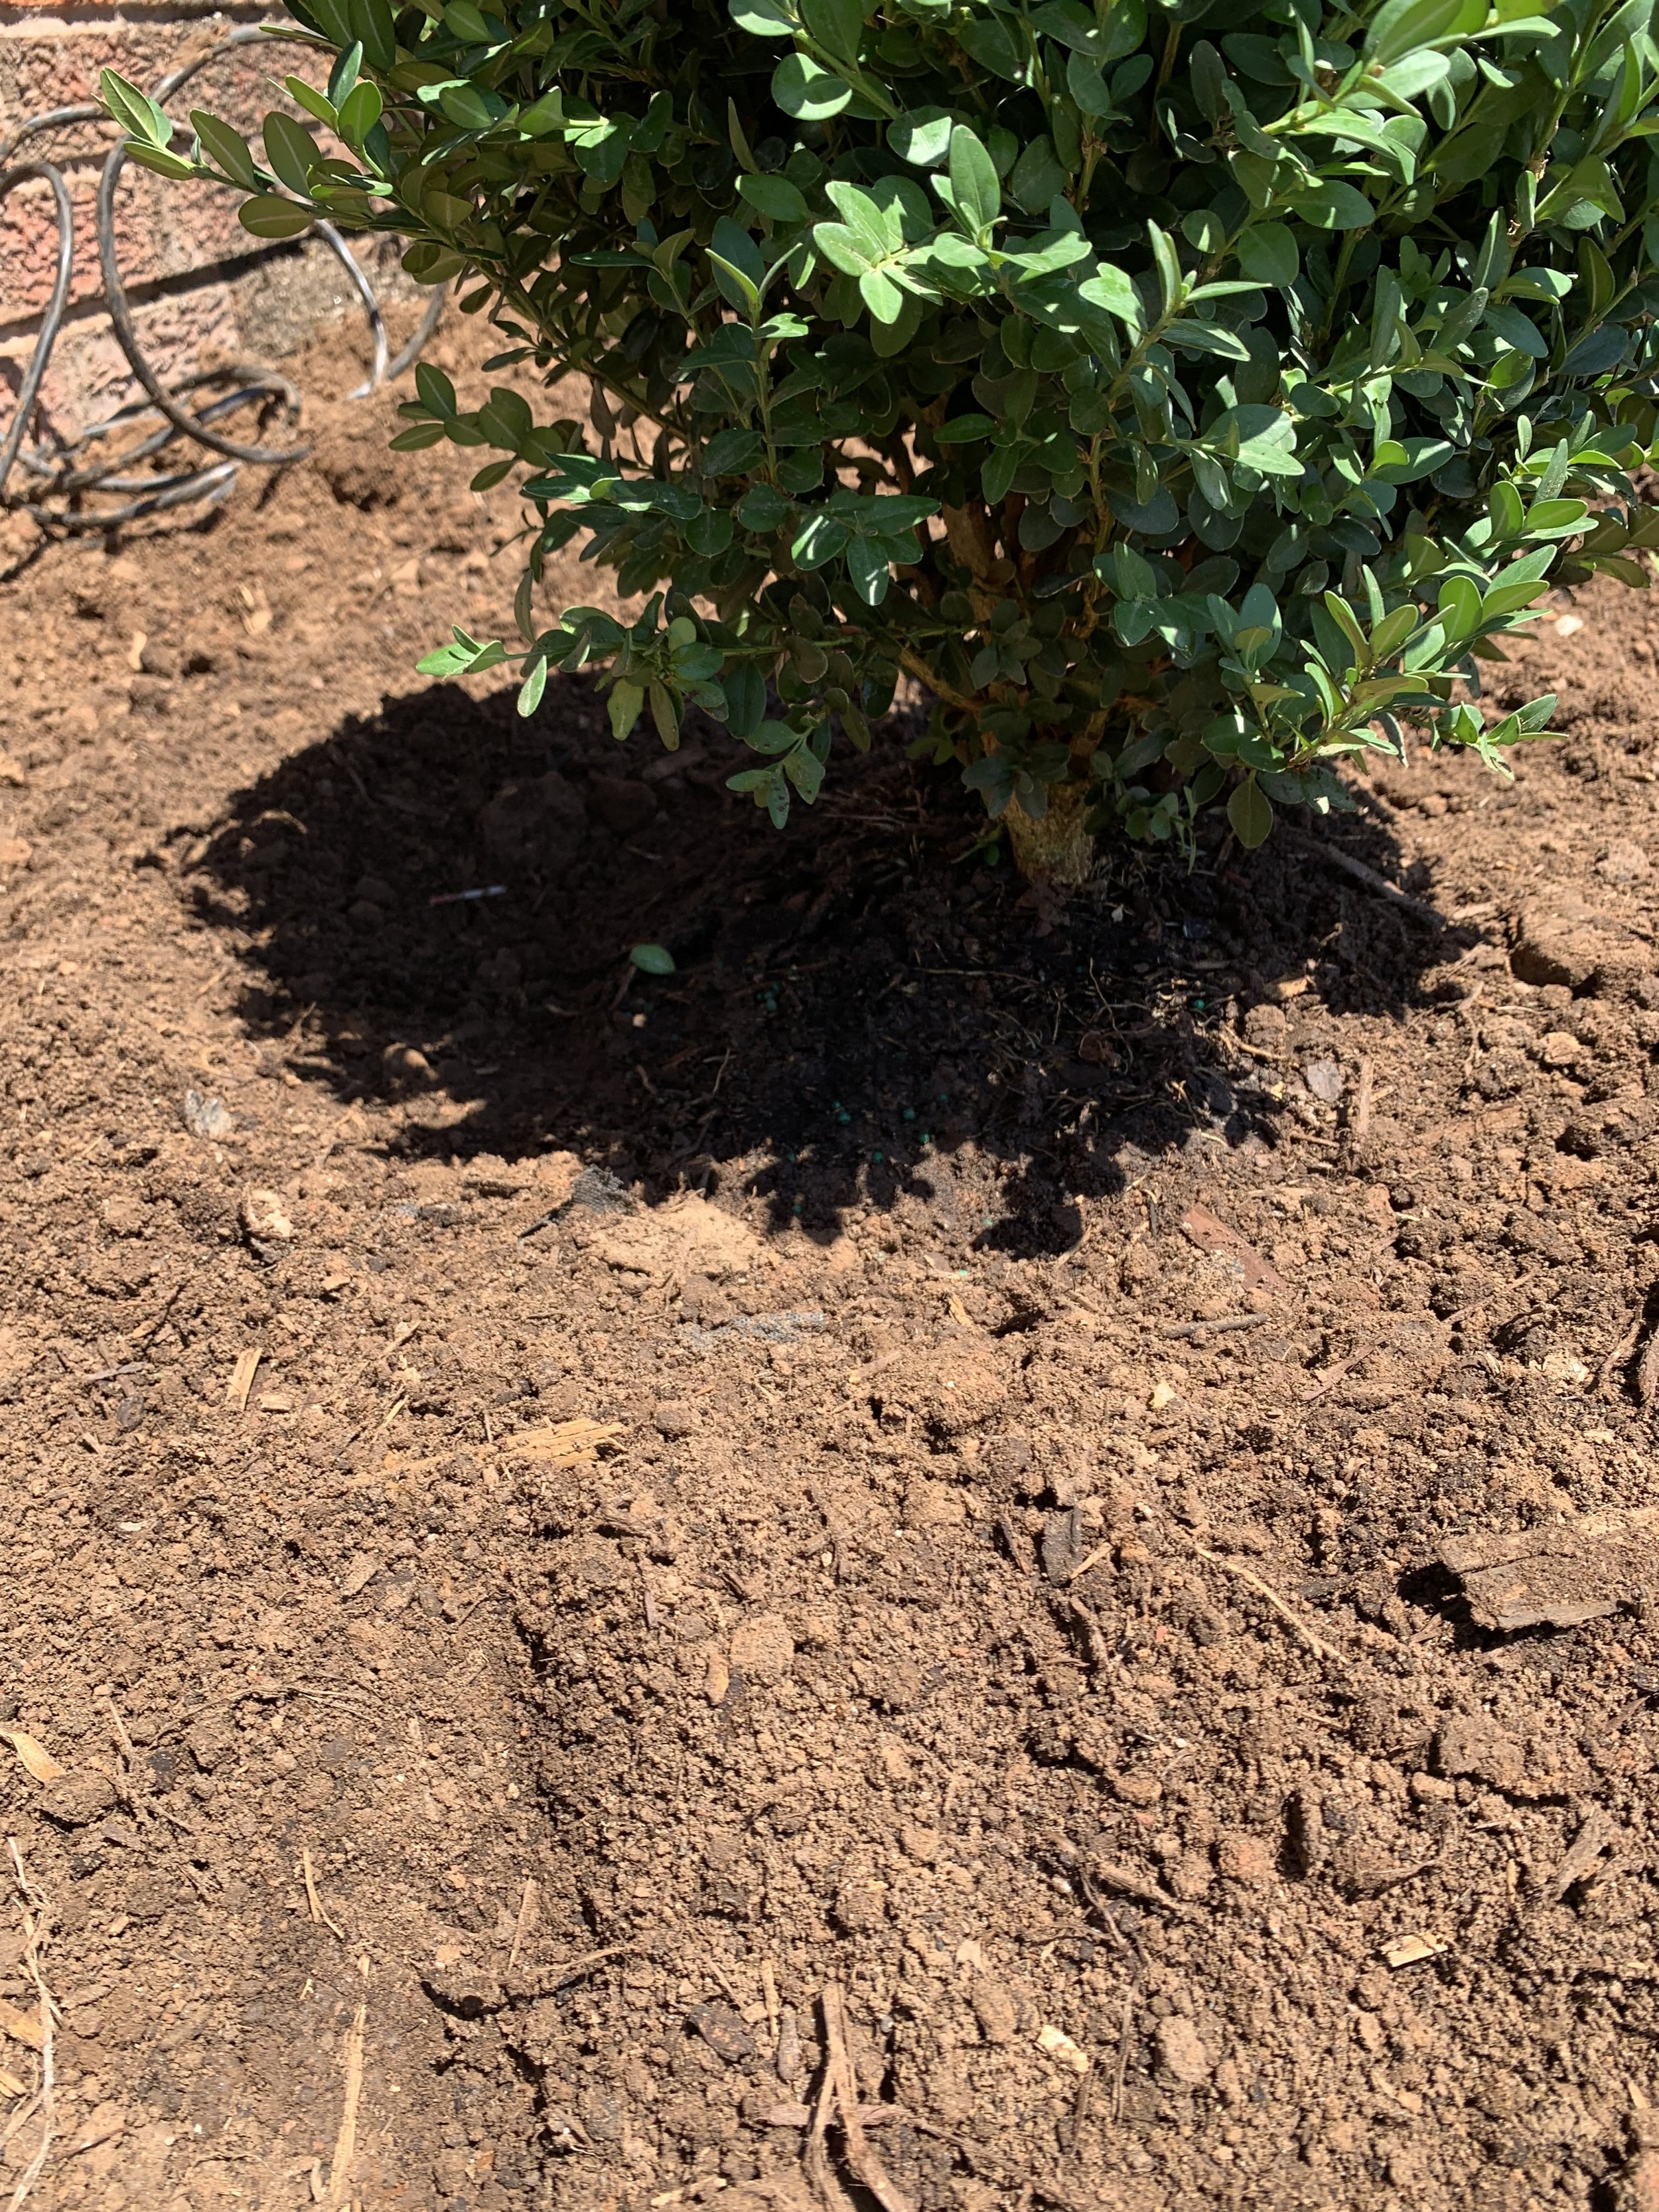
Mix organic compost with the soil you removed from the hole, place some of the mixture in the hole, firm up the soil in the bottom of the hole and place the plant with the top of the soil around the plant 1-2” higher than the surrounding soil.
Backfill 1/3 of the soil around the plant with the compost and soil mixture, lightly firm up and then fill the rest of the hole with water.
After the water drains from the hole, backfill with your soil mixture forming a small saucer around the plant while being careful not to place any soil on top of the plant root ball.
Fill the saucer with water and let it soak into the soil.
Mulch around the plant with 2 to 3” of quality, natural mulch to help keep the soil moisture and temperature consistent.
Deep water daily for the first two weeks when planting in the heat of the year. Don’t let the soil around the plant get too dry for the rest of the summer. But, at the same time, you don’t want to over water, so check soil moisture often. The soil should be moist, but not so moist you can make a mud pie.
For trees, the best practice is to use a tree gator around new trees planted during the summer.
The goal is to keep the plant alive and healthy until the fall. Don’t expect much new growth until next spring.
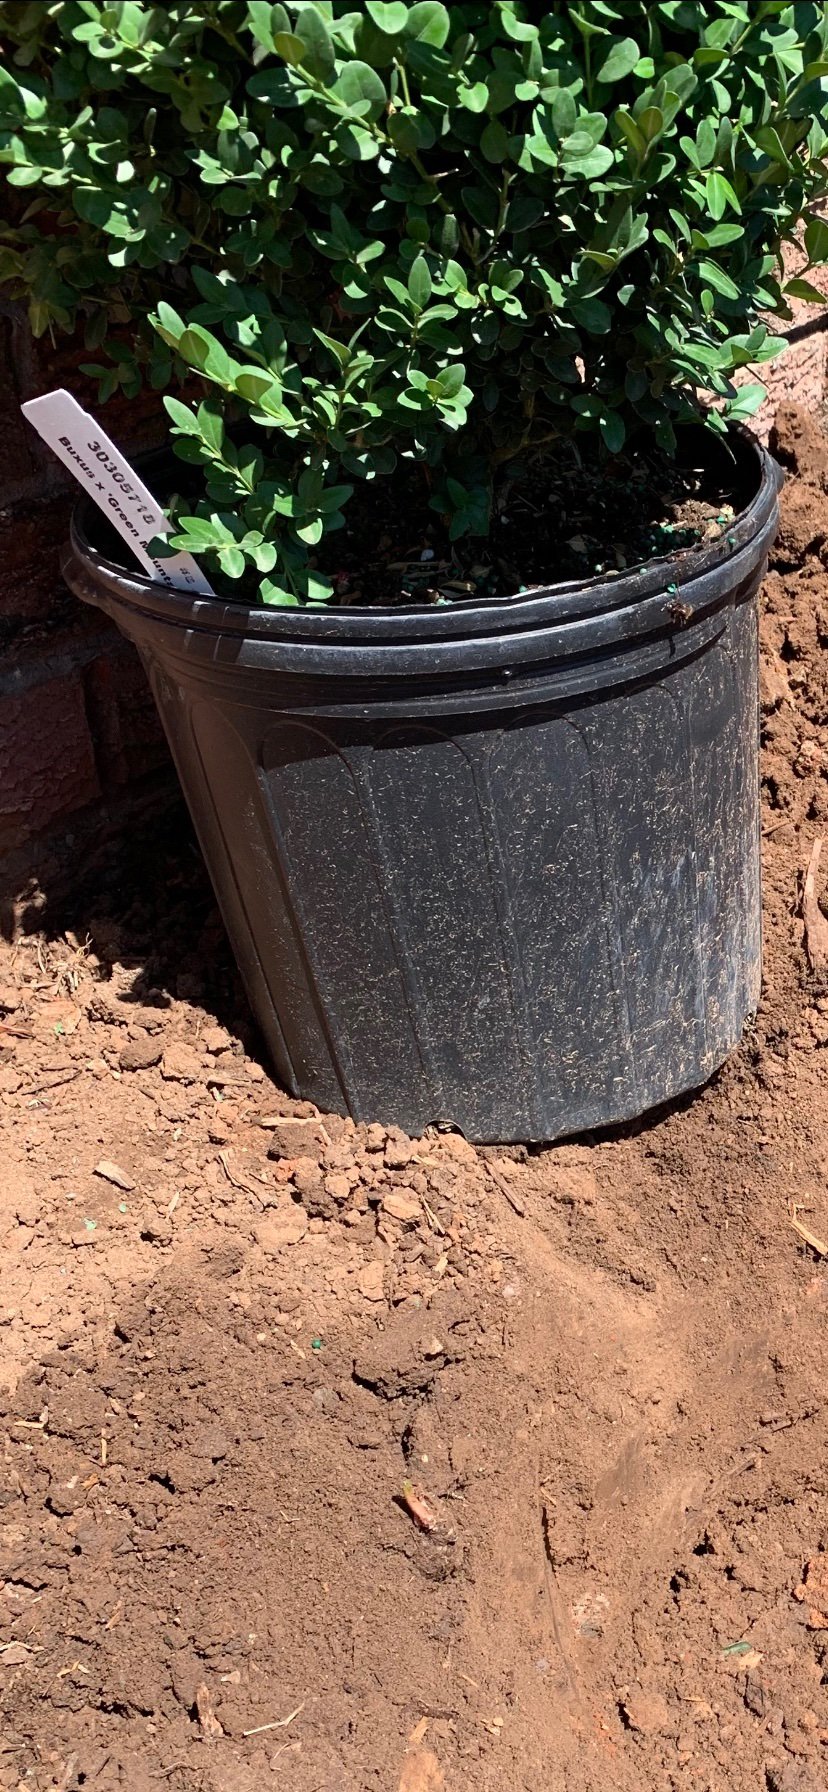
Container-grown plants are best for summer planting because there is less transplant shock than with balled and burlaped or bare root plant material.

Mix organic compost with the soil you removed from the hole, place some of the mixture in the hole, firm up the soil in the bottom of the hole and place the plant with the top of the soil around the plant 1-2” higher than the surrounding soil.

Place the shrub with the root ball 1-2” higher than the surrounding soil.

Fill the rest of the hole with water allowing time for the water to be absorbed into the soil before backfilling.

Finish the planting with 2-3” of quality, natural mulch.

Dig a whole that is twice as wide as the plant container and 25% deeper.

Place some of the compost soil mixture in the hole and lightly stamp it down.

Backfill 1/3 of the soil around the plant with the compost and soil mixture, lightly firm up and then fill the rest of the hole with water.
Backfill the hole being careful not to add soil to the top of the plant’s root ball, lightly pack the soil, create a small saucer ring from the soil, and fill the saucer full of water.
What are your best landscape ideas?
What are your favorite plants?
We would love to hear what is working well in your landscape.
Stay cool.
Keep landscape dreaming.
Lorne Hall
Hall | Stewart Lawn + Landscape
(405)367-3873
What’s bugging your landscape?

Wouldn’t it be nice if your landscape could tell you when something is bugging them?
If they could, there would be a whole lot of chatter out in the landscapes right now.
No two years are the same when it comes to battling insects and disease in the lawn and landscape. But one thing is consistent, when your landscape is under stress it is more susceptible to insect and disease problems.
The dryness of the last 30 days along with the above normal temperatures have brought added stress to your turf and plants resulting in more insect and disease pressure.
Here are a few of the problems that we are either currently seeing in landscapes or we have on our watch list:

The first generation of webworm started to show up in trees this week. Inspect your trees this weekend. The best control is to cut the branch out when they are small.

The webworm caterpillar weaves a loose web around tree branches to protect themselves while they are destroying your tree’s leaves.
WEBWORM
Timing – The first-generation spin webs in July and later generations create webs in September to October.
Caterpillars weave a loose web around tree branches while they are munching on the leaves.
Favorite trees include hickory, mulberry, oak, pecan, popular, redbud, sweetgum, and willow. But, you can find them on most ornamental shade trees when populations are heavy.
Early generations won’t cause long lasting damage. They are just unsightly. The last generation can cause damage when the branch tries to rebud just before a killing frost. When this occurs, you can expect the affected branch to die.
The best control is to cut out any affected branches in the early generations when the webbing is small. Completely dispose of the branch as the worms will exit the webbing and return to a tree. If the web is too high or if the population has increased to the point that pruning is not possible, an insecticide application will be needed. The spray must penetrate the webbing to gain control of the caterpillars. Dormant oil applications are a good idea as worms overwinter in tree bark.
Even though early populations do not cause damage, early control is important. When left untreated typically later generations’ populations increase.

Webworm caterpillars loosely weave webbing around branches to protect them while stripping a branch of leaves. When spraying, you mush have enough pressure to penetrate the webbing to gain control.


Bagworms produce silk threads to move locations.
BAGWORMS
Timing - Eggs hatch in May and they remain active through September.
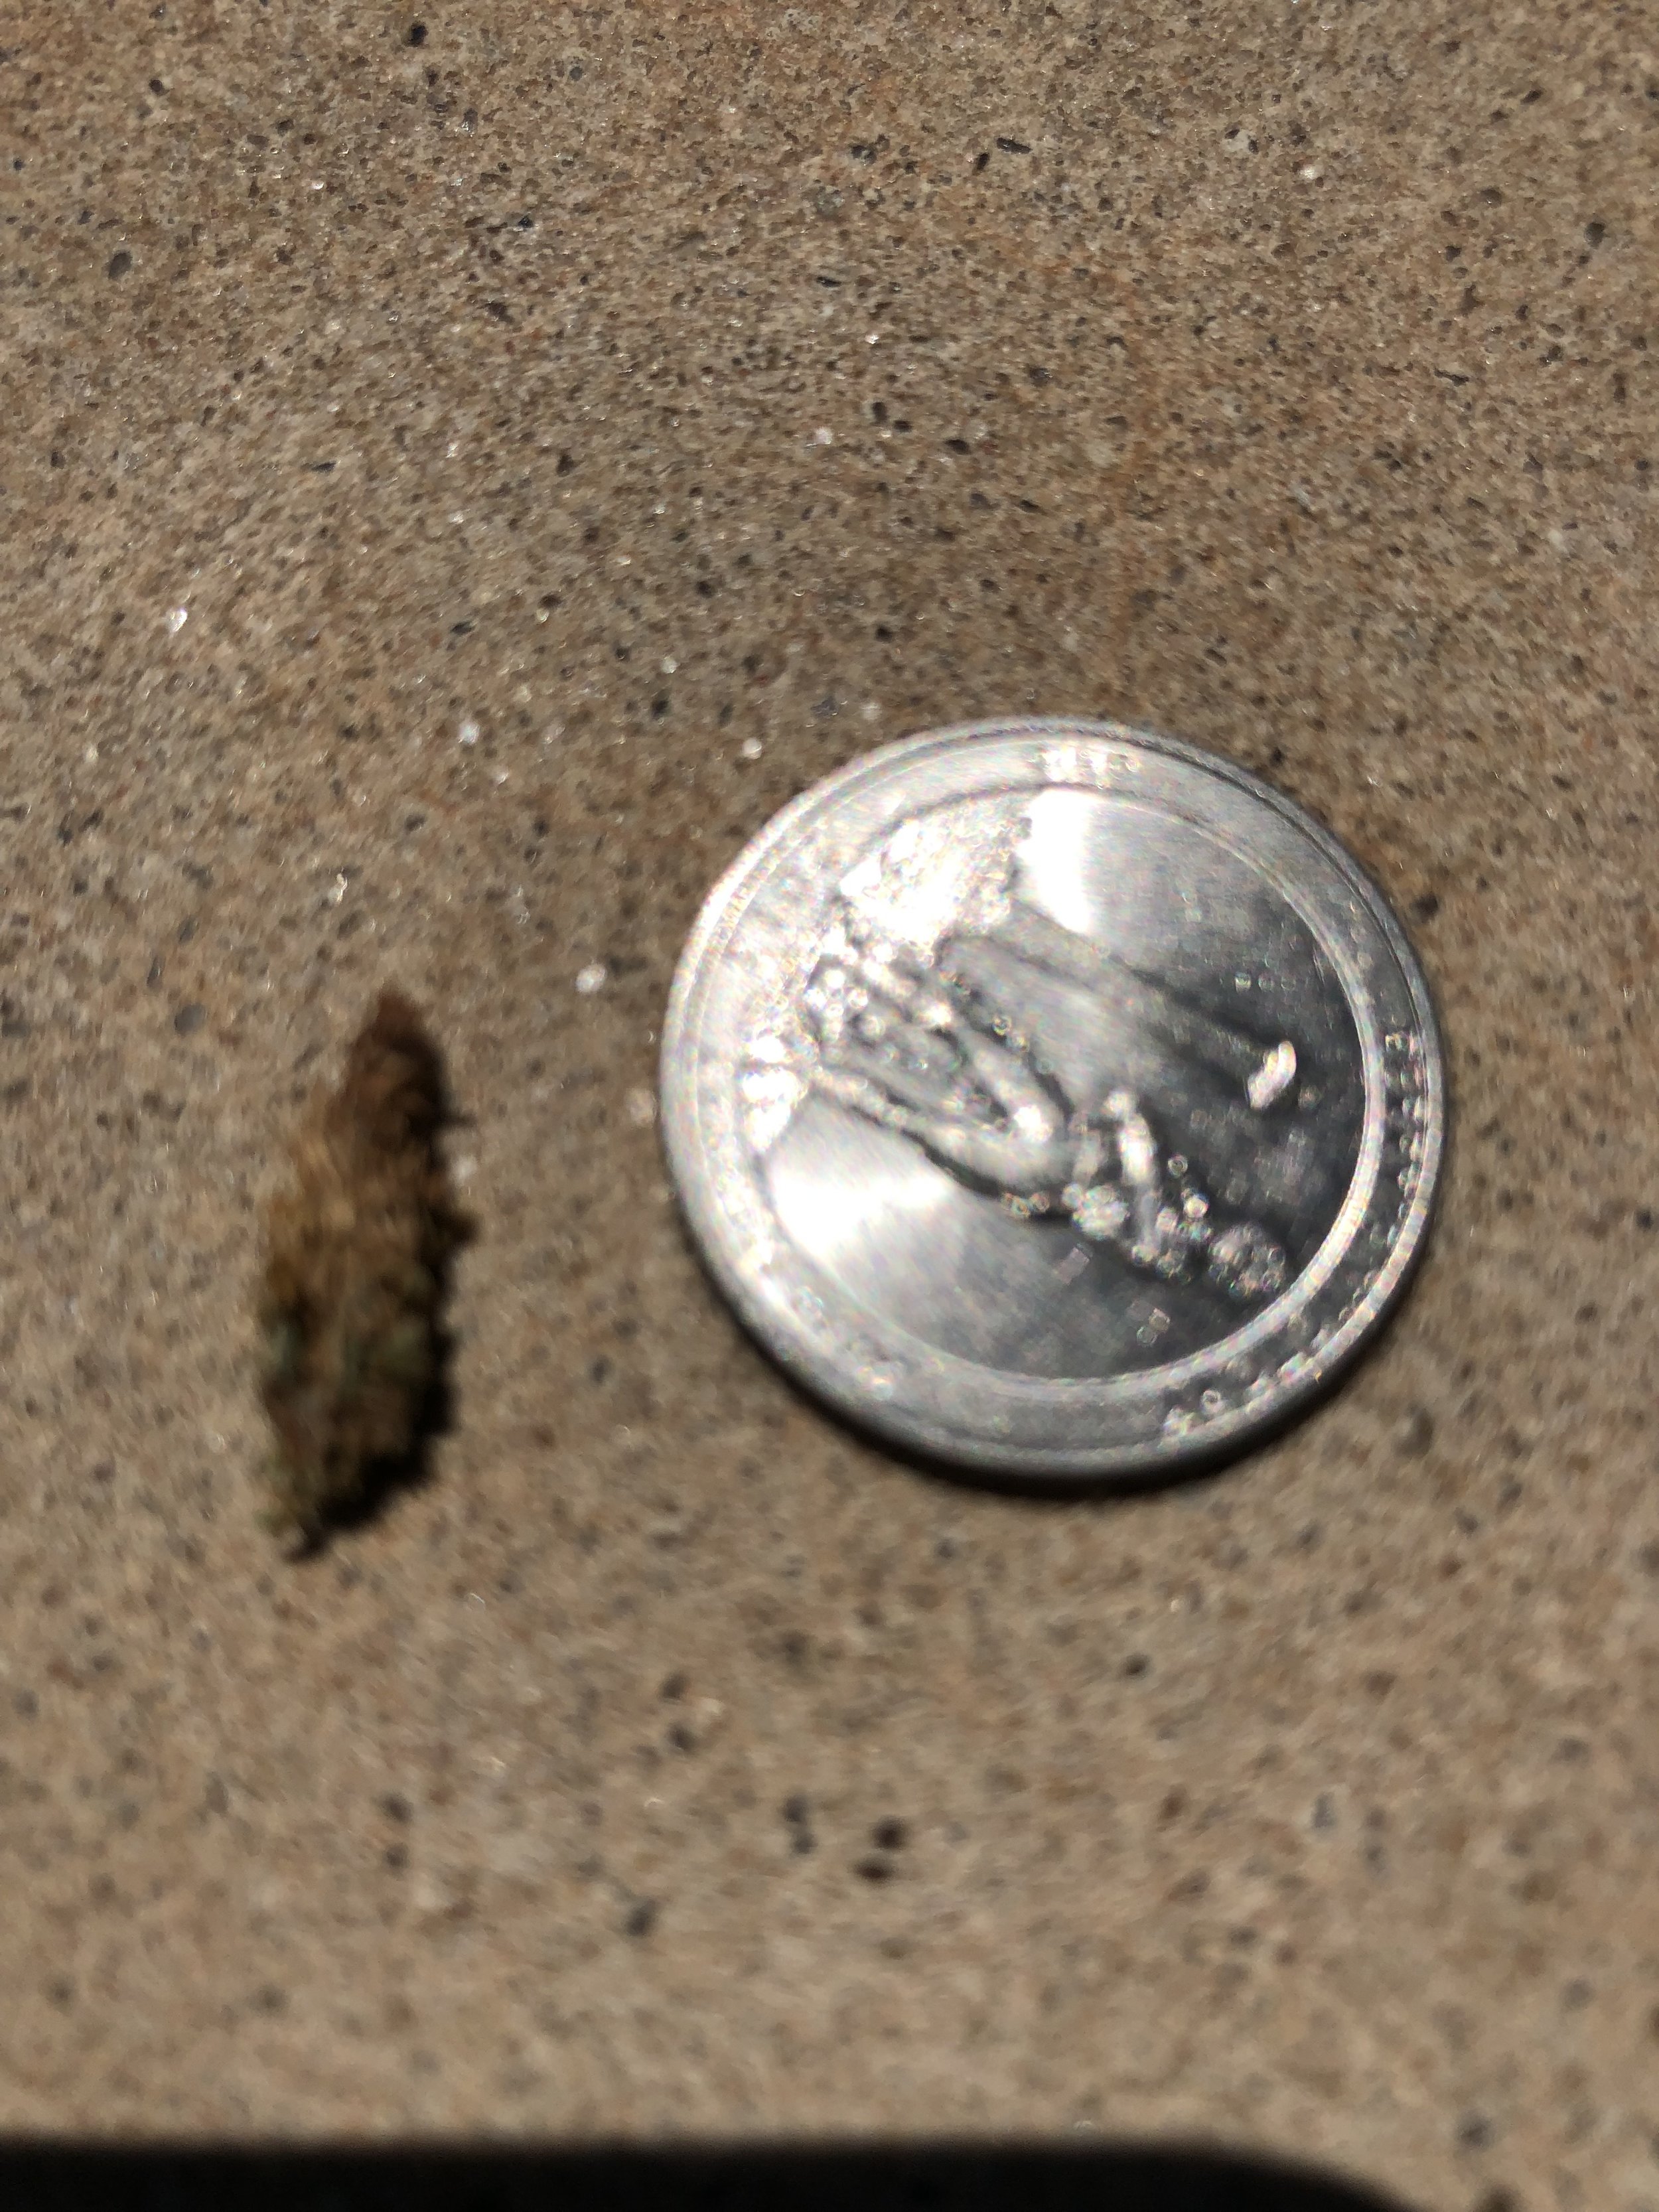
½-2” long spindle shaped bag wrapped in the foliage of the host plant. Young bagworms are very hard to spot.
Favorite host plants are juniper, arborvitae, spruce, pine and cedar. But, they can attach themselves to deciduous shrubs and trees and we are seeing a lot of bagworms on deciduous trees this year!
Females lay eggs in bags left on plants over the winter. One female bagworm will lay as many as 500 eggs. The eggs hatch in the late spring and tiny larva crawls out and start feeding. As they feed, they use silk and plant materials to protect and camouflage themselves. Bagworms can strip a plant of foliage.
Heavy infestations, particularly on the same plant year after year, can completely defoliate a plant. Defoliation of needle evergreens, such as junipers and cedars, usually results in plant death. Broadleaf evergreens and deciduous plants typically are not killed but a weakened and more susceptible to other insect and disease problems.
When there are only a few, control is best by hand picking. If you have a large population an insecticide treatment should be made as soon as they are noticed. Try to remove any bags left on plant material in the fall. Bags left on the plant will serve as cocoons for females to lay more eggs. When removing bags, destroy them. Do not pick and toss on the ground as the worm will crawl back to a plant.

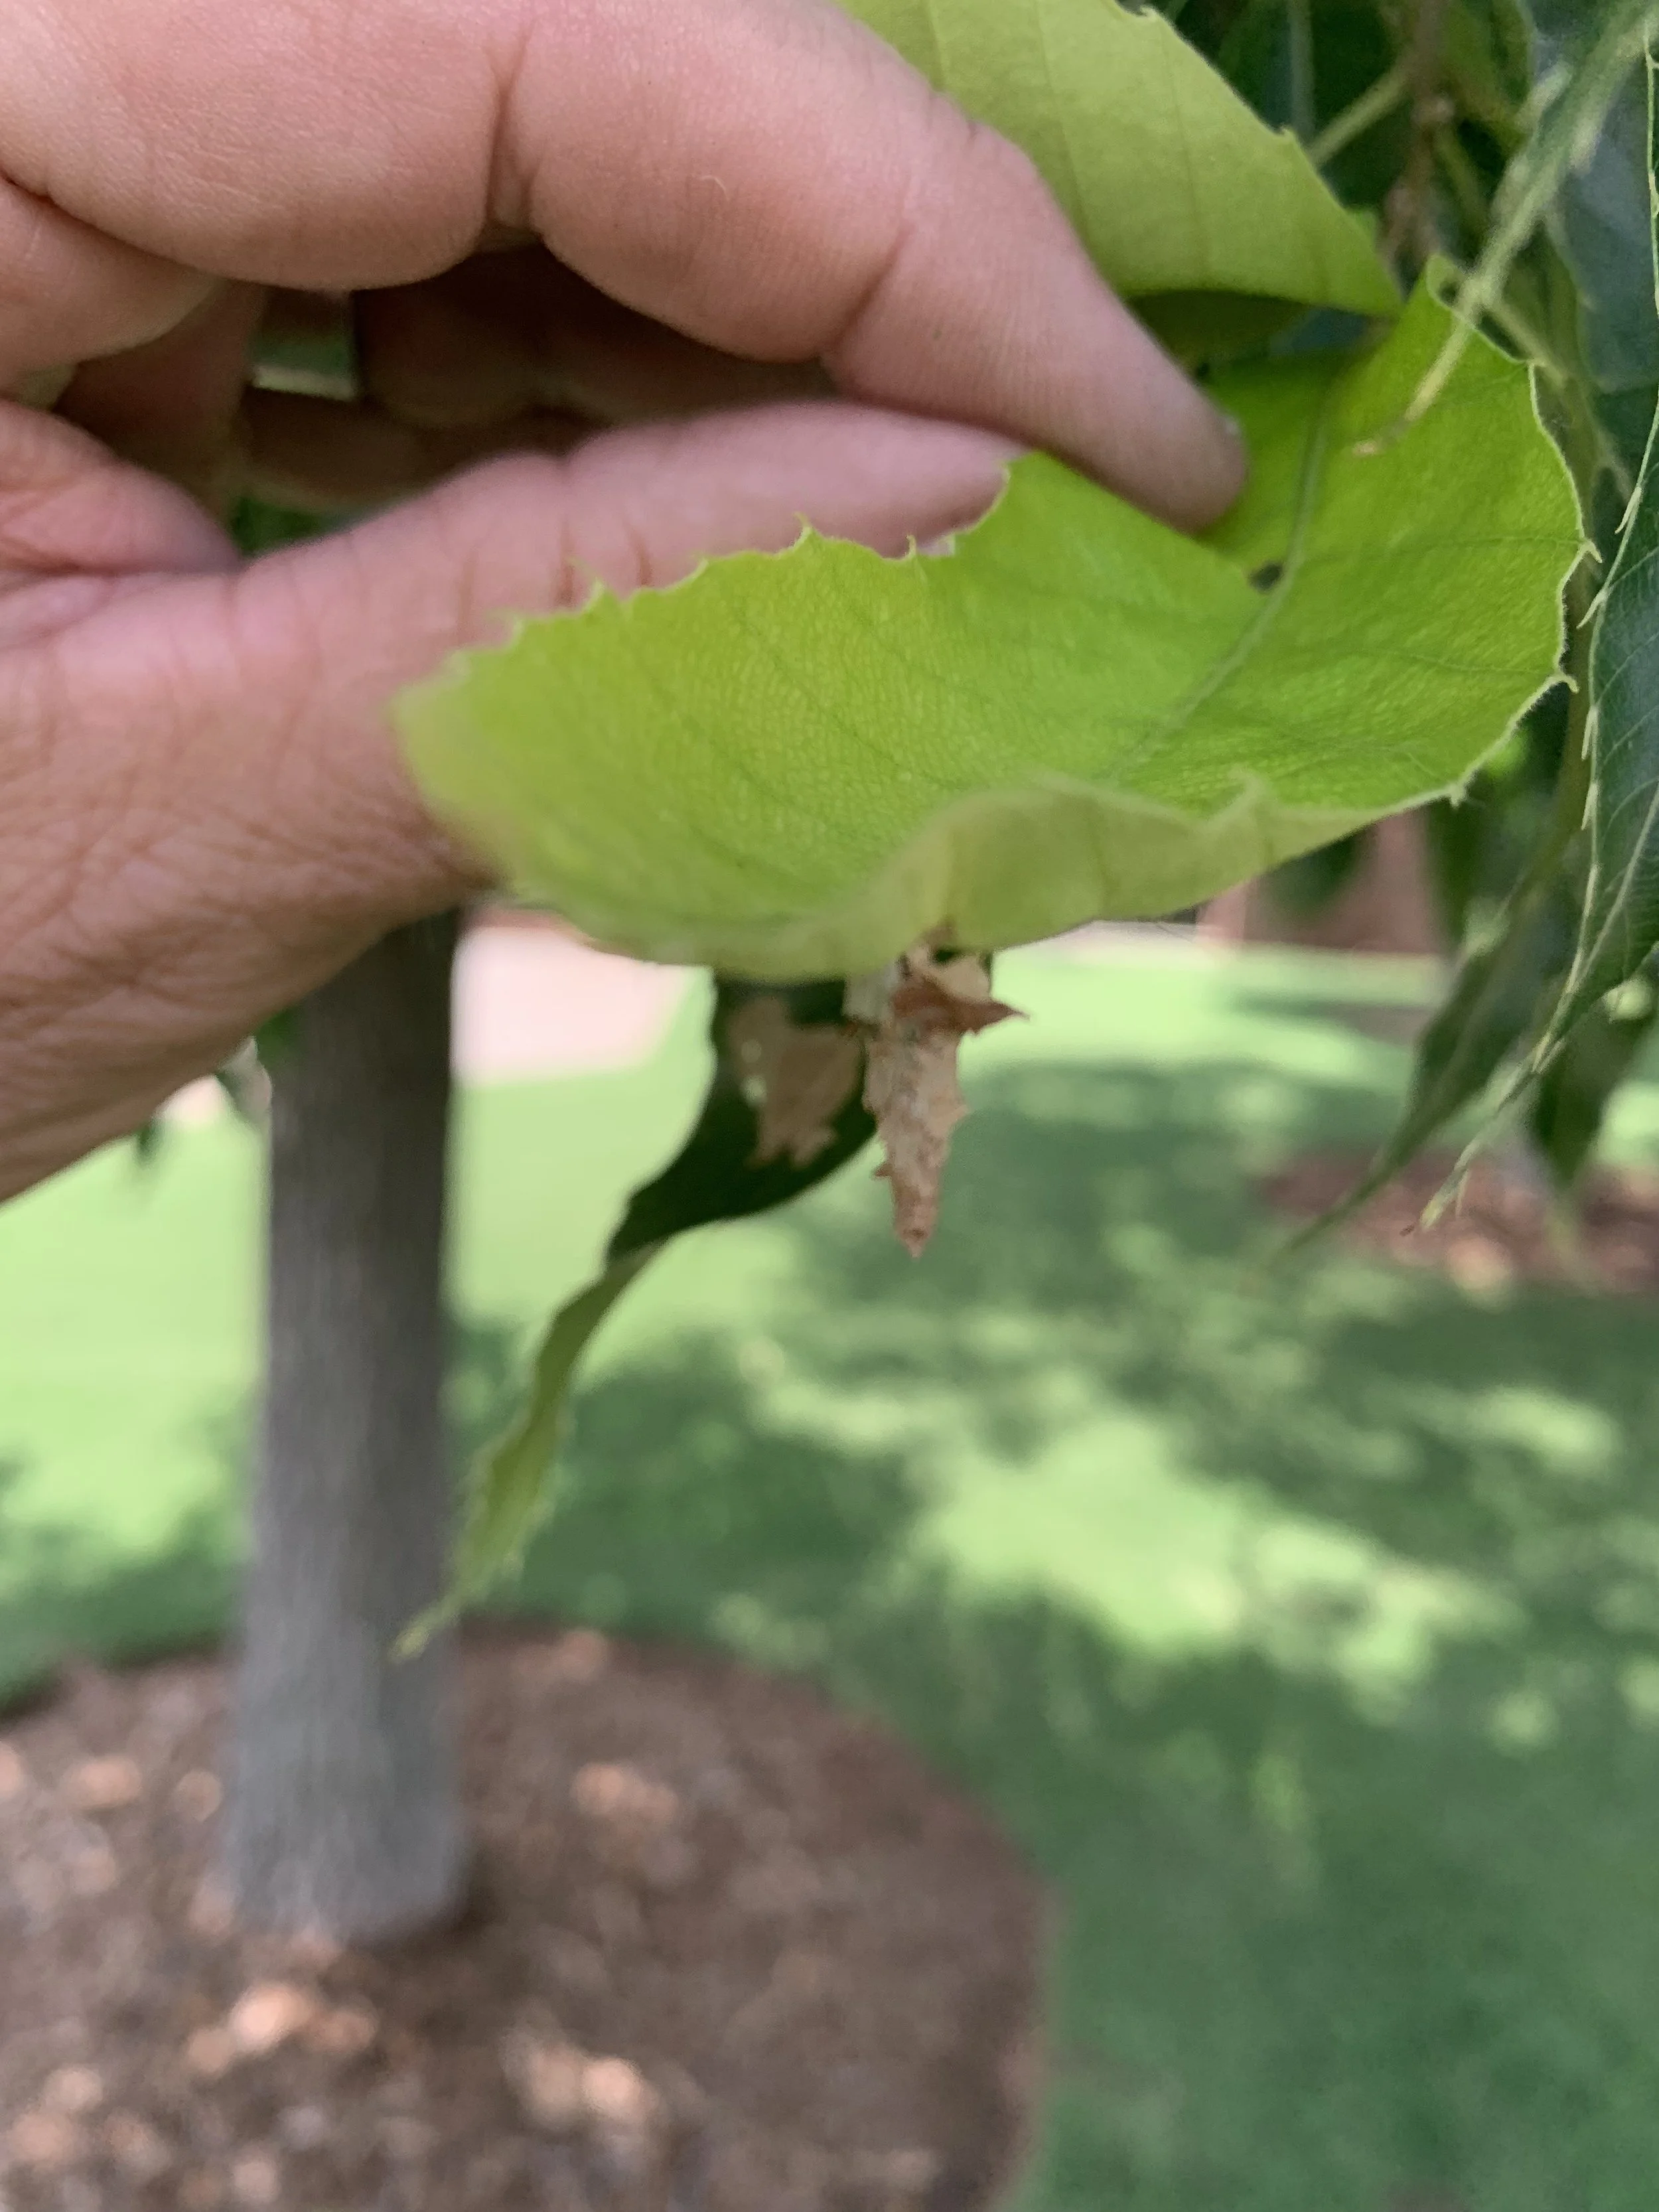
Bagworms use the leaves of the host plant to protect themselves while they feed. This bagworm came off an elm tree, not a typical host plant for the caterpillar.


Bagworms can strip a mature Bald Cypress of its leaves quicker than you would expect.

Although not as common bagworms will feed on deciduous trees. If you notice skeletonized leaves, look close, most likely there are bagworms attacking the tree.

Young bagworms are small and can be hard to see. They wrap themselves in the plant needles making them hard to notice.
If you notice a juniper or cedar starting to loose color, inspect for bagworms.

Left untreated, large, heavy infestations of bagworms will kill mature trees and shrubs.


If there are not too many, the best way to control bagworms is to simply pull them off and throw them away. Don’t throw them on the ground, if you do they will crawl back onto the tree.

Aphids are small and often go unnoticed but the sticky substance they leave behind is easy to spot.
APHIDS
Timing – Species start producing in April and increase rapidly as temperatures increase.
A small, soft-bodied insect that is nearly invisible to the naked eye. The honeydew, sticky substance they excrete is the easiest way to know aphids are active. Colonies develop on the underside of the leaf and often are not noticed until the sticky substance starts to show.
They feed on the leaves, stems and buds of a wide variety of plants throughout the growing season. Usually, they attack the succulent new growth.
Aphids generally do not cause serious harm to mature plants, although they can be harmful to young plants. Heavy populations can cause wilt and yellowing of leaves as the sap is removed. Blooming trees and shrubs will see a reduction in flowers. Aphids can promote sooty mold, a fungal disease, and spread viruses.
Early detection is the key. Aphids mature in 7-10 days and can produce 40-60 offspring resulting in population explosions in the thousands within a few weeks.
When populations are small, a high-pressure blast of water can be used to wash the insects off the leaves. Wiping the leaves with a soapy solution is also effective with early detection. In most cases, once you notice the honeydew, it is best to treat with an insecticide. A dormant oil application in the winter is helpful in reducing populations the following season. Lady bugs can be used as a beneficial insect control when populations are small.

Aphids feed on the underside of the leaf and become noticeable as the leaf becomes covered with the sticky substance they excrete.

SPIDER MITES
Timing – They are active from early summer through fall. The hotter and dryer the weather, the more severe the problem will become.
Very small (1/60 of an inch) that live on the underside of leaves and survive by sucking on the cell content of the leaves. First shows up as stippling of light dots on the leaves. Leaves then turn from bronze, to yellow, and then fall off.
They get their name from the small silk protective webs they create.
Because spider mite damage can look like many other plant problems, the best way to determine if it is spider mite is to shake the plant leaves over a white sheet of paper. Spider mites will look like tiny moving black dots on the paper.
Spider mites reproduce rapidly when conditions are perfect. Spider mites can hatch in as little as 3 days and become mature within 5 days. One female can lay up to 20 eggs per day during their 2-4 week life span.
The best control results from making two applications 7-10 days apart.
Adequate plant moisture during the hottest time of the year helps prevent population explosions.

Early signs of spider mites.

To know if you have spider mites shake leaves over a white sheet of paper.
Spider mites will look like tiny moving black dots.

Silk protective webbing formed by the spider mite.

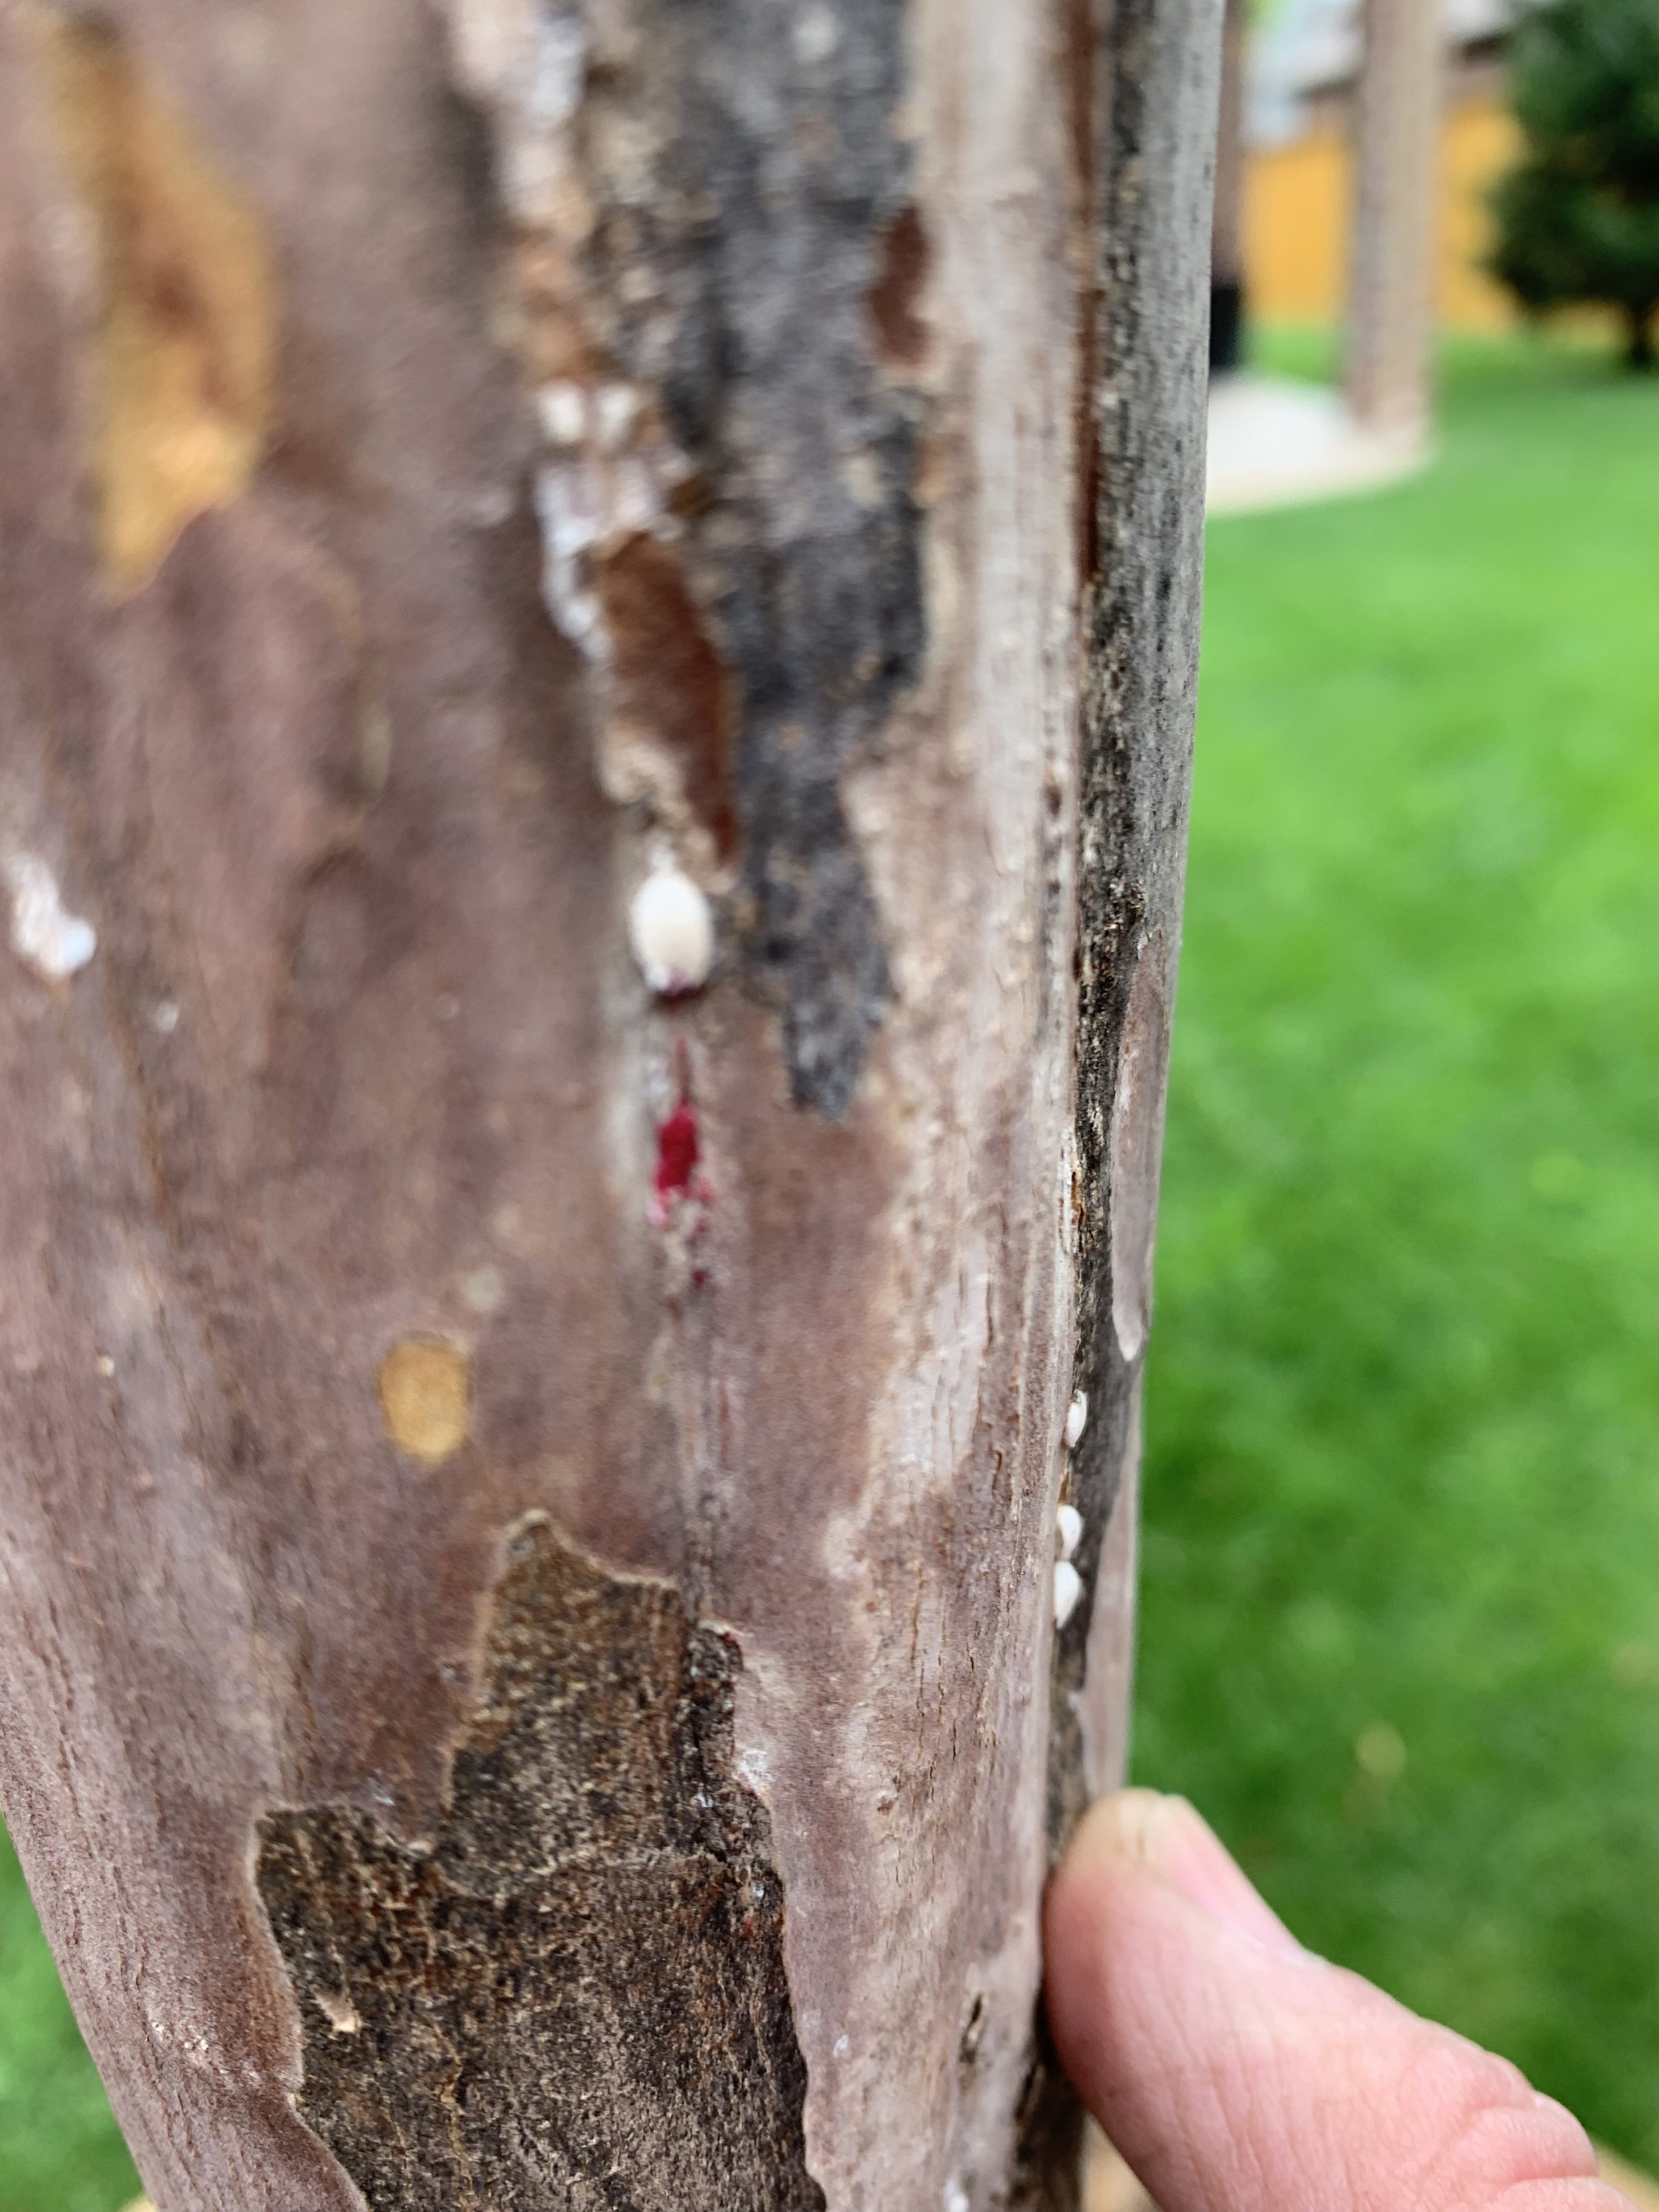
White scale attacks Crape Myrtles leaving a black sooty substance on the bark.
Crape Myrtle Scale
Timing – Females lay eggs from May through September. Crawlers emerge within a day or two and spread to new areas of the plant.
The scale is white to gray and exudes a pink blood-like liquid when crushed. Initially, you will notice a black sooty mold on the twigs and trunks of crape myrtles.
Bark scale is difficult to control without the use of a systemic insecticide to kill the sucking pests.
Inspect new plants for scale before purchasing.
Scrubbing the bark with a soft brush and mild solution of dishwashing soap and water will remove many of the females and eggs as well as remove the black sooty mold.
A dormant oil application in the late winter to early spring is an effective way to reduce scale populations.
SOFT OAK SCALE
Timing – One generation per year. Crawlers emerge in June, feeding and spreading on the branches.
They are convex in shape resembling a helmet, brown and ¼” in size. Crawlers are small and pale in color.
Scale feed on the fluids in the vascular system.
They produce honeydew which is a source for mold and attract ants and other insects.
They rarely kill the tree but open up wood wounds that provide entry for other damaging pathogens.
When populations are allowed to increase, canopy damage may occur along with discoloration of the leaves.
Application of an insecticide via spraying needs to occur in June when the crawlers are active. Annual spray applications in June are required until the populations are under control.
An alternative treatment is trunk injections of a systemic insecticide. Trunk injections allow the insecticide to be readily distributed throughout the plant’s vascular system to the fluids the scales feed on.

Soft Scale are small brown convex shaped insects on oak tree branches.
ARMY WORMS
Timing – Moths migrate from the Gulf Coast in June, lay eggs and the first-generation caterpillars start feeding in July. With a 28-day life cycle there can be 4 or 5 generations between July and November.
Army worms are always present in our summer lawns and landscapes. When populations are normal you may never know they are there. But, when conditions are right, as they were in 2021, we can see an explosion and experience turf damage.
Early caterpillars are green and very small. As they grow to 1 to 1 ½” they turn browner with reddish brown stripes on each side of the body and small back spots on the top. Their distinctive mark is an inverted “Y” on the front of the head.
Army worms will feed on any leafy, soft plant with plenty of moisture in the leaf. In 2021 they feasted primarily on fescue lawns because growing conditions were perfect for fescue. In previous outbreaks, army worms picked bermuda over fescue. If army worms are high in populations this summer, you can expect them to choose bermuda over fescue because the early summer heat has kept fescue from flourishing.
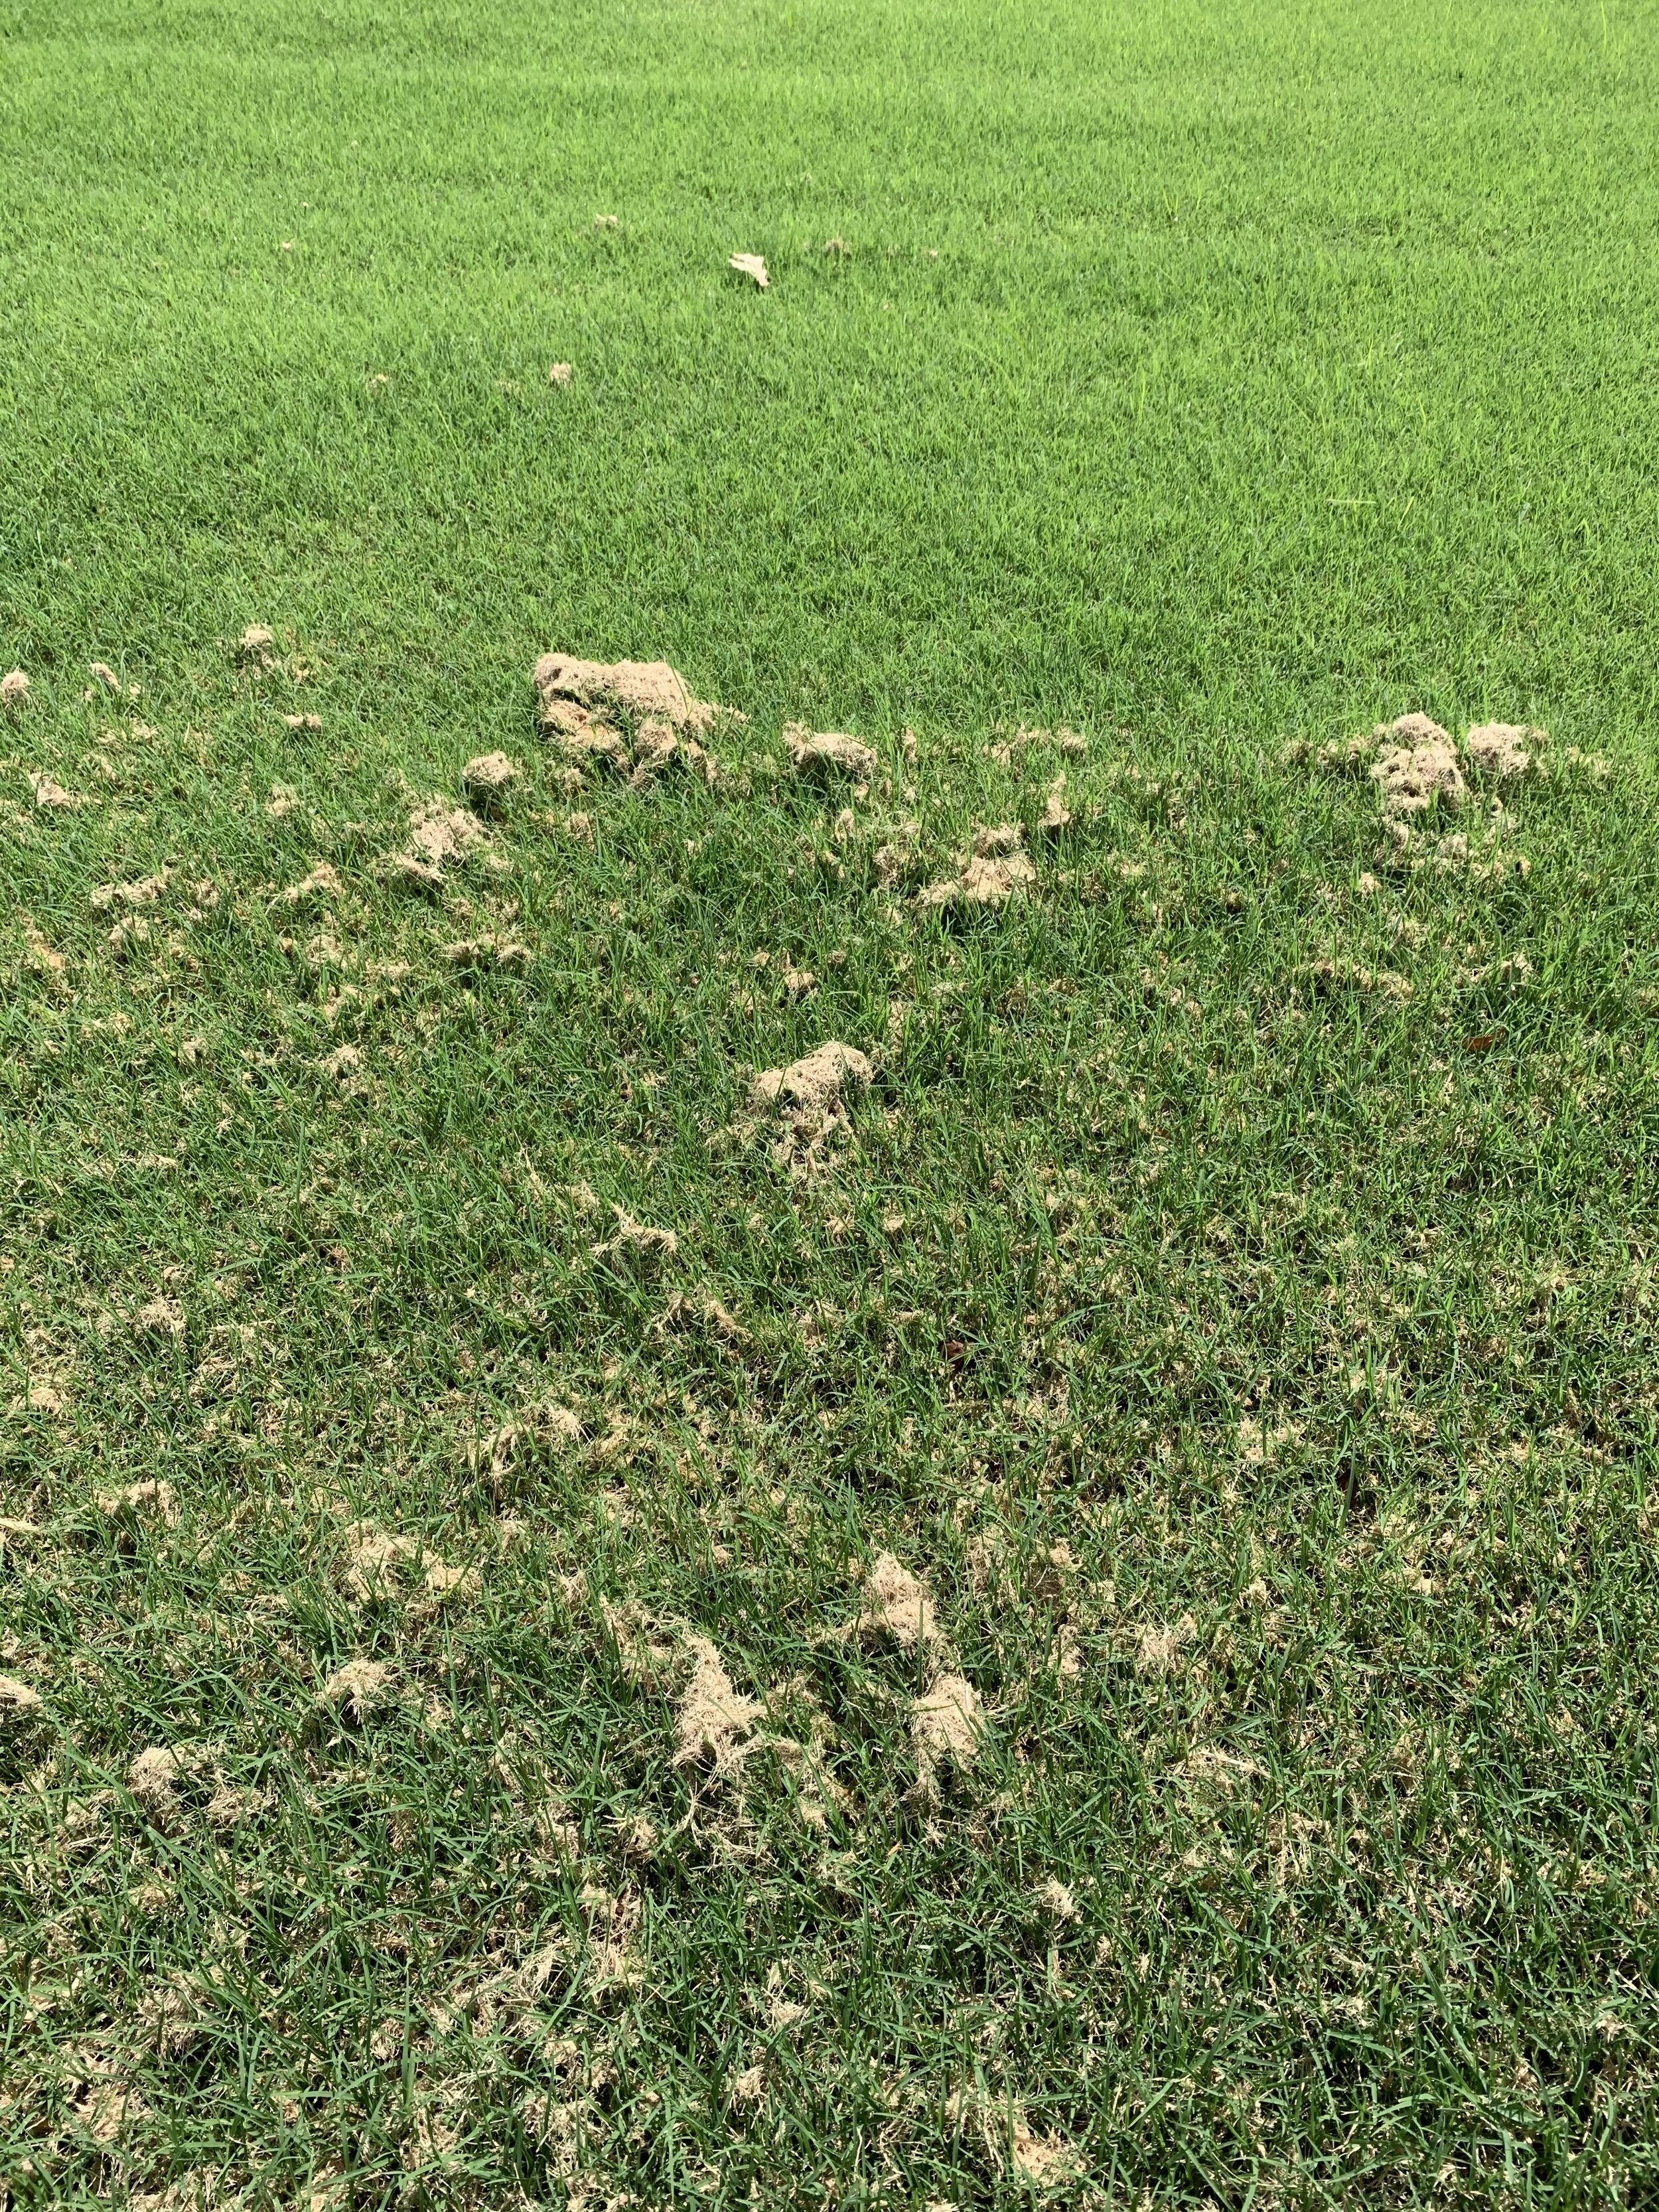
Watch for areas of the lawn that appear to have drought stress should not be. Test the area with a soap flush. Mix 1 teaspoon of dish soap with 1 gallon of water and pour over the surface. If you have army worms, they will come to the surface.
Treatment with a systemic insecticide when the worms are small before they become heavy feeders is best.

Can you count the number of army worms in this picture from August ‘21?

If you have areas in your lawn that are turning brown you can test for army worms by drenching the area with soapy water. If there are army worms present they will immediately come to the surface.

Army worms are present every year but in numbers that don’t usually cause turf damage. August ‘21 army worm populations were high enough they devastated areas of lawns in just a couple of days.
Healthy landscapes are a result of an Integrated Pest Management program.
The first step of an IPM approach is maintaining healthy plant material with proper watering, feeding and pruning. Insect activity increases on plant material that is already stressed.
The second step is simply monitoring your plants. Weekly observation is critically important. Does the overall plant color look healthy? How do the leaves look?
Our landscapes represent large investments in both time and money. They add curb appeal and provide enormous benefits to the environment. It is important that we do all we can to keep them healthy and growing.
The best way you can protect your investment is to take a few minutes each week to inspect your lawn, shrubs, trees and flowers.
Complete control is much easier when insects are noticed early while populations are small.
Please let us know if you have any questions or concerns about your lawn and landscape.
Lorne Hall
Hall | Stewart Lawn + Landscape
(405)367-3873
July Lawn & Landscape Tips

Wow, June, traditionally one of central Oklahoma’s wettest months really fell short! Many lawns and landscapes are showing heat and drought stress earlier than normal this year. Now, we are headed into one of our hottest months and with more stress for your lawn and landscape on the horizon.
How can you help your landscape not only survive, but thrive through July? Let’s take a look:
Watering – The biggest determiner on your lawn and landscape thriving through the hottest and driest periods of the summer is practicing the best water techniques. I know…we are repeating ourselves, but it is so important that we are going to keep saying it.
Best watering practices:
Water 1” to 1.5” per week.
Place the Hall|Stewart Rain Gauge in your lawn, give your lawn a good deep soaking and then check the gauge. If you have ½” of water in the gauge you need to water 3 times per week.
Water deep. If you can get ¾-1” of water on your lawn without excessive runoff, water every 4 days. Deep watering creates deep roots and a more drought tolerant lawn.
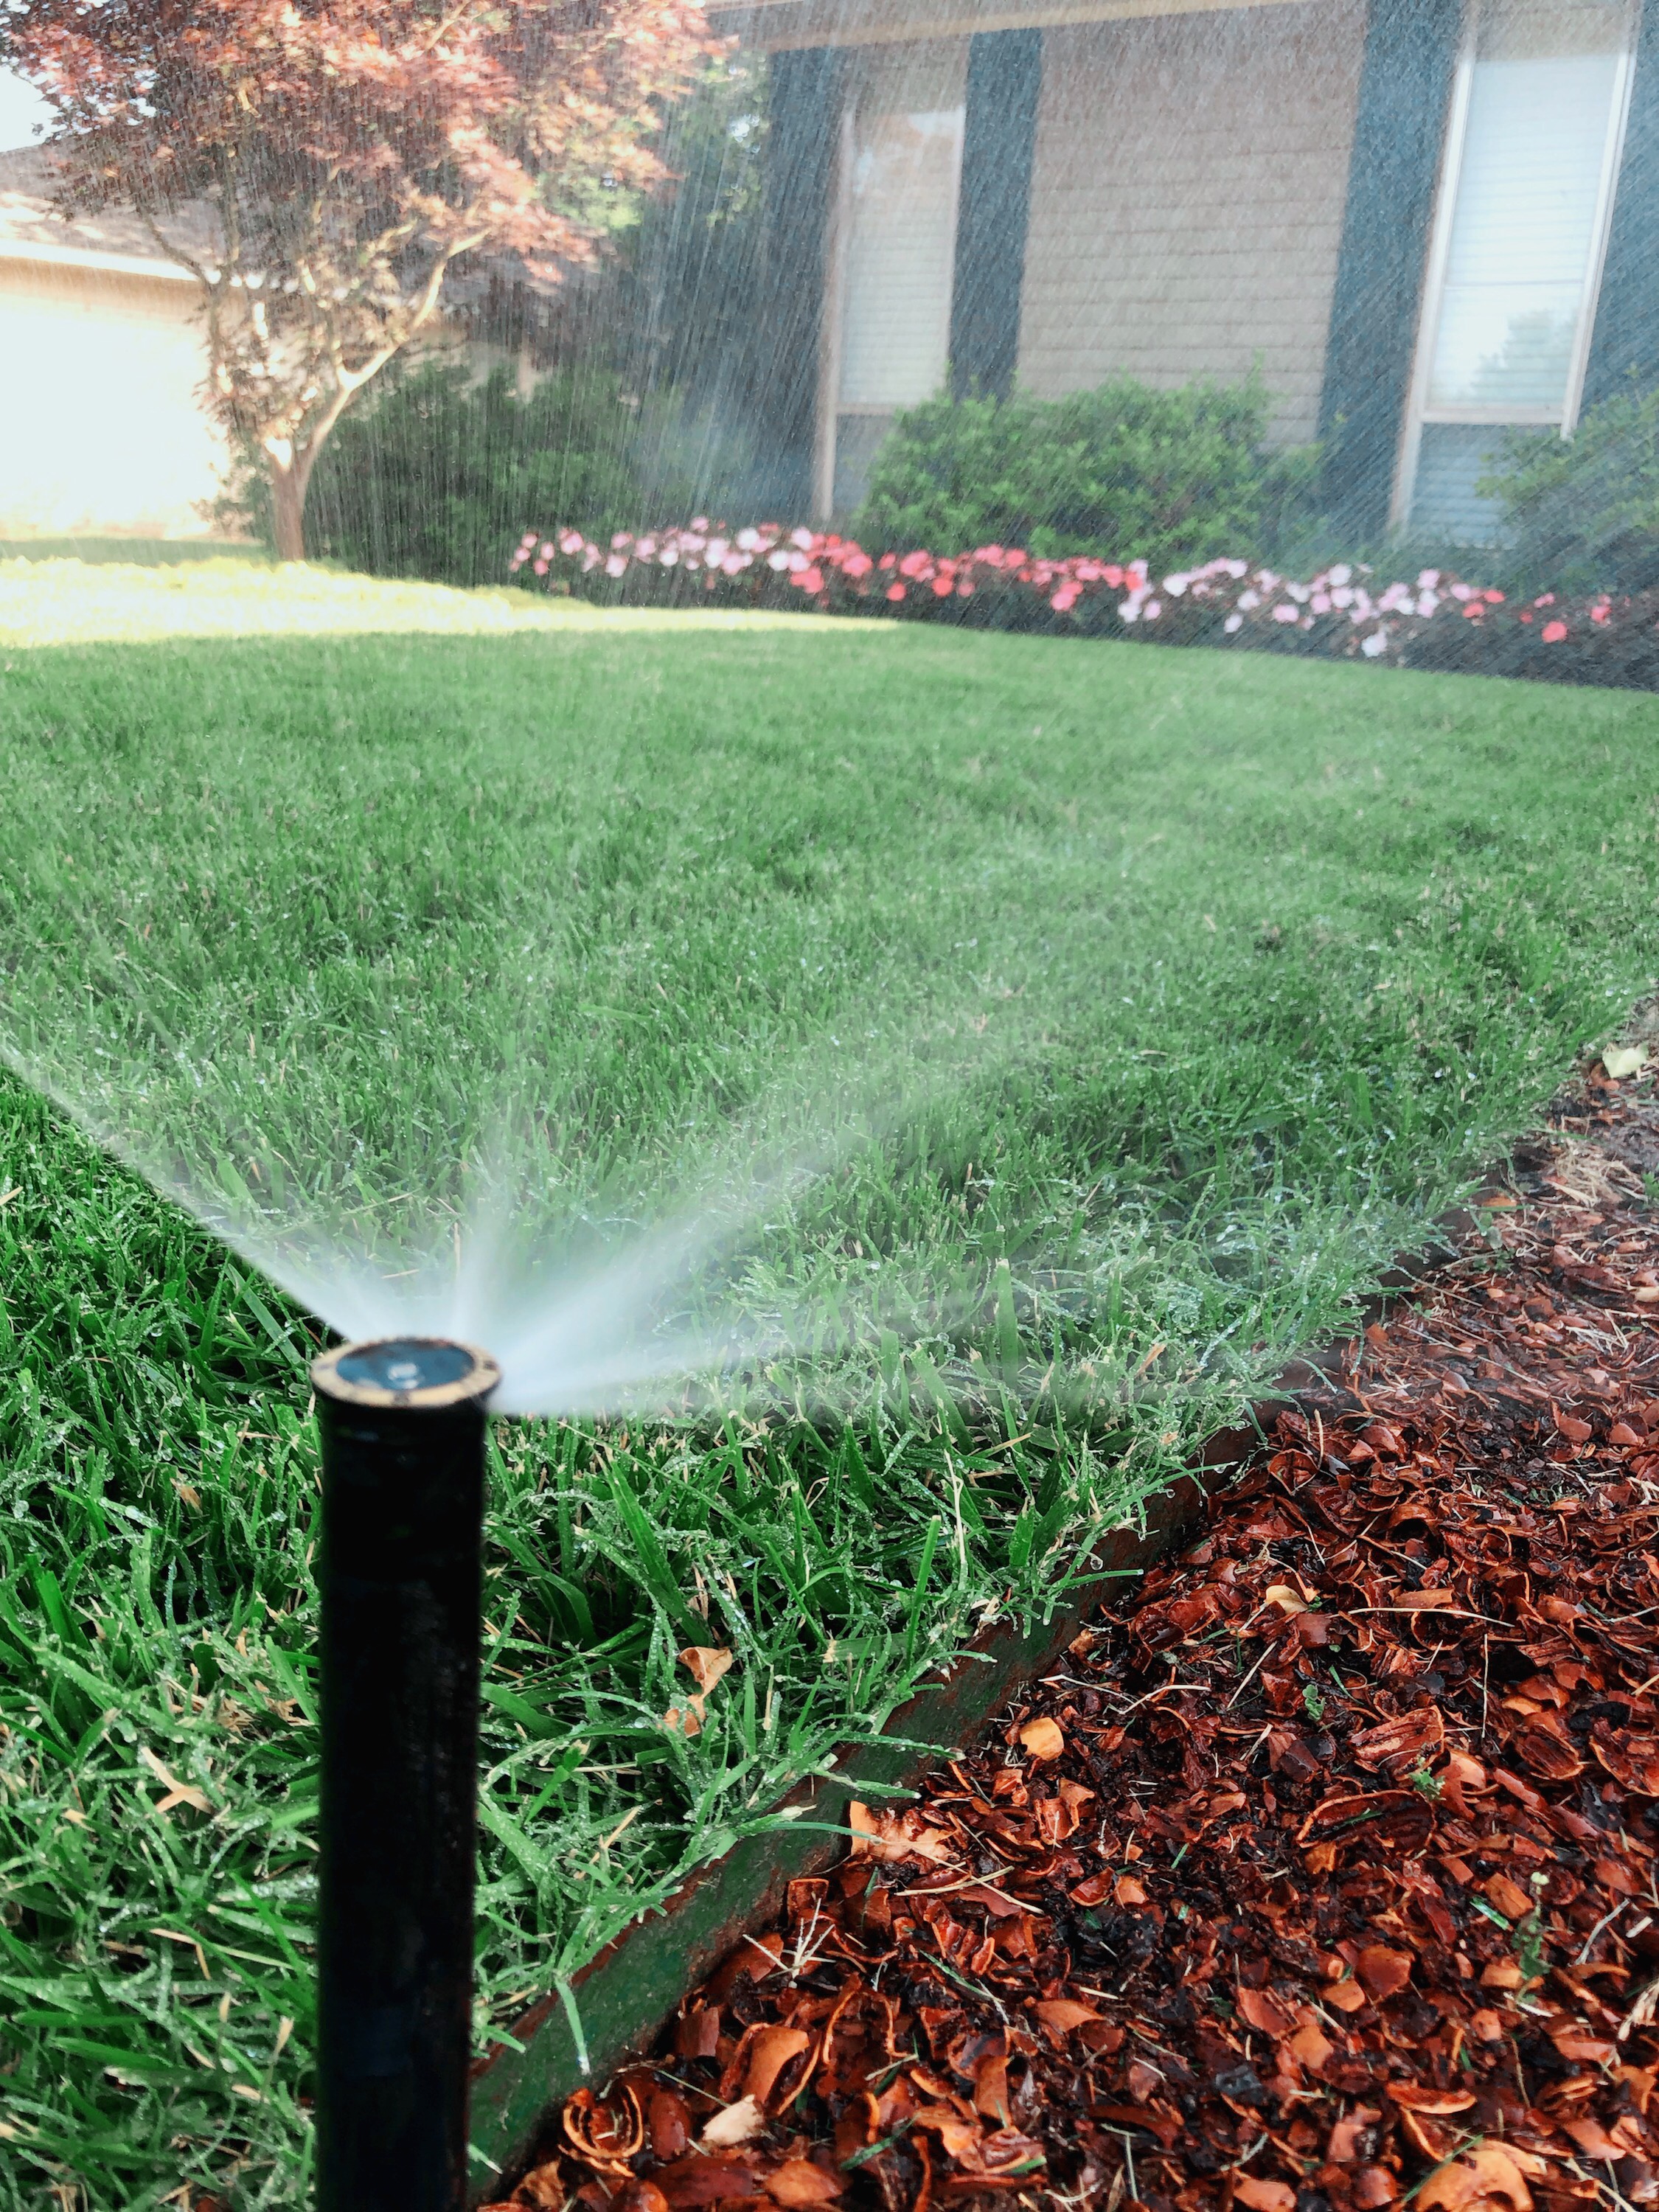
Set your controller to water with back-to-back run times. If a zone needs to run 30 minutes to get the correct amount of water, set it for 15 minutes and program two start times an hour or two apart. Example: 4:00 AM & 5:00 AM. This ‘Best Practice” will increase the amount of water that soaks into your lawn and reduce the amount of runoff.
Water in the early morning. Evaporation is at the lowest point in the pre-dawn hours and typically wind is at its lowest point. Evening water promotes turf diseases, such as brown patch, and should be avoided.
Daily watering does more harm than good. Short daily watering results in shallow rooted turf and a lawn dependent on constant moisture to survive.
Anytime we receive ½” of rain or more, don’t water for a few days.
Aeration improves moisture absorption.
Watering Tip –
Most people don’t realize how long you need to run the sprinkler to get 1” to 1.5” moisture on your lawn in a week. If your lawn and landscape are struggling, take time to place cans around the lawn to collect water. Water your lawn as you normally do and then measure the amount of water in the containers.
If you collected 1/3” to ½”, you are watering long enough for every other day watering.
If you didn’t collect enough during a typical watering, increase the water time and continue watering every other day.
The temptation is to start watering every day, but this creates a shallow rooted landscape that is more dependent on daily water.
Deep watering every other day is the key to a lawn that will thrive in July.


We are a strong believer in the benefits of not catching your clippings when mowing as long as they are not noticeable. Heavy clippings always need to be cleared from the turf.
Mowing Tip -
One of the biggest differences between a good lawn and a great lawn in the heat of the year is not bagging the clippings. Allowing finely mowed clippings to stay on the lawn returns moisture and nutrients to the soil.

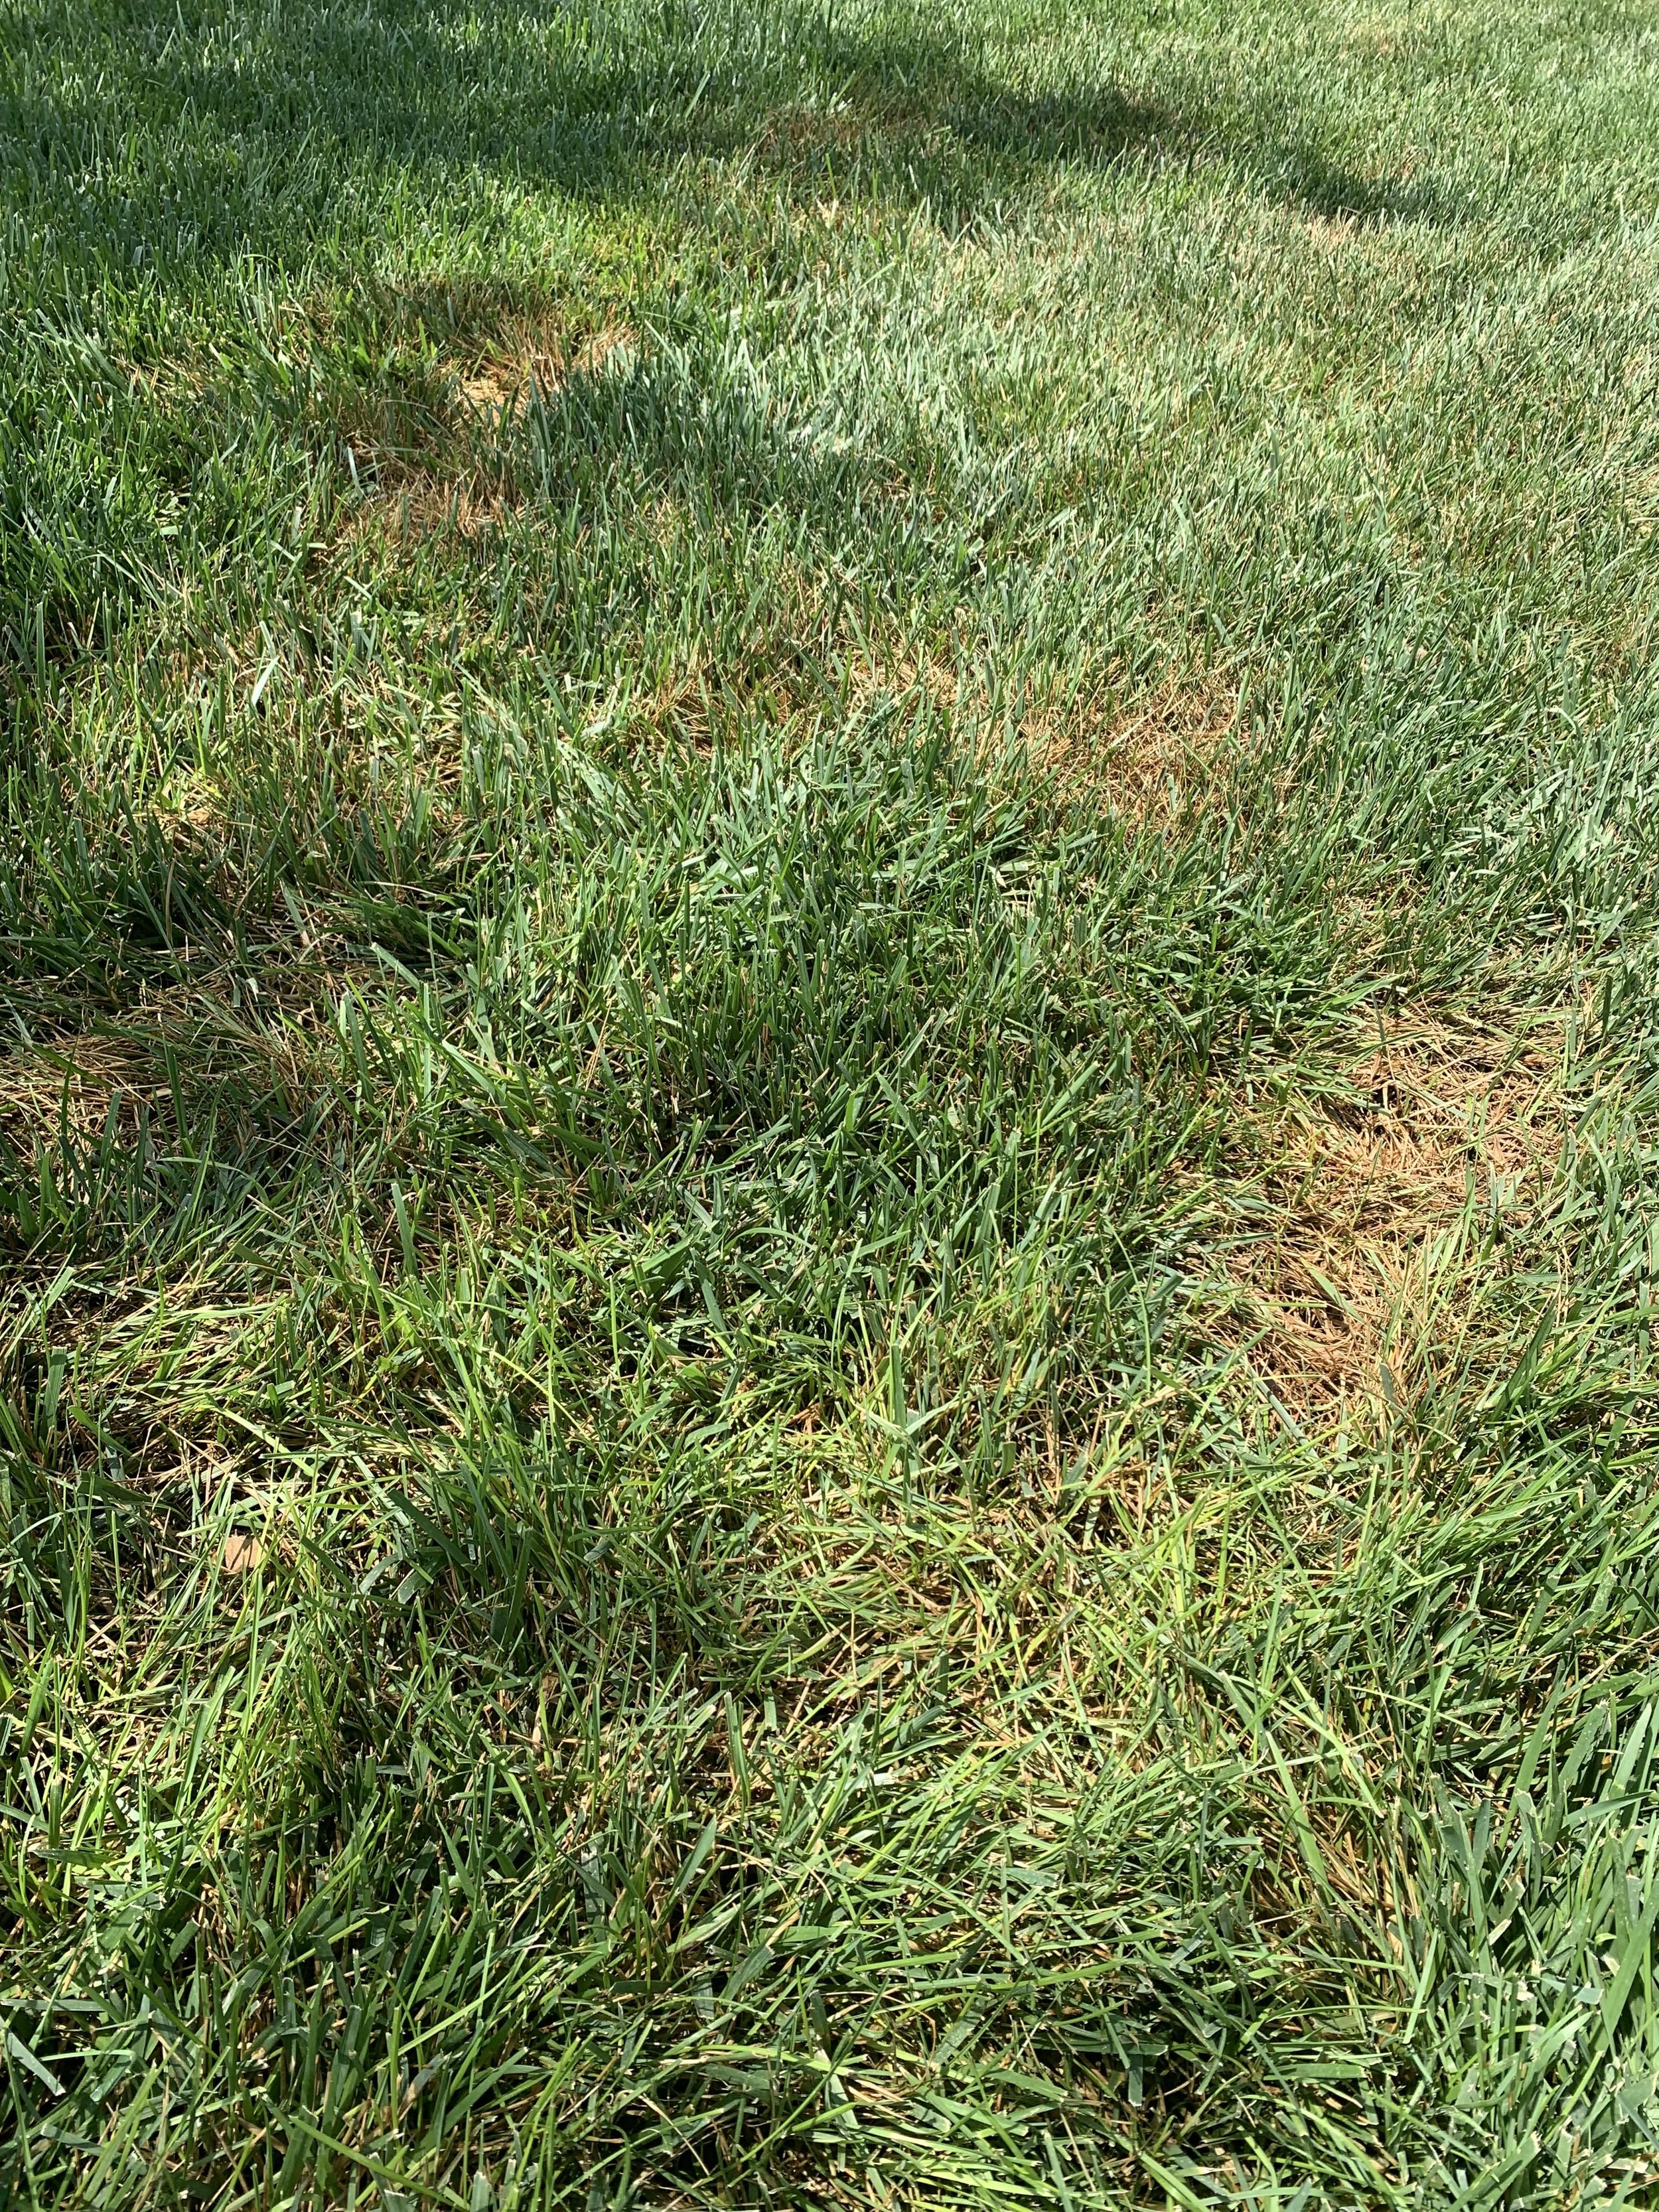
This picture taken on Friday of a fescue lawn demonstrates that fescue is heat tolerant when best practices are followed: deep watering every other day, mowing at 3” with no more than 1/3 cut off per time, and not bagging the clippings.
Mowing – For warm season turfs (Bermuda and zoysia) gradually raise the height of your mower. Bermuda should be mowed between 1.5” to 2.5” during the summer heat. Fescue, cool season turf, should be maintained at its maximum height, 3” to 3.5” now. The more leaf space you have the more drought resistant your lawn will be. Mow often enough that you only remove 1/3” of the grass each time. For healthy, irrigated, and fertilized Bermuda, if possible, mow every 4-5 days for the best lawn. If you are mowing often enough and only removing 1/3 of the growth, don’t catch the clippings. Grass leaves are mostly water and nitrogen and break down very quickly into the soil. If your lawn has a brown cast to it after you mow, you are cutting below the leaves and into the stems. Stems do not break down quickly and can lead to thatch build-up, so if this is the case, it is best to bag when mowing.

Mulch mowing is one of the most beneficial things you can do for your lawn. The key is mowing frequently enough that you are removing no more than 1/3 of the leaf blade.

The tropical type flowers of hardy hibiscus thrive in the heat of July.
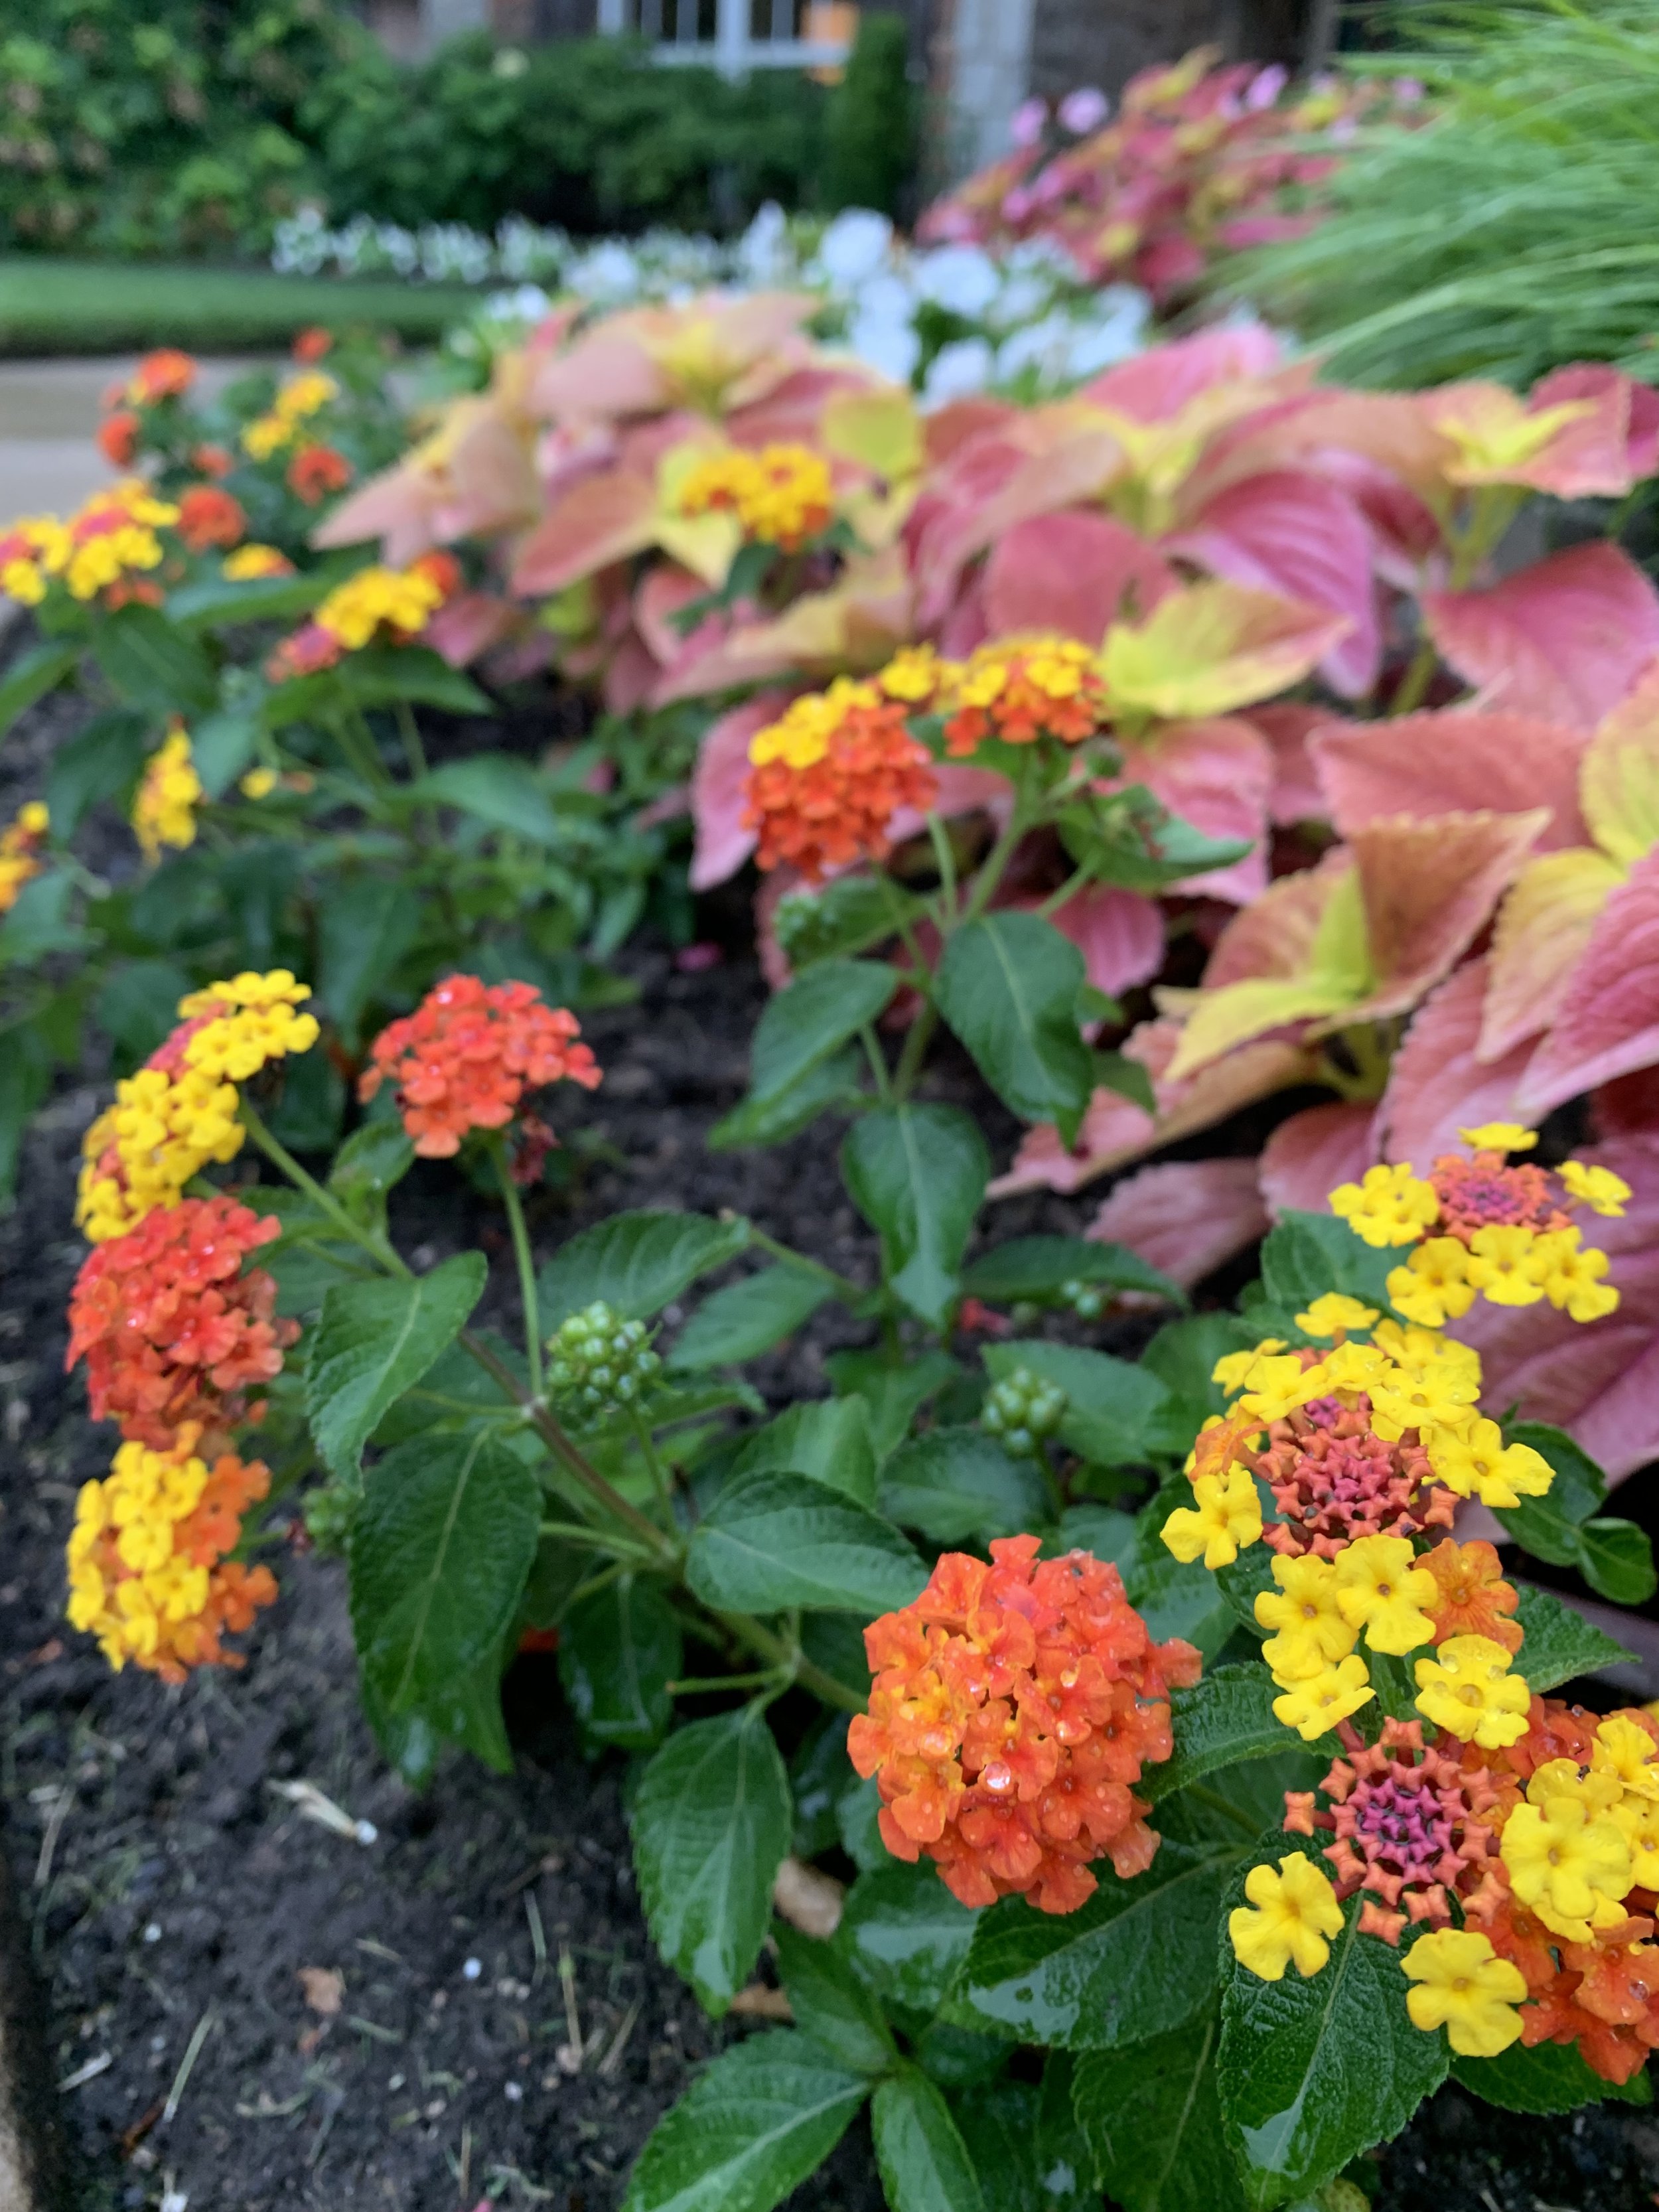
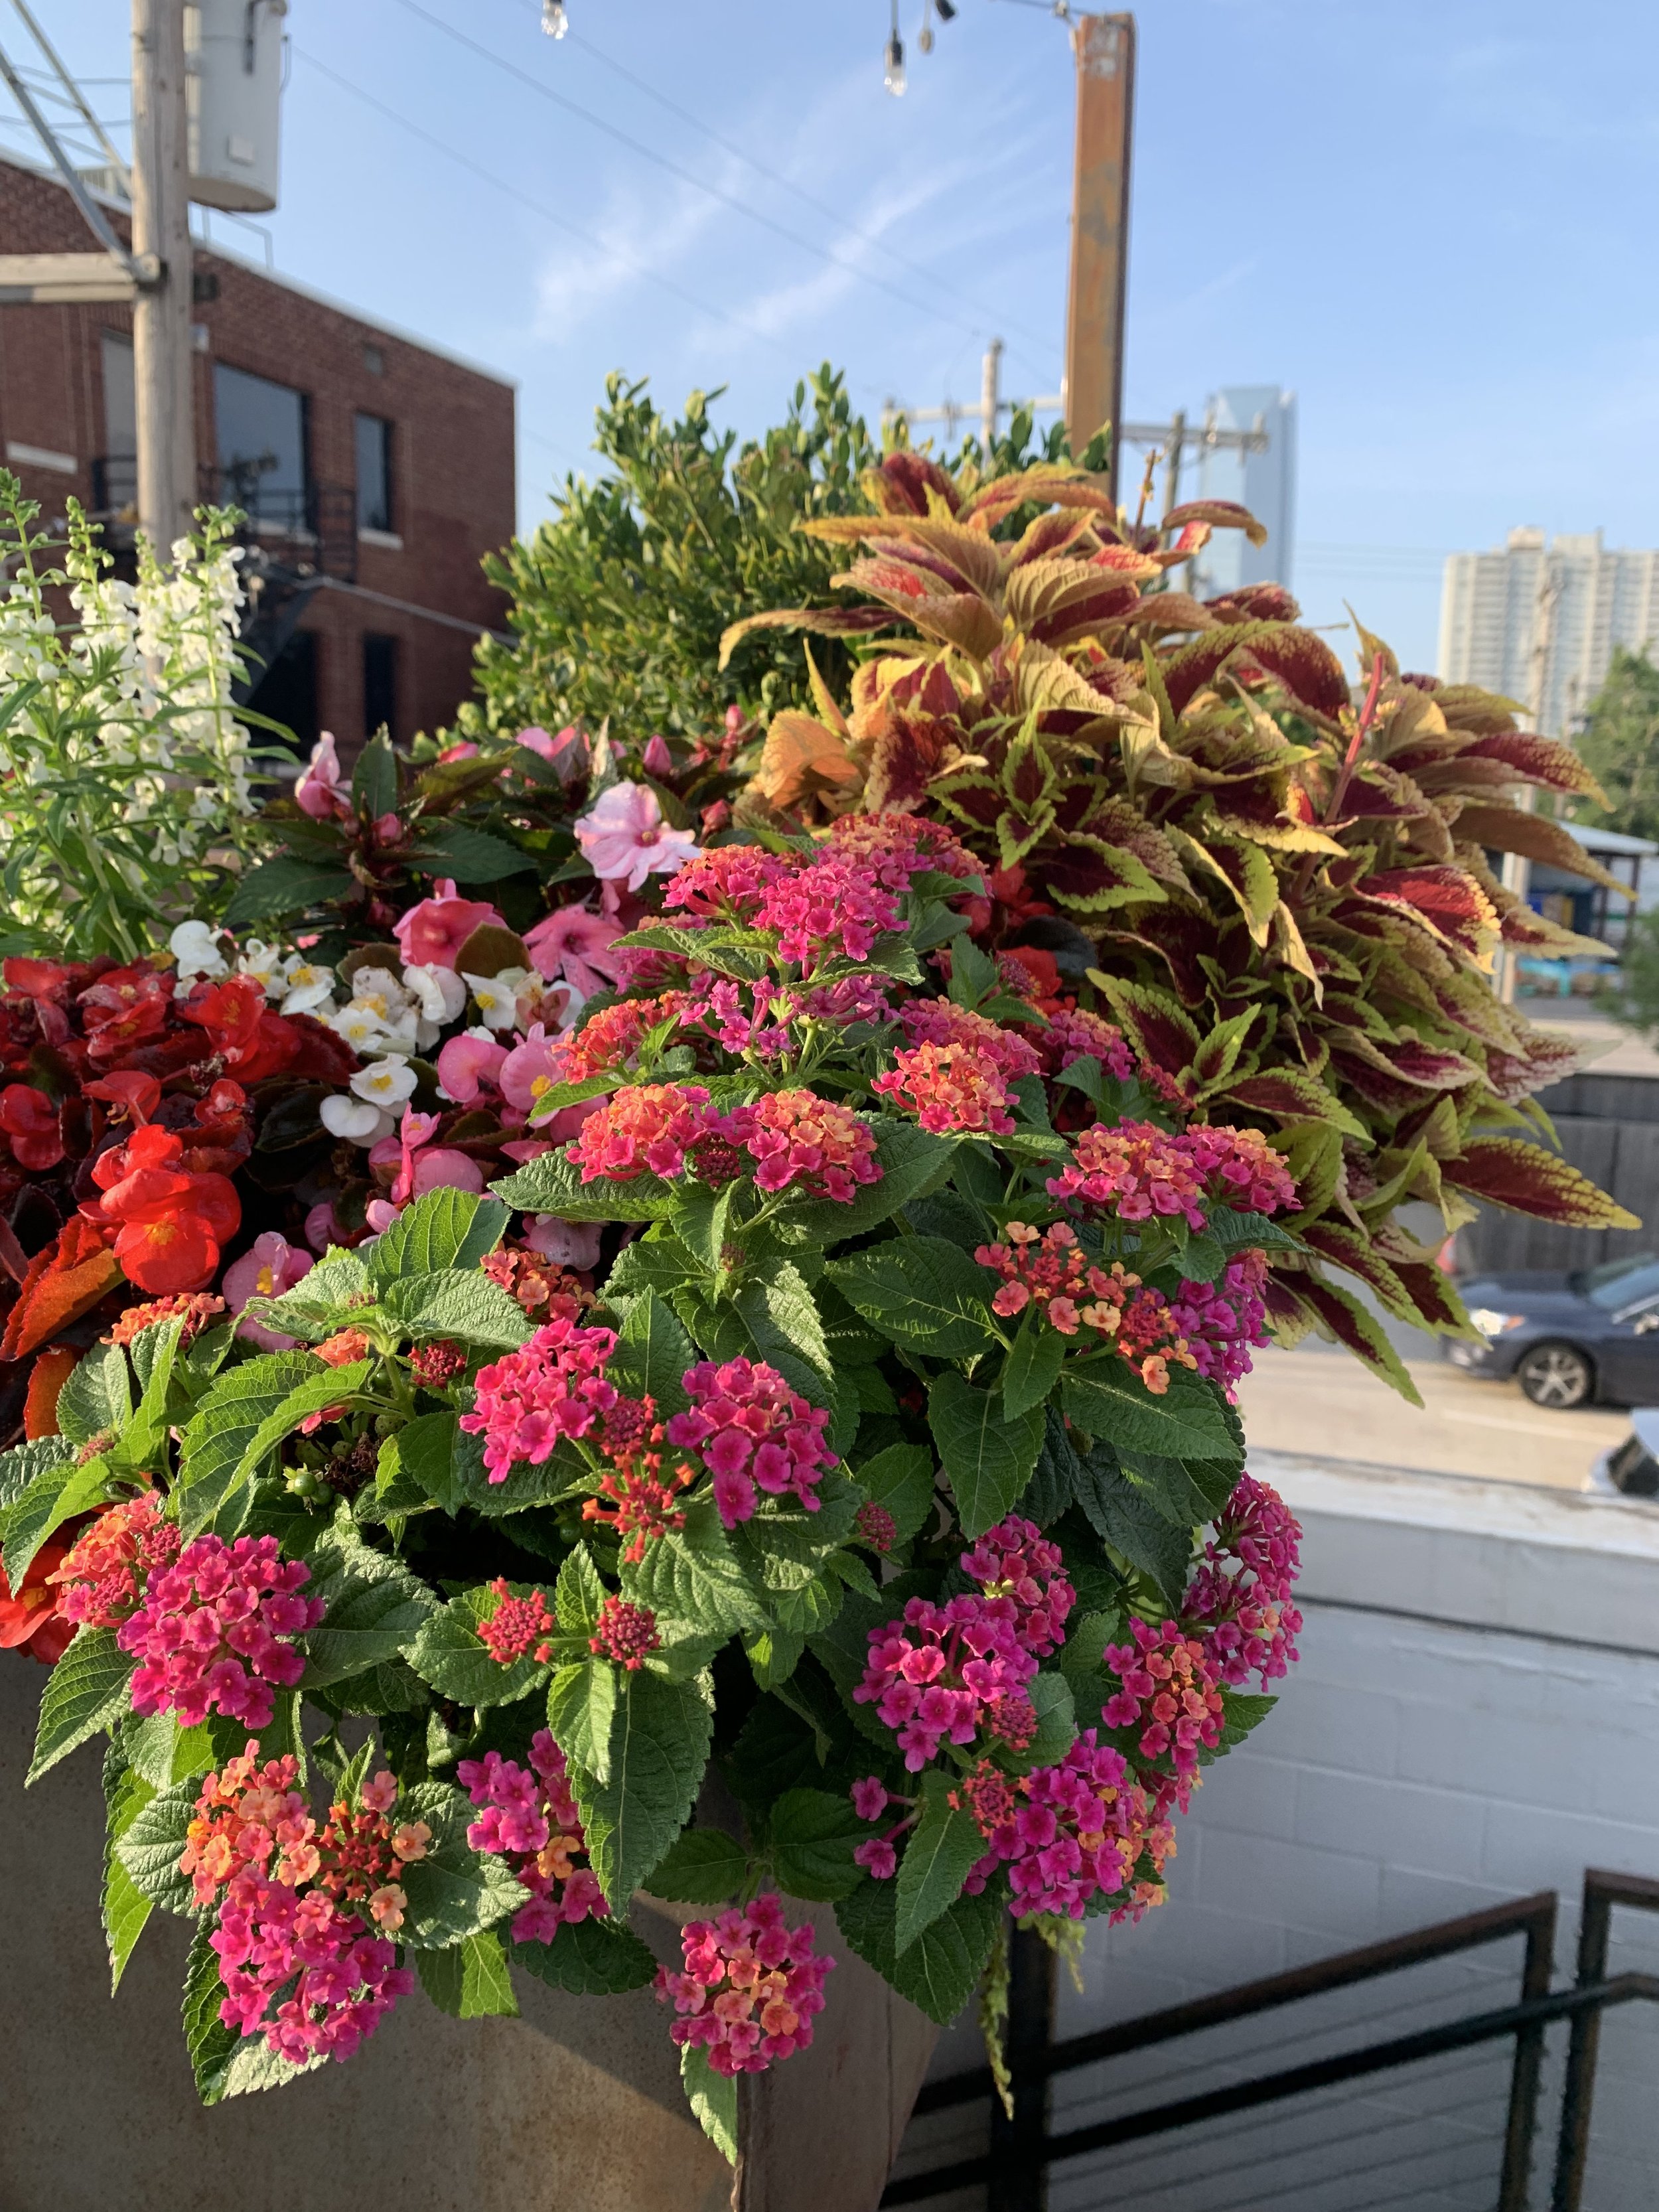
Lantana and Coleus are heat loving annual summer color plants.

Limelight Hydrangea

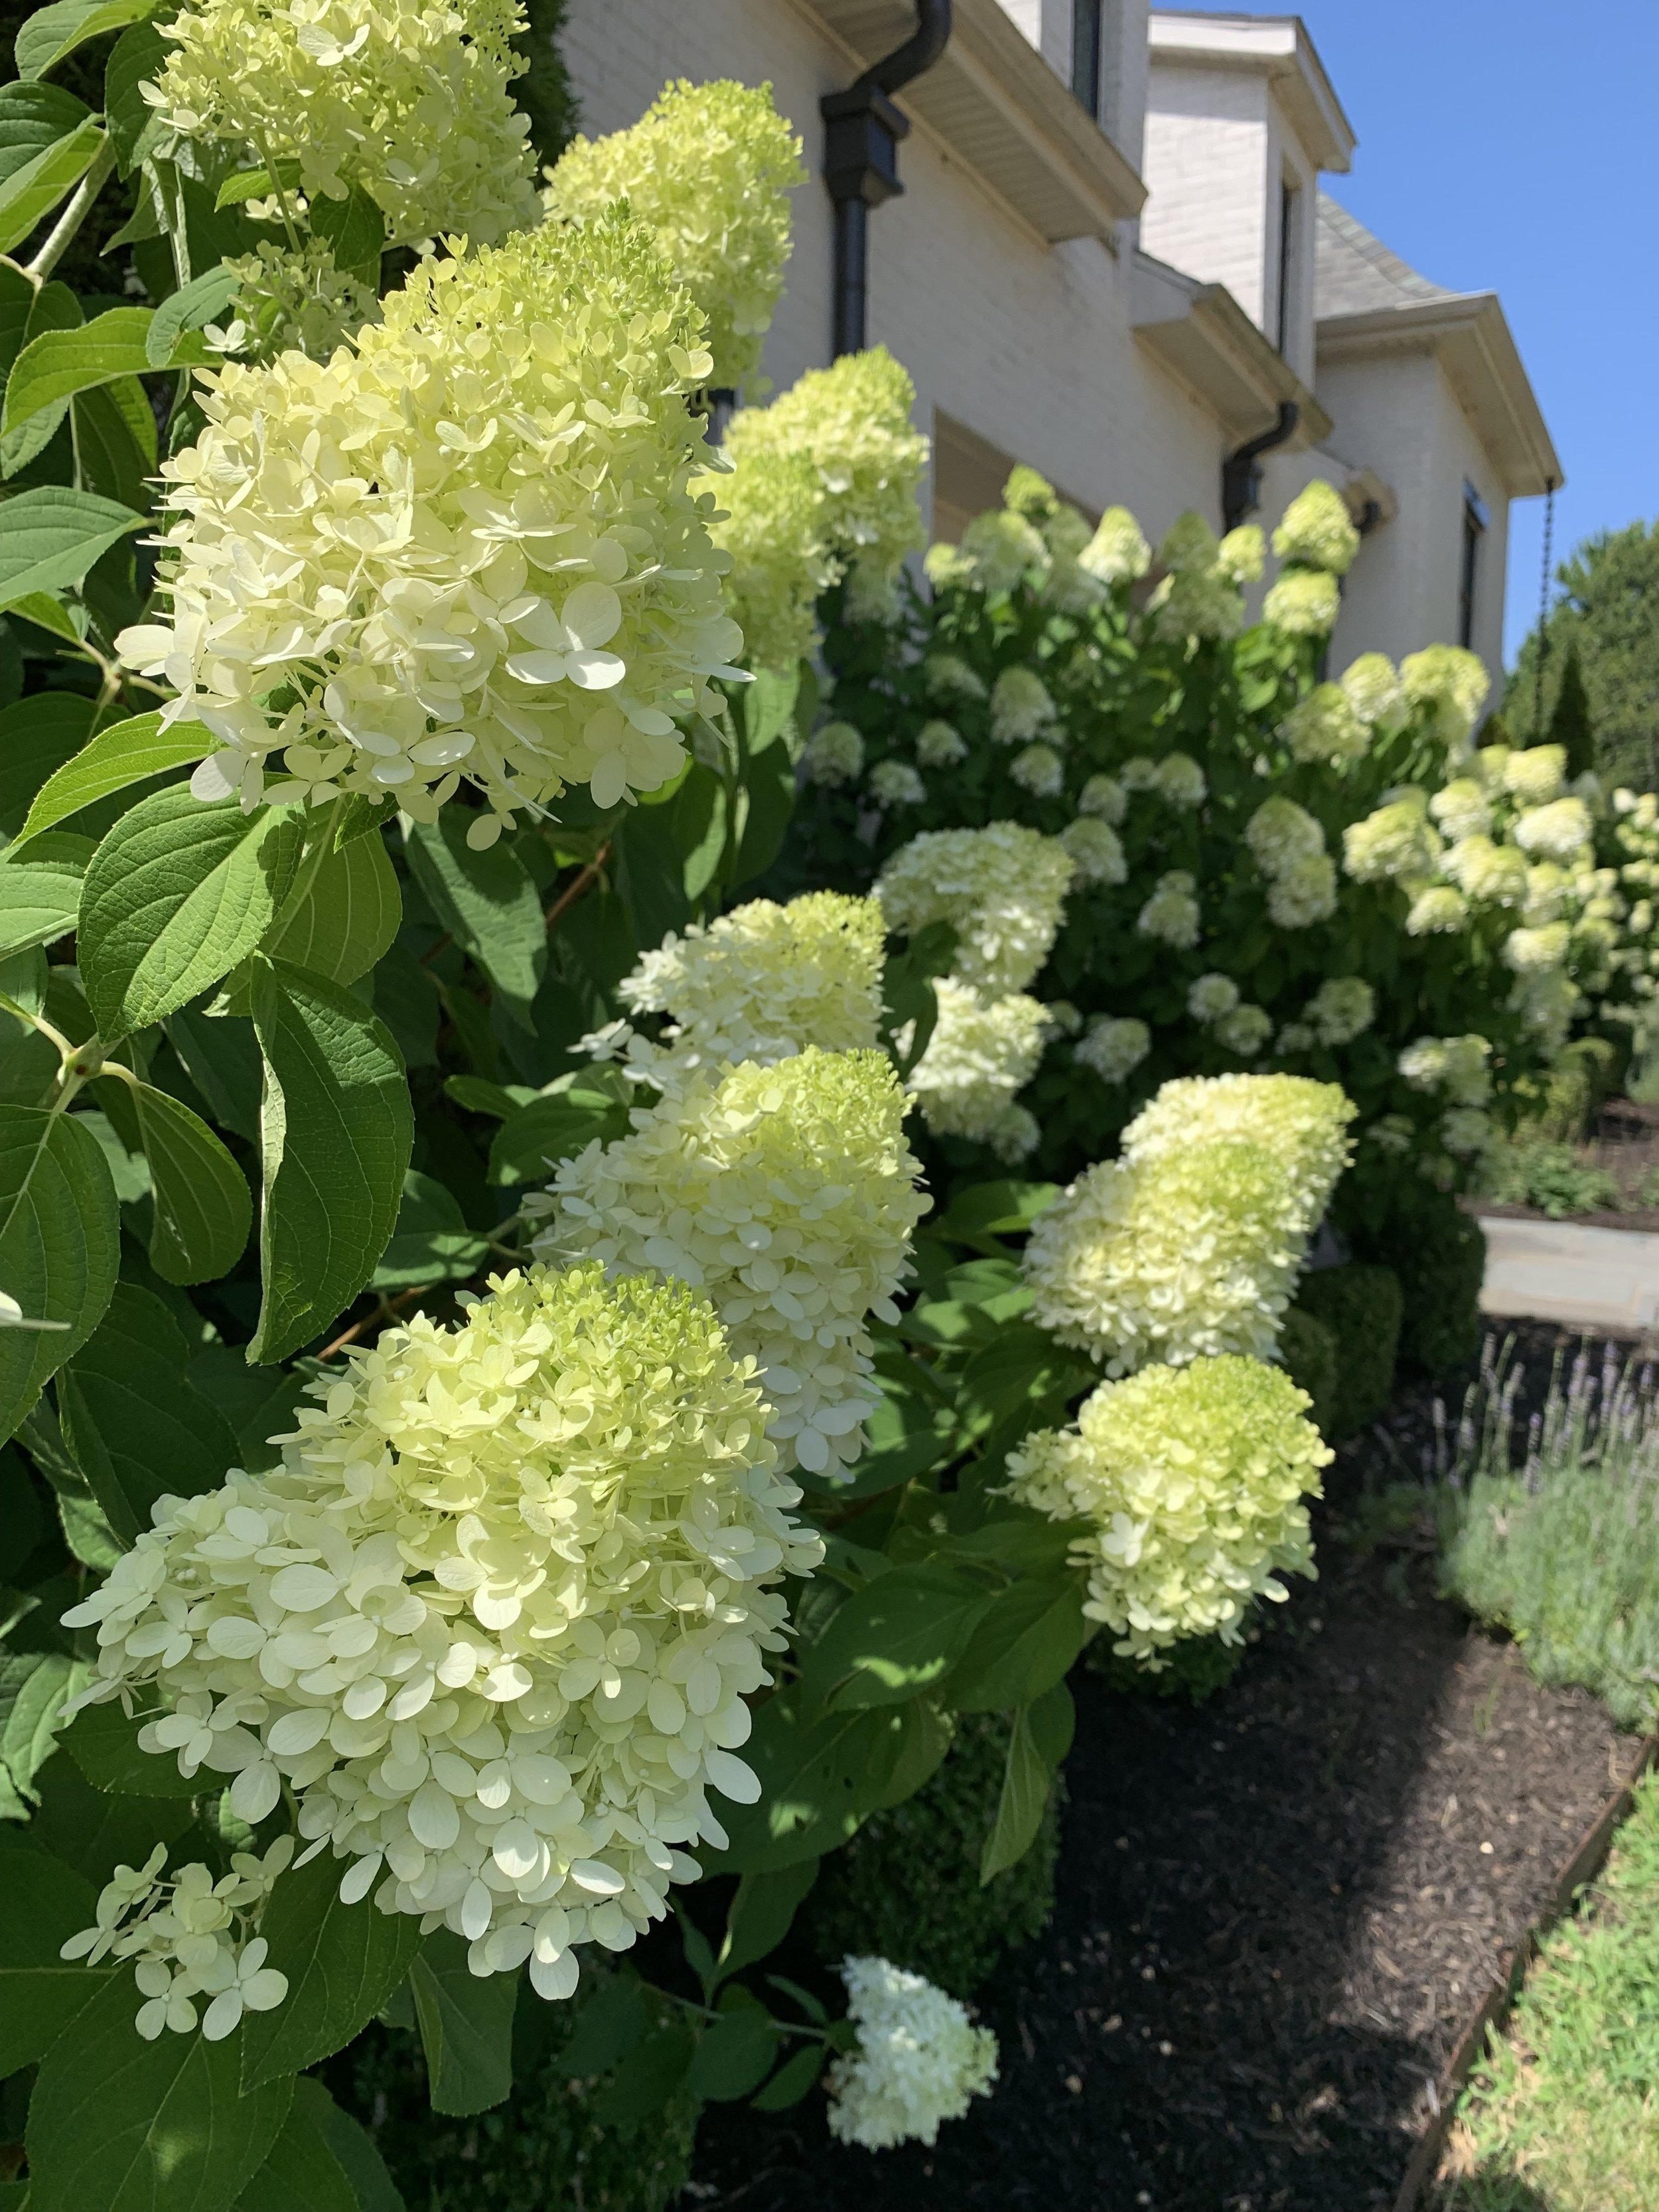
Limelight Hydrangeas grace the July landscapes with large lime-white blooms.
Brown Patch – One benefit of the dry air of July is less brown patch disease in fescue lawns. Brown patch occurs when there is excessive moisture, high humidity, and/or high dew points when nighttime temperatures are in the 70s or more and daytime temperatures are in the 90s. Brown patch is worse in areas with dense shade and/or low wind movement. Anytime the leaf blades of your fescue stay wet for more than 6 hours at a time in the summer, brown patch is unavoidable.
The temptation is to water fescue more frequently in the summer. It is common for us to find fescue lawns with the irrigation set to run morning and night creating the perfect conditions for the disease to spread. If you have heavy shade and/or low wind movement (most smaller backyards) water after sunrise and no more than every other day. Resist the urge to water more. Your fescue is not dying due to summer heat, it is struggling with brown patch.

Black Eyed Susan is a favorite perennial during the month of July.


Sunpatiens do well through the summer heat in Full Sun to Part Shade.

Penta is another summer annual that enjoys Full Sun to Part Shade.
Brown Patch Disease will make you think your fescue lawn isn’t getting water, so you respond with more water, which makes the lawn look worse, so you water more…. This fescue lawn was extremely wet this week resulting in self-induced Brown Patch.
Fescue Tip –
The key to fescue surviving the summer is not watering more.
The key is deep soaking every other day.
Watering daily, or as some are known to do, watering twice per day, is one of the worse things for fescue in the summer heat.
Keeping fescue wet will always promote Brown Patch disease.

Crape Myrtles respond to the heat of July with bold pinks, purples, whites, and reds.

Through the summer heat Caladiums and Inpatients will perform well in Full Shade to Part Sun.
Fertilizer – Because warm season grasses are actively growing, they need feeding during July. The plan is to use fertilizer with a 3 to 1 to 1 of nitrogen (N), phosphorus (P), and potassium (K), plus iron (Fe) for added color. Most of our soil has plenty of phosphorus and potassium, but nitrogen needs to be replaced. July is a great month for turf development and a thick, healthy growing lawn is the best defense against weeds. Do not fertilize fescue lawns now. As a cool season grass, fertilizer in the heat of the summer on fescue will cause damage.
Bermuda lawns look their best in the heat of the year when they are properly fertilized, mowed and watered.

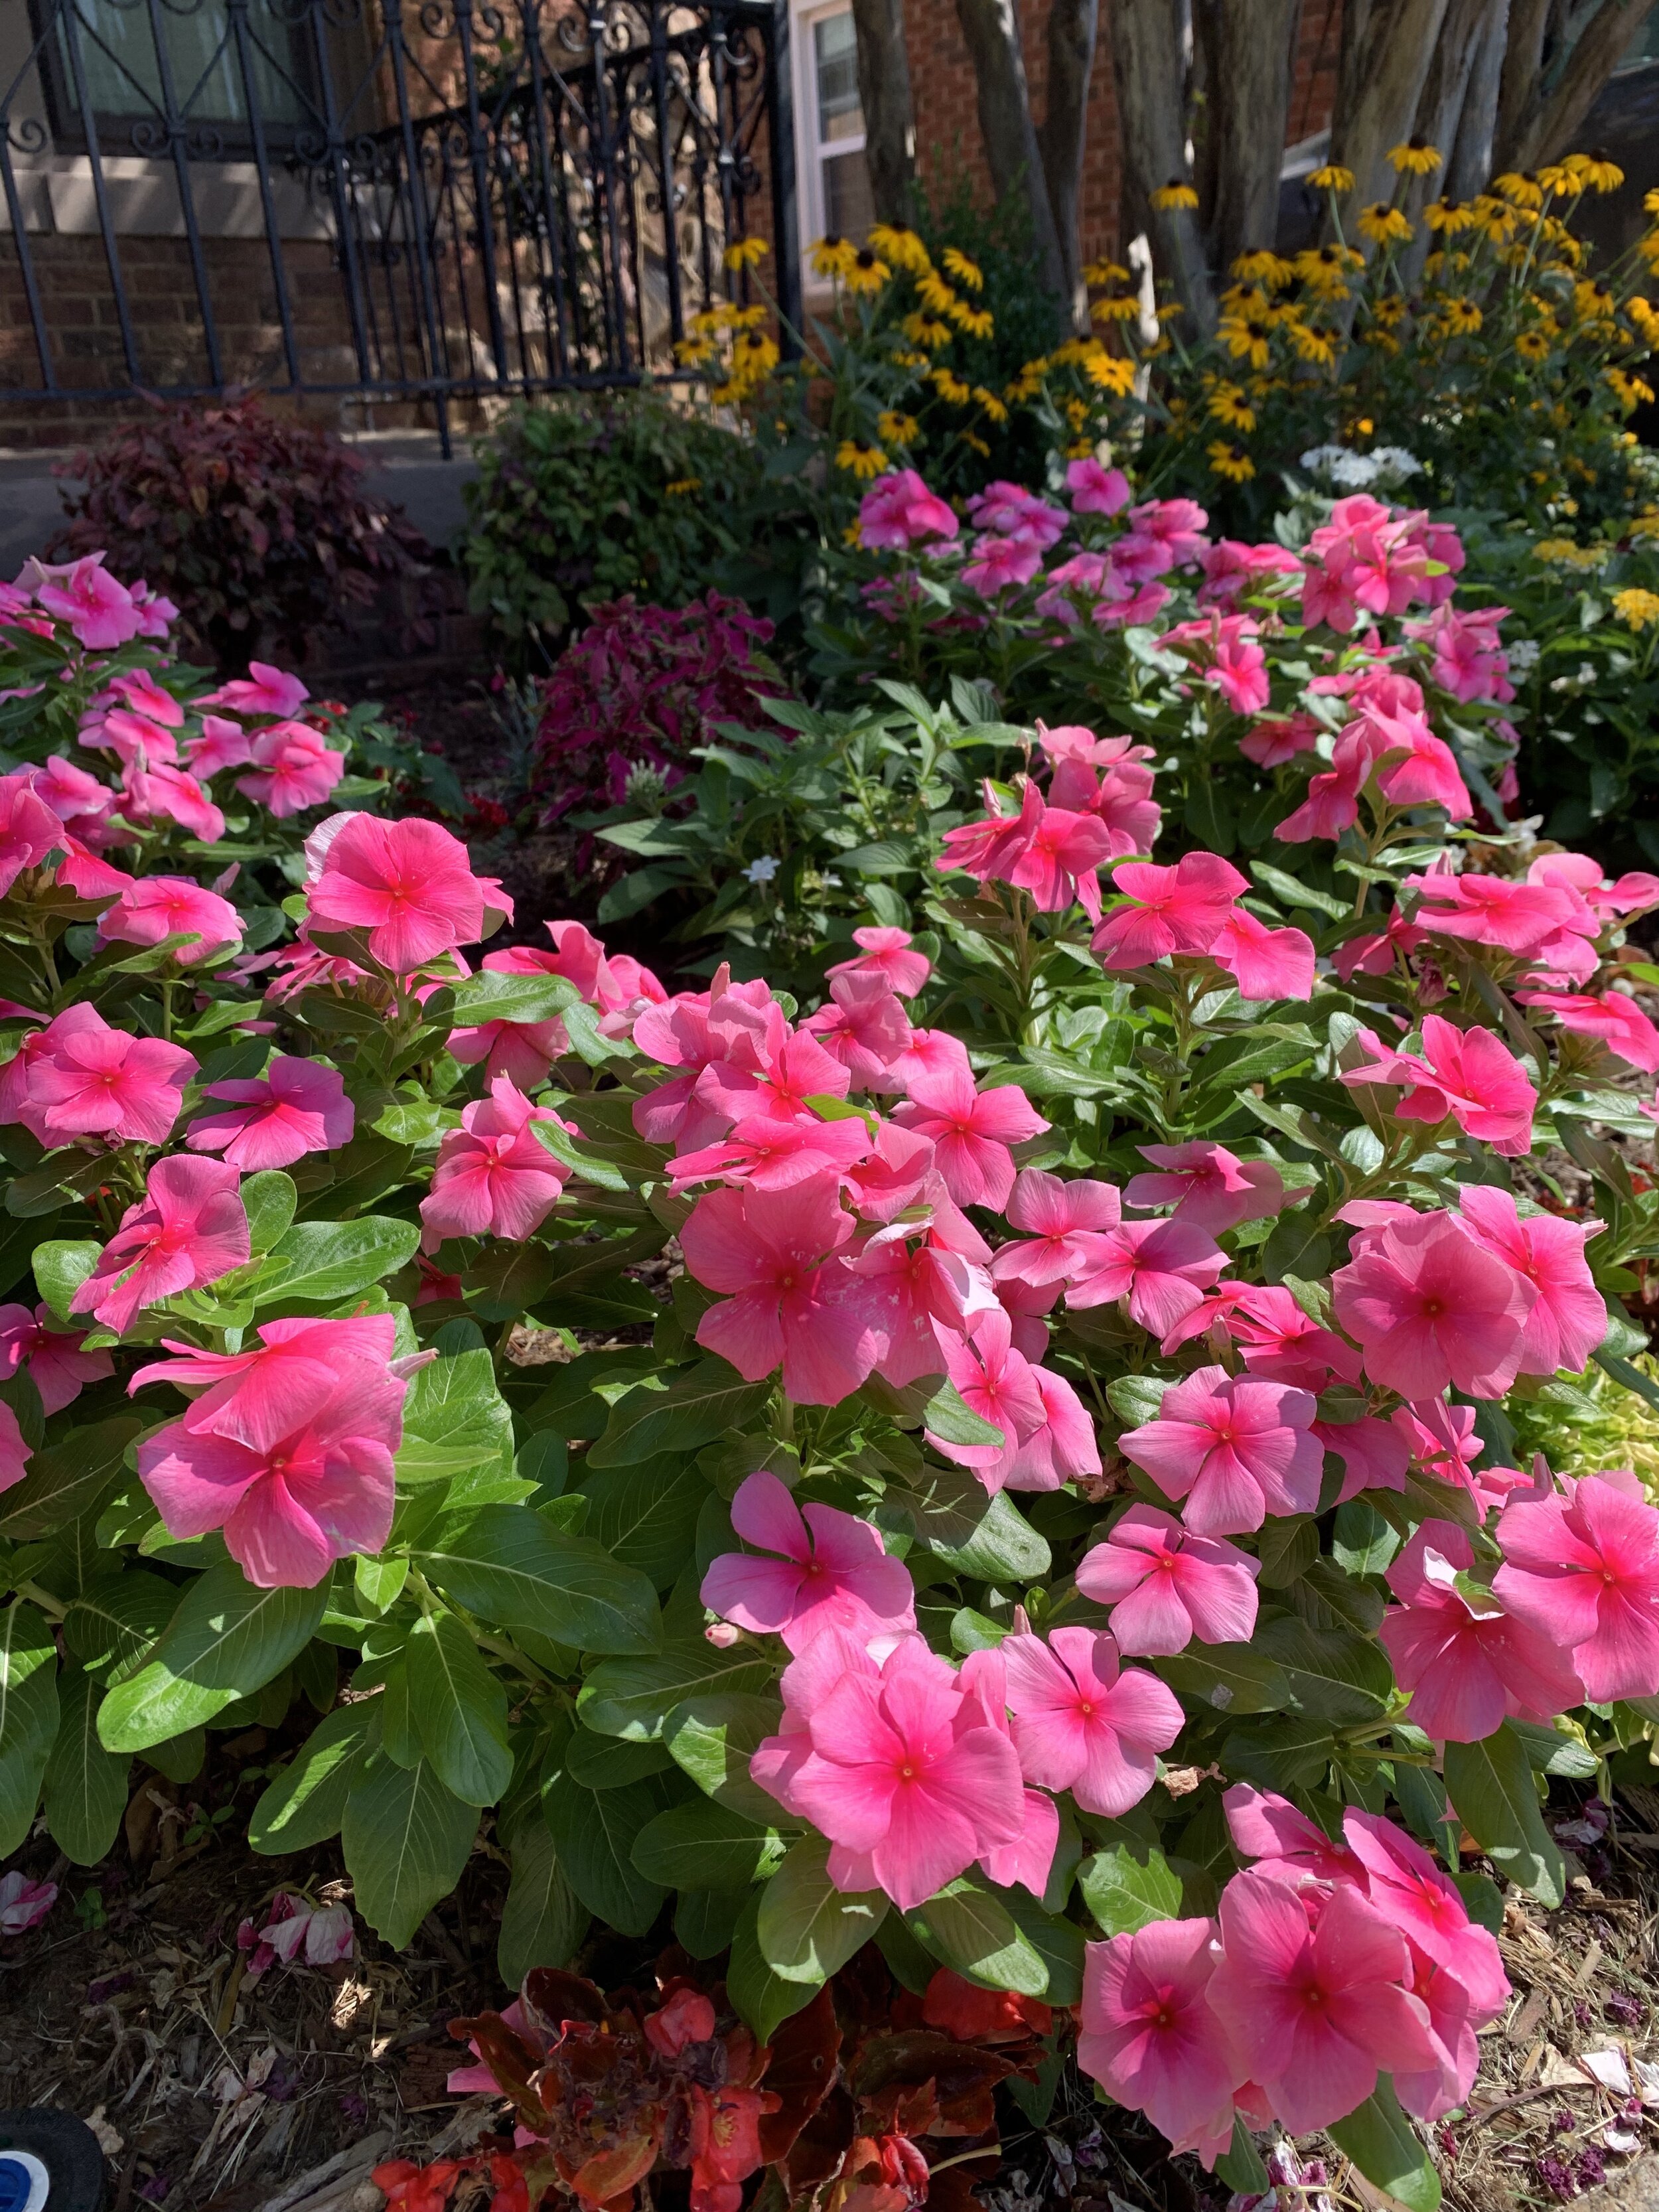
Periwinkle is one of the best annual color plants during the hottest periods of the summer.
Weed Control – If you are on a regular lawn care application program, and if your first application was made prior to mid-March, you shouldn’t be experiencing many summer annual weeds. A common weed this time of year is nut sedge. Nut sedge thrives in tight, wet soils. Areas with poor drainage and overwatered turf are frequent trouble spots. If you didn’t get an early pre-emergent, you most likely have a good crop of crabgrass now. Controlling weeds in the heat of the year often can cause more damage to the turf than is beneficial. It is important that label instructions are always followed when spraying weeds. Don’t over apply. What is most important in July is developing a thick, healthy turf. If you are too aggressive on weeds now you will have weak spots that are more susceptible to weeds in the future.

Nutsedge

Shrub Pruning – Selective pruning and light shearing should be practiced during the summer heat. If possible, wait to do major pruning during the hottest periods of the summer. Avoid any pruning or shearing on spring blooming plants because you will be removing flower buds and reducing the show next spring.

Early July is your last chance to trim spring blooming plants such as azalea without reducing next spring’s blooms.


Turf areas that receive less than 4 hours of direct sunlight is considered Full Shade. Fescue is the best turf choice in Full Shade to Partial Shade areas.

Aphids

Bagworms

Bag worm

Bagworms continue to be the biggest insect issue currently. Not only are they attacking needle evergreens, but also deciduous trees and shrubs. Inspect your plants frequently.
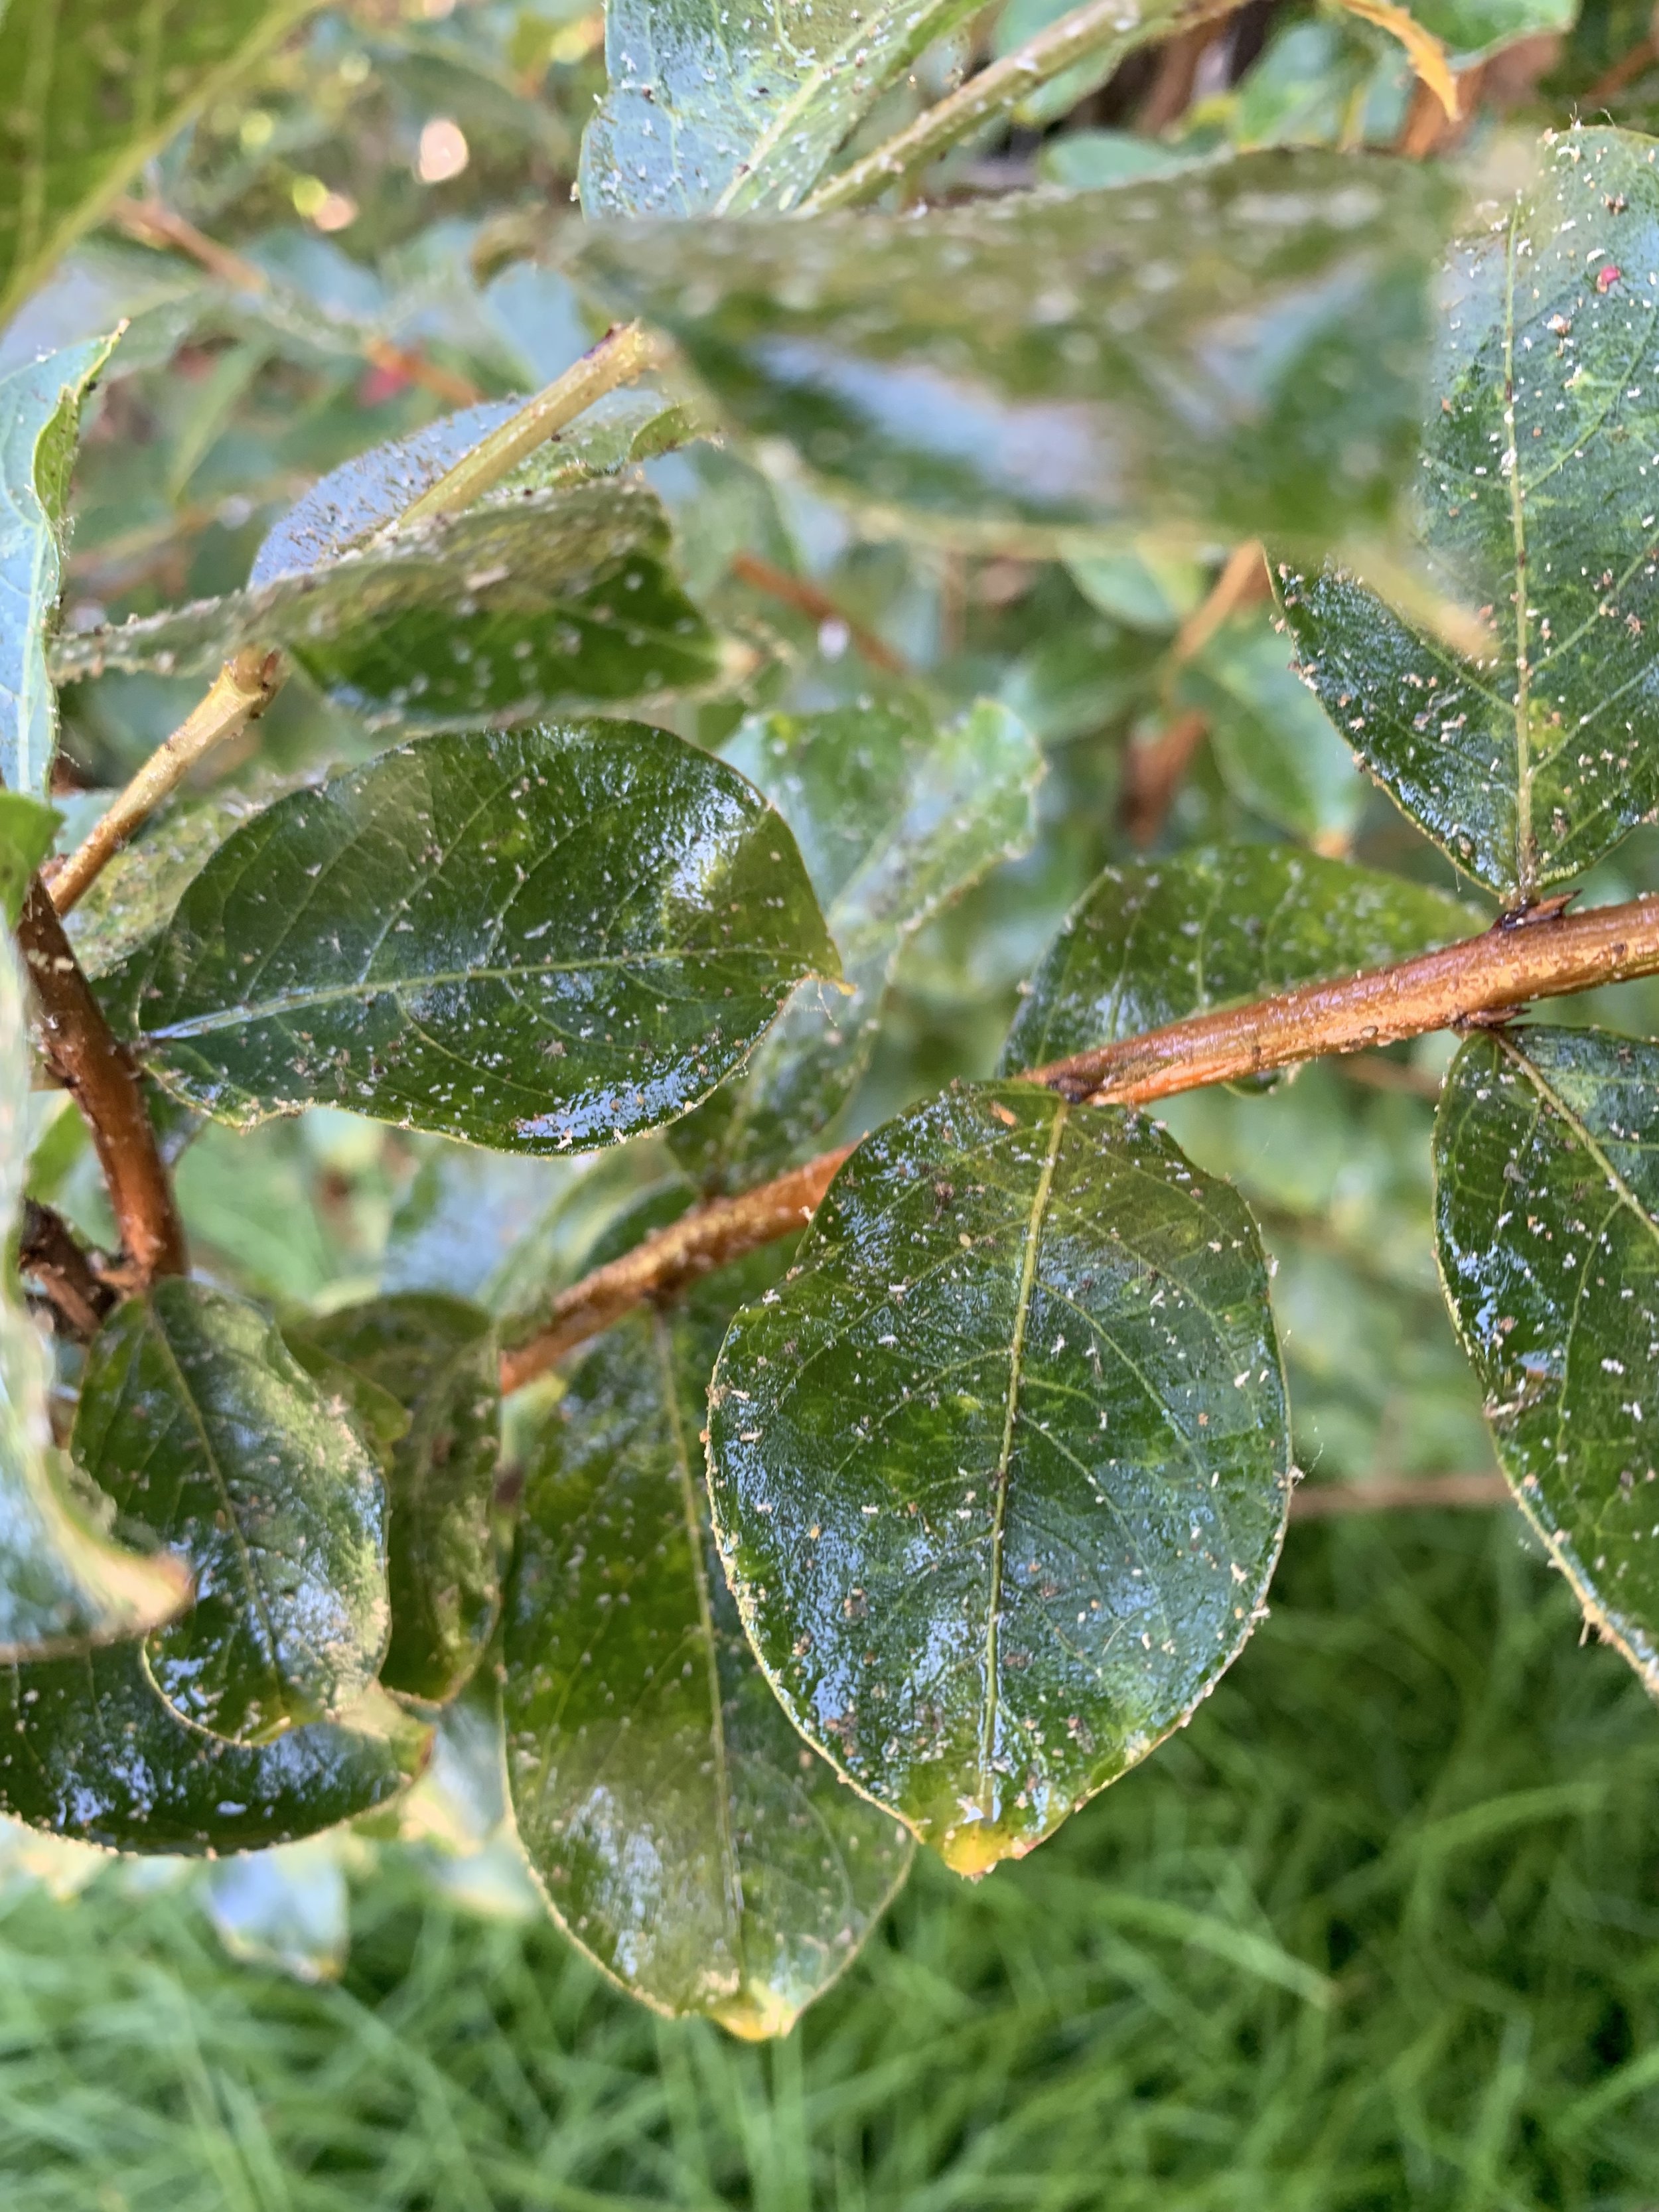
Aphids thrive in the hot weather resulting in an increase in activity the past couple of weeks. They are easy to spot. Look for glossy, wet looking leaves. The leaves will be sticky and the underside will be covered with insects.
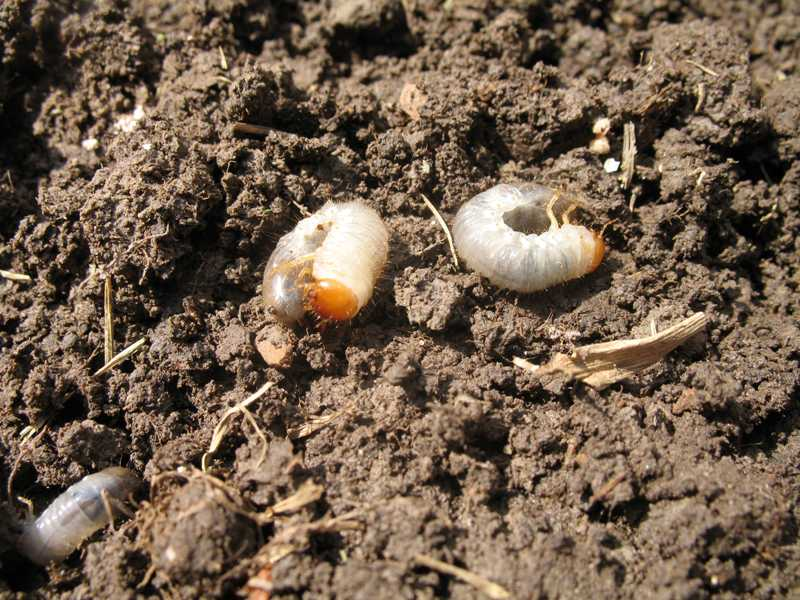
If you see more than an occasional grub when digging in your landscape, we recommend treatment. An occasional grub is good for the environment, but as with most insects, too many and they will cause damage to your lawn.
Insect Watch – The first step to healthy plants is inspecting them regularly and then treating as needed. If you attempt to treat on a schedule, you will find that you often will miss the target pest. These are the insects that are currently most active:
Bagworms – Common on needle evergreens (juniper, cedar, cypress, etc.). If a plant is already stressed due to heat or draught, bagworms can kill the plant. Inspect often and treat as needed.
Aphids – Small sap-sucking insects that leave plants with a honeydew, sticky substance on leaves. Aphids are easy to spot. If the leaves appear unusually glossy stop and look under the leaf and you will find insects hard at work. Aphids thrive in hot, dry conditions.
Spider Mites - They also gather on the underside of leaves but are very small and hard to see. The first sign you may have spider mites is a plant with weak looking, yellowish leaves. Take a white sheet of paper, place it below the leaf and lightly shake the leaf. If you see small specs of red, yellow, and brown on the paper and they start moving around, it isn’t dust and dirt you are seeing, it is spider mites.
Grub Worms – If you have experienced grub damage in the past, or if you have noticed a lot of June bugs around your landscape, July through August is a good window to apply an application for control. Grub worms are the larva form of the June bug. June bugs have laid their eggs, and they are hatching now. Grubs are easiest to control when the new grub is small and feeding close to the surface in July and August.
Army Worms – Three summers ago was the big army worm plague and it still has many lawn enthusiast shaken. Army worms are always present in our summer lawns and landscapes. When populations are normal you may never know they are there. But, with the right conditions we can see an explosion to turf damaging levels in a matter of days. We are more likely to have turf damaging population levels when we have a cool, wet late June and early July. Army worm eggs and worms have a higher survival rate when there is abundant moisture and cooler temperatures. The weather pattern so far this summer is not conducive for an army worm outbreak. We will keep an eye on conditions and let you know if army worms become a problem.
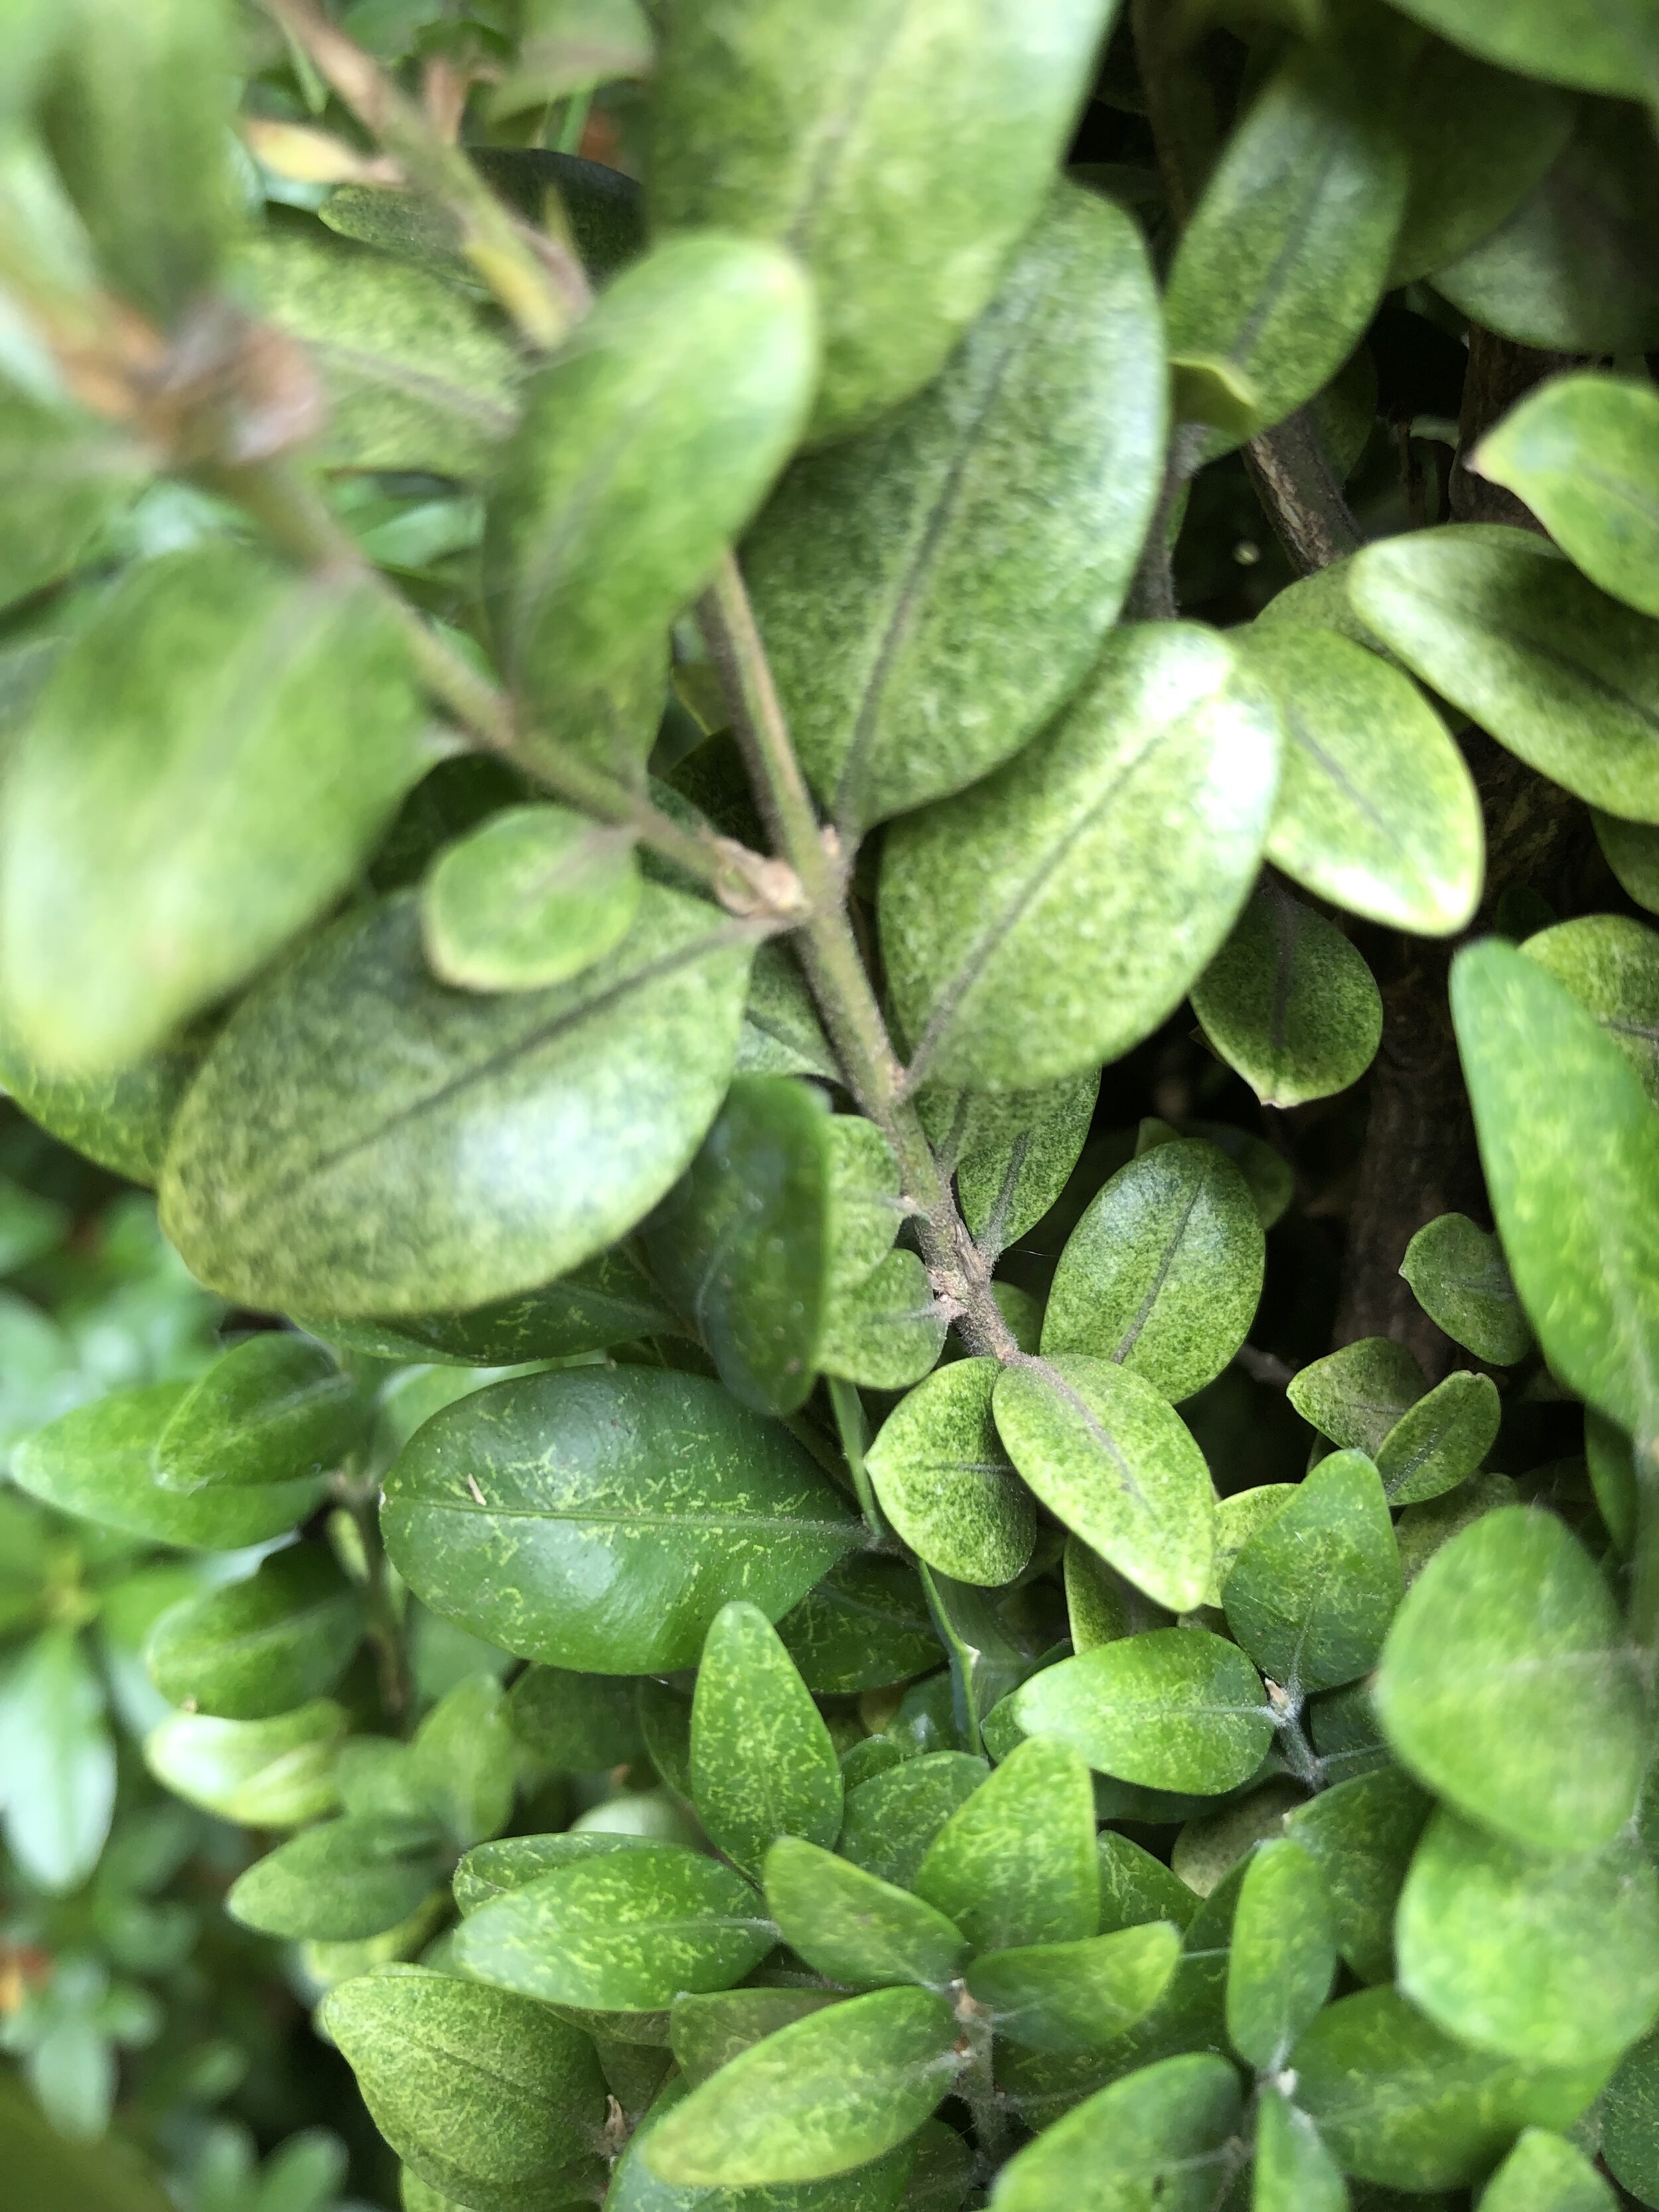
Spider Mite activity will make a healthy plant look weak with yellowing, speckled leaves.

Place a white sheet of paper under a branch and gently shake the branch. If you see small specs on the paper that are moving around, you are seeing spider mites.
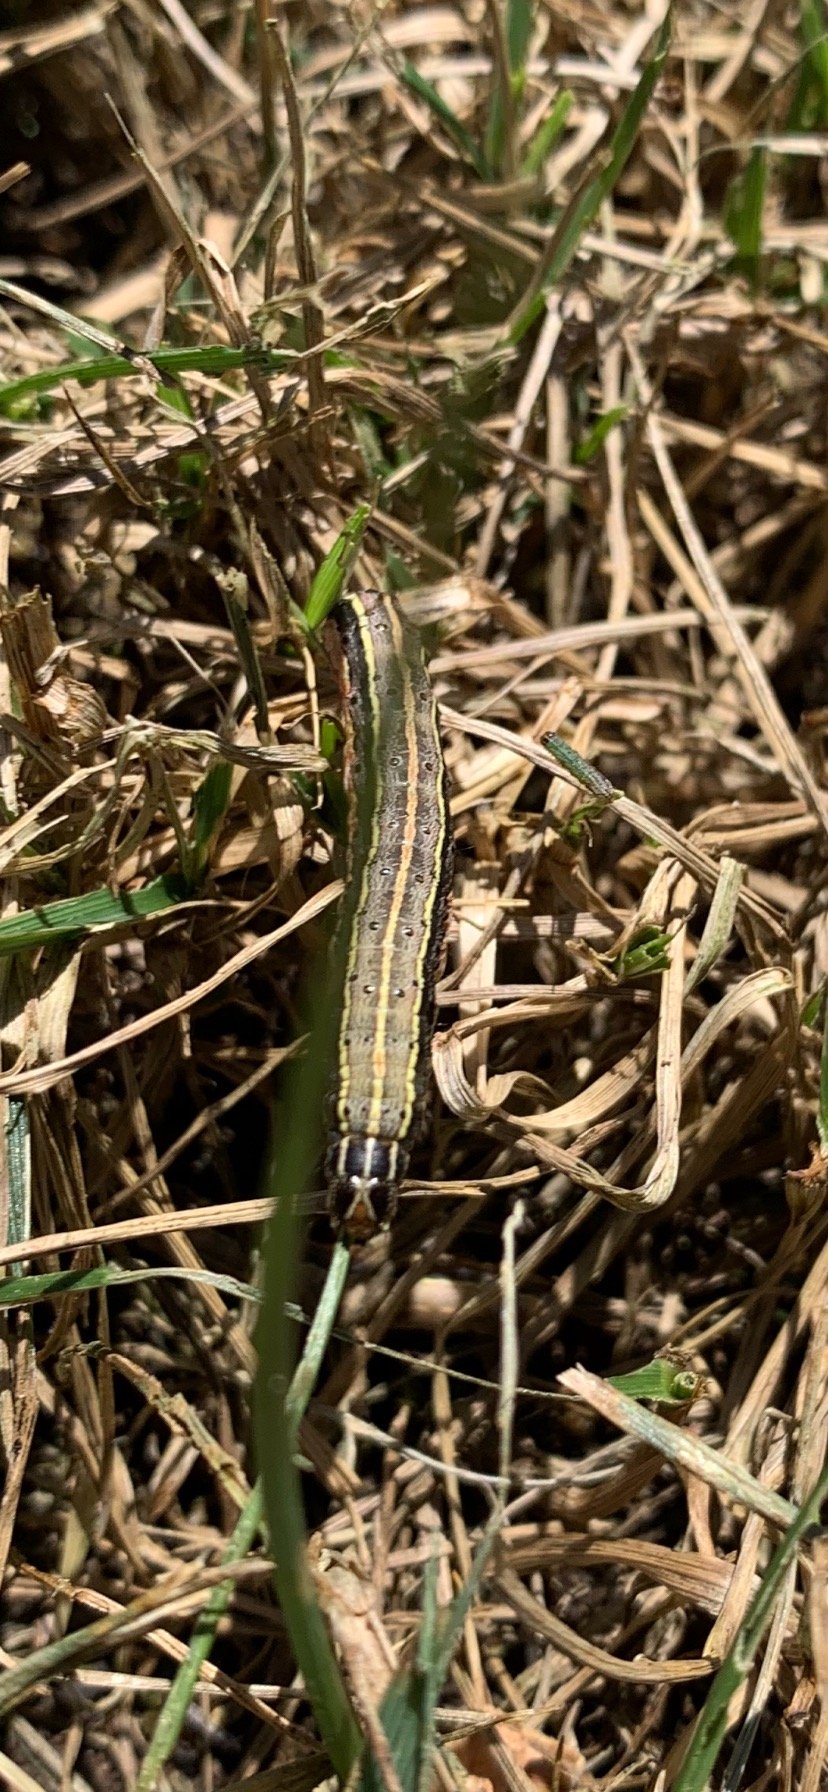
Army Worms start out green and mature to a greenish-brown. They have distinctive strips on each side of their bodies and an inverted “Y” on their head.

Lantana loves Full Sun but also performs well in Part Sun.
Tree Leaves – Expect some leaf drop on deciduous trees in the summer heat. Some leaf drop is normal as the tree naturally adjusts to less moisture and more heat. The fun fact about most trees is they have a secondary set of buds. If they are stressed, they naturally drop leaves to survive, and then re-bud as they recover.


July, more than any other month, requires you to keep your eye on how your lawn and landscape are doing.
Inspect regularly for insect activity.
Make sure your landscape is getting the correct amount of moisture.
And, mow frequently for the best curb appeal.
We want your lawn and landscape to not only survive this summer, we want it to thrive!
If you have any lawn or landscape concerns, needs, or questions, please give us a call.
Lorne Hall
Hall|Stewart Lawn + Landscape
(405)367-3873
Summer Blooming Trees

Well, summer officially arrived on Thursday. I don’t know about you, but it feels like it showed up a few days early and in full force!
Let’s celebrate the start of summer by doing one of my favorite things…talking about summer blooming plants.
But, before we jump in, let’s discuss the biggest problem we are seeing in lawns this week…WATER!
We are approaching 3 weeks without rainfall (yes, June is supposed to be our wettest month) with no chance of rain in the near future. Unless you have started practicing your best watering techniques, your lawn and landscape are showing signs of stress.

Back to Summer Blooming Trees…
Everyone is aware of Crape Myrtles. Crape Myrtles are our longest blooming tree. They start adding bright colors to our landscapes in June and keep the show going through September. But, there are so many more summer blooming trees.
Let’s take a quick look at few more summer blooming trees:
Vitex – Covered with lilac-purple flowers in June and July.
Commonly known as Chaste Tree. It is easy to overlook this summer bloomer because too often they look like overgrown shrubs. But, when you see a 15-20’ tall, multi-truck, well maintained variety covered with 12-18” purple flowers and gray-green foliage, you will fall in love. They do well as large shrubs but make an even better summer statement when their lower branches are kept clear of suckers. They are very tolerant of our soils and weather. Fertilizing in the spring and sufficient water in the early summer will produce the most dramatic summer show. Best planted in full sun.

Vitex makes a bold summertime statement with its 12-18” purple flowers.

The multi-trunks of a well maintained Vitex add a dramatic look to a landscape.

Vitex does well as a large shrub but looks even better as a small, multi-truck tree when their lower branches are free of sucker growth.
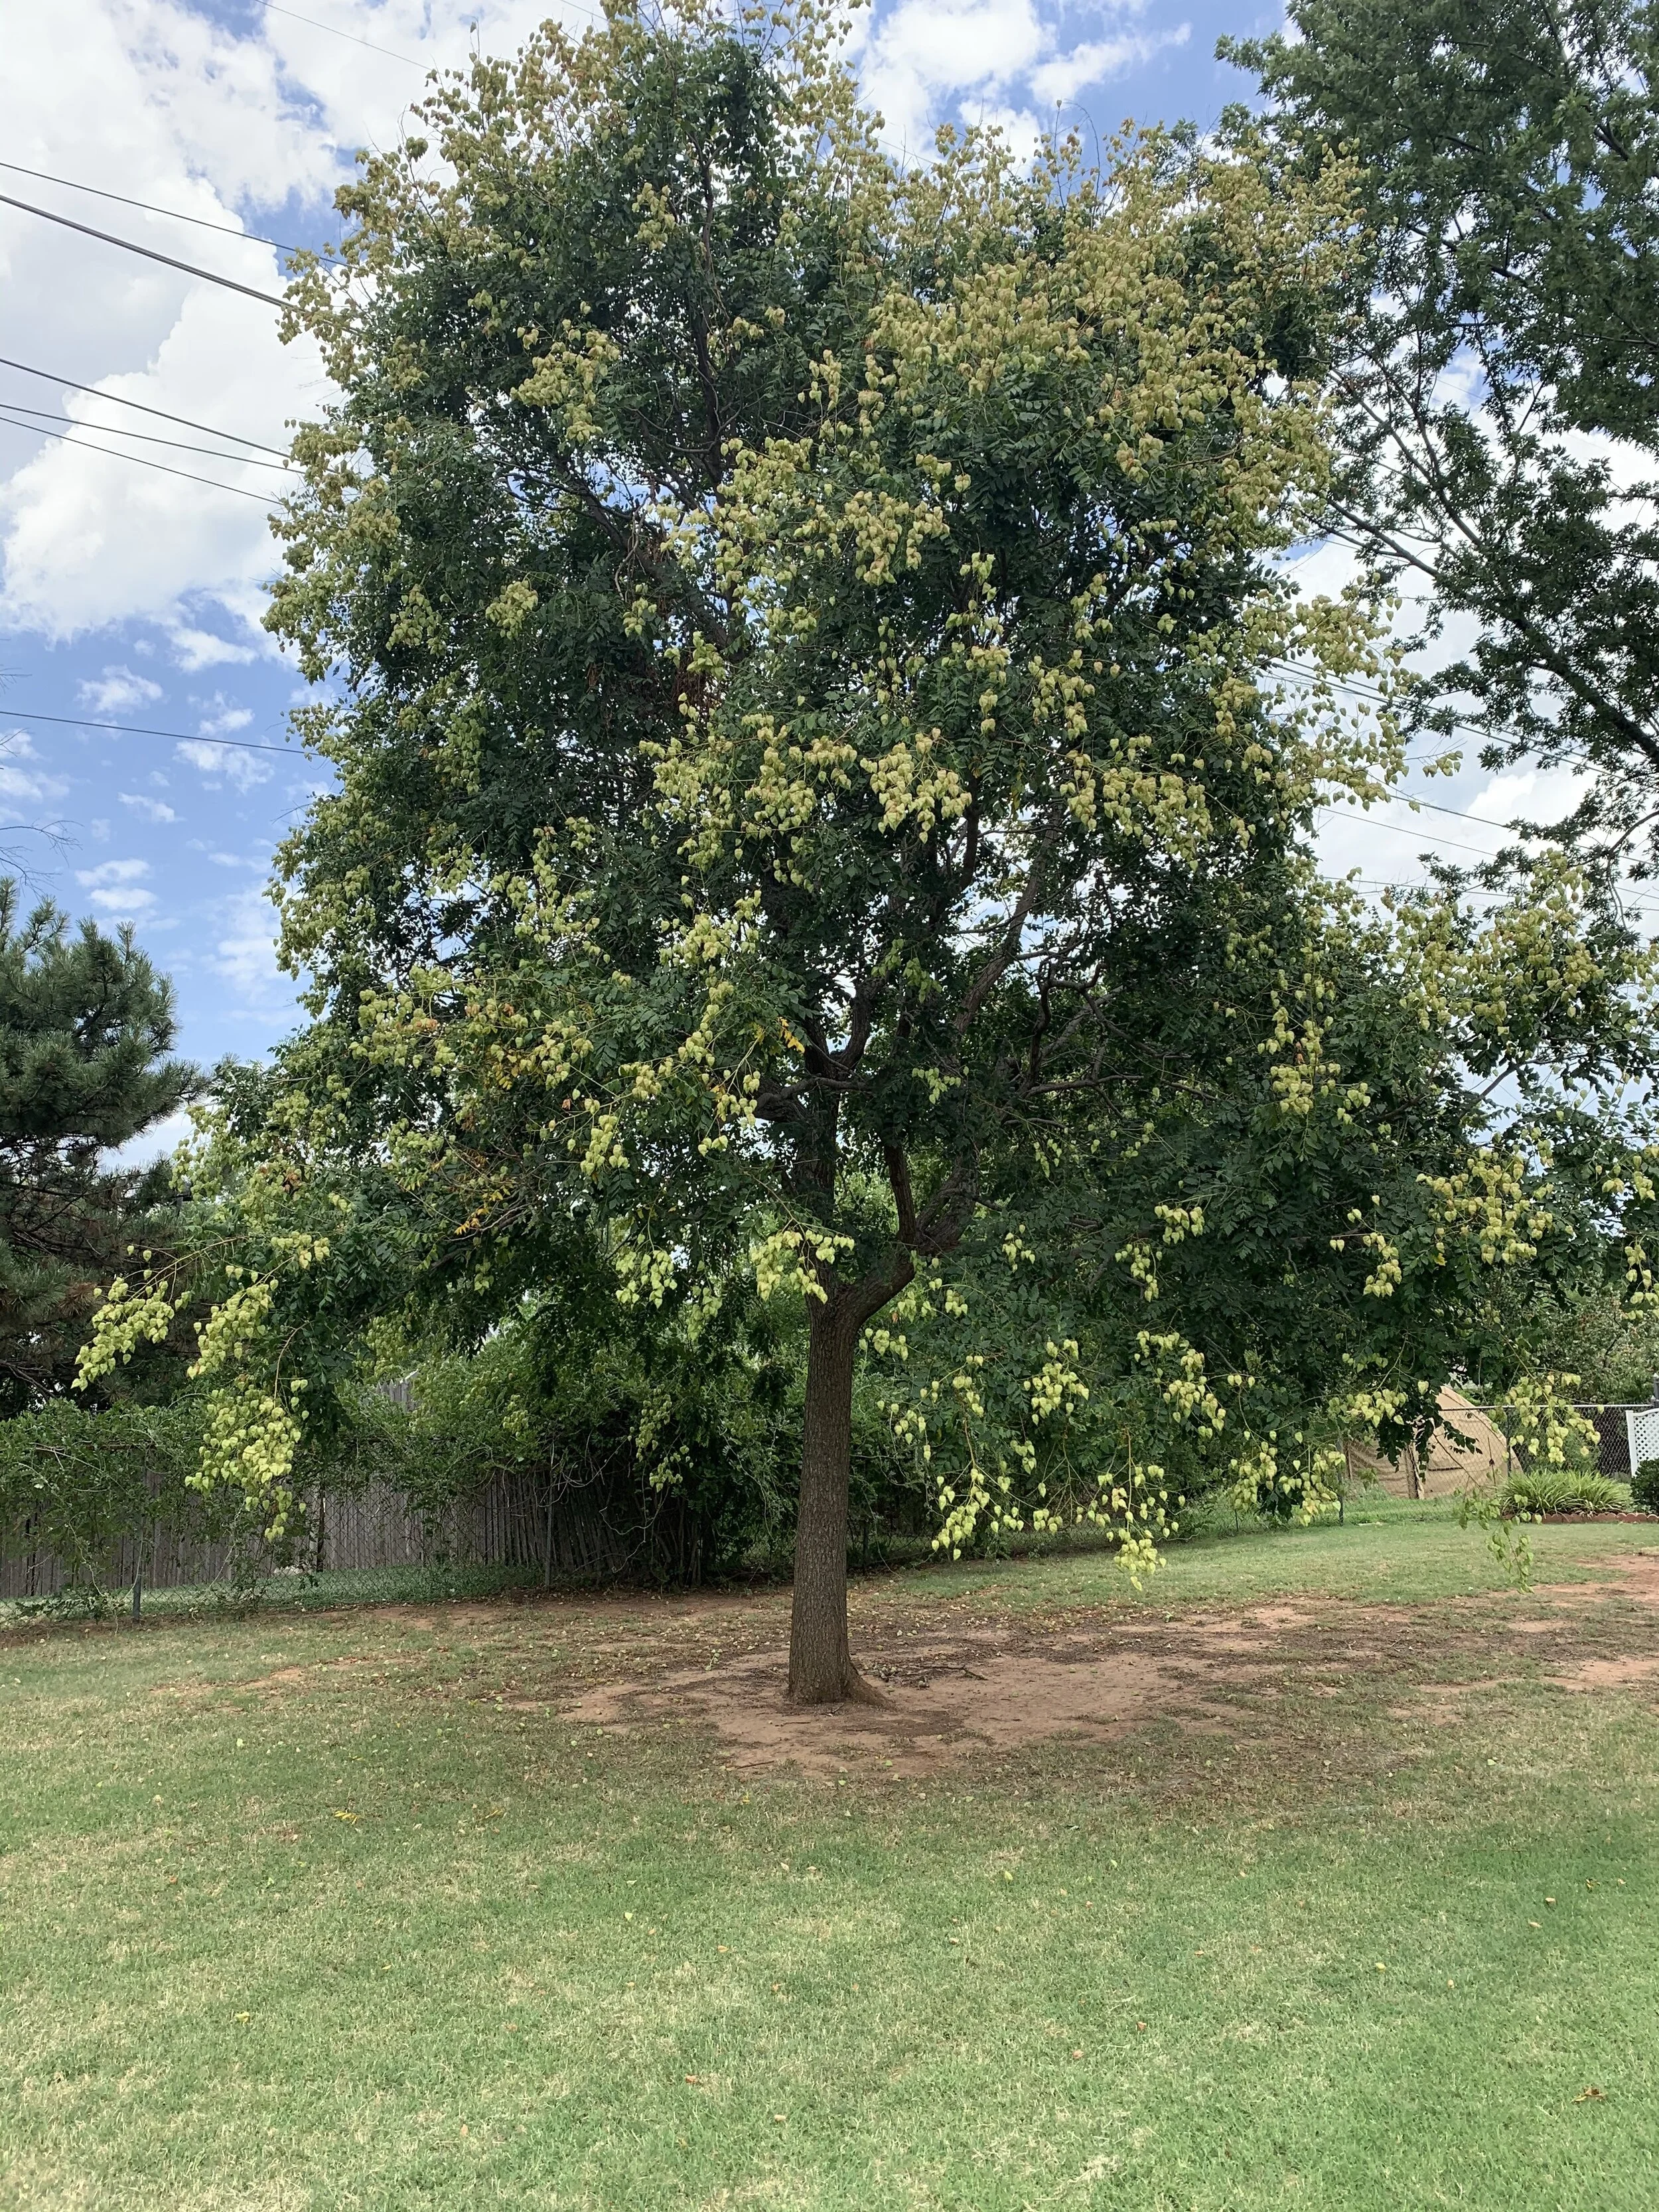
Goldenrain Tree adds brightness to the summer landscape with papery, lantern like flower pods.

The early summer bright yellows of the Goldenrain Trees are eye catching.
Goldenrain Tree – Never receives enough attention for its stunning yellow color.
As the tree matures, it develops an open branched, airy, oval shaped form with rich yellow flowers in June and July. The flowers form a papery, lantern-like pod that gradually turns brown in late summer. The tree handles drought and heat well. It is tolerant of most soil types, but is a fast grower in moist, well-drained soils. It is an excellent lawn specimen that grows to 30-40’ high and wide.

Goldenrain Tree flowers gradually turn to a papery, pattern like seed pod in late summer adding another interest to the landscape.
Mimosa – Fern like foliage with pink pincushion style blooms.
My childhood home had one in the front lawn. Unfortunately, most old varieties of Mimosa were susceptible to a wilt disease that results in gradual decline and eventual death. Prolific seeders, it is common to see them growing in rural fence rows. But, in recent years we have seen a resurgence of Mimosa with newer, disease resistant varieties. With an umbrella shaped canopy and fern-like leaves, the tree adds a tropical look to the landscape. Fast growers that will reach 15-30’ depending on the variety. For even more summer interest, check out the Summer Chocolate and Chocolate Fountain Mimosa varieties have bronze-green and purple foliage.

Mimosas have been adding pink pincushion style blooms to the summer landscape for generations.

Ombrella Mimosa is a newer, disease resistant variety with large, cherry-pink, powder-puff-shaped, fragrant flowers.

Chocolate Mimosa Trees leaves deepen to a rich chocolate-brown color during the summer with pink pincushion-like blooms.

Desert Willow have trumpet shaped blooms and are the most drought and heat resistant flowering tree.
Dessert Willow – Great addition to a waterwise landscape.
Willow type narrow leaves create an airy tropical, loose appearance with long blooming trumpet shaped blooms. A smaller tree, 15-20’ tall that is loved by hummingbirds. They need to be planted in full sun and prefer dry, well-drained soil. Unlike traditional willow trees, they will not tolerate wet soils. Dessert Willow is the most drought and heat resistant flowering tree.
Smoke Tree – Tremendous visual appeal in May and June.
Often considered a large shrub, this small tree can reach 10-15’, producing smoke like airy plums in early summer. There are several varieties available ranging from green, to yellow, to purple leaves. Best planted in full sun.

Smoke Trees add smoke like airy plumes to the landscape in early summer.

Smoke Trees make an excellent landscape focus as a small tree.

Royal Purple Smoke Tree has dramatic, pinkish purple, smoke-like clusters on reddish purple foliage.

There is a Smoke Tree variety with green leaves and lime green airy plumes.
Rose of Sharon – Adds an antique appearance to the landscape.
Often found as a large shrub at older residences, but many improved varieties are available. With a strong multi-stemmed upright growth habit, they add interest to the landscape as a small tree, 8-10’ tall. White is the most common bloom color but there are varieties in pinks, blues, and purple as well. They grow well in full sun to partial shade.


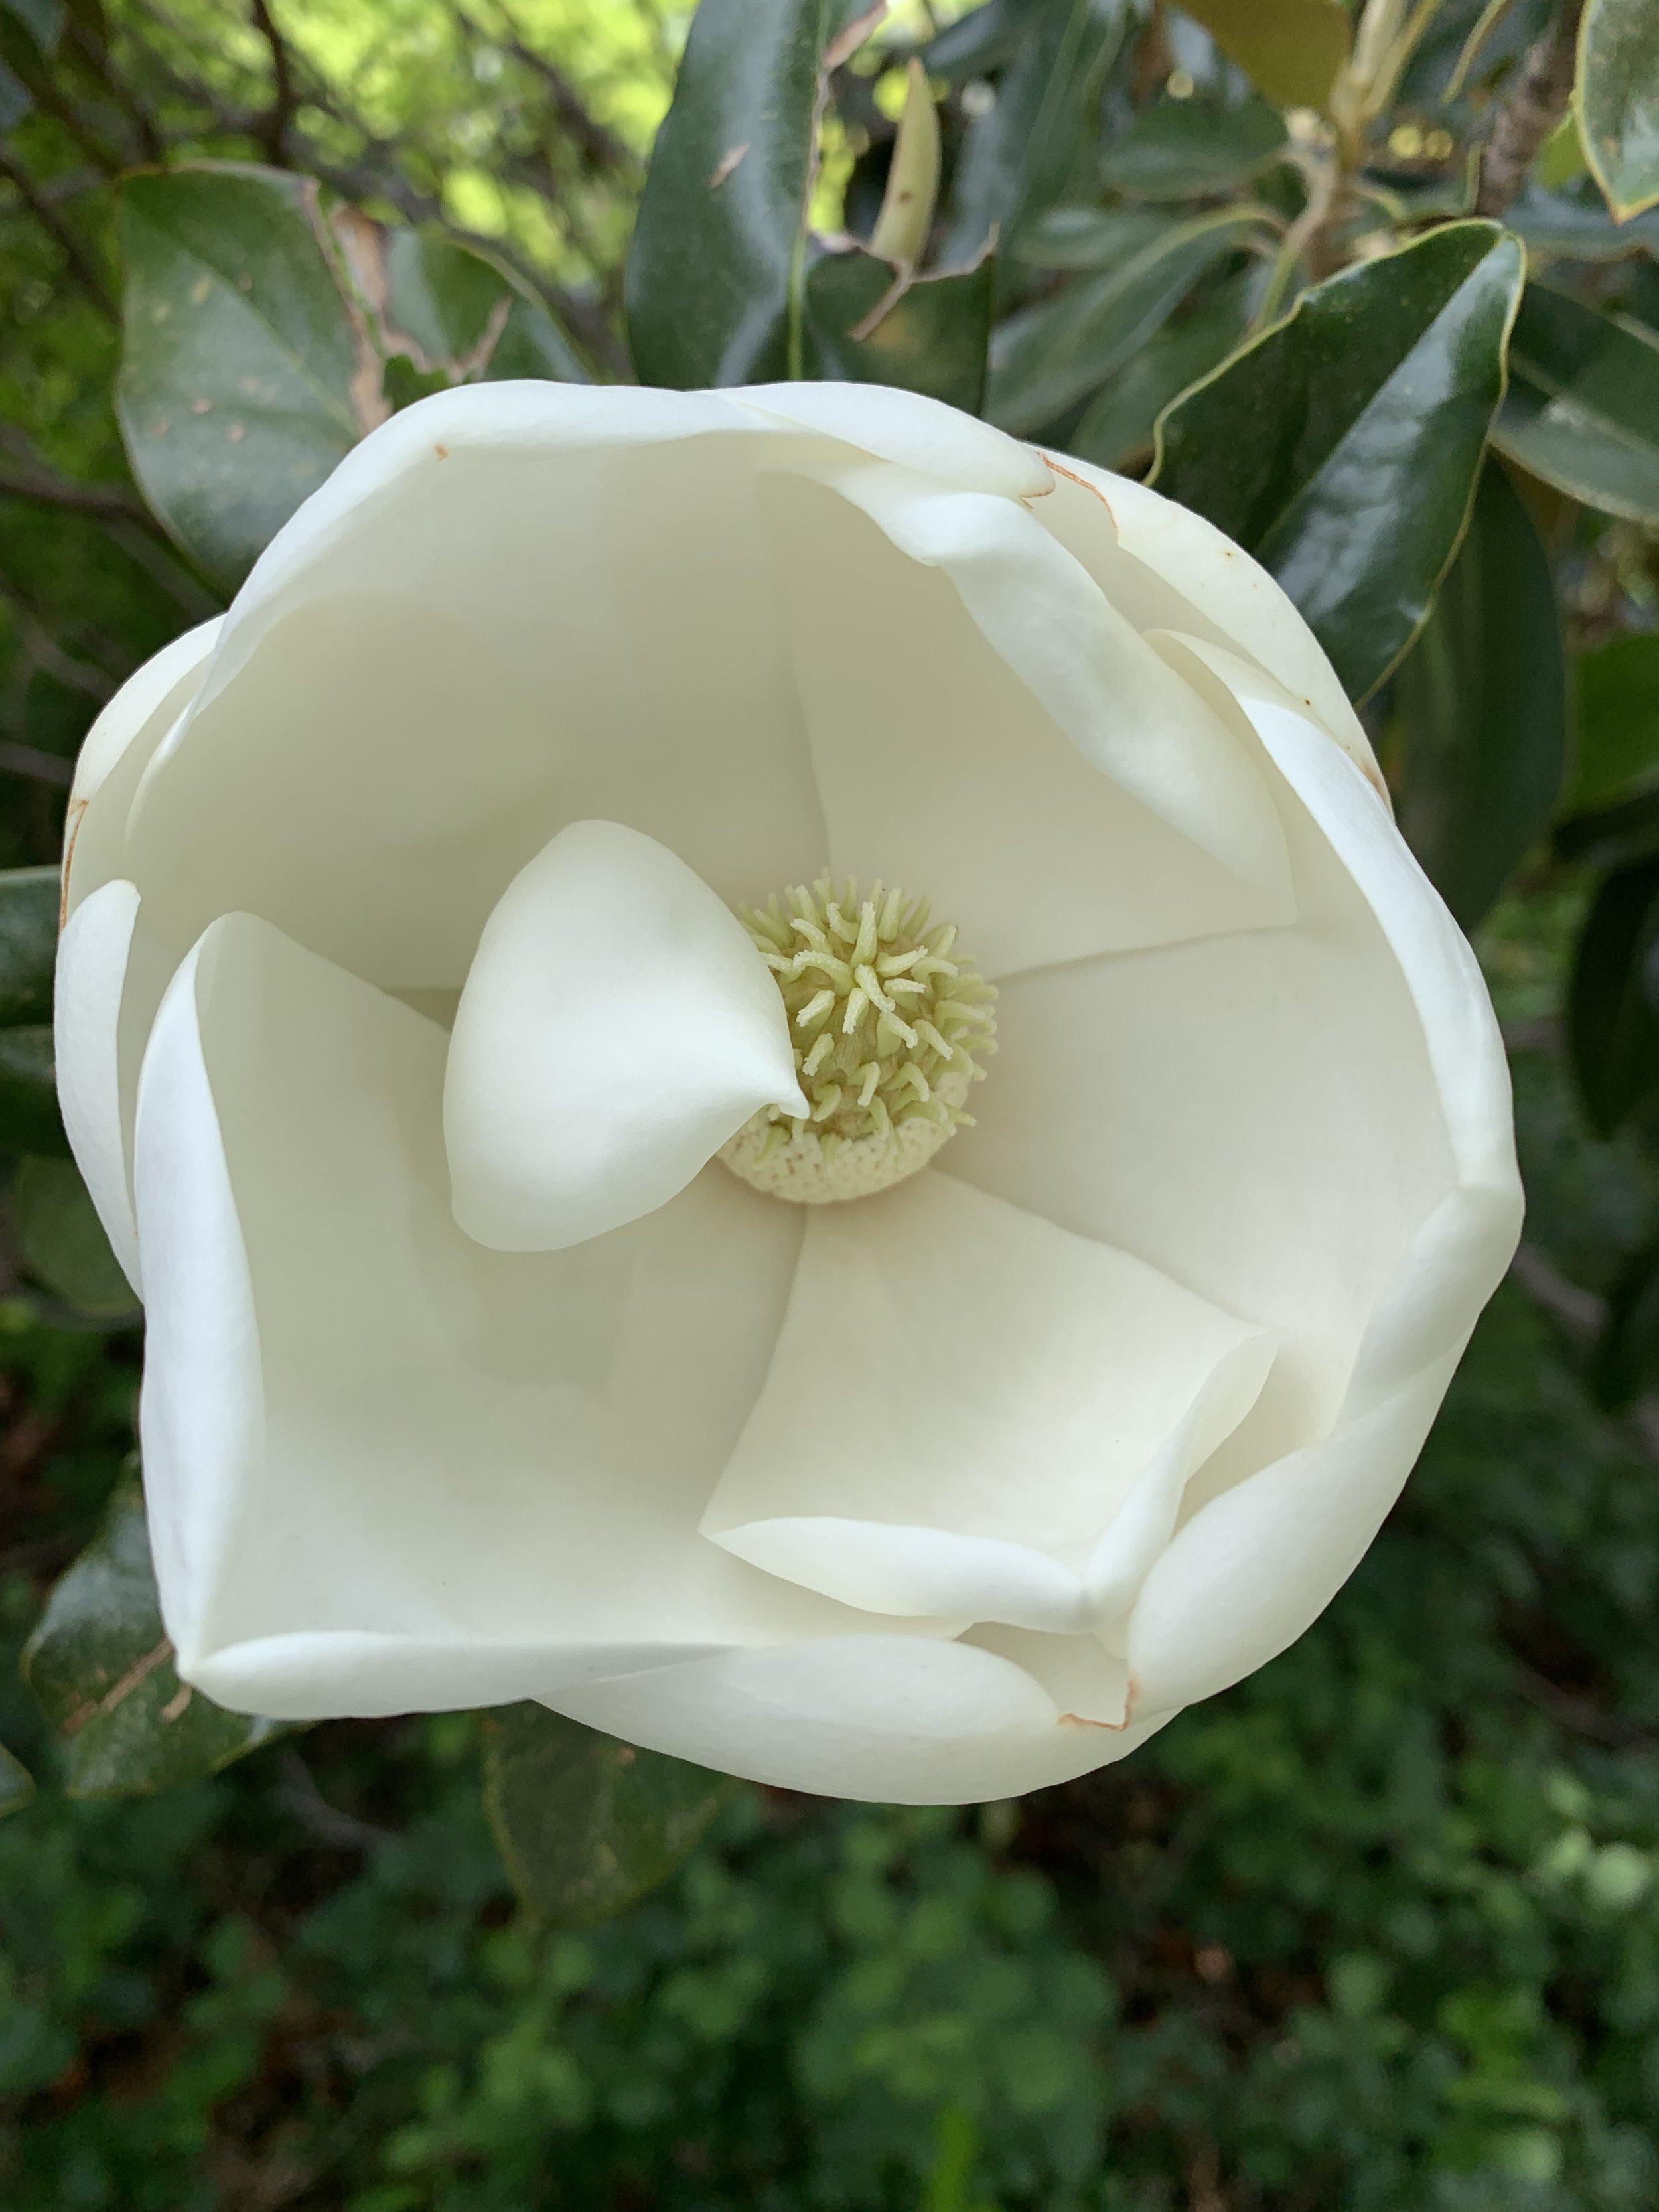
Magnolias add a graceful feel to the summer landscape with their large white fragrant flowers.
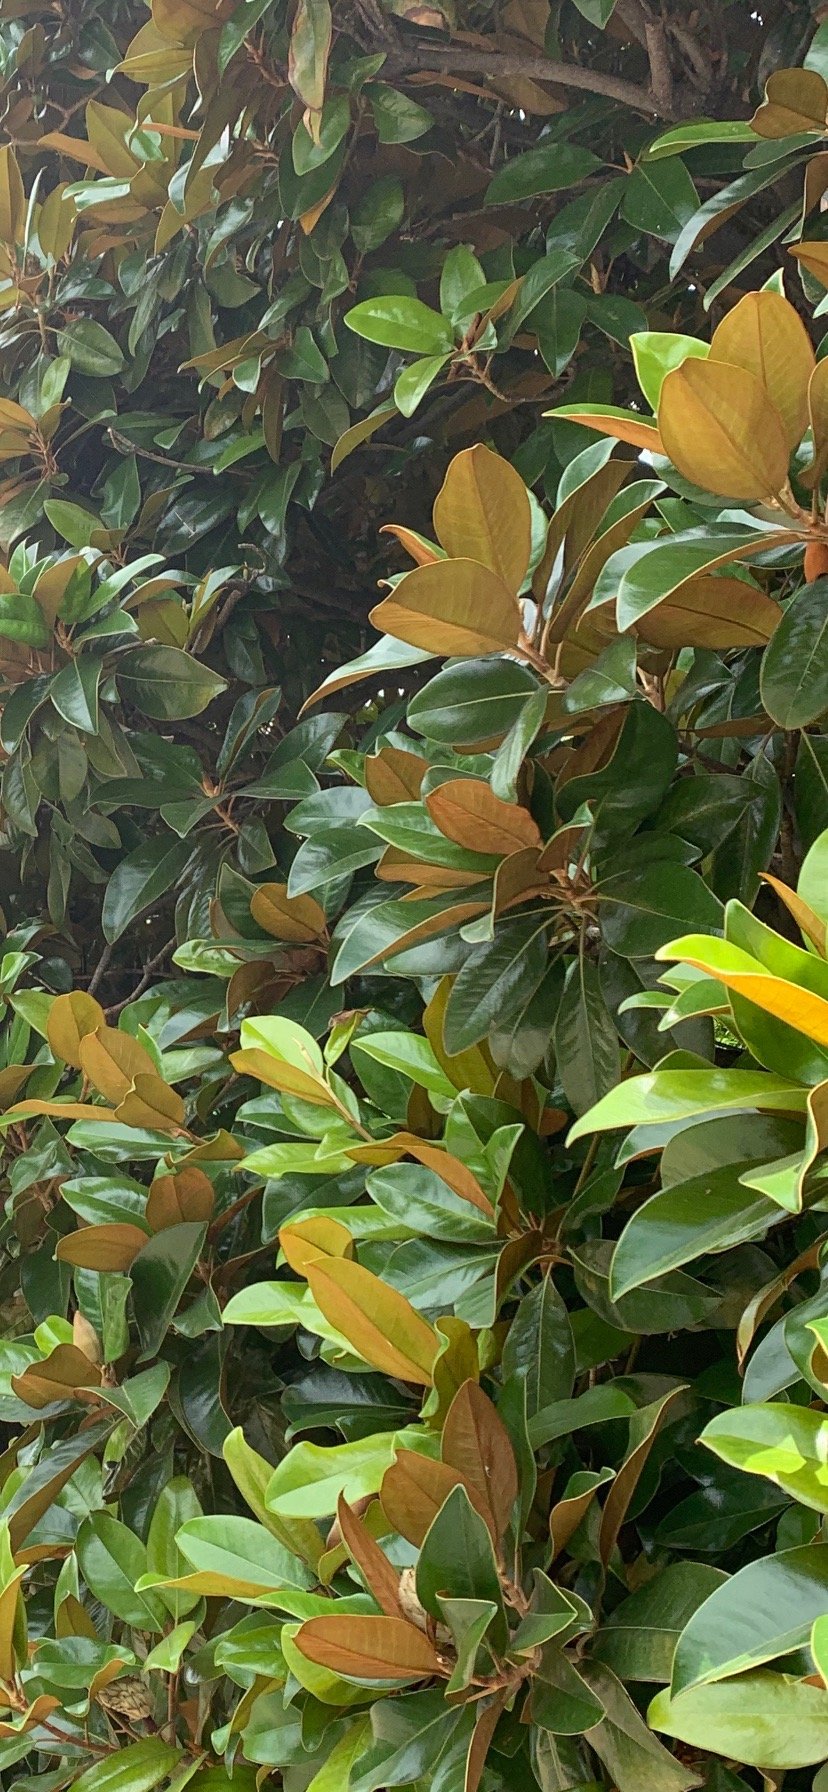
Magnolia, an evergreen, has leaves that are large, shinny, and dark green on the top, but velvety, reddish-brown on the underside.

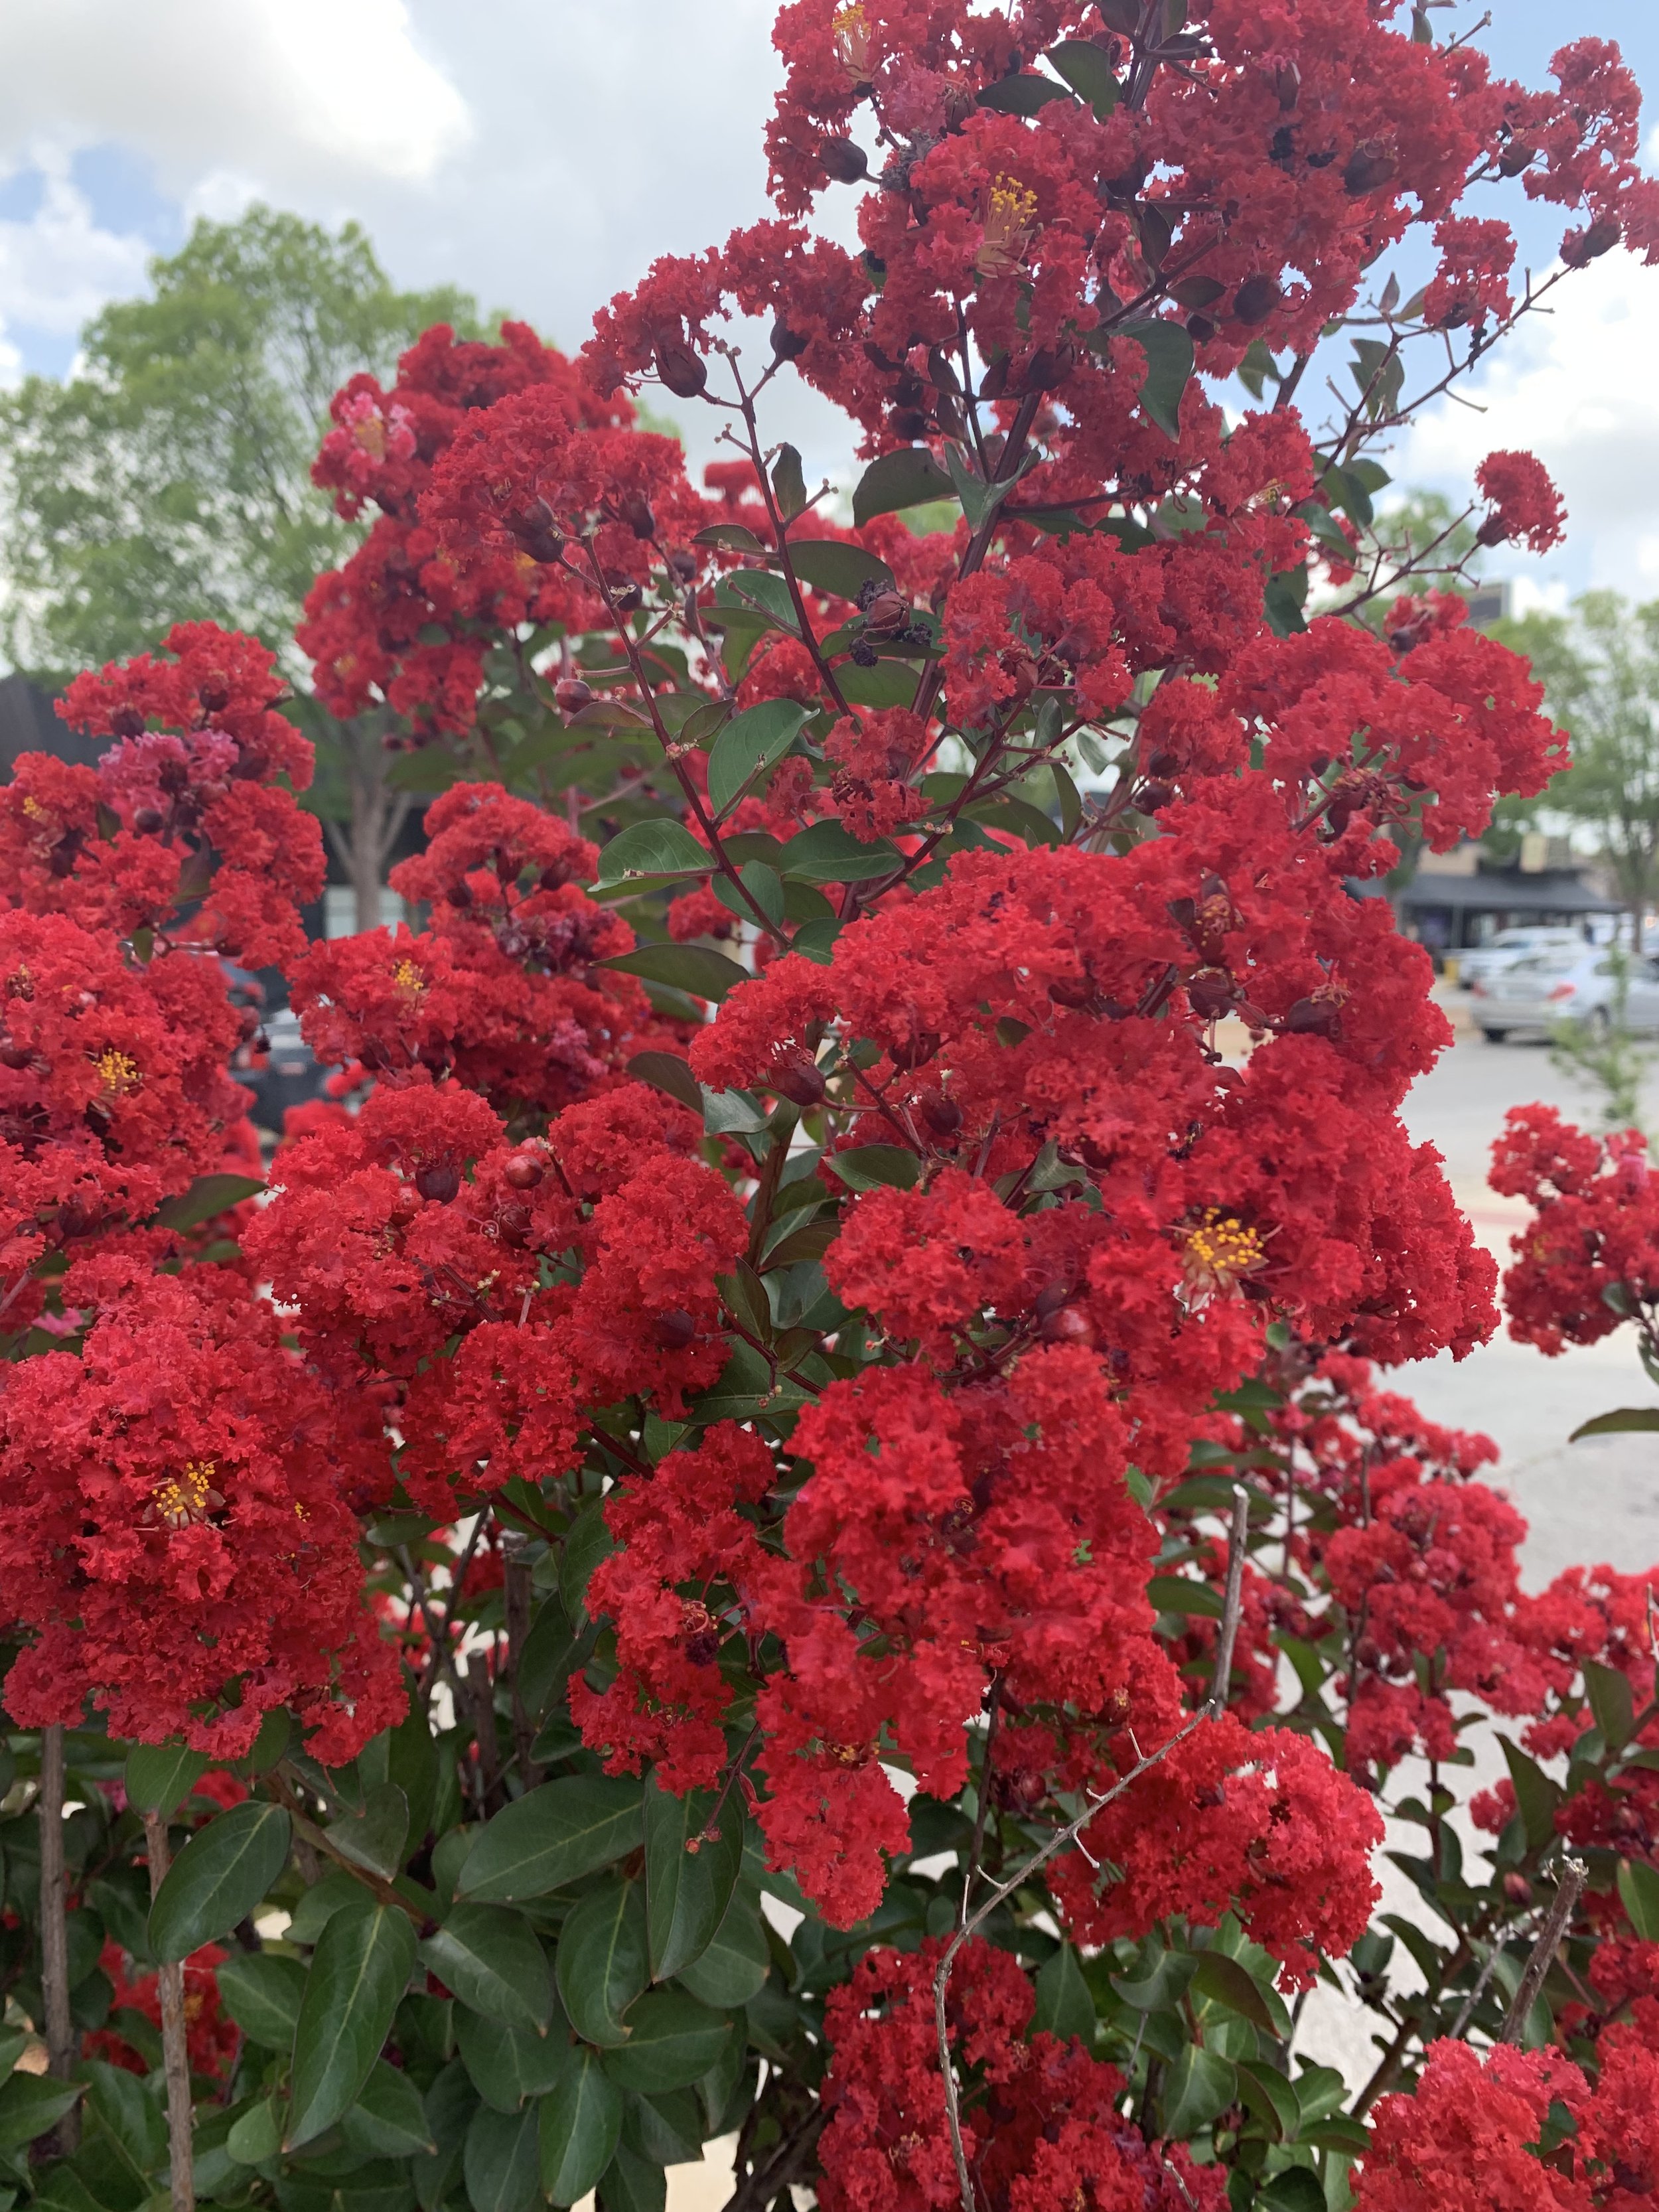
Dynamite

Ebony Flame

Natchez
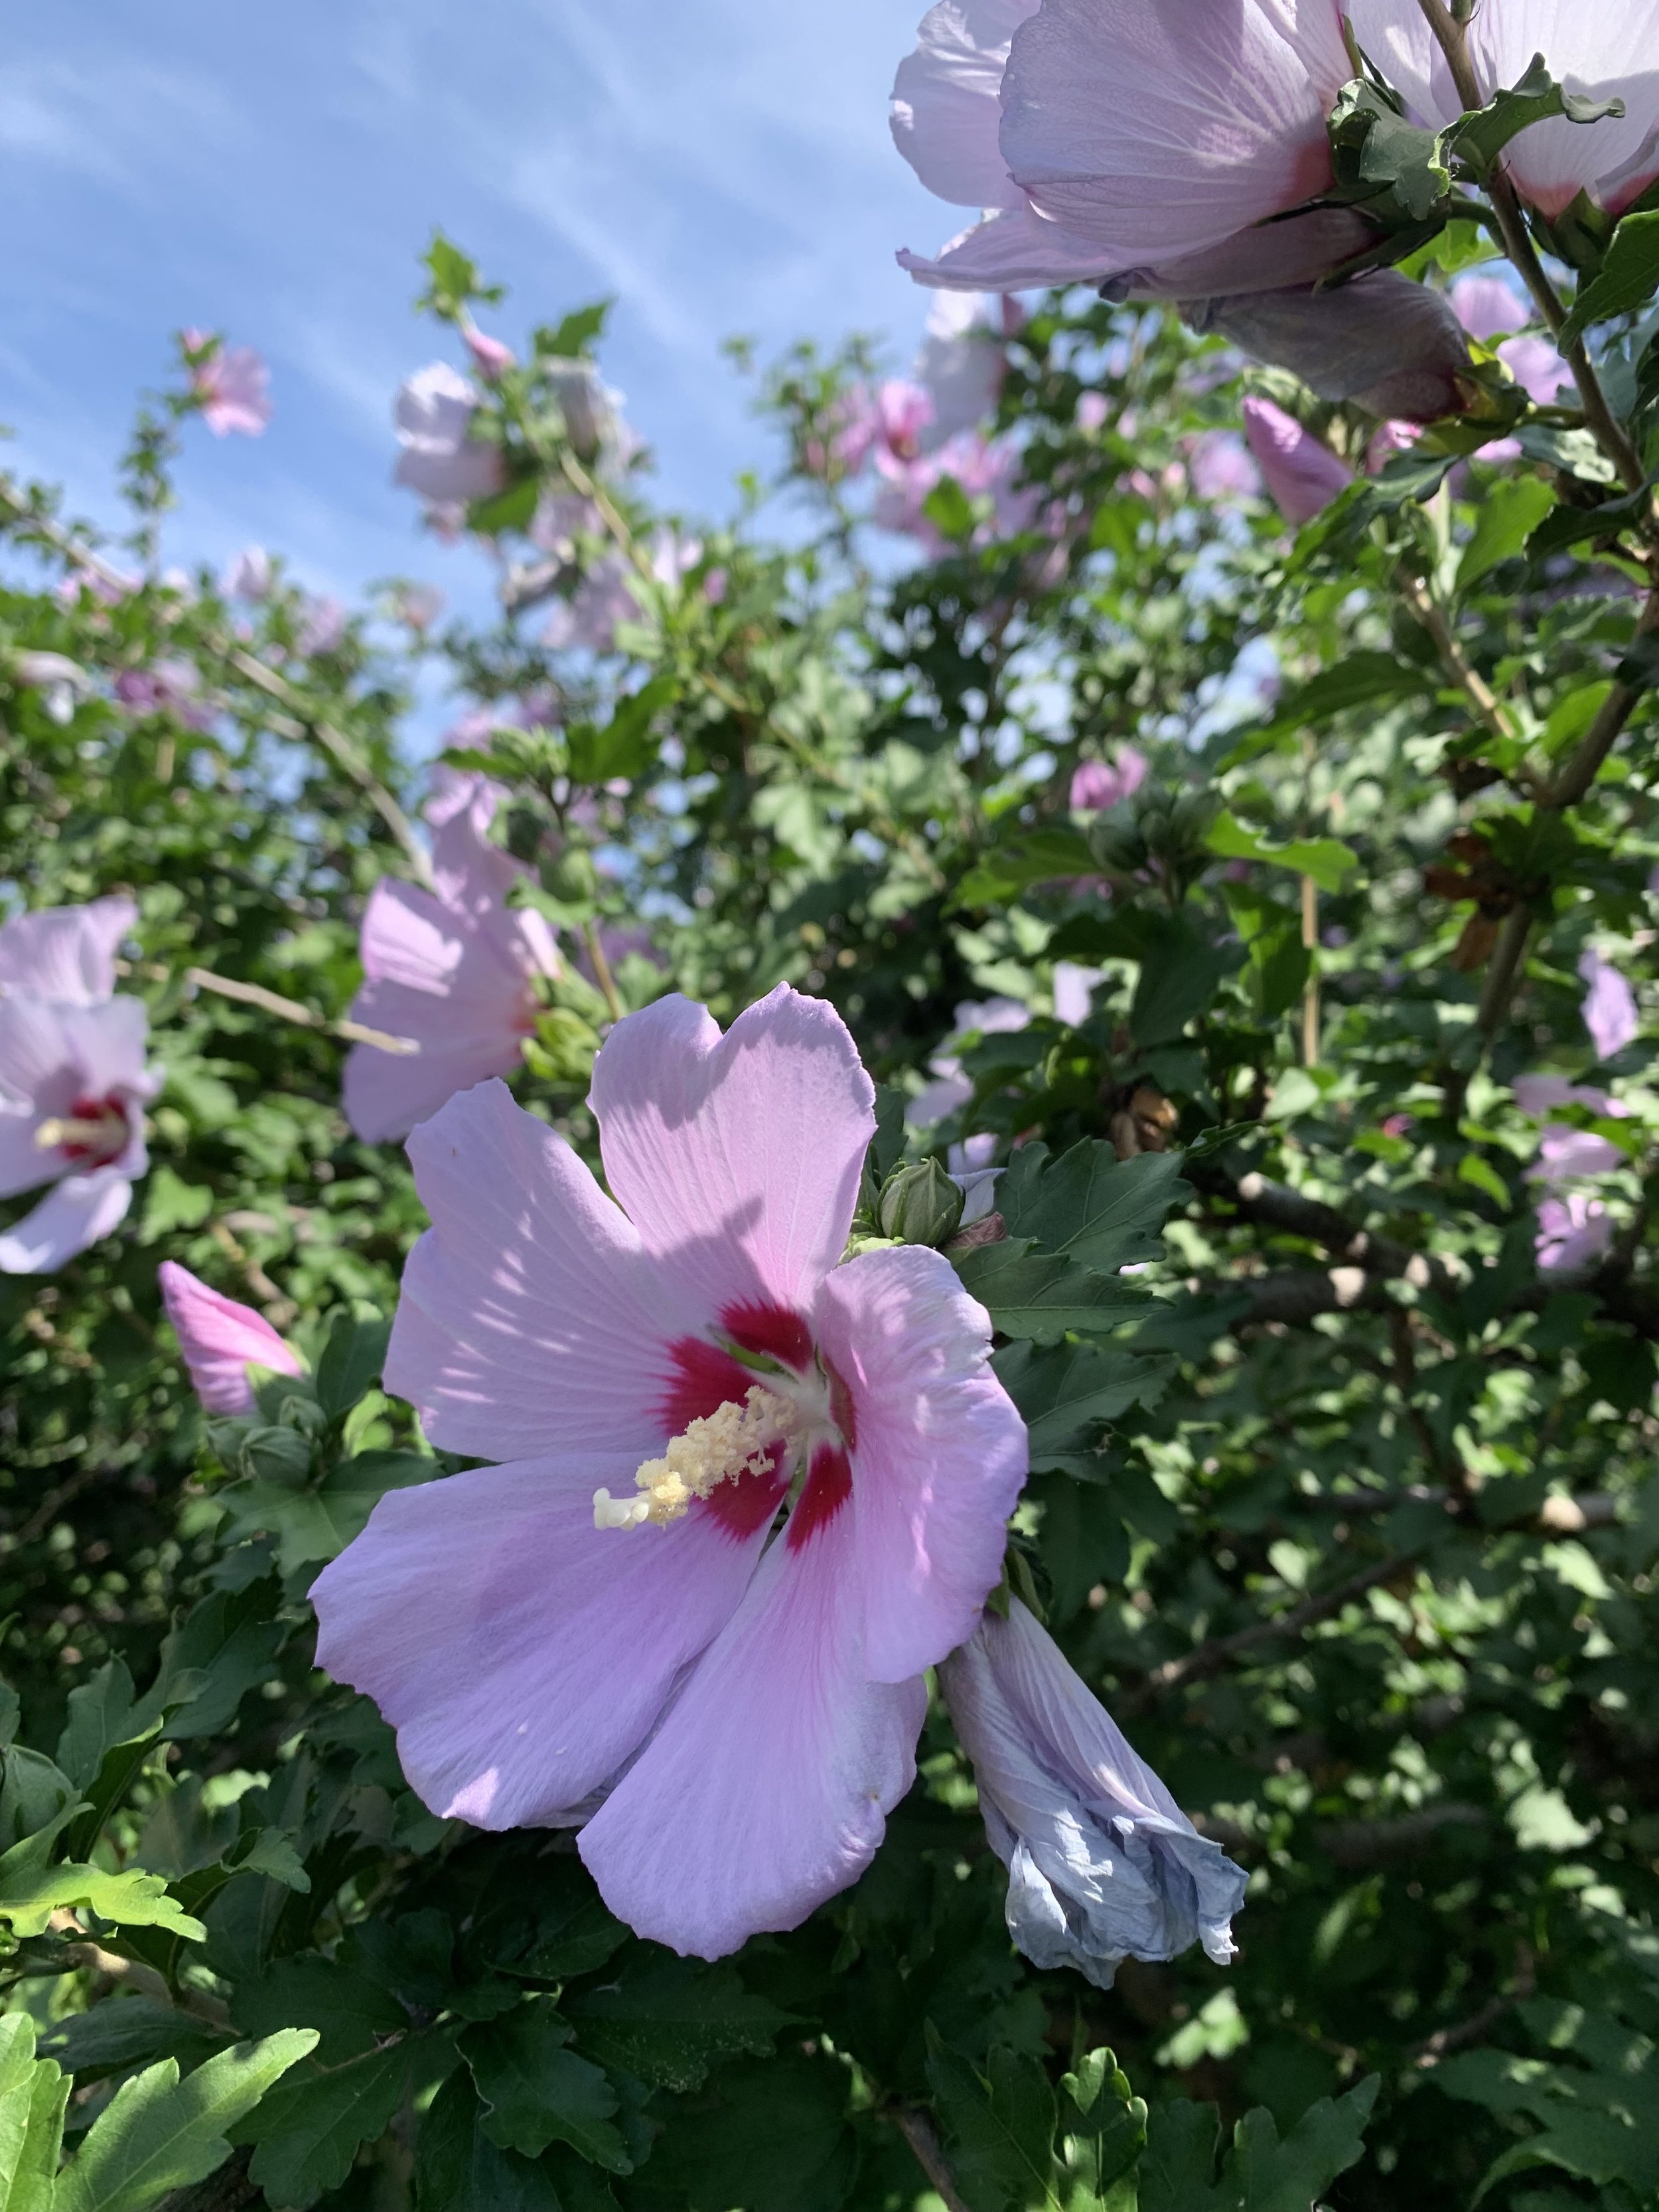
Rose of Sharon is an old fashioned typically grown as a large shrub, but with their upright multi-stemmed growth habit they make a great small tree.
Magnolia – An evergreen summer blooming tree.
The traditional Magnolia, Southern Magnolia, is a large 50-80’ tall, 30-50’ wide evergreen that is too large for most city-sized landscapes. But the Little Gem and Teddy Bear Magnolia are smaller, 20-25’ tall, 10-15’ wide, compact forms of the Southern Magnolia. They grace the landscape with large shiny dark green leaves with a velvety, reddish-brown underside year-round and large 8” white saucer shaped blooms from early summer to fall.

Crape Myrtles most commonly are multi-truck small trees, but more recently we are seeing more and more grown as single-trimmed trees.
Crape Myrtle – Summer’s biggest show.
There are over 50 varieties of Crape Myrtles and new ones are introduced every year. The color pallet ranges from white, pink, purple and red. Bloom color is not the only attribute of a crape myrtle. Their foliage ranges from dark green, wine colored, velvet and dark purple. The combination of the bloom and foliage colors is one of the things that attracts me to the plant.
With so many varieties of Crape Myrtles, there is sure to be one right for your landscape. Here are a few of my favorites:
Pink Velour – Large 12-15’ small tree form with dark wine foliage and bright pink flowers. The foliage and flower combination are very striking.
Dynamite – Also a small tree that grows up to 15’. Dynamite was one of the first red tree form varieties. New foliage is nearly crimson in color and changes to a rich green as it matures. Flowers are brilliant red.
Natchez – One of the largest tree form crape myrtles reaching 25’. The foliage is rich green, and the flowers are white. The cinnamon brown bark puts on a show of its own as it exfoliates.
Ebony Flame – A great accent plant that grows 10-12’ with dark red blooms on intense black foliage.

Pink Velour


Dynamite Crape Myrtle
The bark of a large Crape Myrtle is one of the most overlooked aspects. The bark is smooth and ranges in color from pink to gray. As the plant matures, the thin bark exfoliates to expose a different color underneath. Too often, tree form Crape Myrtles are severely pruned every spring and we never get to enjoy the beautiful bark of the mature plant.
One of the nation’s leading innovators of Crape Myrtles is Oklahoma’s own, Dr. Carl Whitcomb. Dr. Whitcomb holds 32 patents and has authored five books including Know It and Grow It, a book every landscape enthusiast should own. You can see all of Dr. Whitcomb’s Crape Myrtles by following this link.
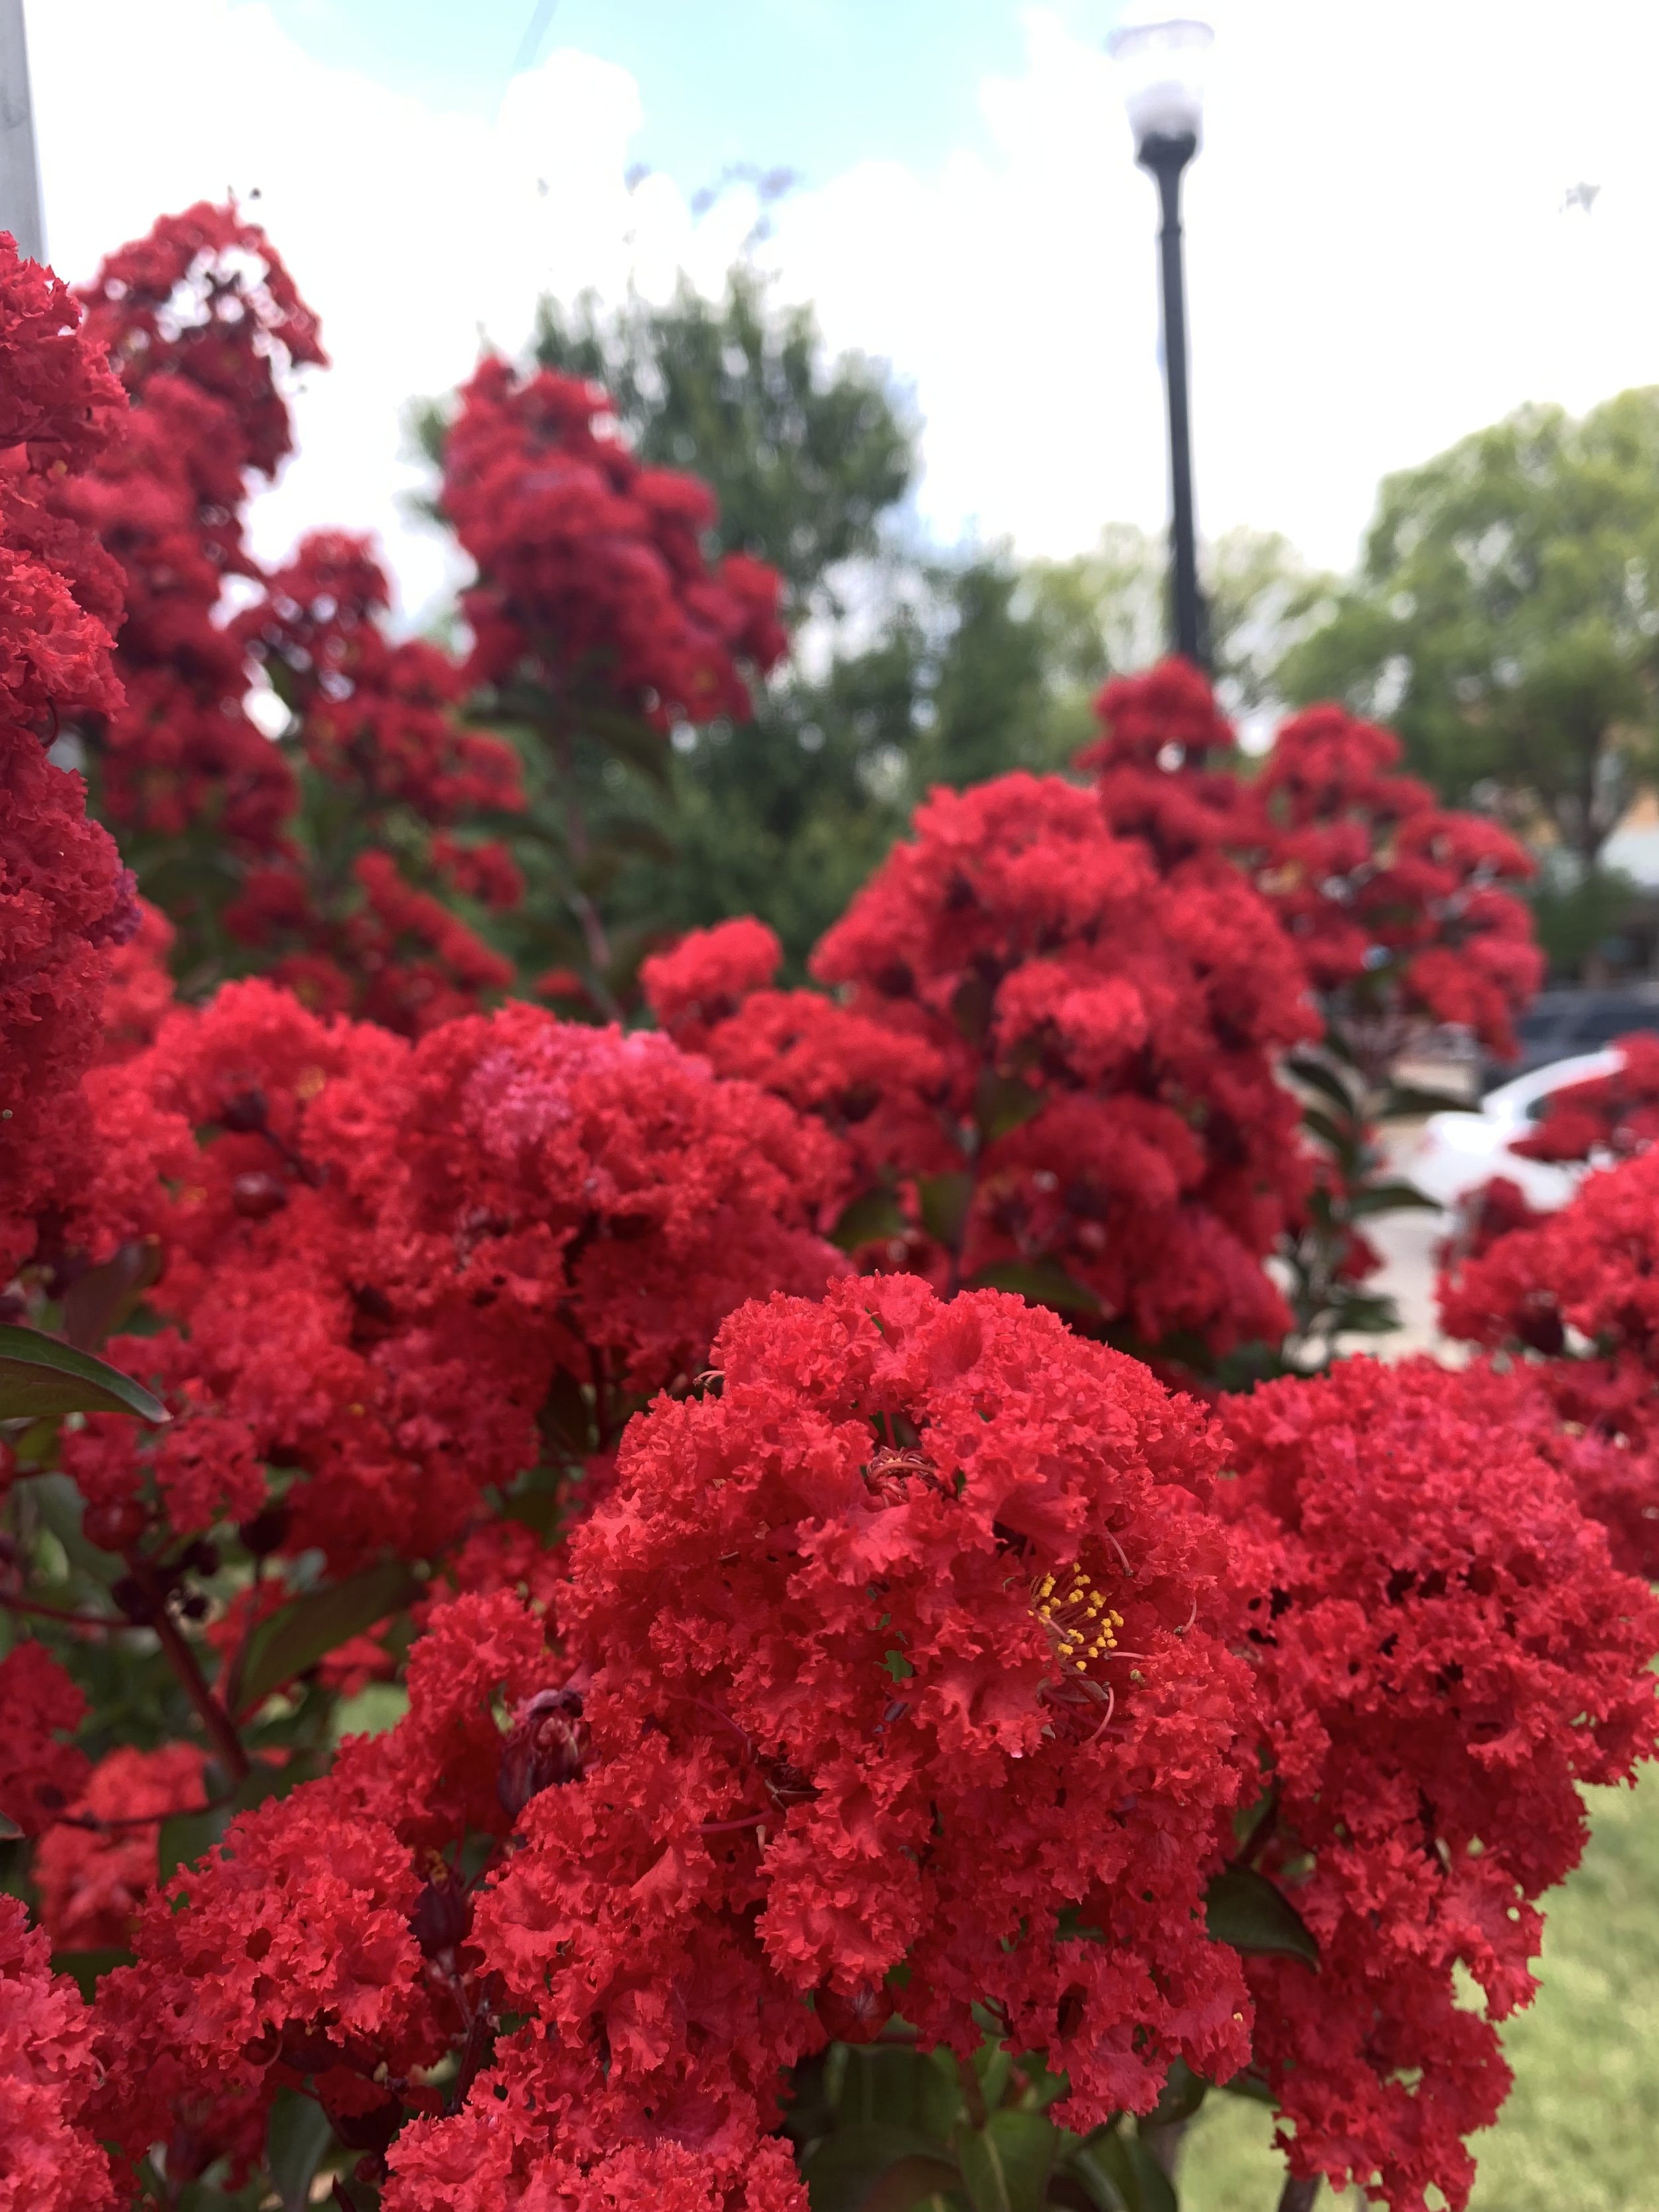
Some of the brightest colors you will see this summer will be from Crape Myrtles.

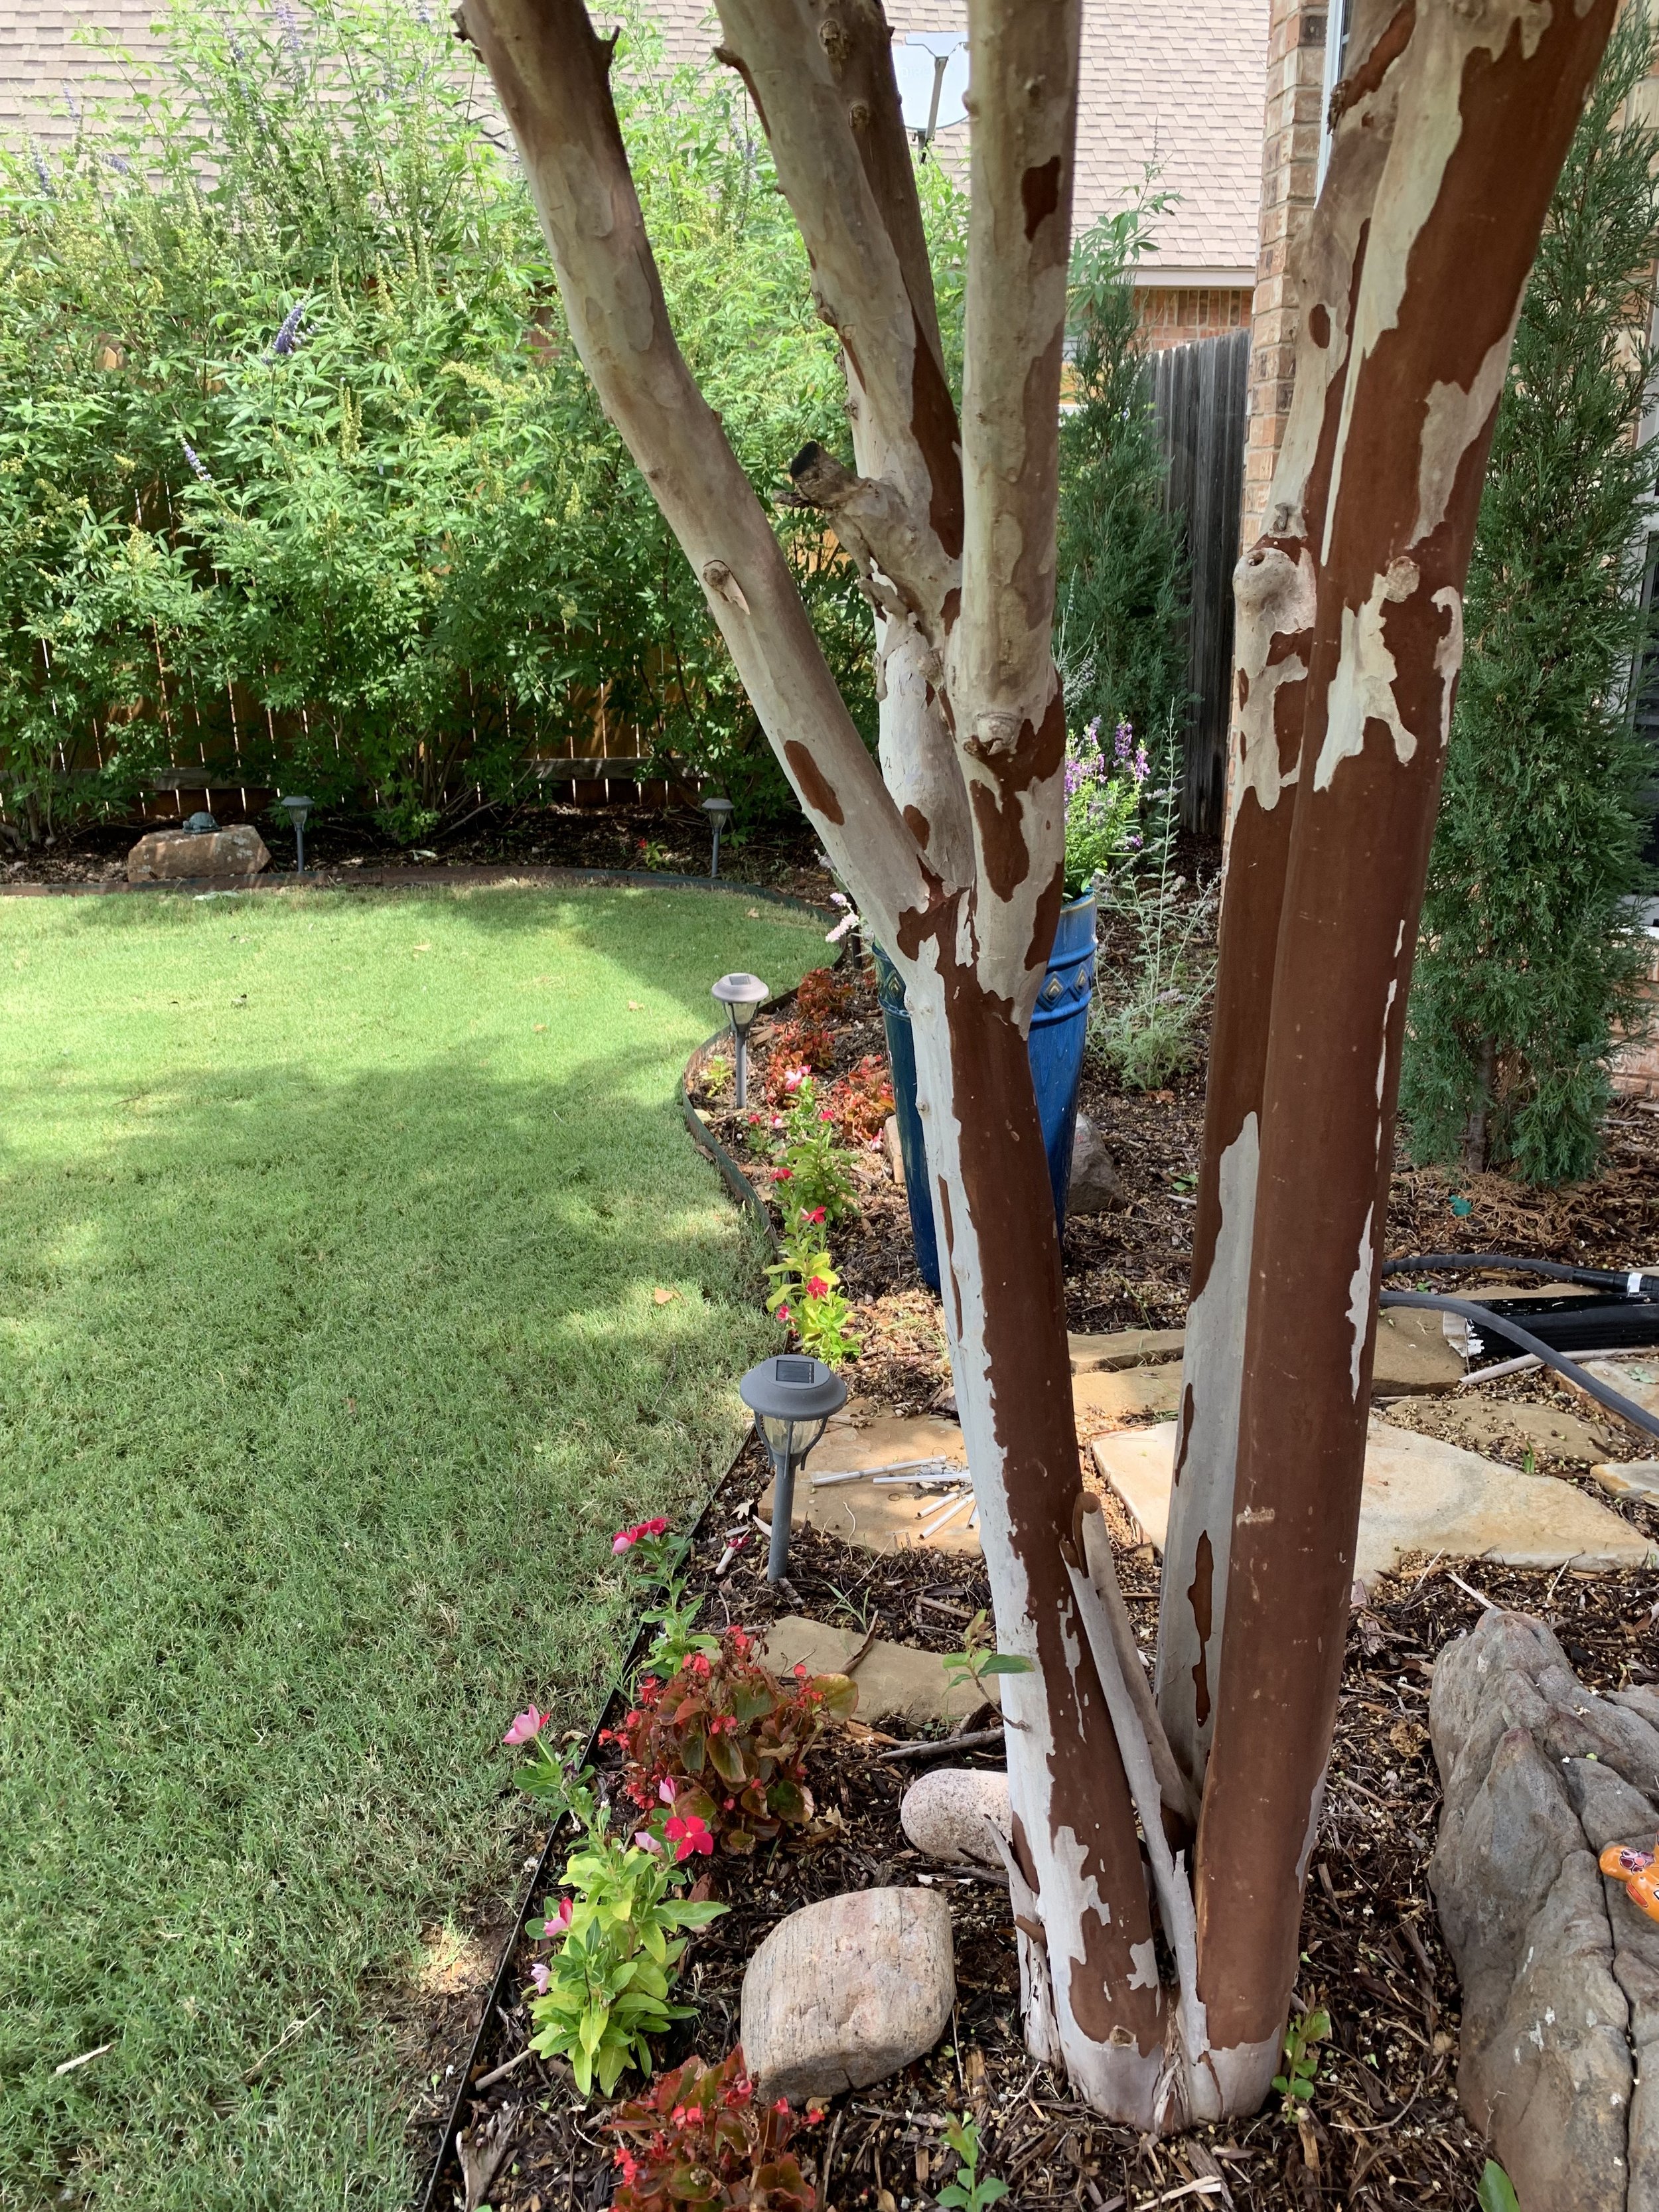
Mature Crape Myrtles grown as trees have the added interest of multicolored bark.
What is your favorite?
Did any of these inspire you to add a new summer blooming tree to your landscape?
Get outside. Walk the neighborhood. Visit one of our parks.
I am confident you will discover a few of these trees adding color to the summer!
Lorne Hall
Hall Stewart Lawn + Landscape
(405)367-3873
3 Keys to a Great Lawn -- #3 Environmental Conditions

When it comes to having a great lawn, what is most important?
Is it the lawn care applications?
Is it mowing practices?
Is it environmental conditions?
All three are keys to a great lawn - Lawn Care Applications, Maintenance, and Environmental Conditions.
Great lawns are not a result of getting one, or even two, of the three correct. Great lawns are equally the result of all three.
In April, we covered Lawn Care Applications.
In May. we discussed Maintenance.
Today we are covering the last key - Environmental Conditions.
Environmental Conditions are all the things that are outside of our control:
Rainfall & Soil Moisture
Air Temperatures & Soil Temperatures
Sunshine & Wind
Oh, don’t you wish you could control environmental conditions!?
Our role when it comes to environmental conditions is to monitor, supplement, and adjust our practices based on the conditions.
A good source for monitoring all weather data is mesonet.org.
The Oklahoma Mesonet is a world-class network of environmental monitoring stations. The network was designed and implemented by scientists at the University of Oklahoma (OU) and at Oklahoma State University (OSU).
The Oklahoma Mesonet was commissioned on January 1, 1994 and consists of 120 automated stations covering Oklahoma. There is at least one Mesonet station in each of Oklahoma's 77 counties.
At each site, the environment is measured by a set of instruments located on or near a 10-meter-tall tower. The measurements are packaged into "observations" every 5 minutes, then the observations are transmitted to a central facility every 5 minutes, 24 hours per day year-round.
The Oklahoma Climatological Survey (OCS) at OU receives the observations, verifies the quality of the data and provides the data to Mesonet customers. It only takes 5 to 10 minutes from the time the measurements are acquired until they become available to the public.
How do environmental conditions impact our lawns and what we can do?
Rainfall & Soil Moisture
The amount of rainfall in the last 7 days is an important starting point for watering decisions. But, knowing the soil moisture is even more important.
The best rainfalls are slow soakers vs downpours. A slow soaker will increase soil moisture and provide your lawn’s root system with life sustaining moisture. A downpour will help the lawn in the short term but has little benefit when it comes to increasing soil moisture. It is important to not only know rainfall amounts but also to know the soil moisture.

Through the month of May, Oklahoma City enjoyed frequent rainfall in varying amounts around the metro. But, the tap has been shut off for the last 12 days. Halfway through the month and June is not living up to its billing as our wettest month.

Based on this map, May’s soil moisture is fading quickly in our 90-degree temperatures.
These two maps combined guide my watering decisions. During the summer months, when the 7-day rainfall map reports less than 1” and soil index is less .7 or less, it is time to start watering. Early this week I started regular watering, early in the morning, every other day for the first time this year.

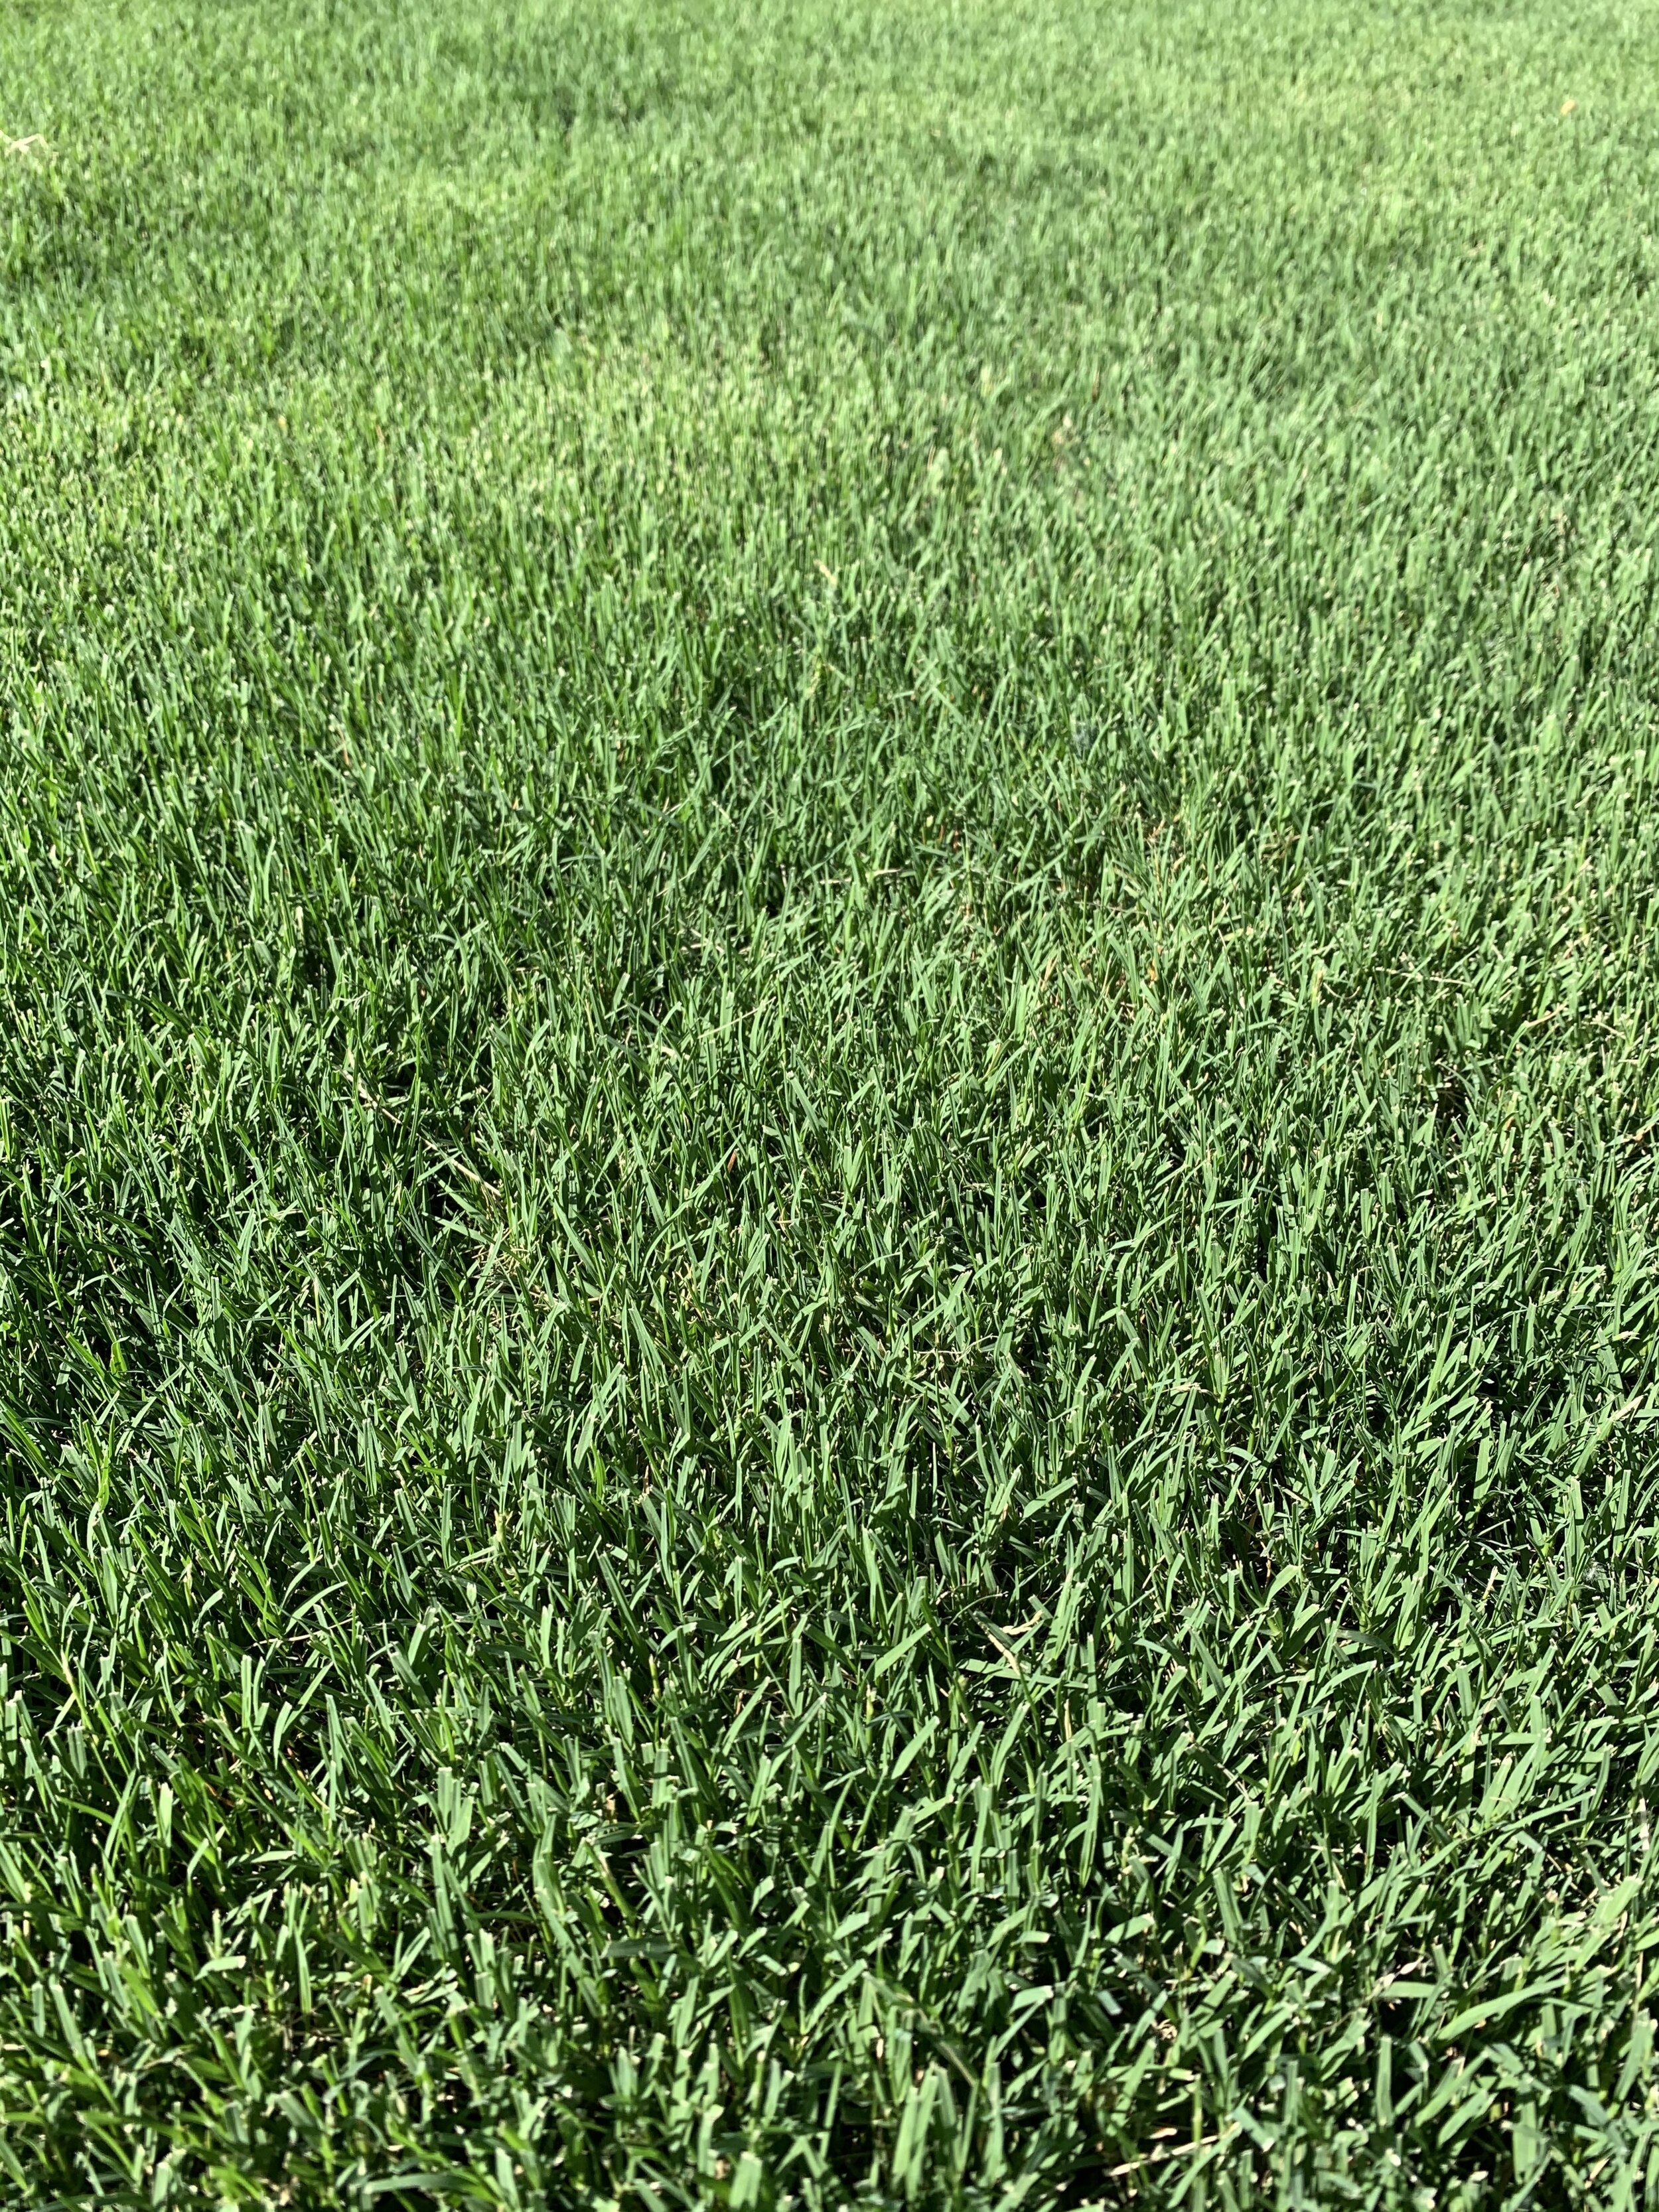
Fescue, when watered with deep soakings every other day, will stand up to 90+ temperatures.
Best Watering Practices -
Deep soakings are always best. Short, shallow watering is detrimental to your lawn and landscape in the heat. The healthiest lawns are watered to the point of runoff and then allowed to dry for a day. Daily watering, except for newly planted lawns, is not beneficial, even in 90+ degree heat.
Only water in the early morning. This is typically the least windy time of day and always the time of the least evaporation. Avoid watering in the evening. Wet grass, especially wet fescue, is prone to disease when it stays wet for more than 5 hours at a time and temperatures are in the 90s.
Lawns need 1” to 1.5” of water per week during the summer months to stay green and active.
How long should you water? Every irrigation system is different – different head types, different size nozzles, different head spacing, different areas, etc. The best way to know how long you should water is to place a few cans around your lawn in a random pattern. Run your sprinklers through a cycle and measure the amount of water in the cans. If the sprinklers ran for 15 minutes and you had .25” of water, you need 60 to 90 minutes per week. Next determine how long you can run your irrigation before you there is excessive runoff. This will tell you how many times per week you need to water. If you can get away with watering every 4th day, you will have a healthier, stronger landscape. Unfortunately, with our tight soils, watering every other day on the required ODD/EVEN system during the hottest times is needed to get the correct amount of water on the lawn without excessive runoff.
If you don’t have the time to audit the amount of water your system puts out, start with these settings, monitor, and adjust: Fixed spray pattern heads with 10-15’ spacings – 15 mins per time. Larger rotor type heads on 10-30’ spacings – 40 mins per time.

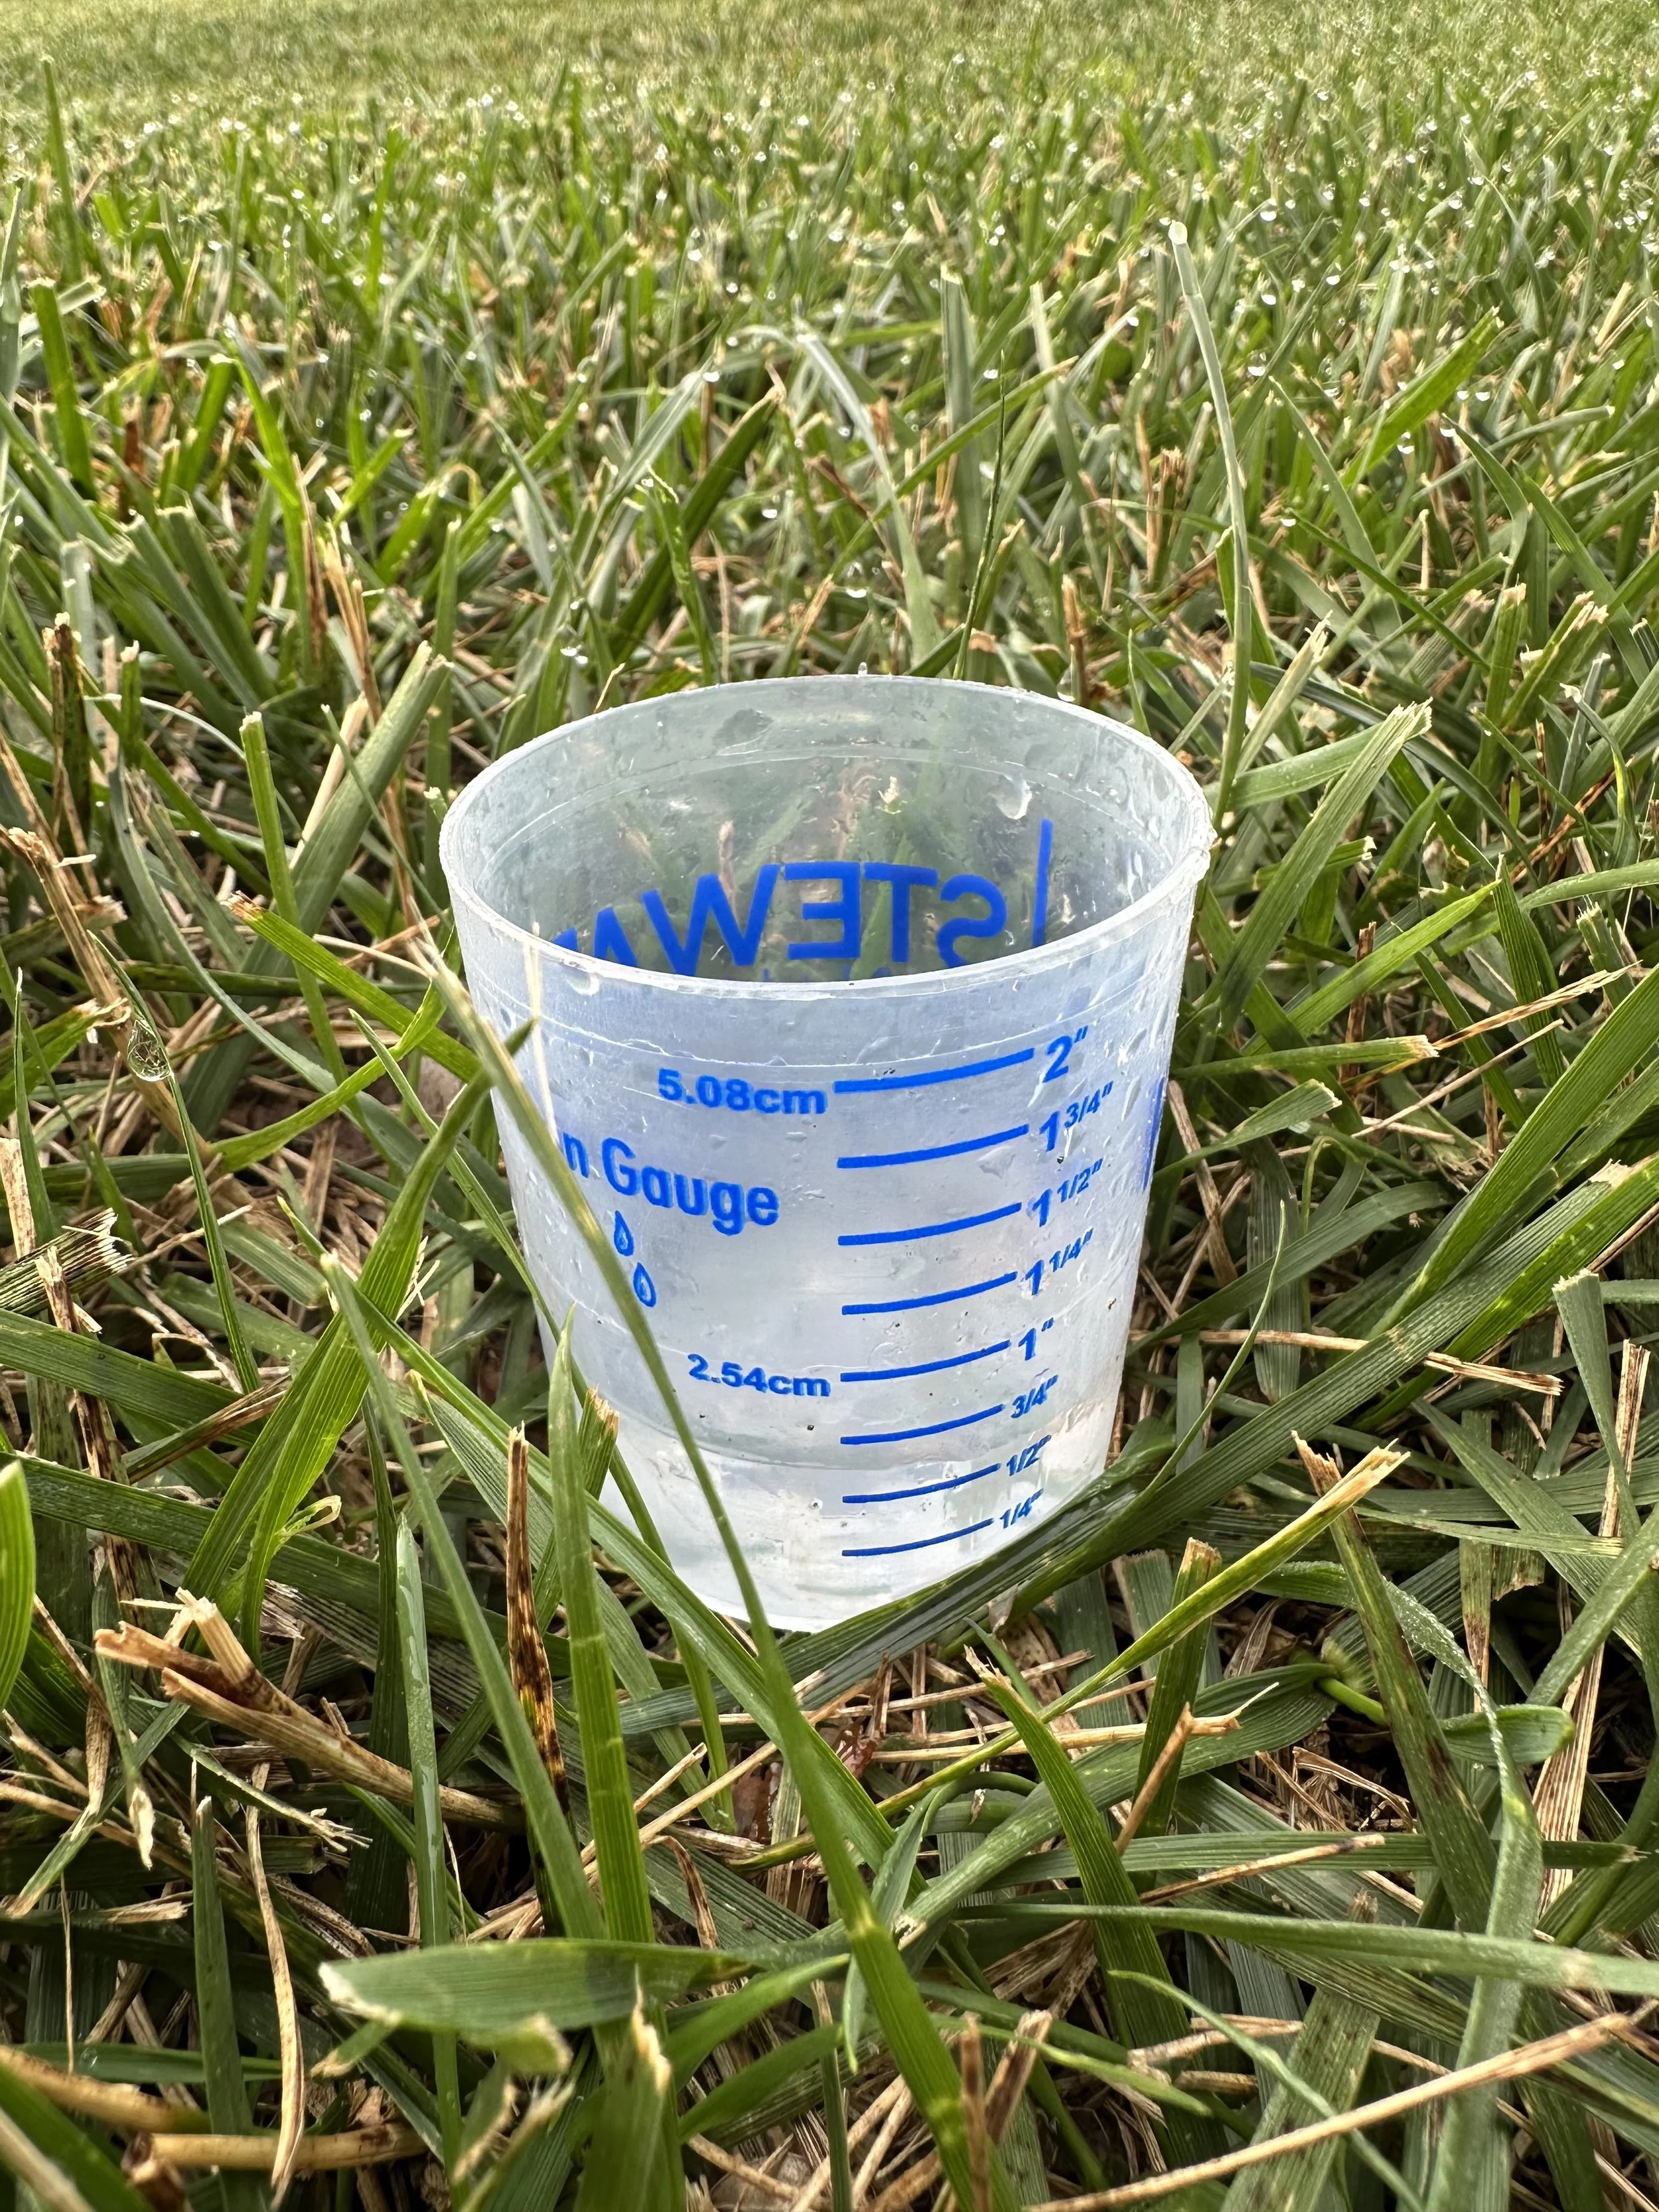
After watering a normal cycle, the Hall | Stewart water gauge is showing just over 1/2” of moisture. In this situation watering 2-3 times per week will give your lawn the correct amount to remain healthy and green.
If you don’t have the time to audit the amount of water your system puts out, start with these settings, monitor, and adjust: Fixed spray pattern heads with 10-15’ spacings – 15 mins per time. Larger rotor type heads on 10-30’ spacings – 40 mins per time.
Set your controller to water with back-to-back run times to reduce the amount of runoff. Moist soil absorbs more water than dry soil. Split the amount of time each zone runs in half and set your controller to come on twice on your water days. Example: Set controller to come on at 4:00 AM and 5:00 AM. When the first cycle is complete, the controller will start the second cycle.
I started the practice of setting irrigation controller to run back-to-back run times a few years ago, on slopes and gradually have incorporated the concept to all lawns. It really makes a difference in water efficiency.
Aeration improves moisture absorption. You can’t beat aeration for improving your soil structure and a benefit of improved soil structure is better water absorption. Lawns that are aerated every year (or at least every other year) do not experience as much runoff.
Watch for uneven water patterns. If you notice areas where the lawn is fading, check your system for a broken head, clogged nozzle, or a head that is out of adjustment.
Even if you don’t have an irrigation system, the concepts of good watering apply. There are several brands of inexpensive hose type timers that make it easy for you to control the timing and frequency.
Too much water can be a problem. You can cause damage to your lawn and landscape quicker by overwatering than you will by underwatering. Waterlogged soil reduces the amount of oxygen. Roots need both moisture and oxygen to survive. Many plants struggle when they do not have a chance to dry out between waterings, such as fescue. Fescue’s biggest problem is brown patch. Brown patch will develop when nighttime temperatures are in the 70’s and the leaf blades stay wet too long. Don’t create your own microclimate that promotes disease by overwatering, watering too often, or watering at night.
The Kansas State Turf and Landscape Blog (Link: https://blogs.k-state.edu/turf/) this week led with “Wet Spring Will Likely Lead To Quick Drought Response As Summer Approaches.” Interesting… wet spring could lead to quick drought? You would think a wet spring would lessen drought stress.
K-State’s point is frequent rains through the spring reduced the need for grass to develop deeper roots. As summer approaches, rainfall decreases, and heat increases the lack of deep root development this spring will result in quicker signs of drought stress on lawns.
Oklahoma City experienced similar moisture patterns in May. Now that we have gone 12 days without rainfall combined with several days of above normal temperatures, we are seeing lawns that are showing signs of drought stress much sooner than expected due to shallower root development.

If you notice areas where your lawn is fading start with an irrigation check to make sure heads are functioning correctly.
Air Temperatures & Soil Temperatures
Air temperatures get all the attention. But the driving factor for lawns is the soil temperature.
Soil temperatures are a key factor in determining when weeds germinate, when lawns start to turn green, and when they are actively growing.

Soil temperature of 55 degrees in the spring is when most summer annual weeds begin to germinate. For the best weed prevention each summer a pre-emergent herbicide must be applied before the soil temperature reaches 55 degrees for three consecutive days. This year summer annual weed germination began the first week of March, earlier than normal.
Soil temperature of 55 degrees is when fescue starts to absorb nutrients, regains a rich green color, and begins prolific growth. Most years in central Oklahoma, March is the month to start fertilizing Fescue.
Soil temperature of 65 degrees is when warm season grasses (bermuda and zoysia) become active. Then once soil temperatures consistently reach 70 degrees bermuda grows its best. In a typical spring, we expect bermuda lawns to green up gradually during April and be active growing by early May. Inconsistent soil temperatures in April and May are the biggest reason for slow warm season turf growth.

Bermuda performs best when soil temperatures are consistently in the 70s.

Brown patch disease in fescue appears as irregular areas that lead you to believe the lawn may not be getting enough water.
Other environmental factors that will impact spring green-up: Shady areas and turf on the north side of homes will come out of dormancy slower because the soil temperature will lag. Low moisture levels during the transition period will slow green-up. Turf grass that must compete with weeds for nutrients and moisture will also be slower. And, compacted soil will slow the process by restricting air, nutrient and water movement to the roots.
Soil temperature below 70 degrees in the fall is when winter annual weeds start to germinate. This typically occurs in mid to late September. For the best weed free lawn during winter dormancy, the first fall pre-emergent herbicide needs to be applied between mid-August and the end of September.
Once soil temperatures begin to cool in September it is important to apply little to no nitrogen fertilizer to warm season turf. Pushing the turf to stay green deep into the fall is the most common cause for Bermuda problems such as spring dead spot.
When soil temperatures begin to cool in September and into October it is the best time to establish fescue from seed.
Soil temperature is the critical measurement for pre-emergent herbicides, fertilizer applications and seeding.

Applications of high nitrogen fertilizer on bermuda lawns after mid-September increases the probability of having spring dead spot the following spring.
There is one important thing you can do to help when temperatures are high – adjust mowing height. Mowing at the maximum mowing height for your turf type provides a canopy that cools the soil and promotes a deep root system. Maintain fescue at 3” to 3.5” and Bermuda at 2.5” during the summer heat. If you mow frequently enough don’t bag your clippings. A light sprinkling of grass clippings will act as mulch for the lawn helping to hold moisture in the soil. The key is mowing often. Leaving clumps of clippings on the lawn is not helpful.
Sunshine & Wind
Turf grass moisture loss is much higher on windy, sunny days. This is a fact we often overlook and fail to adjust for.
Evapotranspiration (ET) is the loss of moisture through evaporation from the soil and transpiration from the leaves. Turf grass leaf blades are usually 75% water. The highest ET rates occur on hot, sunny days with lower humidity and moderate winds. This past week, high ET rates have started taking a toll on many lawns.
Another way sunshine and wind impact lawns are in areas of low air circulation and heavy shade. Areas with thicker plant materials, privacy fences, and structures are more prone to diseases due to low air circulation. Be aware of these areas and make sure you are not keeping these areas too moist.
The last of three things that impacts the quality of your lawn, environmental conditions, is something that you have no control over.
But just because you have no control doesn’t give you an excuse.
Your role, and our role, when it comes to the impact of environmental conditions on your lawn is to be aware, monitor and adjust our practices based on the conditions.
Our goal, no matter the current conditions, is to help you have the best lawn possible.
Lorne Hall
Hall | Stewart Lawn + Landscape
(405)367-3873

Picture of the Week:
Hardy Hibiscus
Hardy Hibiscus is a shrub sized perennial that produces bold, large, colorful blooms throughout the summer. Blooms last only a day or two but are quickly replaced by new blooms.
Nutsedge – Possibly The World’s Worst Weed

Sorry…no pretty pictures to inspire you in the landscape this week.
It’s time to discuss what is often the most challenging part of lawn care this time of year….Nutsedge Control!
And I know, I know, I have called many weeds “the world’s worst weed”, but If I am asked what are some of the weeds that give all lawn enthusiast the most difficulty, there is a 100% chance I am going to respond without hesitation: “NUTSEDGE!”
Nutsedge is fast growing, has an upright growth habit and light green in color. Because it grows nearly twice as fast as your turf and is lighter, it ruins the best maintained lawns within a couple days of mowing.

What does nutsedge look like?
Commonly called nutgrass because it looks like a grass, but it is a sedge with triangular ‘V’ shaped leaf blade arranged in groups of three at the base.
Nutsedge grows faster, has a more upright growth habit, is lighter in color and has a thicker, stiffer leaf blade than your turf grass.
What are the best growing conditions for nutsedge?
Nutsedge thrives in moist, tight soils. It is common to find it growing in areas of poor drainage, around irrigation leaks, and in lawns that are watered too frequently.
Although nutgrass starts in overwatered lawns or areas of poor drainage, once it is established it thrives with normal irrigation, in dry lawns and even through a drought leading many to believe nutgrass has more to do with the soil structure than moisture.
Nutsedge also prefers full sun and doesn’t grow well in shade and typically isn’t a problem in shady lawn areas.
Nutsedge first emerges in May and continues to thrive until the first frost.


Why is nutsedge so difficult to control?
Nutsedge is a perennial weed. Perennial weeds are always more difficult to control. But nutsedge is one of the toughest, because it spreads by underground tubers. Four to six weeks after the first blades emerge, typically in late June to early July, nutsedge begin forming new tubers (nutlets) and rhizomes (underground stems).
The tubers grow 6-12” deep and are referred to as nuts - thus the common name of nutgrass. Nutsedge spreads by growing rhizomes which produces more nuts. Weeds that propagate through tubers and rhizomes are very difficult to control because unless you get control of the rhizome and tuber, the plant will sprout new growth within a few days. Also, tubers can remain dormant in soil for three seasons.
Be proactive. With the first sign of nutsedge, take action. Nutsedge is much harder to control once it has been allowed to spread and mature.
Weed killers labeled for use on nutsedge will be either a contact killer or a systemic. A contact herbicide will kill only the leaves and the tubers and rhizomes will remain active if you make only a single application. Systemic products will translocate through the plant to the tubers and rhizomes.
Remember, single applications of most herbicides labeled for nutsedge will kill the plant leaves but leave the nut unaffected.
Because it is not a grassy or broadleaf weed, common herbicides will have little to no control. For nutsedge control you must search out products specifically labeled for nutsedge.

In late June to early July, uncontrolled areas of nutsedge will begin to multiply and take over areas.
A few herbicides available at most garden centers labeled for nutgrass include:
Basagran – A second application must be made 7-10 days after the first application.
Image Nutsedge Killer – Requires a second application 3-4 weeks later.
Sedge Hammer Plus – Must have a surfactant mixed with the herbicide to be effective and a second application will need to be made in 6 weeks.
Ortho Nutsedge Killer and Gordon’s Trimec Nutsedge Plus – Both require follow up treatments every 4 weeks.
Please read the label and follow it. You will need to know your turf type. Read the label to make sure you can use the product on your lawn.

Is pulling nutsedge a good idea?
Pulling nutsedge is only recommended when the plant is very small before nuts start to develop on the rhizomes (May through June). Once nuts start to develop, you must remove the nut when pulling the weed, which is typically 6-12” below the surface.
If you pull the weed and leave the nut behind, new plants will emerge very quickly. If pulling, the best method is to dig at least 12” deep and 12” wide to get all the tubers.
Research suggests that anytime the tuber is stressed, by either pulling the top off or by killing the top without killing the tuber itself (the result of a single application of an herbicide), the tuber multiples. Therefore, many people experience more nutsedge after they have pulled or sprayed.
Cultivating nutgrass, such as in landscape beds, is ineffective. All you are doing is redistributing the tubers and rhizomes.
What else can I do to be proactive in preventing nutsedge?
Aeration is a great way to reduce the chances of nutsedge starting and spreading. Aeration reduces soil compaction and reduces the best growing conditions for nutsedge.
Our experience is lawns which are aerated annually rarely have significant nutsedge problems.
Water only based on need and infrequently. Overwatering, keeping your lawn too wet, promotes the best growing conditions for nutsedge. Water deep. Allow the soil surface to become dry between waterings.
Correct water leaks in your sprinkler system promptly. Nutsedge will stake a claim to any areas that become waterlogged.
Along the same line of thinking, correct poor drainage areas. Often patches of nutsedge are an indicator of poor drainage.


If you find yourself struggling with nutsedge, give Hall | Stewart a call, (405) 367-3873.
Hall|Stewart’s 7-Step Lawn Care Program includes nutsedge control. One of the benefits of subscribing to our full program is we do not charge extra for nutsedge control. And, because we know the presence of nutsedge can quickly tarnish a great looking lawn, we use the most advanced nutsedge control herbicides available to the industry.
Nutsedge is one of the more aggressive and persistent weeds you will encounter. Control of nutsedge can be a long process. It is a marathon, not a sprint.
Success involves both the best cultural practices (aerating, watering, and mowing) and timely use of quality herbicides labeled for the control of nutsedge.
Lorne Hall
Hall | Stewart Lawn + Landscape
(405)367-3873


June Lawn & Landscape Tips

Hello Summer!
June… what a great month for your lawn and landscape!
June is the month when both cool season and warm season turf look great.
June is the month when an abundance of perennials add color to the landscape.
June is the month when shrubs are covered with soft, tender new foliage and so many blooming shrubs are adding splashes of color.
June is the month summer blooming trees start adding color to our world.
June is the month I discover another favorite tree, shrub, perennial or summer annual color every year. What will be my favorite this June?
June is the month that I know there is a good chance around every corner I’m going to stumble upon another fantastic lawn and landscape.
Awe…June is the month when all your lawn and landscape work this spring rewards you with enjoyable evenings on the patio.
Wait…don’t get too comfortable, it is summer and your lawn and landscape needs attention:

June is the month for day lilies to add splashes of color to the landscape.
Mowing – Good mowing practices will have the biggest impact on the quality of your lawn over the summer months. For the best summer turf, get into a routine of mowing often enough that you only remove 1/3 of the leaf blade with each mowing. For Bermuda and zoysia, both warm season turf grasses, this may require mowing every 4 to 5 days. If you mow this often, don’t bag your clippings. The top 1/3 of the grass leaf is 90% moisture and nutrients. The best summer height for warm season turf is 1.5 – 2.5”. Fescue, cool season turf grass, will continue to grow rapidly during early June, but once we consistently have temperatures in the upper 90s it will begin to slow down. The best height for cool season turf in the summer is 3.0 – 3.5”. Both warm season and cool season turfs, don’t respond well to being cut below their recommended height. Cutting the lawn too short discourages root development and having deep roots going into the summer heat is important for both warm and cool season turf.

Fertilizer – Bermuda lawns should be fertilized this month with a higher nitrogen, slow-release fertilizer. The goal in June is to create a healthy Bermuda lawn that will thrive in the summer heat. Fescue lawns should only receive low nitrogen, root stimulating fertilizer during June to prepare them for the summer heat.
One of the biggest concerns we have for fescue lawns right now is too many are being cut too short. Cool season lawns will do better in the summer heat with more leaf space. If you have a fescue lawn, gradually raise your mower to at least 3” this month. I started mowing my fescue lawn a ½ notch higher in May and will increase it another ½ notch this week.

Weed Control – If you subscribe to Hall | Stewart’s Lawn Care Programs and have not skipped any applications this year, your lawn has had two pre-emergent applications. This will provide your lawn with a good barrier to prevent summer annual grassy weeds. But, if not, you may have some grassy weeds, most common is crabgrass, showing up in your lawn. June is a good month to control grassy weeds while they are still young plants. Once they mature, stronger products will need to be used which can cause turf damage. If nutsedge is making an appearance in your lawn it is best not to pull it. When you pull nutsedge and do not remove the nut below the surface, the plant becomes stressed and multiplies.

You can expect to see Black Eyed Susans, a perennial brighten the landscape this month.


Crabgrass is a very fast growing summer annual grassy weed. If you did not get a pre-emergent on your lawn early this year, you are almost certain to have crabgrass growing in your lawn. Treat now with a grassy weed control herbicide. If you wait until July to control, harsh products that will damaged desirable turf will have to be used.
Tree & Shrub Care – The best thing you can do for your trees and shrubs this month is give them your attention. Make it a routine to walk around the landscape looking for plants that just don’t look their best. Most insects are great at camouflage and are hard to spot before you have damaged leaves. Start watching for spider mites. If you notice pale and specked foliage, shake the leaves over a white sheet of paper. If you see tiny specks that start to move, you have spider mites and should schedule a treatment. Be on the watch for bagworms on needle evergreens. When they are young, they are hard to spot. If you notice your evergreens losing color, there is a good chance bagworms are the problem. With all insect and disease issues we subscribe to an integrated pest management approach. With our Tree & Shrub Program, we inspect for issues with each visit. Most problems are easier to control the earlier you notice them. If you notice any issues with your plants, please let us know.

If you notice pale or speckled foliage on boxwood shrubs, shake a branch over a white paper. If you see tiny specks that start to move, you need to spray for spider mites.

As temperatures warm up in June be on the lookout for aphids.

Soft scale can be a problem on Redbud trees. A small 1/16-1/8”, reddish, oval scale that is often found on small twigs and can cause small branches to die if not treated. A treatment plan in late winter with a dormant oil with follow-up treatments in late spring and early summer with a horticultural oil is required.

The lacy blooms of June are a wonderful contrast to the big leaves of the Oak Leak Hydrangea.

A benefit on not having a late cold spell this spring…Crape Myrtles are already starting to bloom.

I’m always on the look out for new landscape plant materials. This year we have planted a few Orange Rocket Barberry. Typically Barberries have an oval or spreading growth pattern. But the Orange Rocket is known for its upright, compact growth habit.
Bag worms start out small and hard to see. Take time to inspect your needle evergreen shrubs this month.

Bagworms start out very small and are hard to see. Take time to inspect your needle evergreens before they cause damage.
Annual Color — Sunpatien and Joseph’s Coat
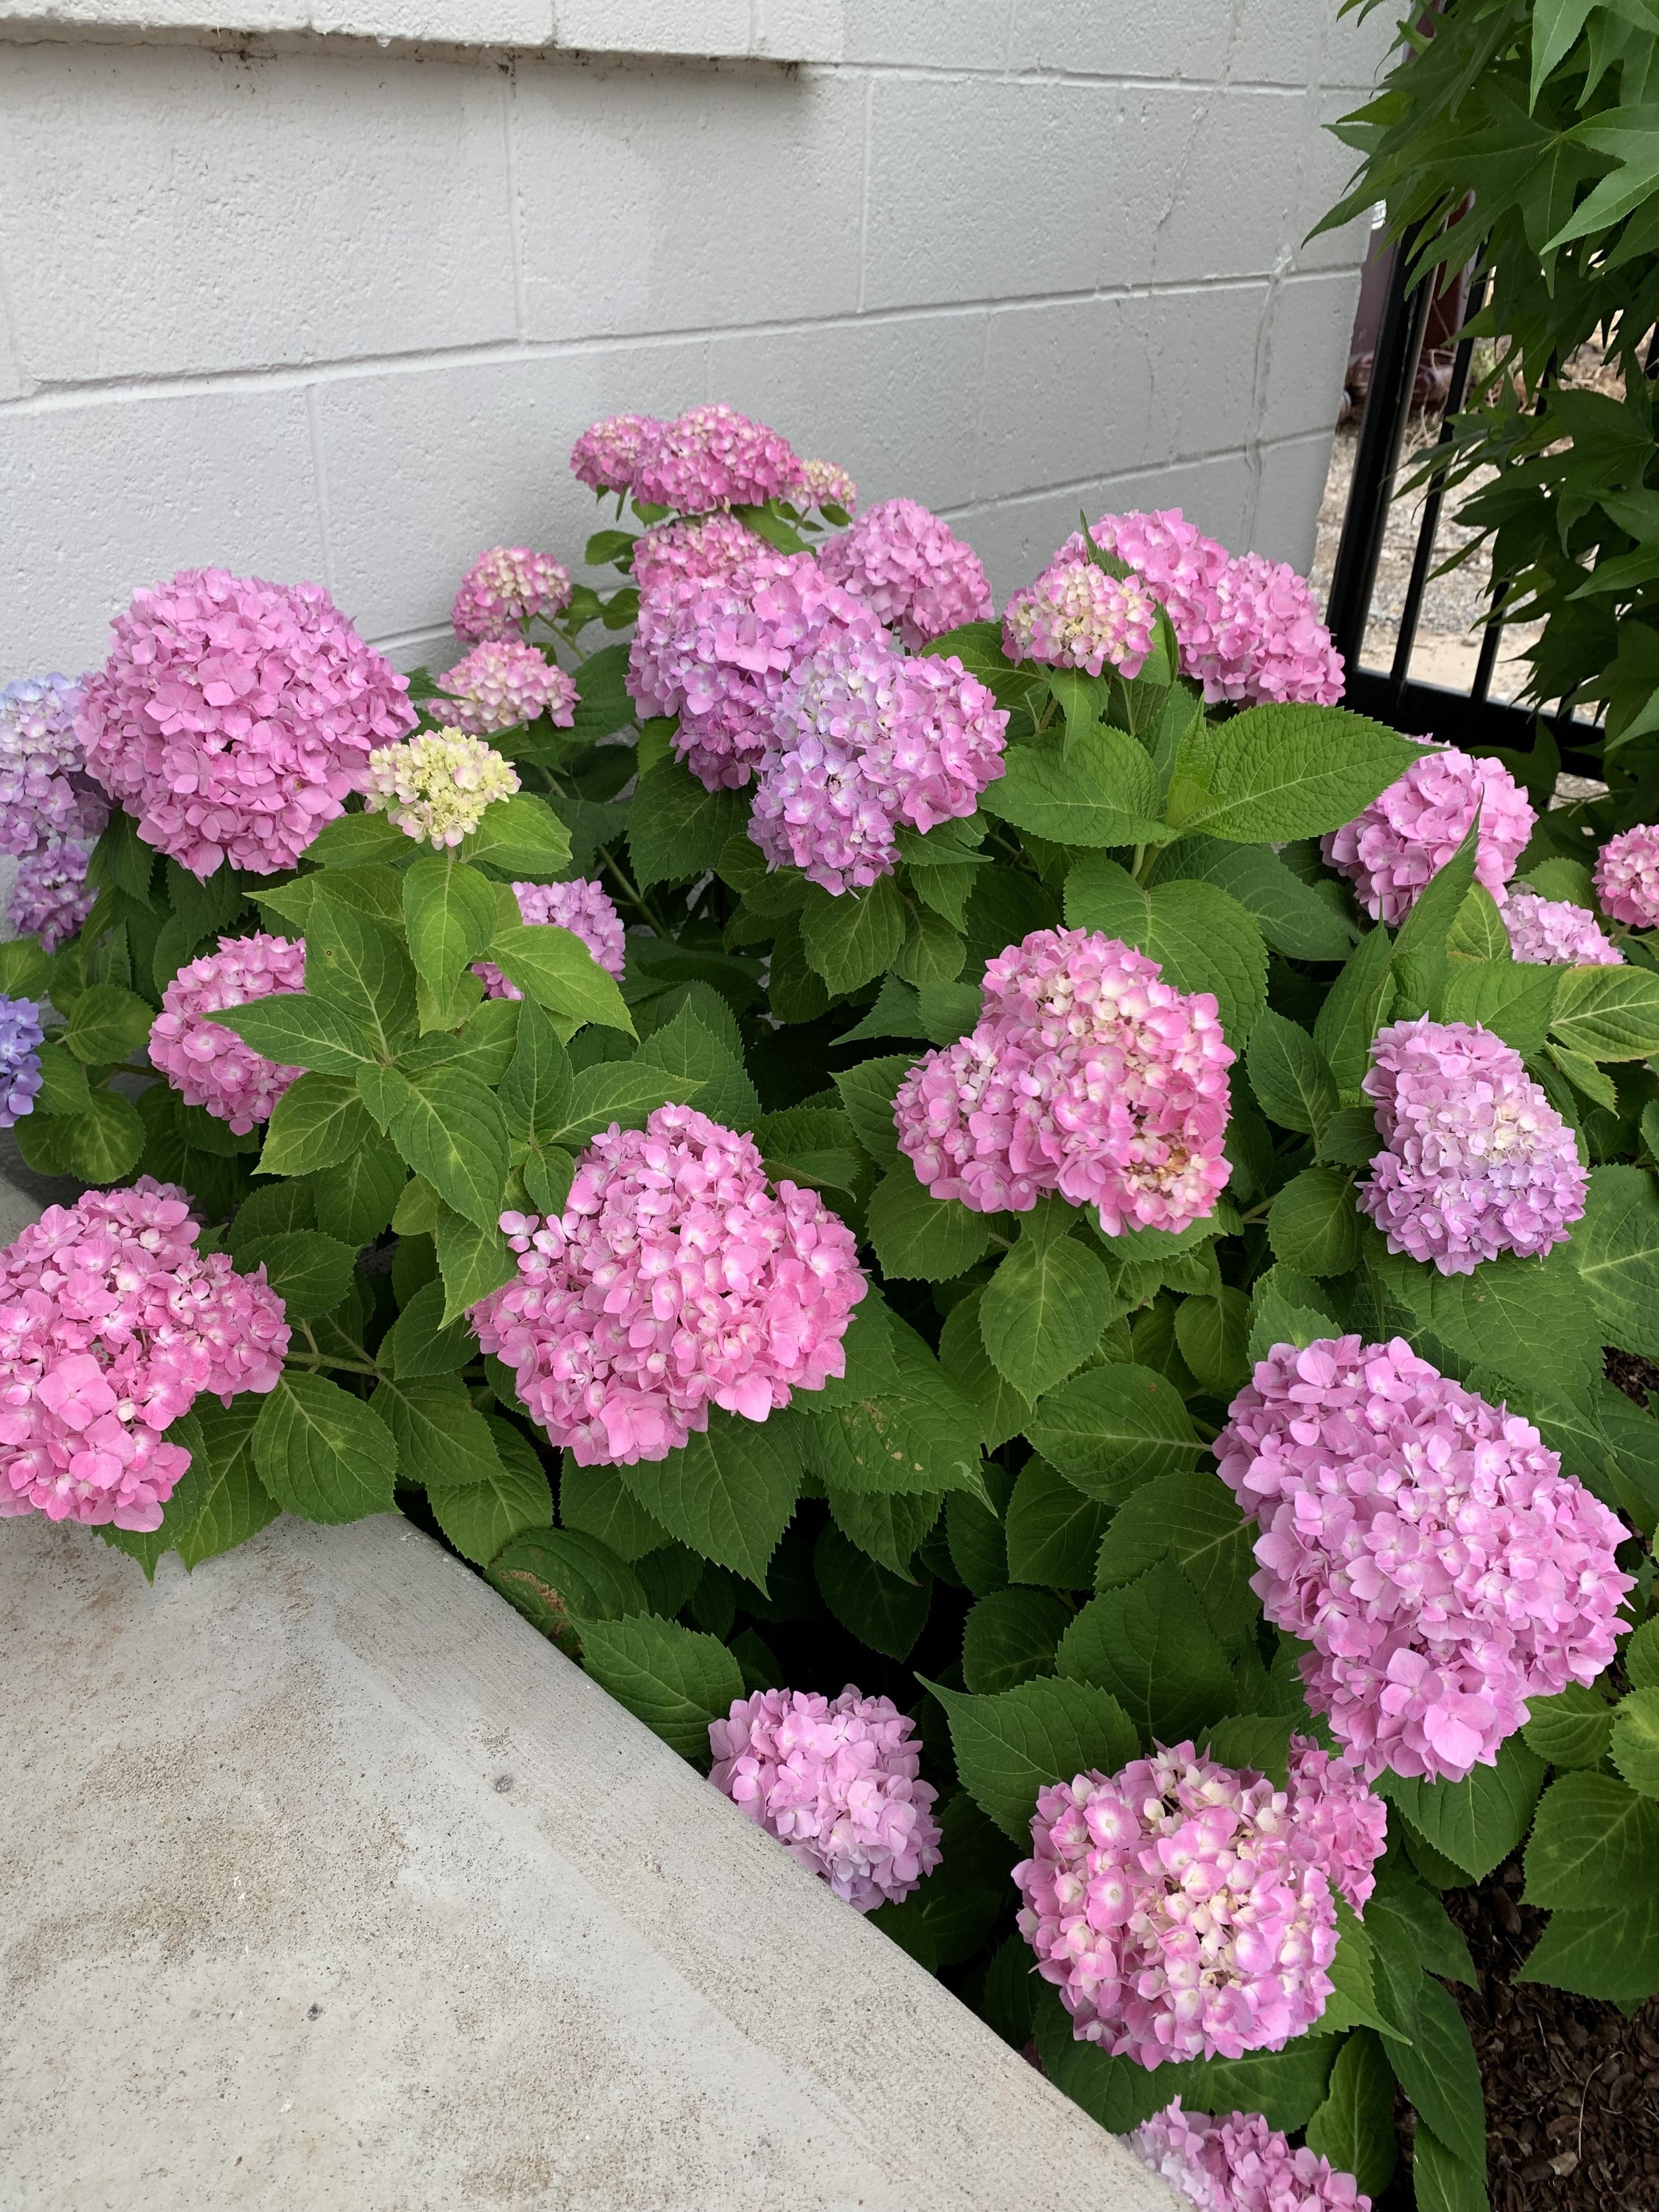
Endless Summer Hydrangeas will make their first big burst of color this month.
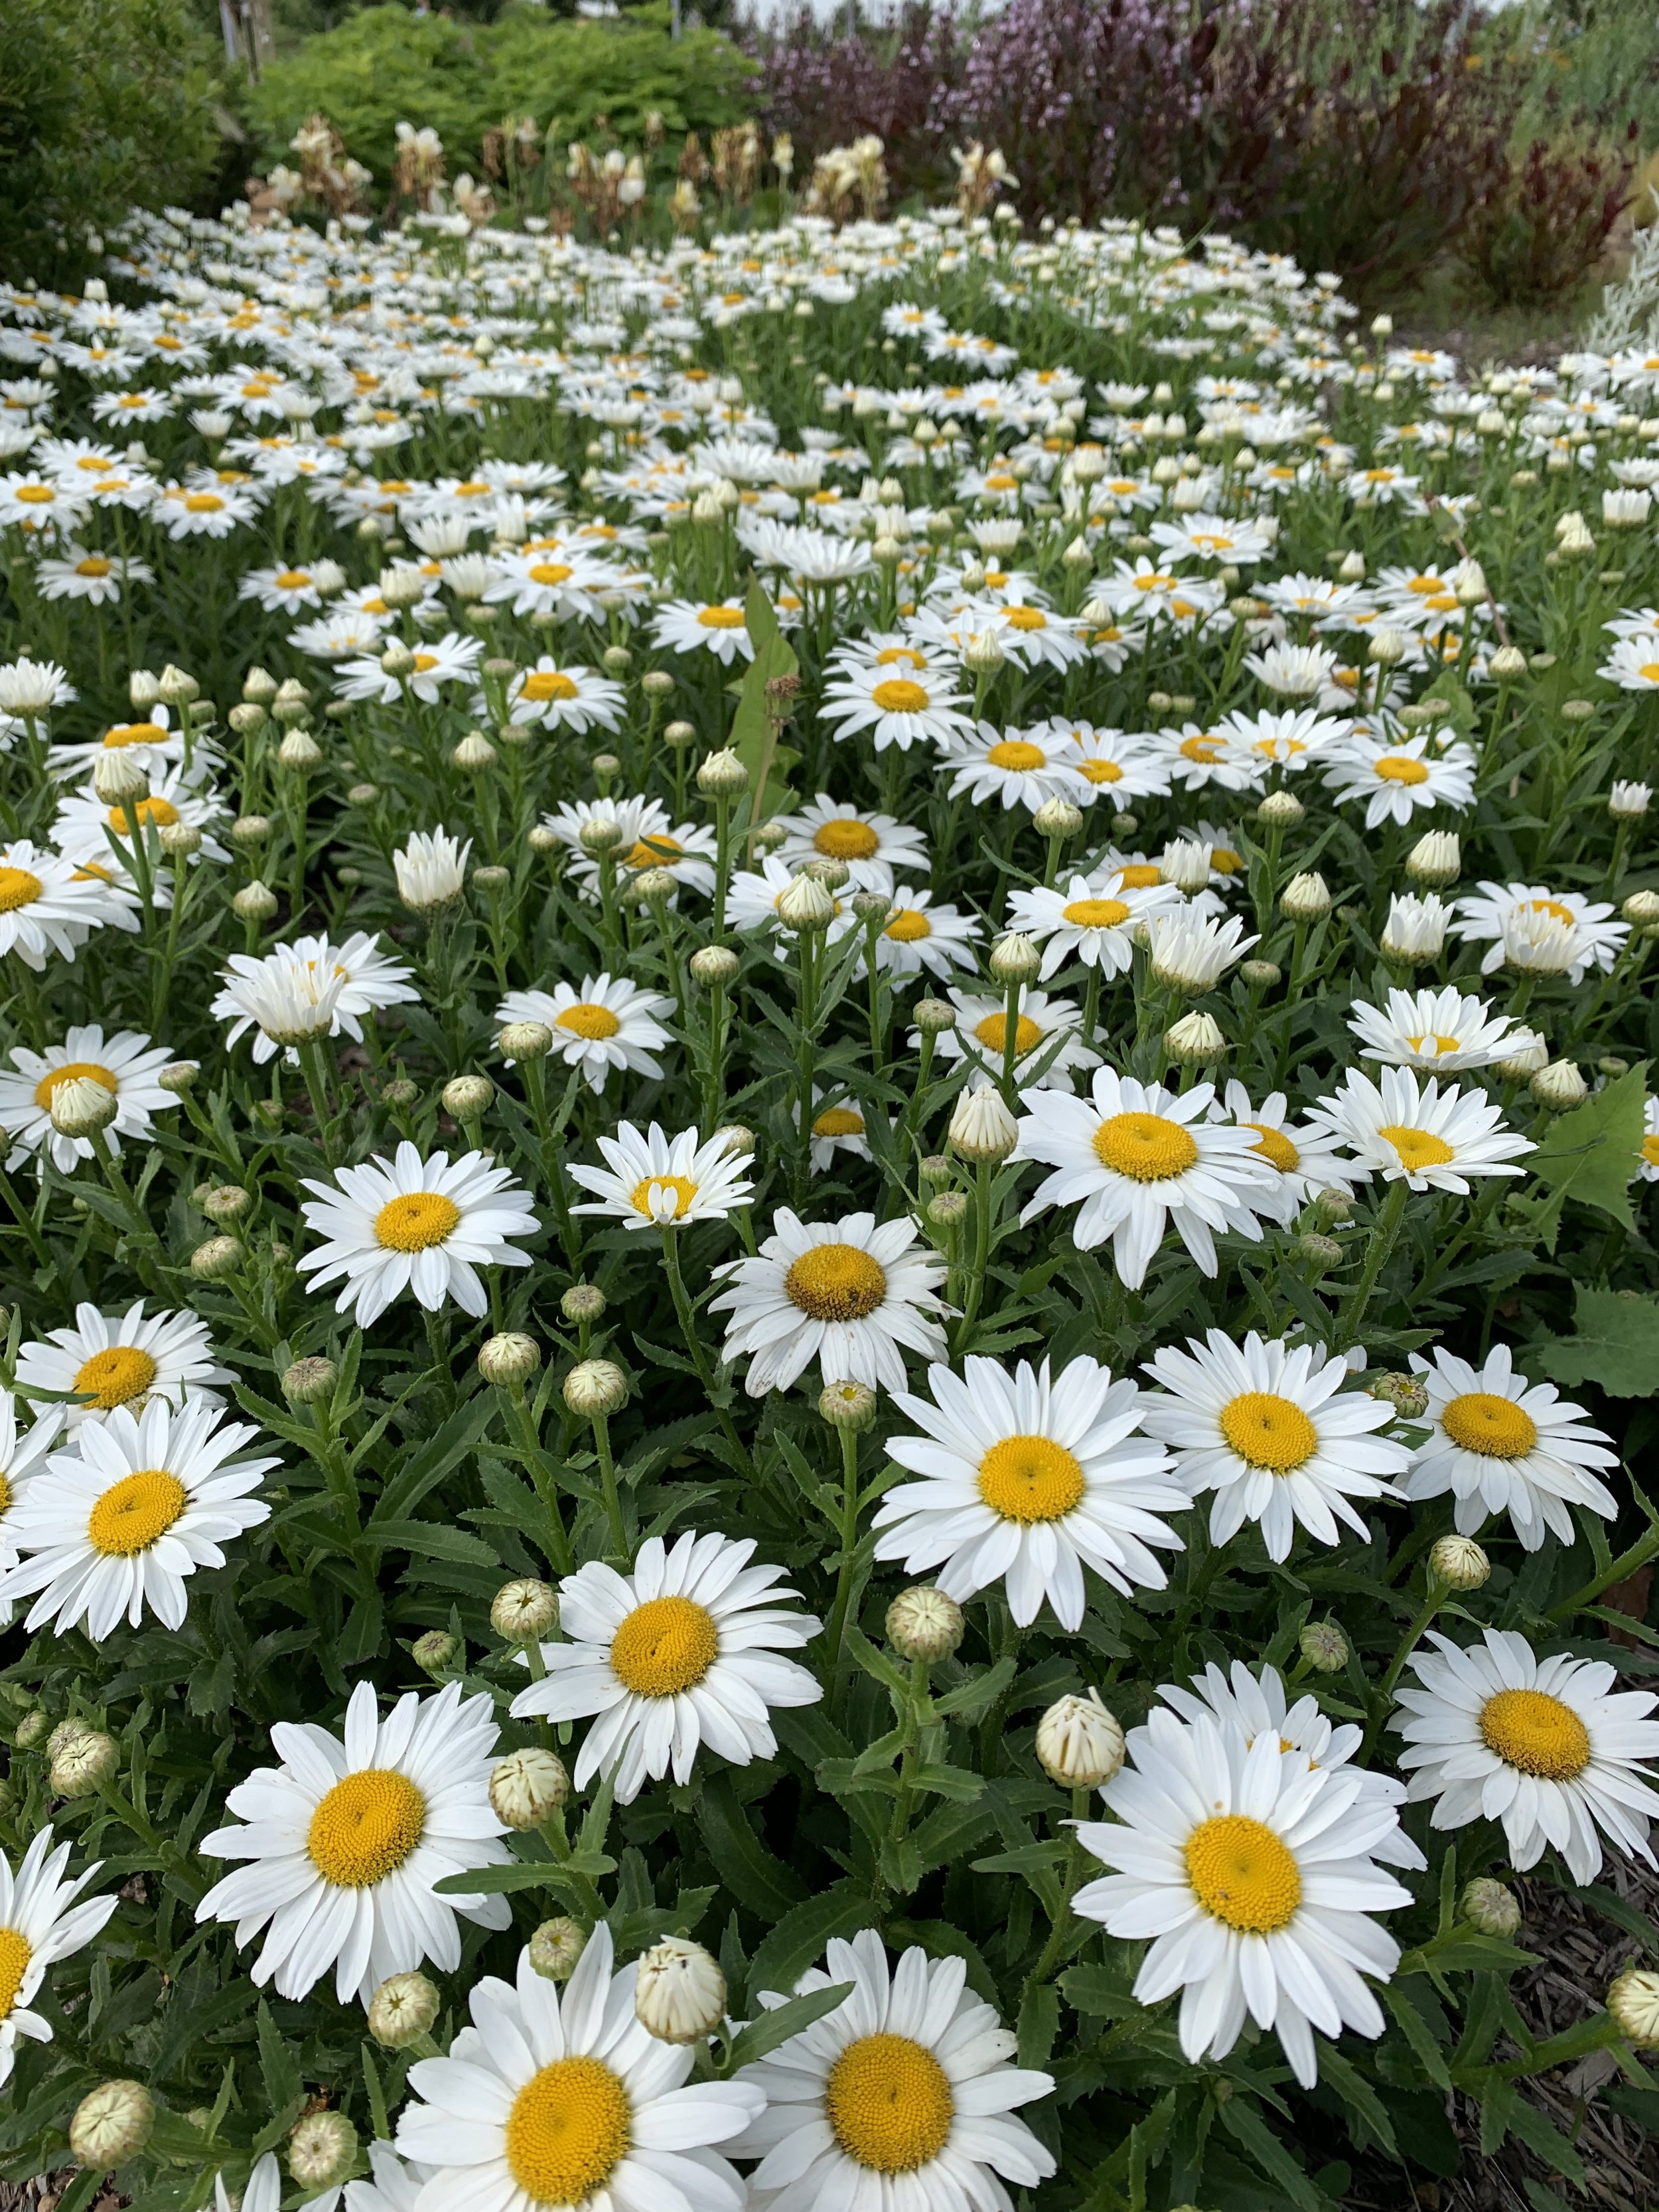
Shasta Daisies, a perennial, will bloom from early June through mid-summer. They make great cut flowers.

Who cant help but fall in love with Oakleaf Hydrangeas at this time of year. Their brilliant large flowers demand attention.

Later this month Mimosa trees will add bright pink, feathery flowers to the landscape.
Shrub Pruning – June is the last month to prune spring blooming shrubs. Spring blooming shrubs start setting flower buds by mid-summer. A few examples of spring blooming shrubs: forsythia, quince, bridal wreath spirea, and azalea. If the shrub is overgrown, use thinning cuts to reduce the size and increase air flow into the center of the plant. Make thinning cuts by removing branches back to the main trunk or another branch. If the shrub only needs a little shaping, make heading cuts near the end of branches. But, remember that all shrubs will perform at their best if they are allowed to grow without heavy pruning or shearing.
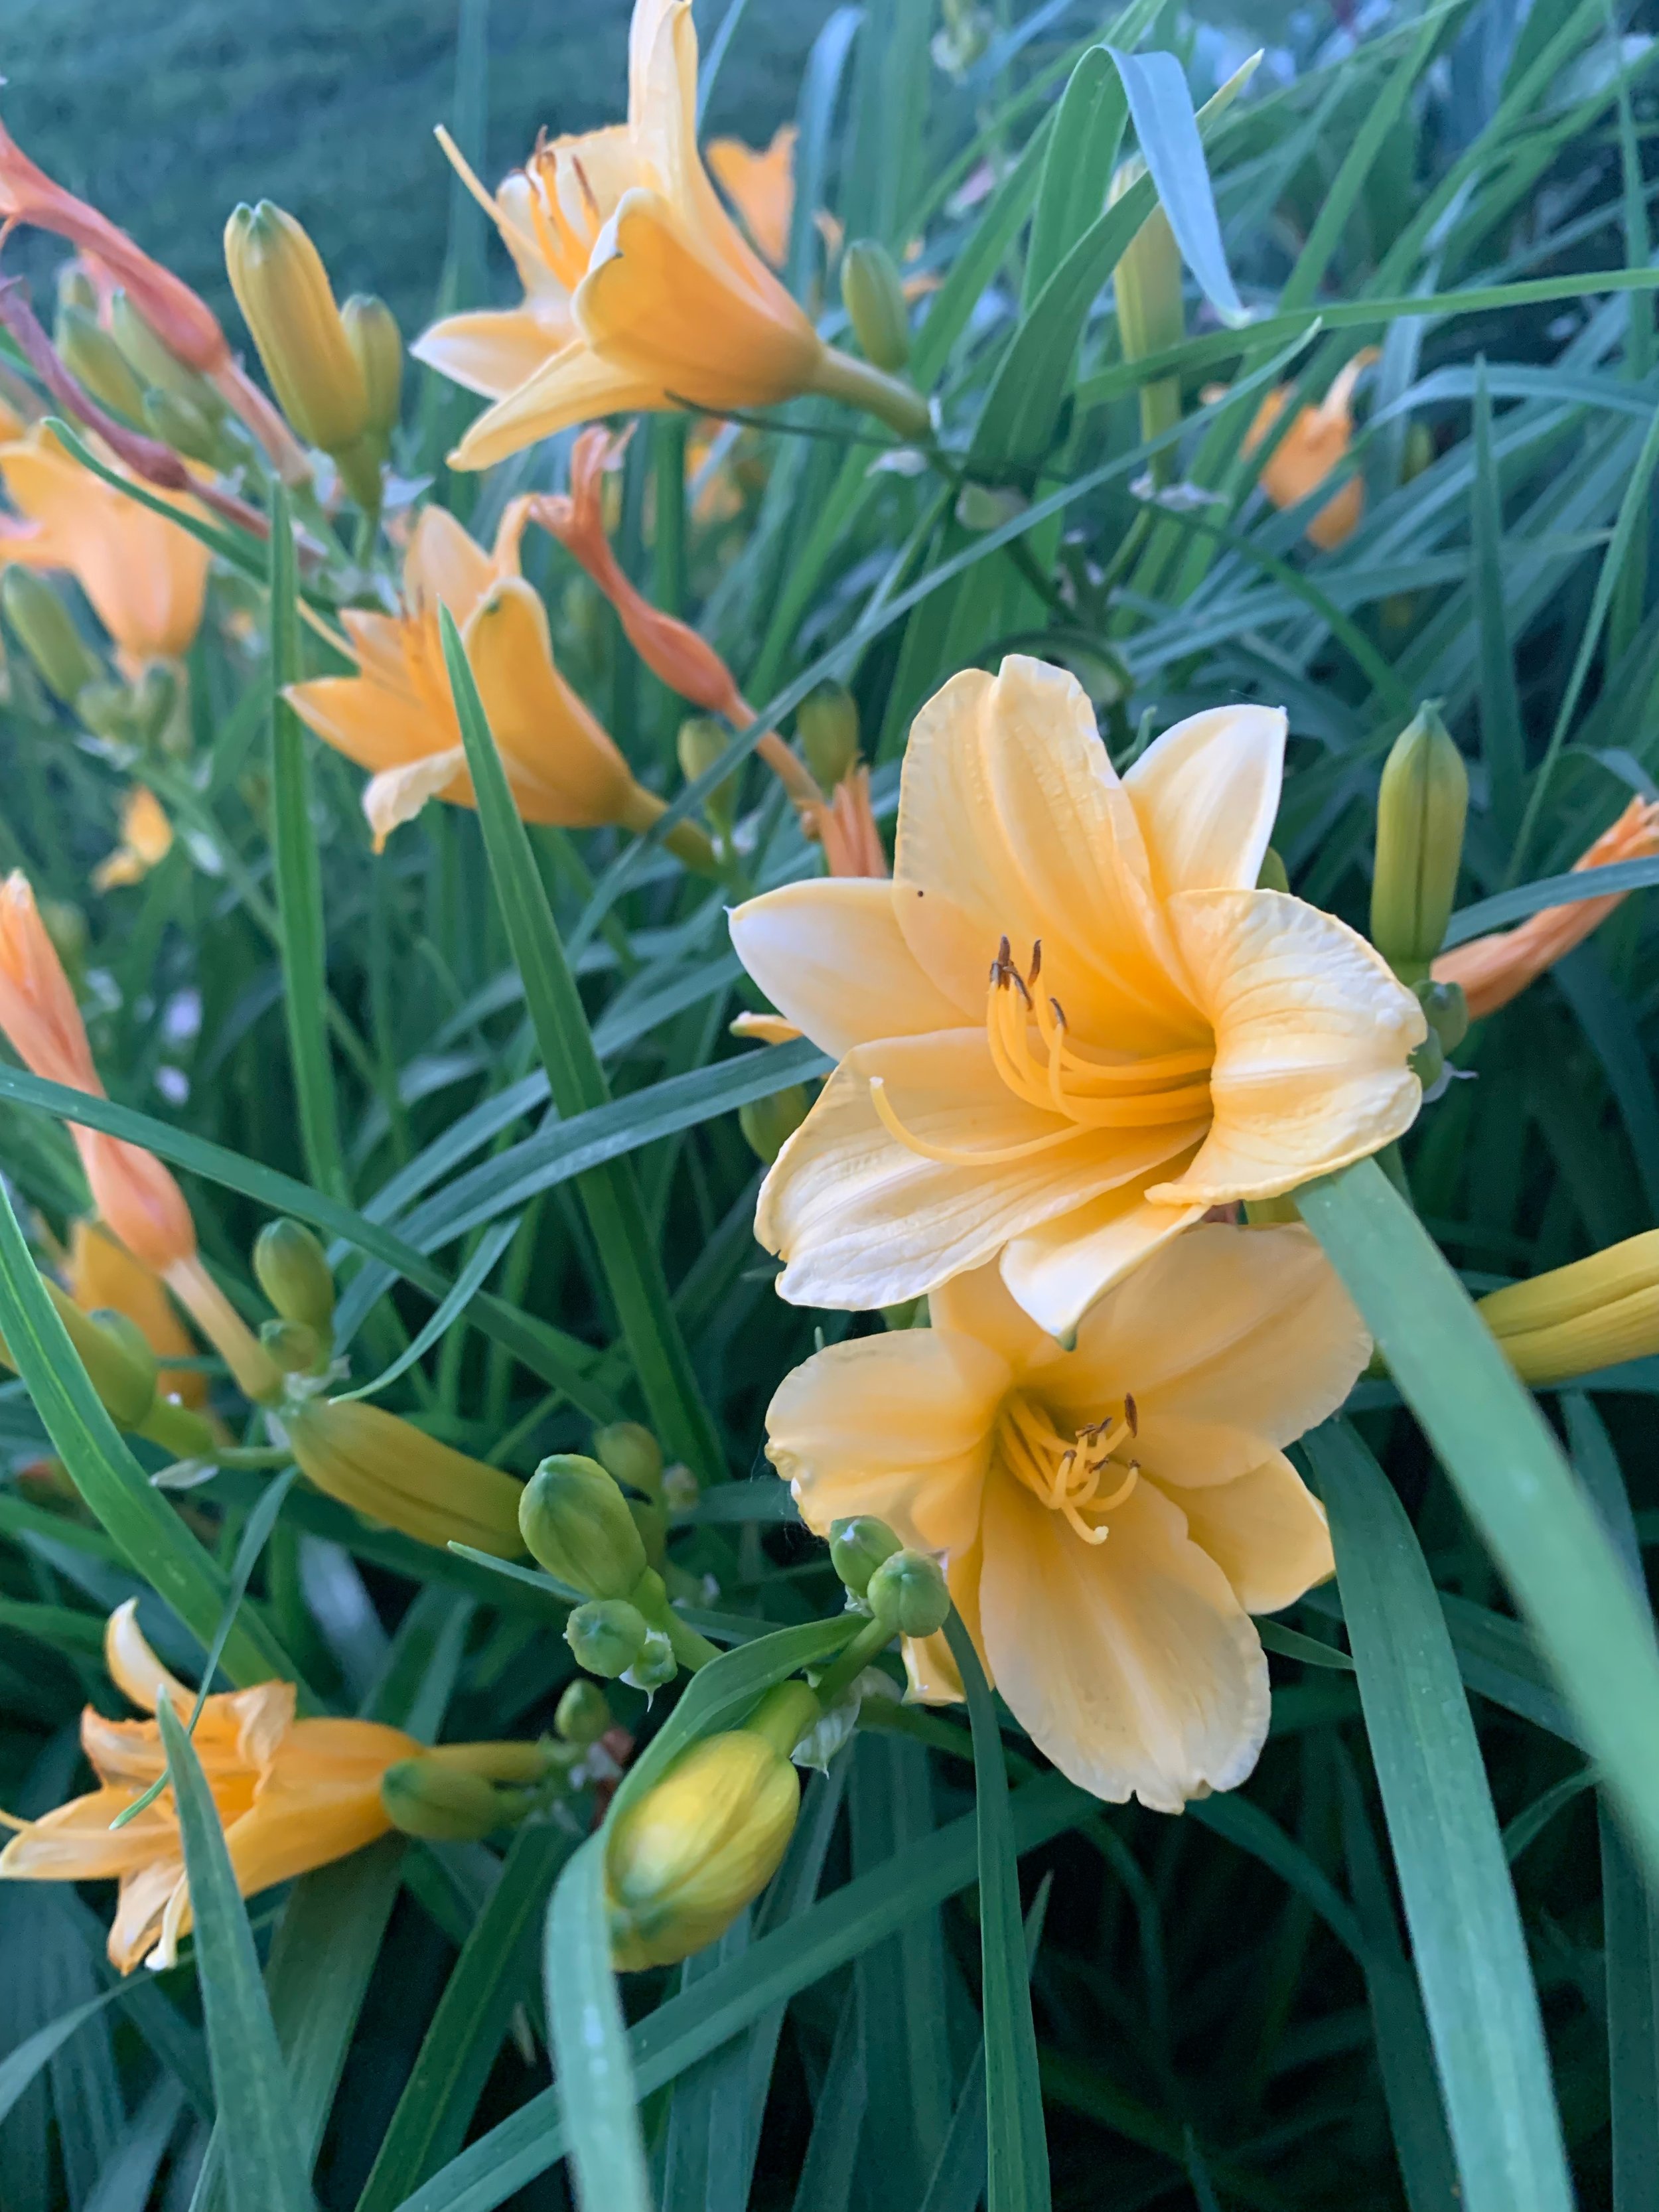
Planted in mass Stella D’oro Daylily’s add bright splashes of yellow to the landscape during June.

If your Azaleas have become overgrown or need shaping, June is your last chance to prune them before they start setting buds for next spring.
Watering – “How much to water” may be one of the most misunderstood aspects of managing a lawn and landscape. Develop the practice of watering based only on need. During the summer months, anytime we get a ½” rain or more, turn your system off for a few days. Depending on afternoon temperatures, a 1” rainfall may save you a week’s worth of water. The converse is true as well. If we go a week without receiving a 1” of rainfall, you need to be watering. Another clue it is time to start watering… when you walk on the lawn, if the grass doesn’t spring back up and your footsteps remain in the lawn, it is time to start watering. Remember, deep soakings are always better than short, frequent watering. Shallow, frequent watering results in lawns with less roots and more dependent on water. Throughout the summer make it a habit to inspect your landscape and adjust. Don’t set your irrigation controller at the beginning of the season, never touching it again until the fall.
My watering goal for June is a good deep soaking every 4 days. If temperatures stay under 90 degrees and we get occasional rain, I’ll save money and water, and still have a great lawn and landscape. The key to this plan is taking a little time to monitor and adjust.


Trumpet Vine
Mulch – Add mulch to your landscape plantings this month. A 2” layer of mulch will retain moisture, cool the soil, and reduce weed germination. We prefer premium shredded all bark cedar mulch because it doesn’t float as much and aesthetically looks great. For acid-loving plants such as hydrangeas and azaleas, pecan hulls or pine bark mulch is a great choice.

Endless Summer Hydrangea

Goldflame Spirea

Annual color planting of Joseph Coat, Sunpatien, and Marigold make a great yellow/orange color scheme.
Brown Patch – Be on the lookout for brown patch in your fescue lawn. June is the most active month for this disease in fescue lawns. Anytime nighttime temperatures are 70 degrees plus and the turf remains damp for over 6 hours at a time, brown patch will develop. Areas where there is little air movement and/or heavy shade are more prone because the turf stays wet longer. Brown patch will make the lawn appear it needs more water, but watering will just make it worse. So, before you water more, think about the site, the amount of shade, the air movement in the area, and the amount of moisture the area has received. The best thing you can do if this problem occurs is to stop watering.
One of the most self-inflicted problems with fescue lawns is watering practices that promote the development of brown patch. Always allow your fescue time to dry out between waterings. Avoid watering fescue in the evening during the summer.
If you subscribe to Hall | Stewart’s 7-Step Lawn Care Program and have fescue, you will receive a fungicide this month designed to suppress the brown patch fungus.

Brown Patch will make fescue look like it needs more water, but the problem is actually the result of the leaf blades staying wet for over 6 hours at a time when nighttime temperatures are in the 70s.

Yarrow is a perennial that produces yellow flowers in late May and early June.

Also, Cone Flower, another summer perennial will make a showing in June.
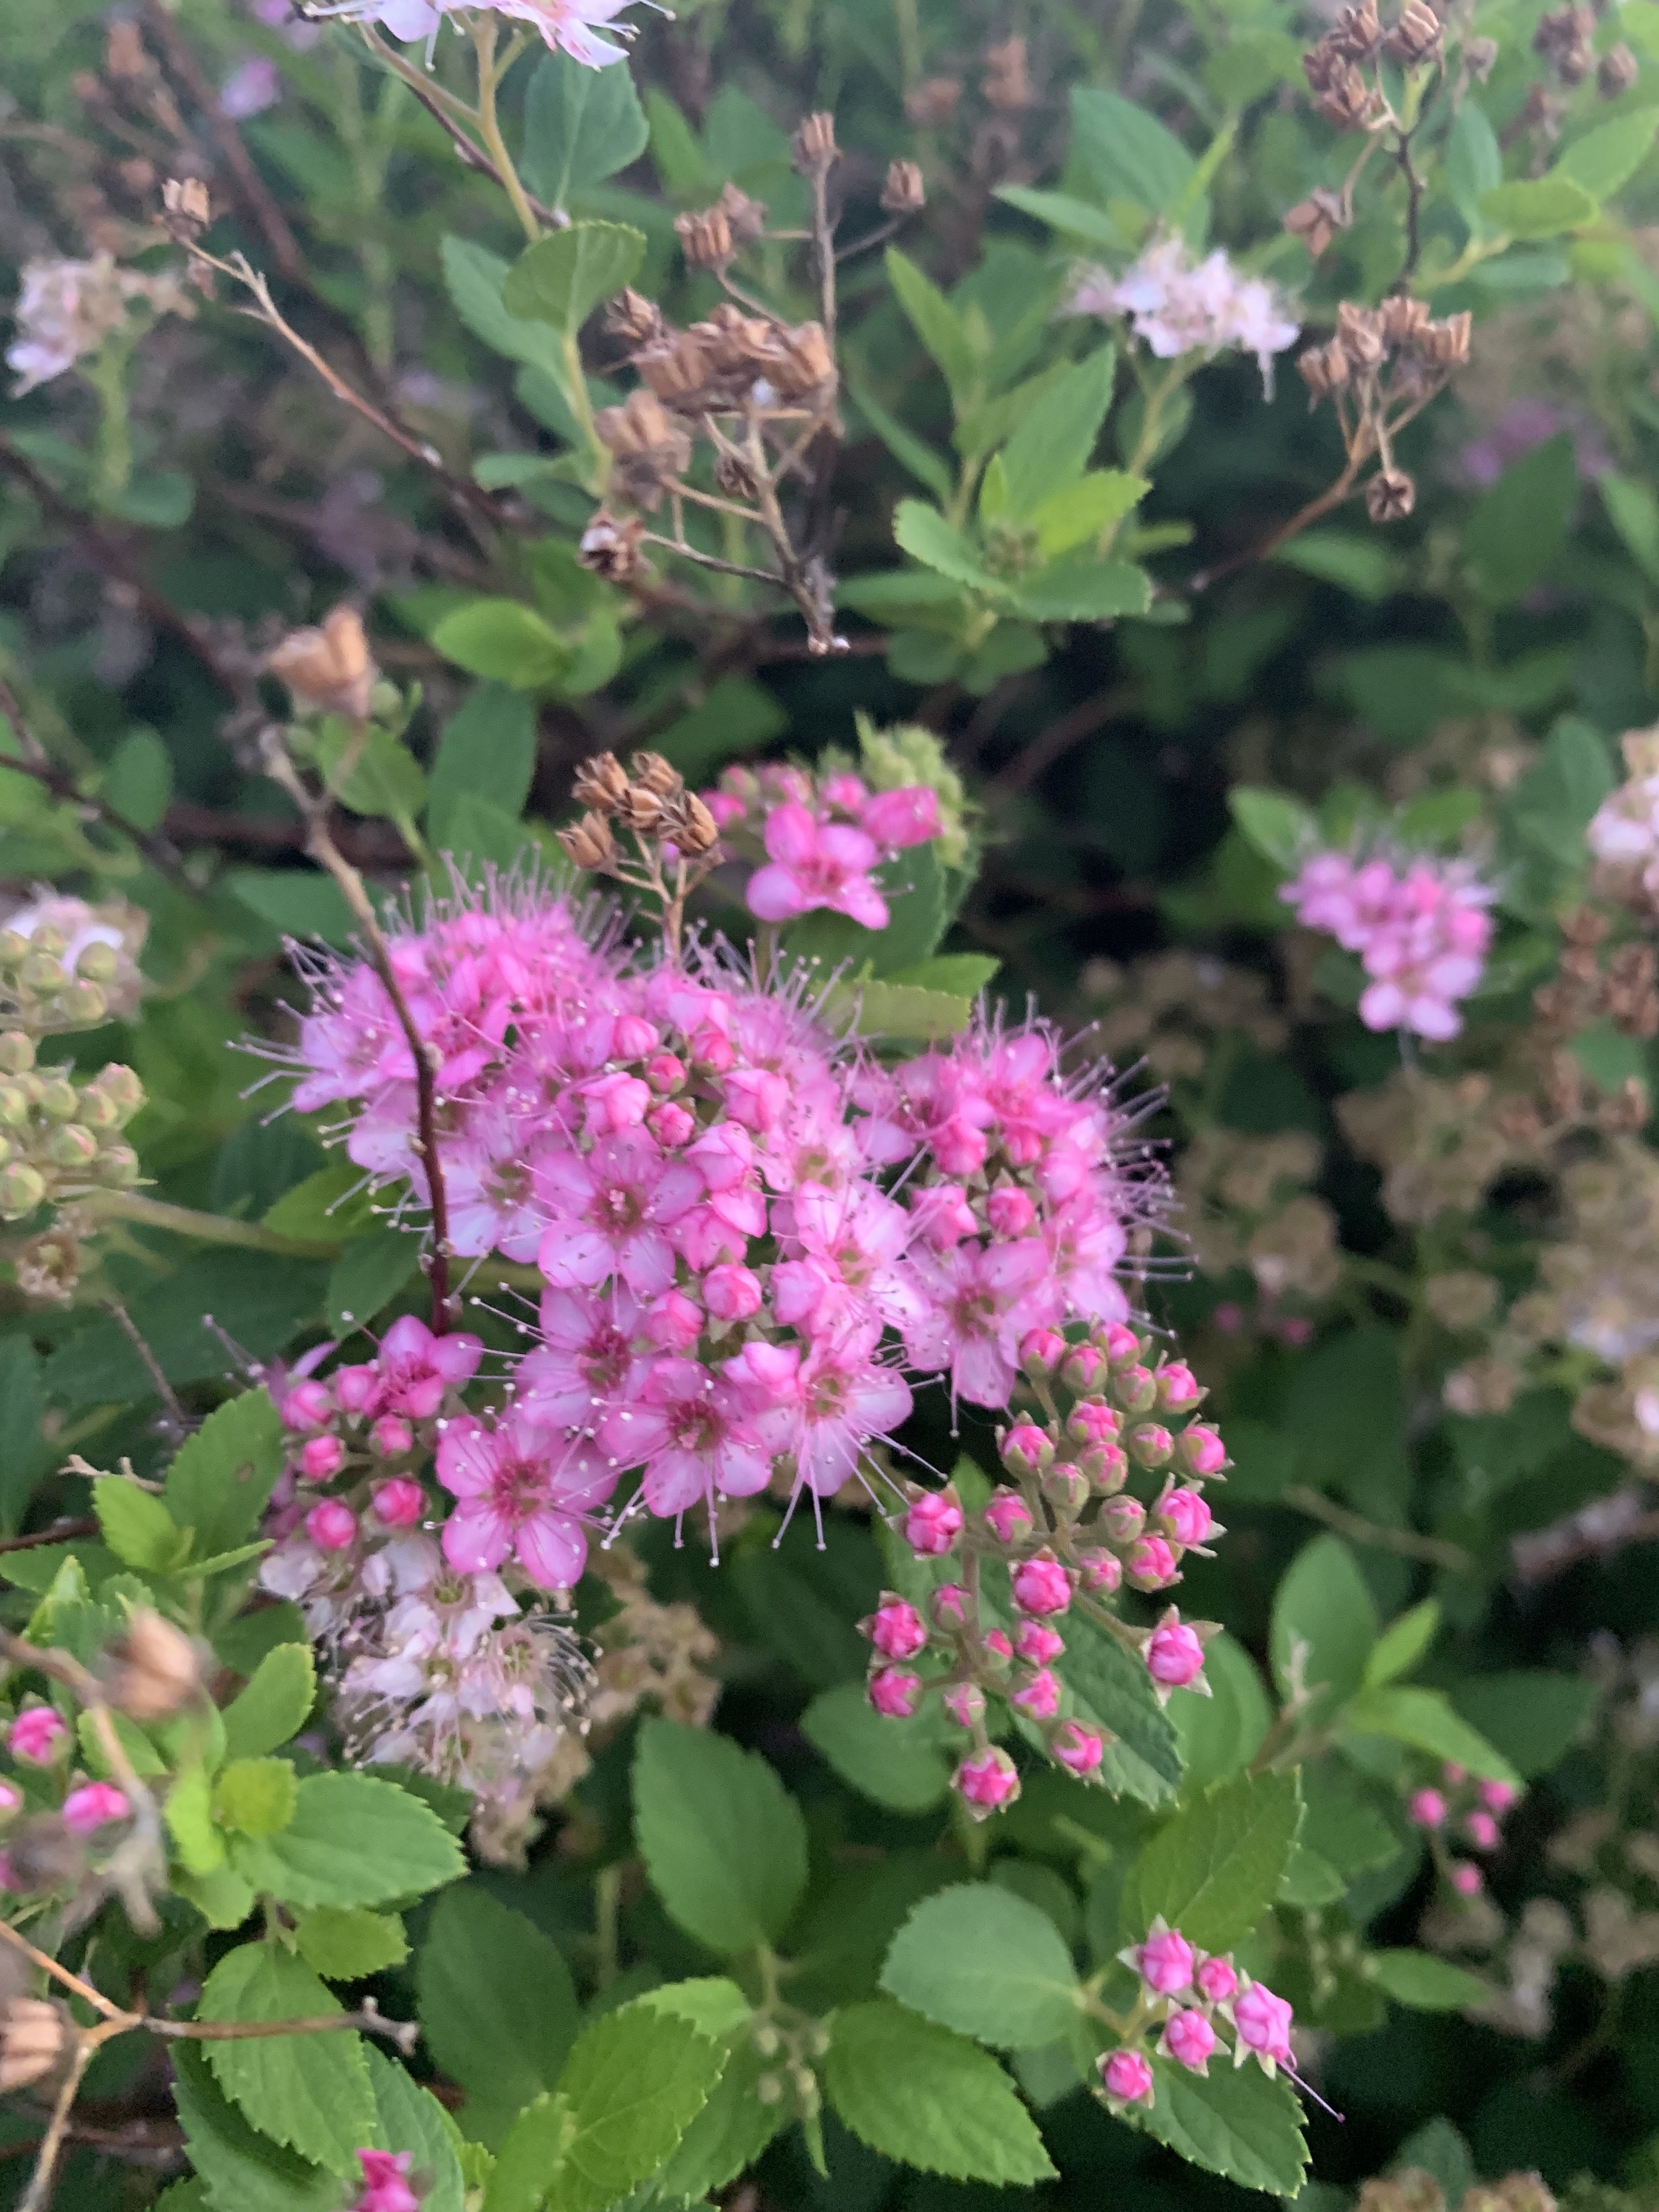
There are many varieties of Spirea’s with yellow and green foliage that put on blooms in the early summer.

Anthony Waterer Spirea is a medium sized shrub that is covered with pink flowers in late May and early June.
Aeration – Mechanical aeration is a “best” practice for any lawn. Aeration reduces soil compaction, promotes root development, and thickens the turf. May and June are the best months to aerate Bermuda. This one practice will make a significant difference in the quality of your turf. The stronger the turf, the less weed problems you will experience.

Insects – Regularly scheduled treatments for fleas & ticks, mosquitos, and perimeter insect control around your house should continue during the summer. The goal is to make outdoor living for your family and pets the best possible.
Southern Magnolia trees produce large white flowers in early summer. Teddy Bear and Little Gem Dwarf Southern Magnolia are great plants for smaller landscapes.

Texas Red Yucca produce tall red flowering spikes this month. There are several varieties. Brakelights Res Yucca is a favorite.
Awe…June…Spend time outside, in your lawn and landscape, enjoying the beauty every day!
If you have any questions, please send us an email or call.
Lorne Hall
Hall | Stewart Lawn + Landscape
(405)367-3873
3 Keys to a Great Lawn - #2 Maintenance

When it comes to having a great lawn, what is most important?
Lawn care applications?
Maintenance practices?
Environmental conditions?
All three are keys to a great lawn - Lawn Care Applications, Maintenance, and Environmental Conditions.
Great lawns are not a result of getting one, or even two, of the three correct.
Great lawns are equally the result of all three.
Today, we are covering the second - Maintenance. In April, we covered Lawn Care Applications and in June we will visit about how Environmental Conditions impact your lawn.
Maintenance includes all mechanical activities involved in caring for your lawn: Mowing, Aerating, Dethatching, Turf Selection, Soil Test, etc.

Mowing
Mowing by far has the biggest impact on the quality of your lawn.
Think about it. More time will be spent mowing your lawn than any other lawn or landscape activity. If your goal is to have a great lawn, you will make somewhere between 28 to 40 trips across your lawn this year. A well-maintained warm season turf (bermuda, zoysia) will be mowed 28 to 32 times per growing season while a great fescue lawn will be mowed 36 to 40 times.
Cutting height is important.
Cutting too low discourages root growth and reduces the lawn’s ability to withstand extreme temperatures and drought.
Cutting too tall results in a stemy turf that is more susceptible to scalping.
Bermuda and zoysia should be mowed at 1-2” March through May. As temperatures start to increase in June, gradually increase the mowing height to 2-2.5” by mid to late summer and maintain that height through the end of the growing season. If mowing bermuda with a reel type mower, the lawn can be maintained at 1.5” during the summer months.

Maintain fescue at 3” during the summer months.
Cutting the lawn shorter in the spring and early summer promotes lateral spread and a tighter turf.
A taller turf in the heat of the year provides a canopy that cools the soil, promotes a deep root system, and provides insulation for low temperatures going into the winter.
Fescue should be mowed at 2.5-3” in the spring March through May. During the heat of the summer, June through September, maintain fescue at 3-3.5”. In the fall, as the weather cools returning to 2.5-3” is fine.
A good rule of thumb is to maintain all turf grown in shade at the recommended highest levels or a little taller. This will increase leaf area to compensate for the lower light levels.

Maintain turf growing in shady areas a little taller. The increased leaf area will compensate for the lower light levels.
Mowing frequency makes a big difference in the quality of a lawn.
The best lawns are mowed based on growth, not a set schedule. If you hire your lawn mowed, mowing on a set schedule, preferably weekly during the growing season, is typically the practical solution. But, if you mow your own lawn, a big step towards a better lawn is to start mowing based on growth.
The best time to mow is at the point where no more than 1/3 of the leaf area will be removed. For example, if you are trying to maintain your lawn at 2”, the lawn should be mowed before it exceeds 3”. Removing more than 1/3 of the height at one time results in cutting below the leaf and into the stems. Removing all the leaf requires the turf to use nutrients stored in the roots to generate new leaves followed by putting energy into storing more nutrients. Scalping into the stems starts a growing cycle that is not optimal for having a great lawn.
Mulch mowing vs bagging your clippings is one of the best things you can do for your lawn.
An added benefit of mowing often enough that no more than 1/3 of the leaf blade is removed at a time is you don’t need to bag your clippings. Leaf blades are mostly water and nitrogen. Every time you remove your clippings you are throwing away valuable moisture and nutrients.
I am a firm believer that what separates the quality of my lawn from other good lawns is that I always mulch mow returning nutrient and moisture rich clippings to the soil.

Mow often and don’t bag your clippings. Mulch mow and return nutrients to the soil. Your lawn will thank you.

When mulch mowing, a few clippings are ok. They will break down quickly and return nutrients and moisture to the soil.

But, if you are like me, you like a neat and clean lawn when you are finished mowing. So, use your blower to distribute any noticeable clippings.

Varying your mowing pattern will reduce soil compaction and give your lawn a professional appearance.
Keep mower blades sharp.
Dull blades bruise leaf tips, reduce growth, and causes a dull-cast appearance over the turf due to frayed leaf blades.
Vary the mowing pattern.
Mowing the same direction 30-40 times per year will create unnecessary soil compaction. Lawns look better when two or three mowing patterns are rotated through.
Aerating
We talk about aerating a lot. Why? The overwhelming common factor of our best lawns is annual aeration.
Aerating is the process of taking small cores out of the lawn with a mechanical core aerator. Aeration reduces compaction and improves the soil structure by improving air, nutrient, and water movement to the root zone. Cores should be left on the lawn and allowed to break down. Gradually the holes created by the aerator are filled in with loose soil from the cores creating pockets for root development. Aerating also reduces thatch.

Bermuda should be aerated any time after spring green up through early summer, April through mid-July.
The best time to aerate fescue is in the fall, September through October.
Aeration will take a lawn from good to great!
Dethatching
Thatch is the undecomposed roots and stems of the turf. Excessive thatch, more than ½,” impedes the flow of water, air, and nutrients into the soil. Lawns with excessive thatch are shallow rooted and therefore are less drought and heat tolerant.
Bermuda lawns are more prone to excessive thatch than fescue. The best time to remove excessive thatch is in the early spring, late February to early March, before the lawn greens up. The best tool to use is a power rake, also known as a dethatcher.
Important note – Lawns that are aerated at least every other year rarely have excessive thatch problems. If your lawn has a moderate amount of thatch, we recommend aeration as a preventative step to dethatching.
Turf Selection
Light is a basic requirement of turfgrass growth and is often the limiting factor in good turf development. All plants, including turf grass, have a minimum light requirement.
Bermuda prefers 8 hours of direct sunlight for optimal growth.
Zoysia will grow well in a little less light, but still needs 6 hours of direct sunlight.
For any areas with less than 5 hours of direct sunlight, fescue is the best option.
We all tend to underestimate the amount of shade our trees, shrubs, buildings, and fences cast on our lawns.

Lawn areas that receive only dappled sun are best planted in fescue.
Over the course of the growing season, take time to observe shade patterns in your landscape and make a plan for any areas with too little direct sunlight to support a thick lawn.
Zoysia is best established from sod and can be installed throughout the season.
Fescue does well established from seed. The best time to establish fescue from overseeding is in September or October. There is a second opportunity in March. But fall, is by far the best time because as a cool season grass, it will have more time to establish a strong root system for the summer heat.
During April and May, establishing fescue from sod is best. Avoid sodding fescue during the summer heat.
Soil Test
When a lawn isn’t growing well, has poor color, looks sickly, and doesn’t respond as expected to fertilizer, a soil test should be done.
There are 13 essential mineral elements in soil. Their availability to be used by turfgrass is based on soil pH. Between pH of 6.0 and 7.0, all essential soil elements are available for optimal turfgrass growth. A soil test will determine if lime is needed to raise the pH or if sulfur is needed to lower the pH.
Fill a quart sized plastic bag with soil from 10-12 random places in your lawn. Using a spade take soil from 2-6” below the surface. Remove roots from the soil. Take the soil sample to your local Oklahoma State University County Extension Office. They will test the soil and send you a report for a nominal fee. The Oklahoma County office is located at 2500 NE 63rd St., Oklahoma City, OK 73111.
Or, give us a call and we will gather a sample and take it to the lab for you.

Just like Lawn Care Applications, Maintenance activities by themselves will not fix
all your lawn problems. But, without proper maintenance activities,
lawn care applications will not be as effective.
We look forward to continuing the conversation of the three keys to a great lawn next month when we discuss how the environment impacts your efforts to have a beautiful lawn.
If you subscribe to a Hall | Stewart Lawn Care Program, good maintenance practices are a key to getting the most out of our lawn care applications.
If you have any questions, please let us know. We enjoy visiting with you about your lawn.
Lorne Hall
Hall | Stewart Lawn + Landscape
(405)367-3873

The Epic Summer Battle: Outdoor Fun vs The Mosquitoes. Coming Soon to Your Backyard!

We want your spring, summer and fall to be filled with outdoor enjoyment.
The key to more outdoor time is winning the battle against the annoying mosquitoes.
Hall | Stewart believes in an integrated pest management (IPM) approach to mosquito control. Success is the result of focusing on prevention and reduction.

What you can do to win the battle –
Mosquito control is everyone’s responsibility when it comes to removing and eliminating larval breeding sites. All standing water is a desirable breeding ground for mosquitoes. Mosquitoes spend three of their four life stages dependent on standing water. This makes anywhere water accumulates from bird baths, flowerpots, toys, poor draining gutters, a perfect playground for the insect.

The first step in mosquito control is to remove any standing water – pots, gutters, birdbaths, poor draining lawn areas, etc.
Mosquito eggs WILL NOT hatch without water.
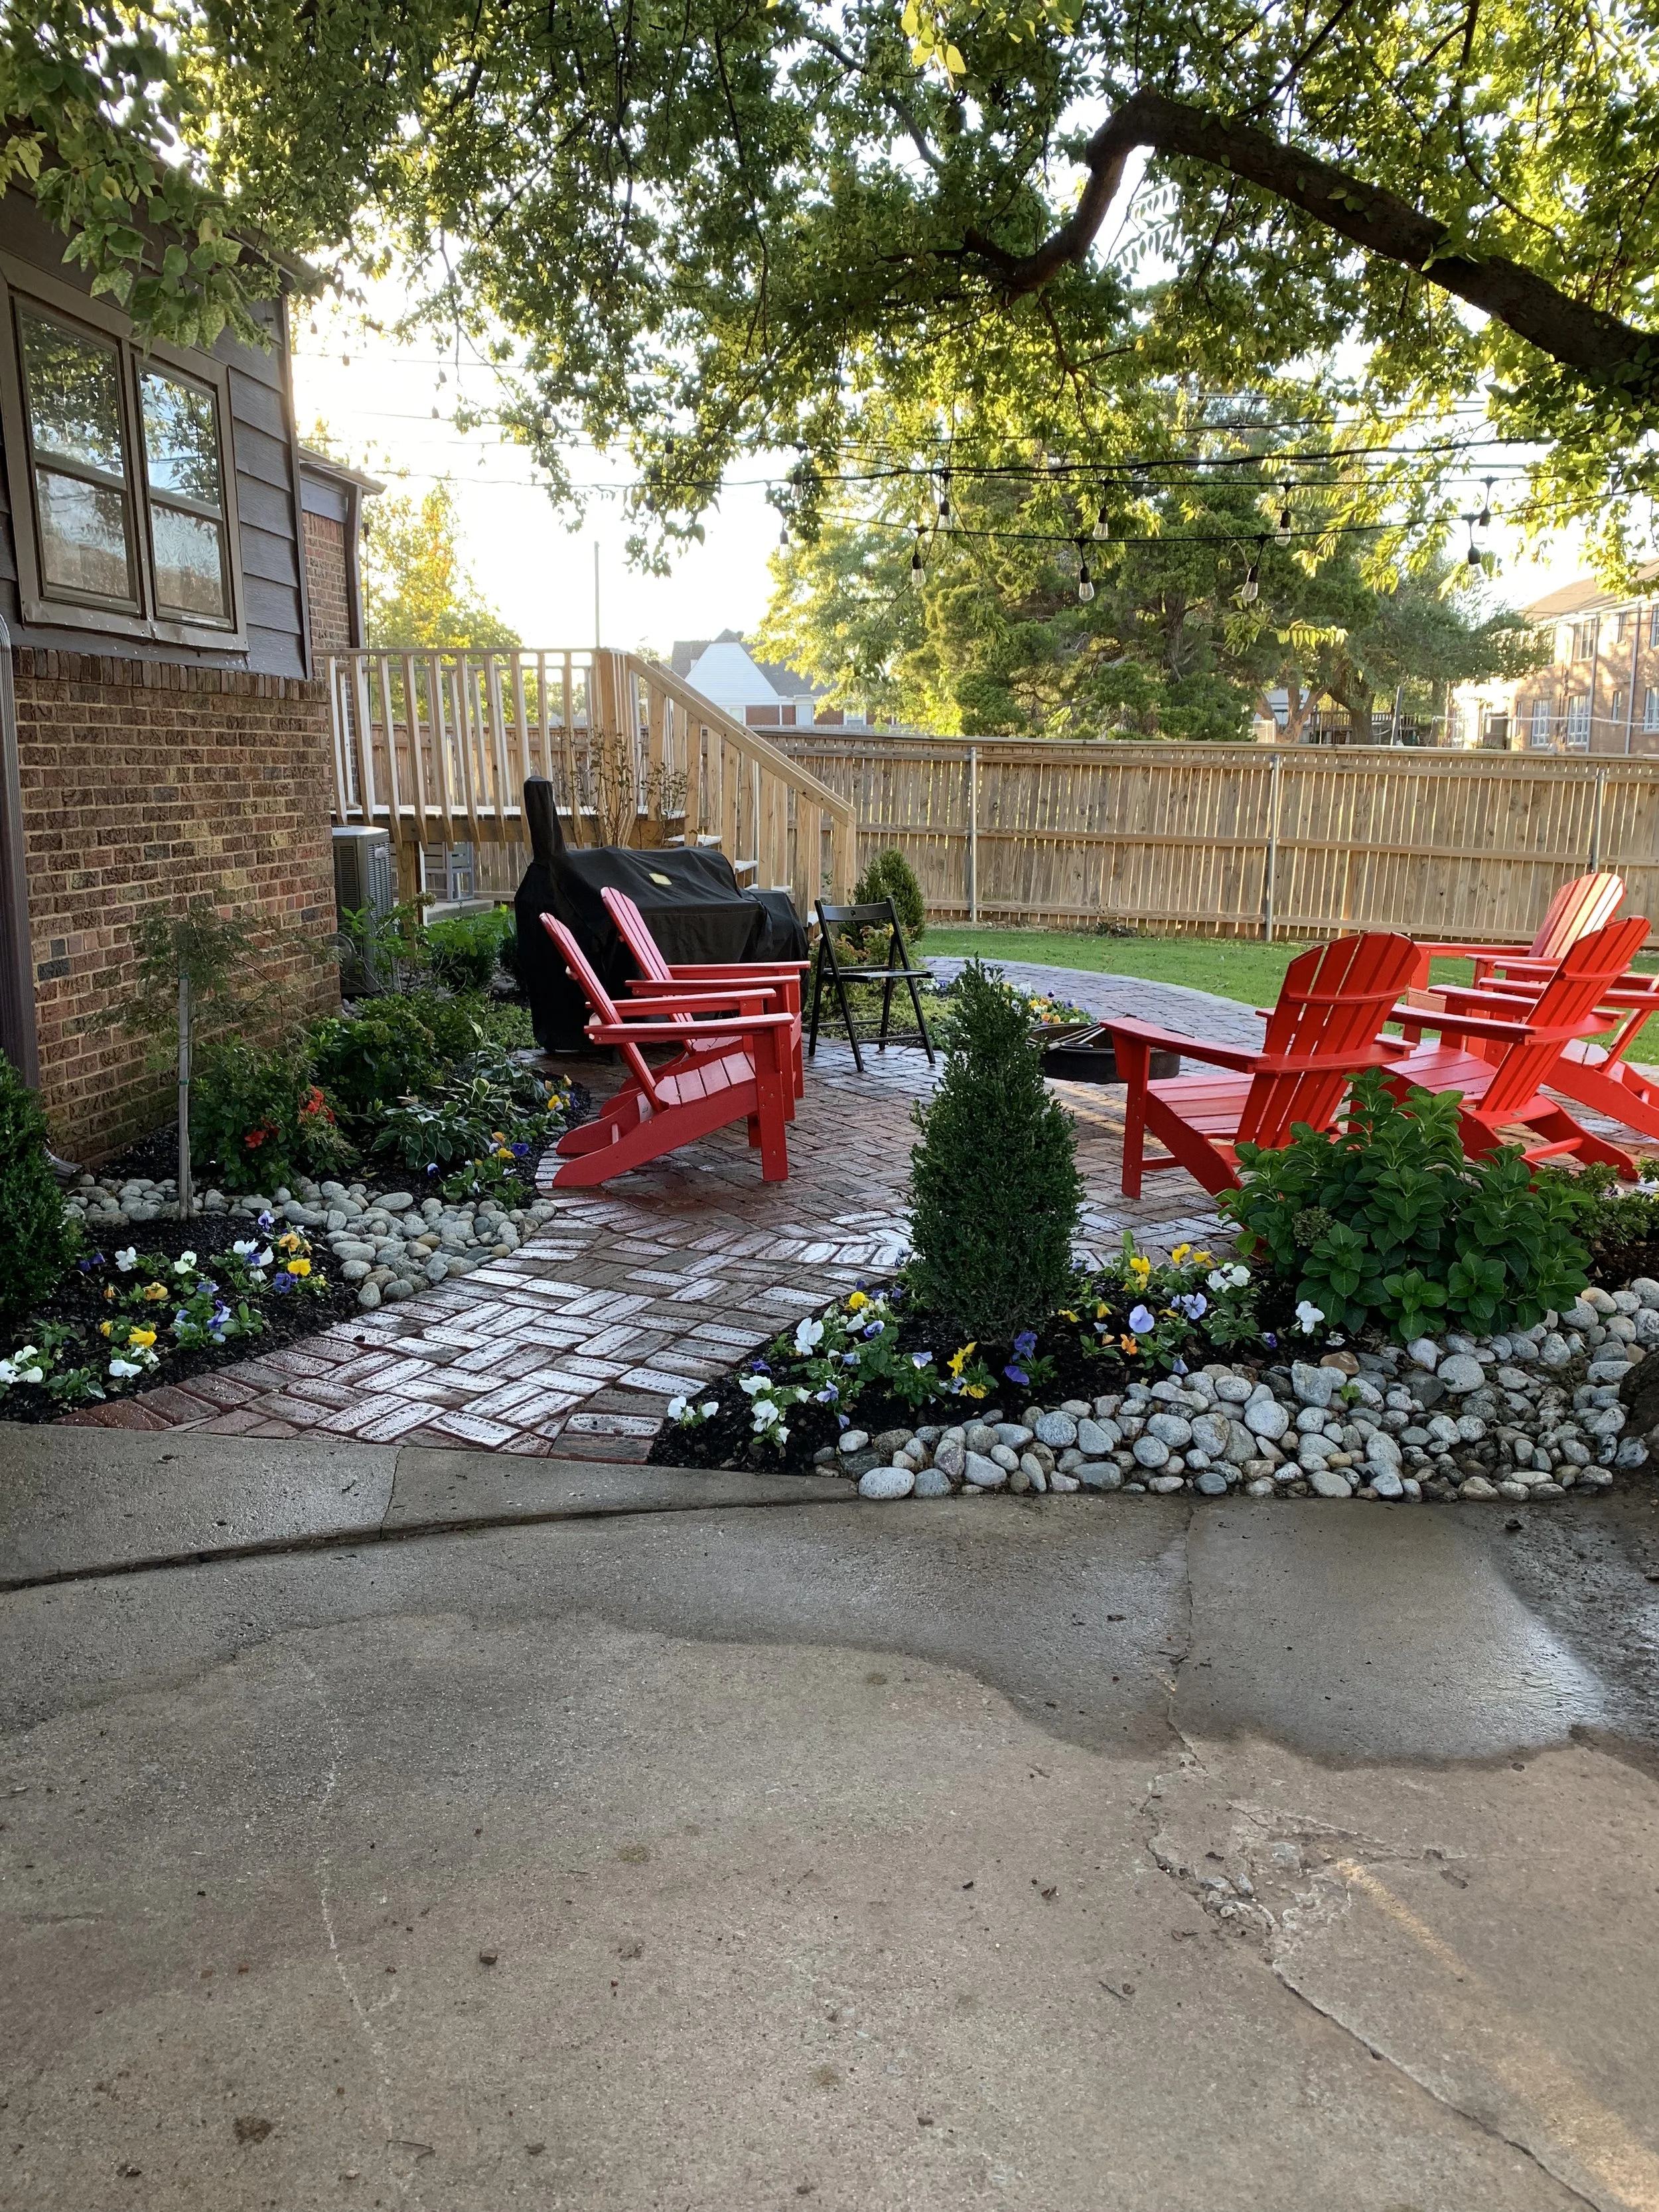
The newly hatched larva lives in water and develop into pupae all before they emerge as an adult. Simply reducing standing water around your residence will have a significant impact on mosquito population. Even pet bowls can be a breeding ground for mosquitoes.
From March through November, any object containing 5–7-day old water is a potential playground for the pest. Drain and refill pet bowls and bird baths every 3-5 days at the minimum.

Adult females are the only mosquitoes that bite. They typically attack in the evening, but occasionally are out during the day. Most afternoons you will find them resting in shrubs, trees and other shady areas.
After a female mosquito has obtained blood meal from a person or animal, they lay their eggs in water or a moist area where their eggs will receive sufficient moisture to hatch.
The entire life cycle of the mosquito takes only 4-5 weeks.

Adult females are the only mosquitoes that bite. They typically attack in the evening, but occasionally are out during the day. Most afternoons you will find them resting in shrubs, trees and other shady areas. After they obtain blood meal from a person or animal they lay their eggs in water or a place where it will get wet. They prefer dark colored containers and shaded areas for egg laying.
What Hall | Stewart can do to help you win the battle –
Barrier treatments are the most effective and proven method for managing pests. A barrier can be made by treating all vegetation, shrubs and trees, from the ground up to a height of 10 feet.
Insecticides must be applied to both the top and bottom of plant leaves which is difficult to achieve with a traditional pump-up, handheld spray can.

Power backpack misters are the ideal equipment for barrier treatments as they force droplets into the vegetation and underneath leaves. Other common resting sites, such as under decks, gutters, and other moist shady areas are included in the treatment areas.
Hall | Stewart’s Mosquito Control Program uses two control methods:
An insecticide is used to provide an initial a quick kill and residual control of adult mosquitoes.
A growth regulator is used to adversely affect the reproductive cycle of the mosquitoes by preventing larval development resulting in fewer adult mosquitoes.

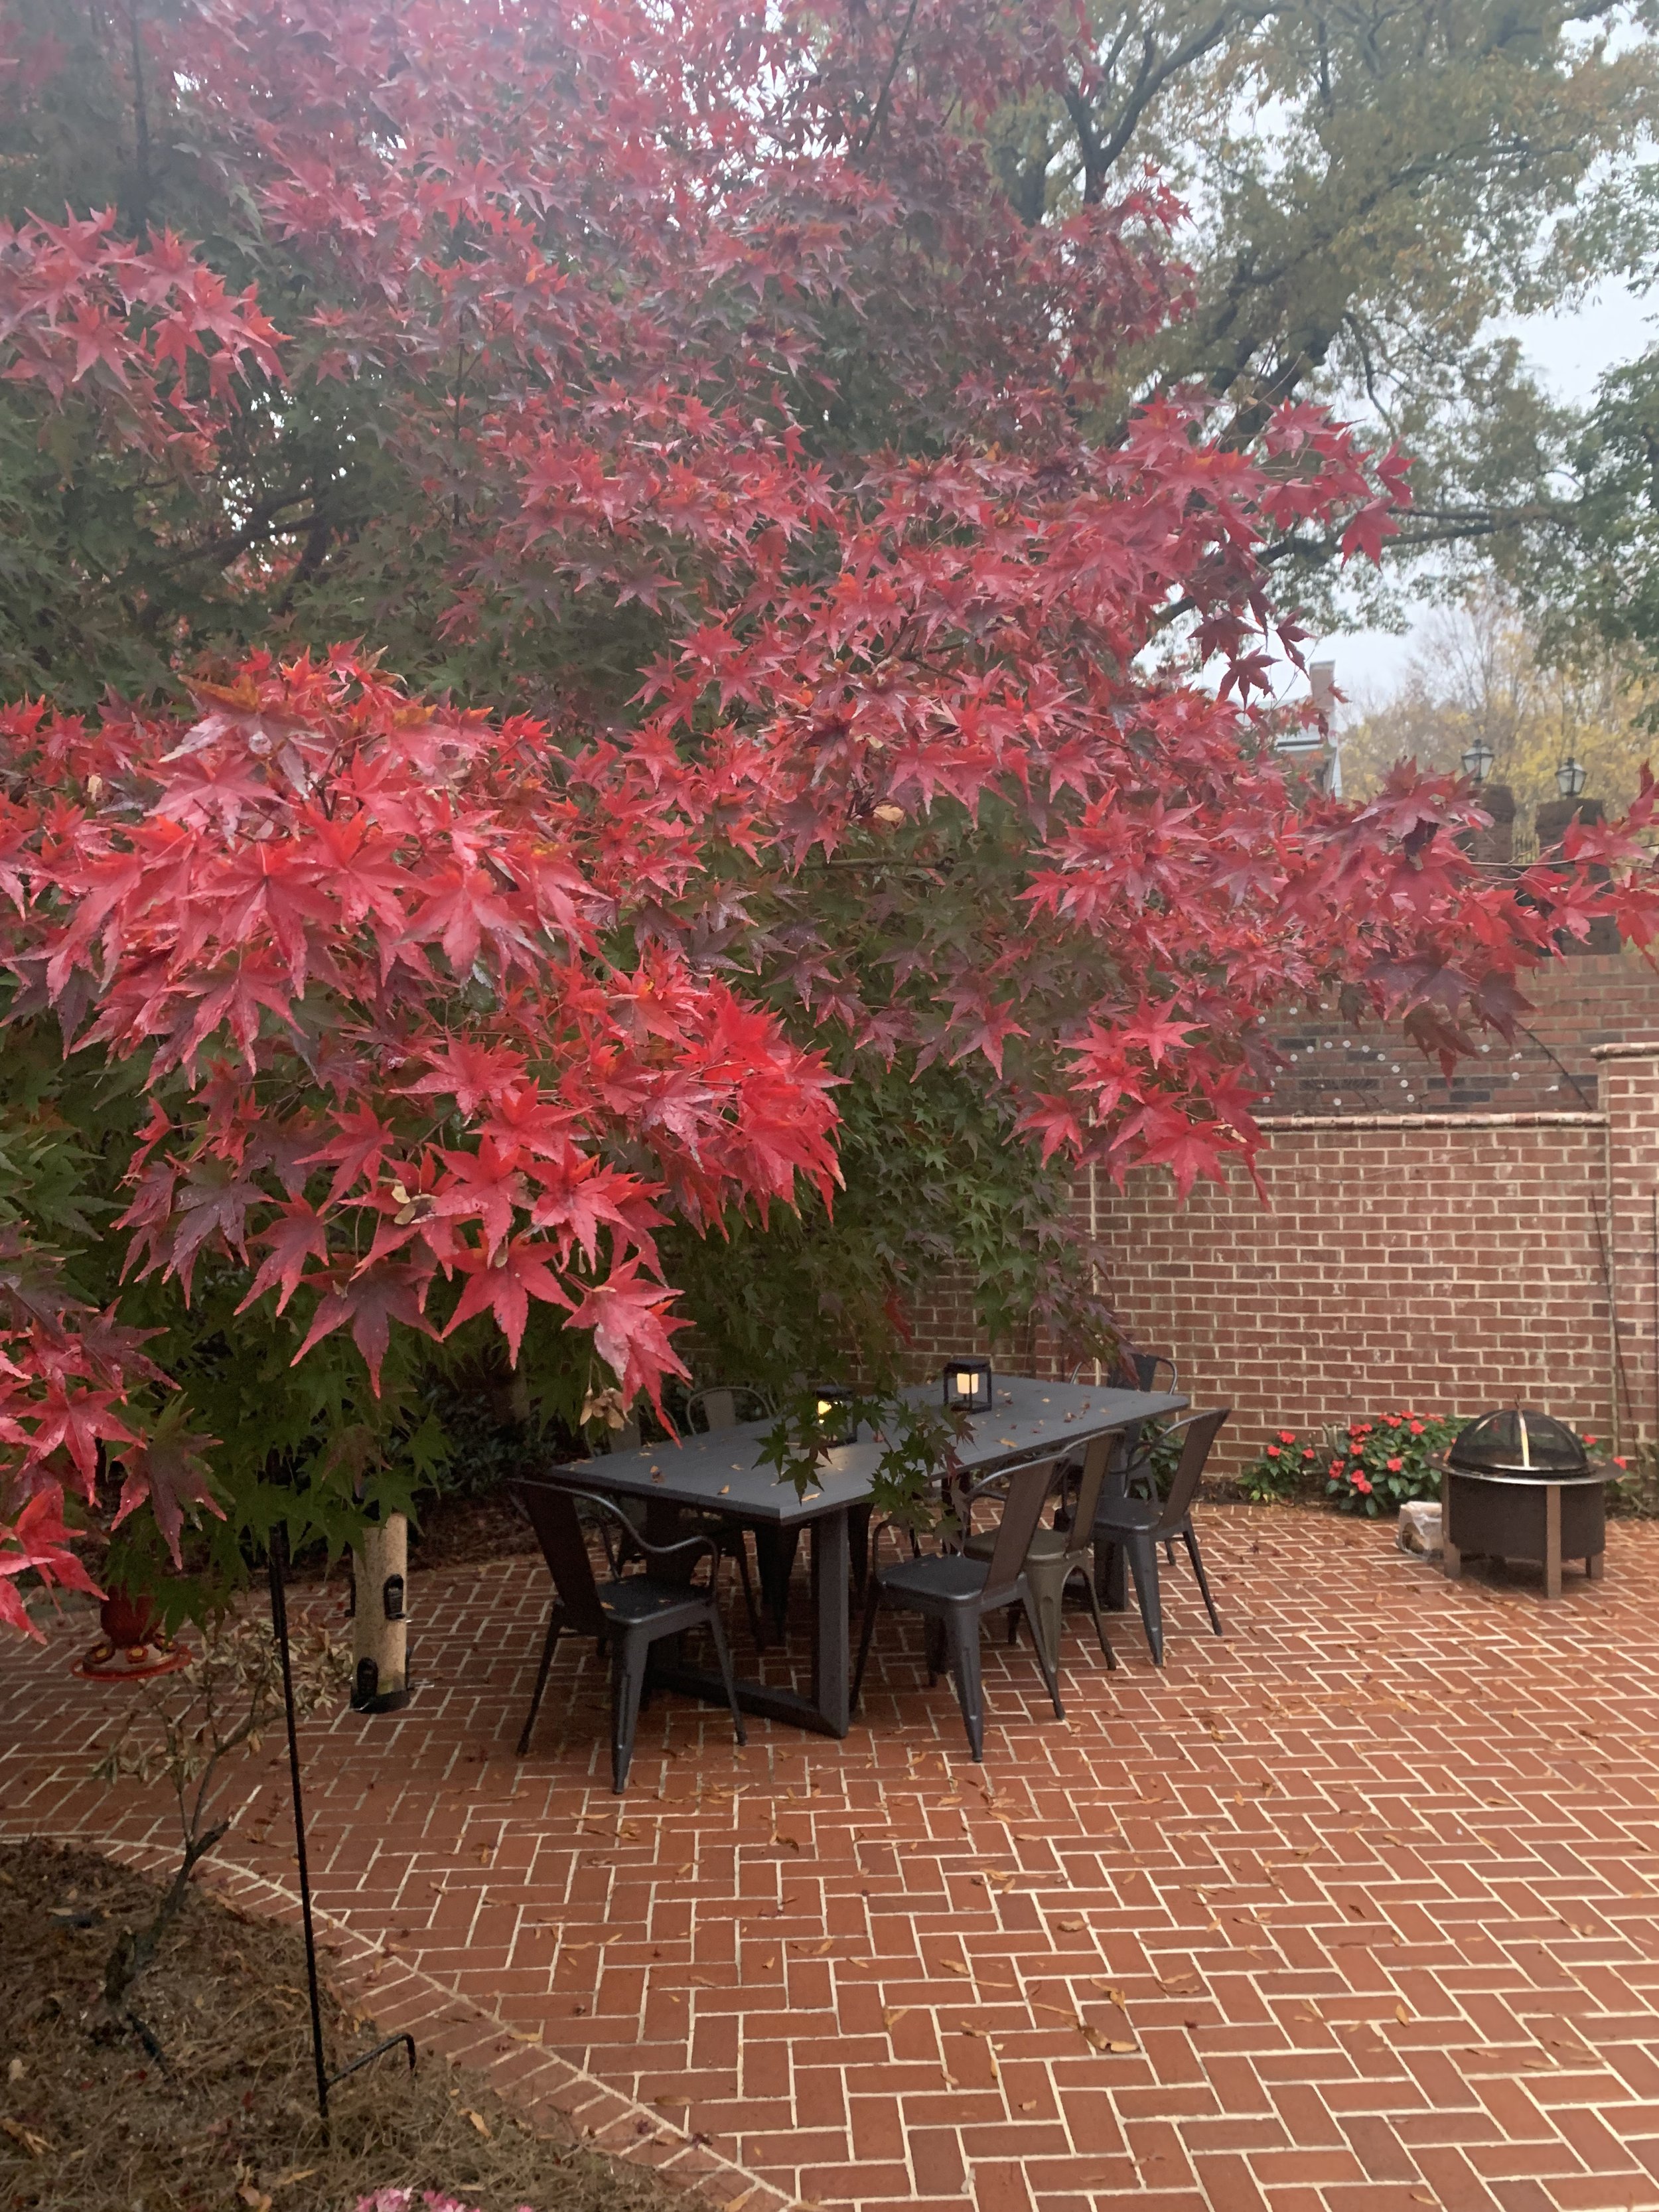

Due to the short life cycle of mosquitoes, regularly scheduled monthly barrier treatments will provide a significant reduction in the number of insects.
The battle is a team effort. You can win by reducing the breeding grounds for mosquitoes and by subscribing to the Hall | Stewart Mosquito Control Program.
We want you to have peace of mind when it comes to outdoor enjoyment this summer.
If you have not already subscribed to our mosquito control program, call or respond to this email.
Lorne Hall
Hall | Stewart Lawn + Landscape
(405)367-3873
Spring Dead Spot – Oklahoma’s #1 Turf Disease

Oklahoma is in the transition zone.
What is the transition zone?
It is the zone between where warm season turf grows best and the zone where cool season turf grows best.
Warm Season Turfs: Bermuda Grass and Zoysia Grass.
Cool Season Turfs: Fescue Grass, Rye Grass, Blue Grass
The transition zone is an overlap area where warm season grasses do well in the heat of the summer while cool season grasses do well in the spring and the fall, and some cool season grasses, such as tall fescue, continue to do well through most summers.
The transition zone is the area where you can’t go wrong growing either warm season grasses or cool season grasses.
Developing and maintaining a great warm season turf can be a challenge in the transition zone where winter temperatures often get colder than warm season grasses prefer and where it is common for an April freeze to stunt warm season turf green-up.
Consistently warming soil temperatures are critical for bermuda to exit dormancy and become active.
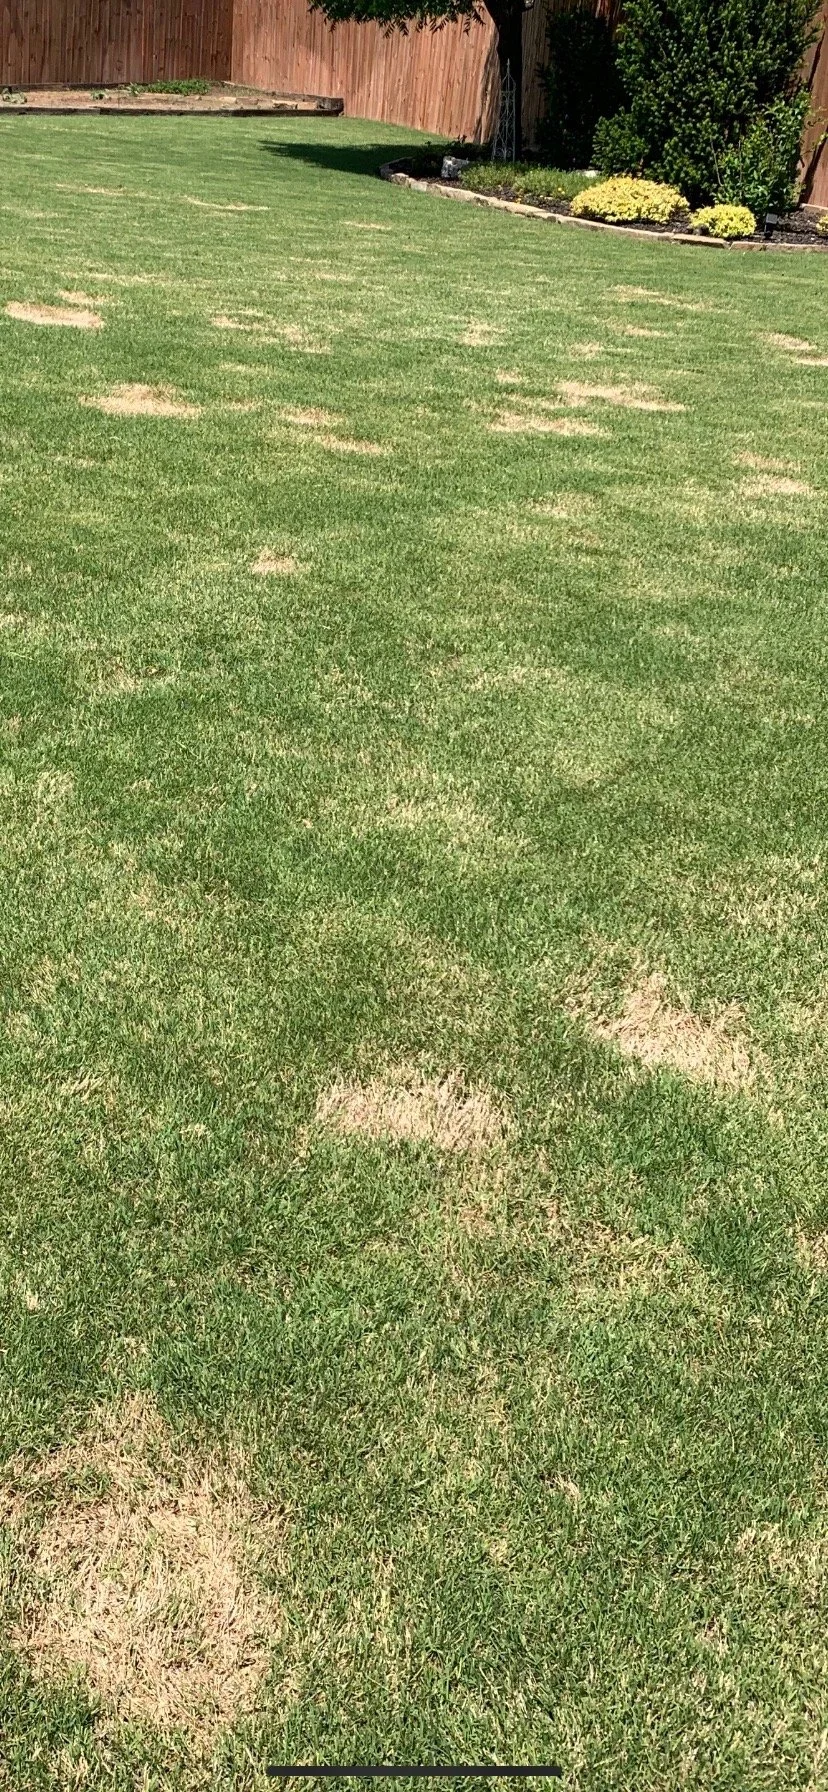
This year, the spring has been kind to Bermuda and zoysia lawns by not delivering us a freeze after the first of April. Green-up has been gradual and consistent.
Challenging areas remain. Lawns with partial shade, where soil temperatures lag, are trying to catch up. Thin turf areas, as well as lawns with weak root systems, are also behind in green up.
Our goal each week is to discuss the things we encounter while visiting lawns and landscapes. This time of year, as the warm season lawns are greening up, we get a lot of calls about dead spots in Bermuda lawns.
“What are all the circular dead spots in bermuda lawns?”
Is it grubs?
Is it damage caused by a weed killer?
These are common assumptions, but they are neither.
It is a disease…Spring Dead Spot.
Spring Dead Spot is widespread in Oklahoma and holds the title as the number one disease of Bermuda lawns in the region. You can count on there always being some Spring Dead Spot, but some springs the disease is worse than others. When the fall, winter, and spring conditions are right for Spring Dead Spot, any Bermuda lawn in our region has the potential to be a host for the disease.
Let’s look at the history, symptoms, disease cycle, causes, and possible solutions for preventing and controlling this mysterious Bermuda grass disease.
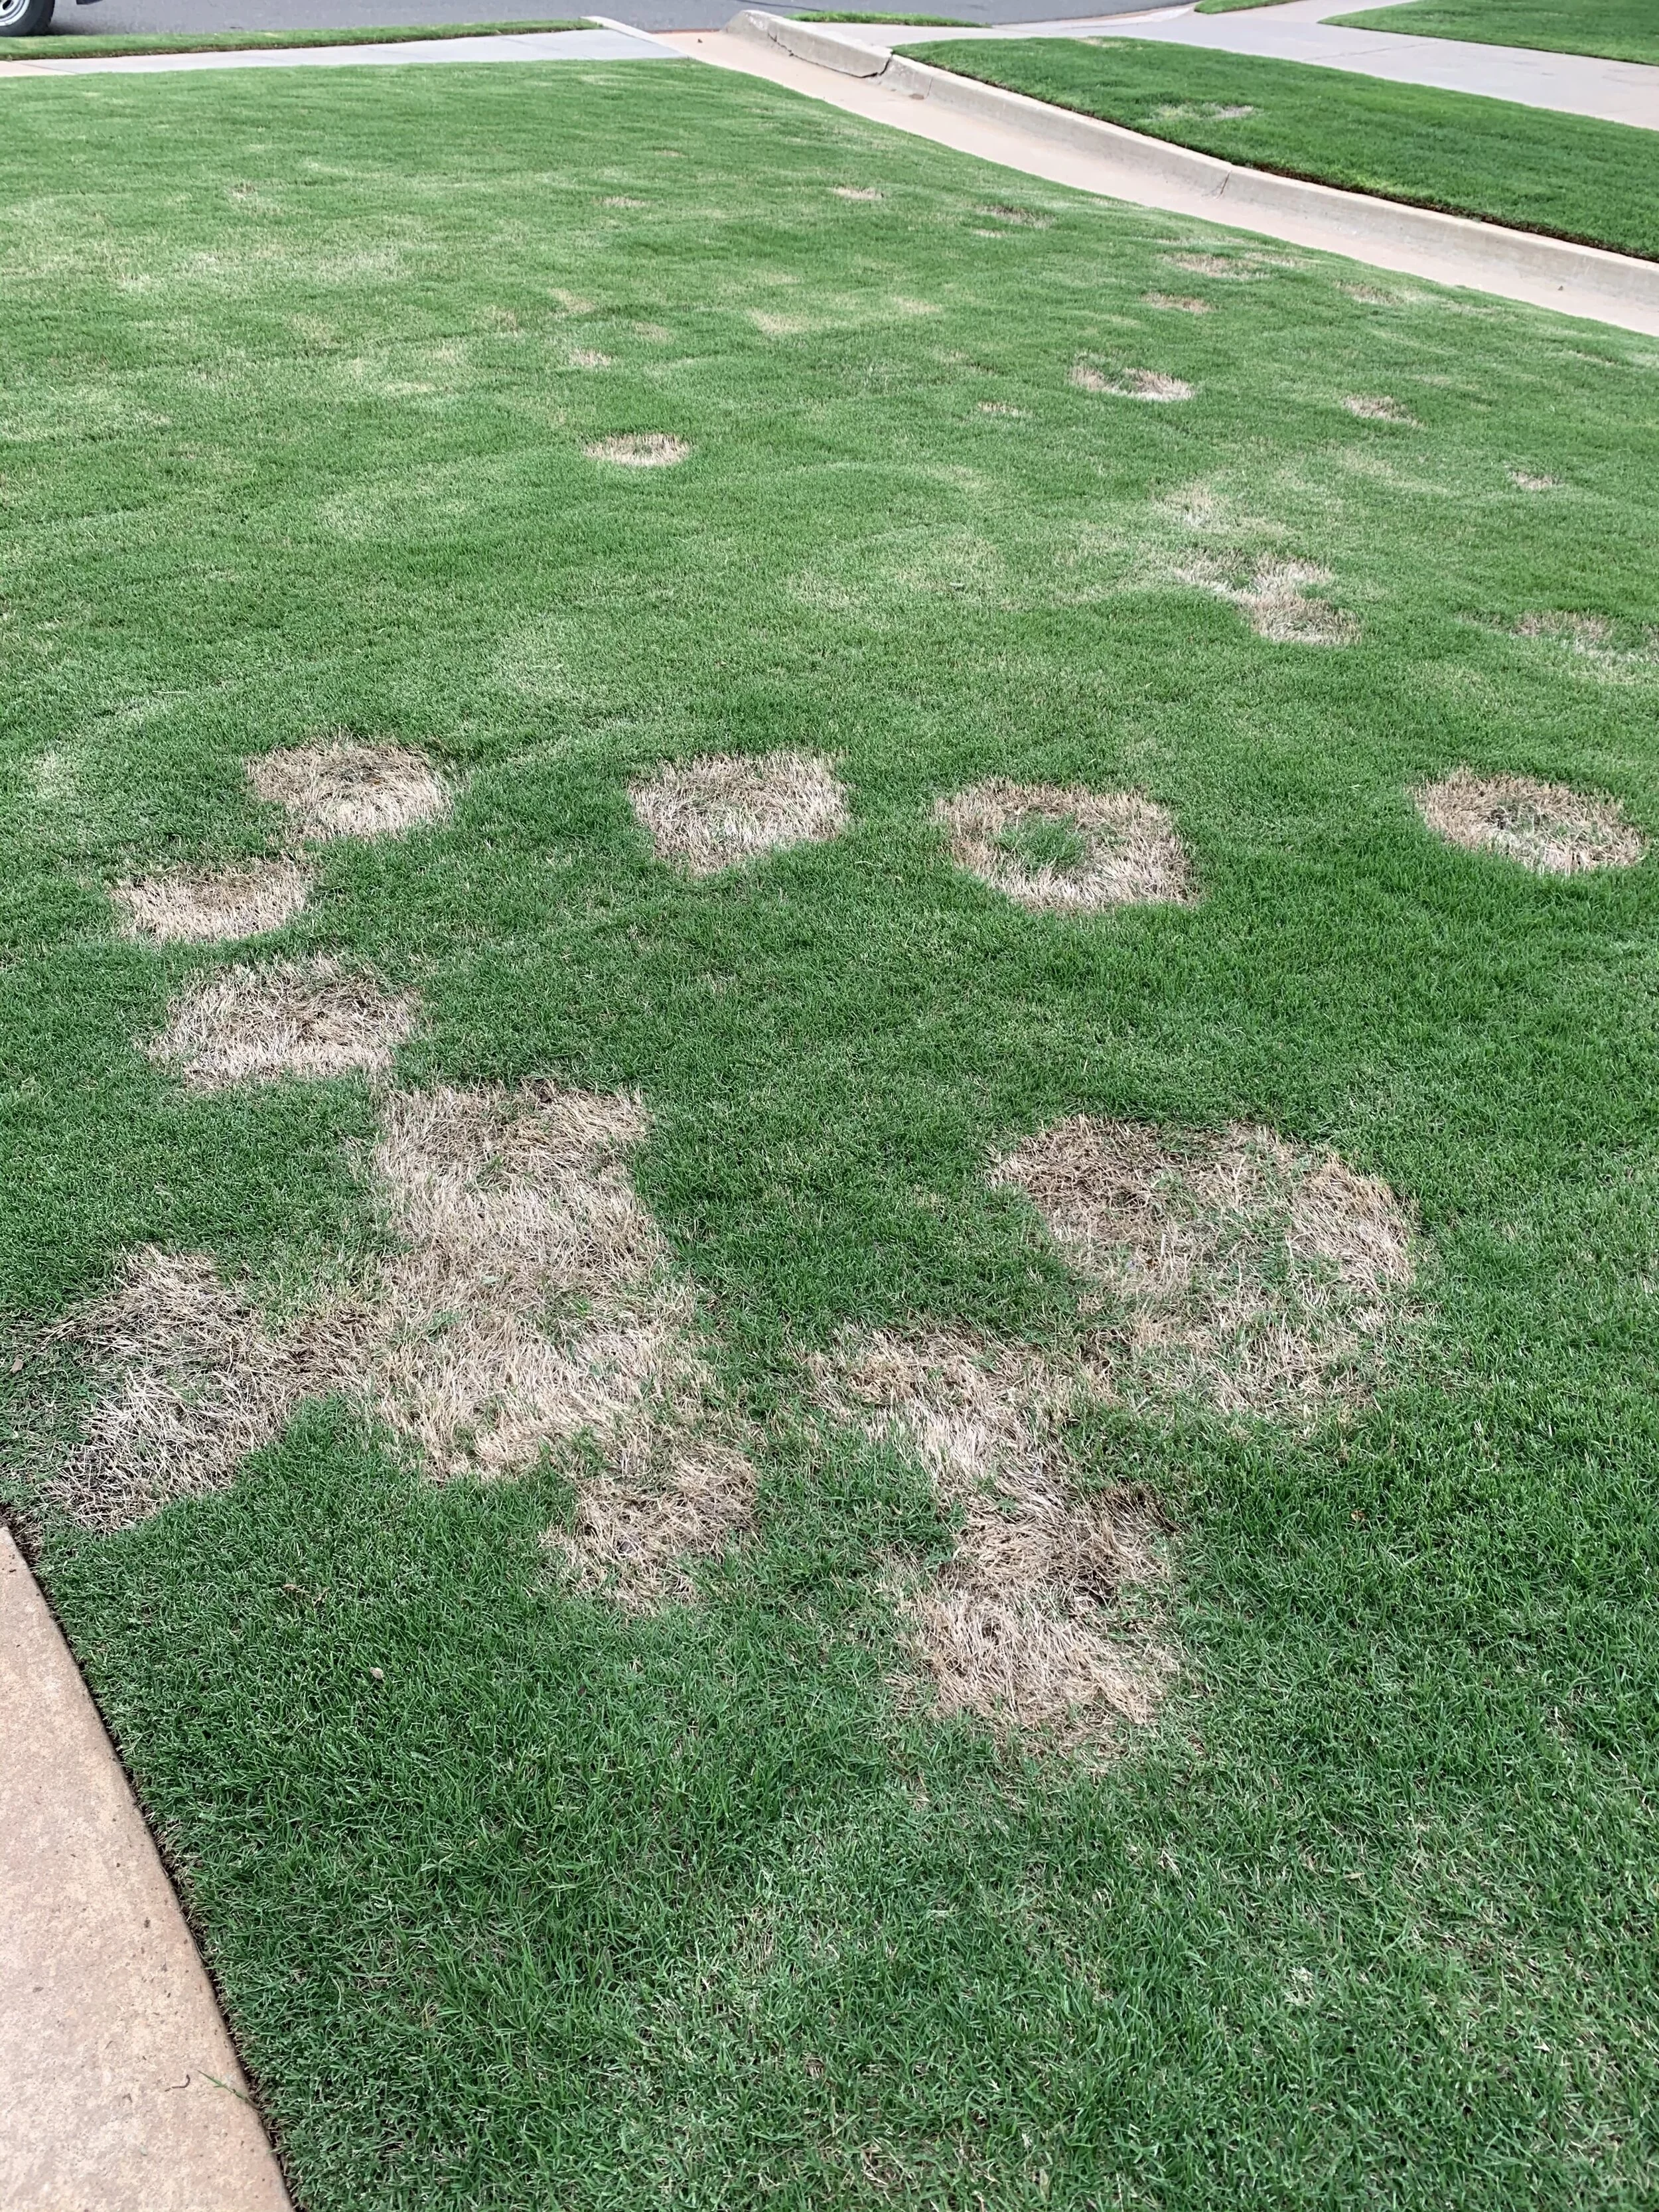
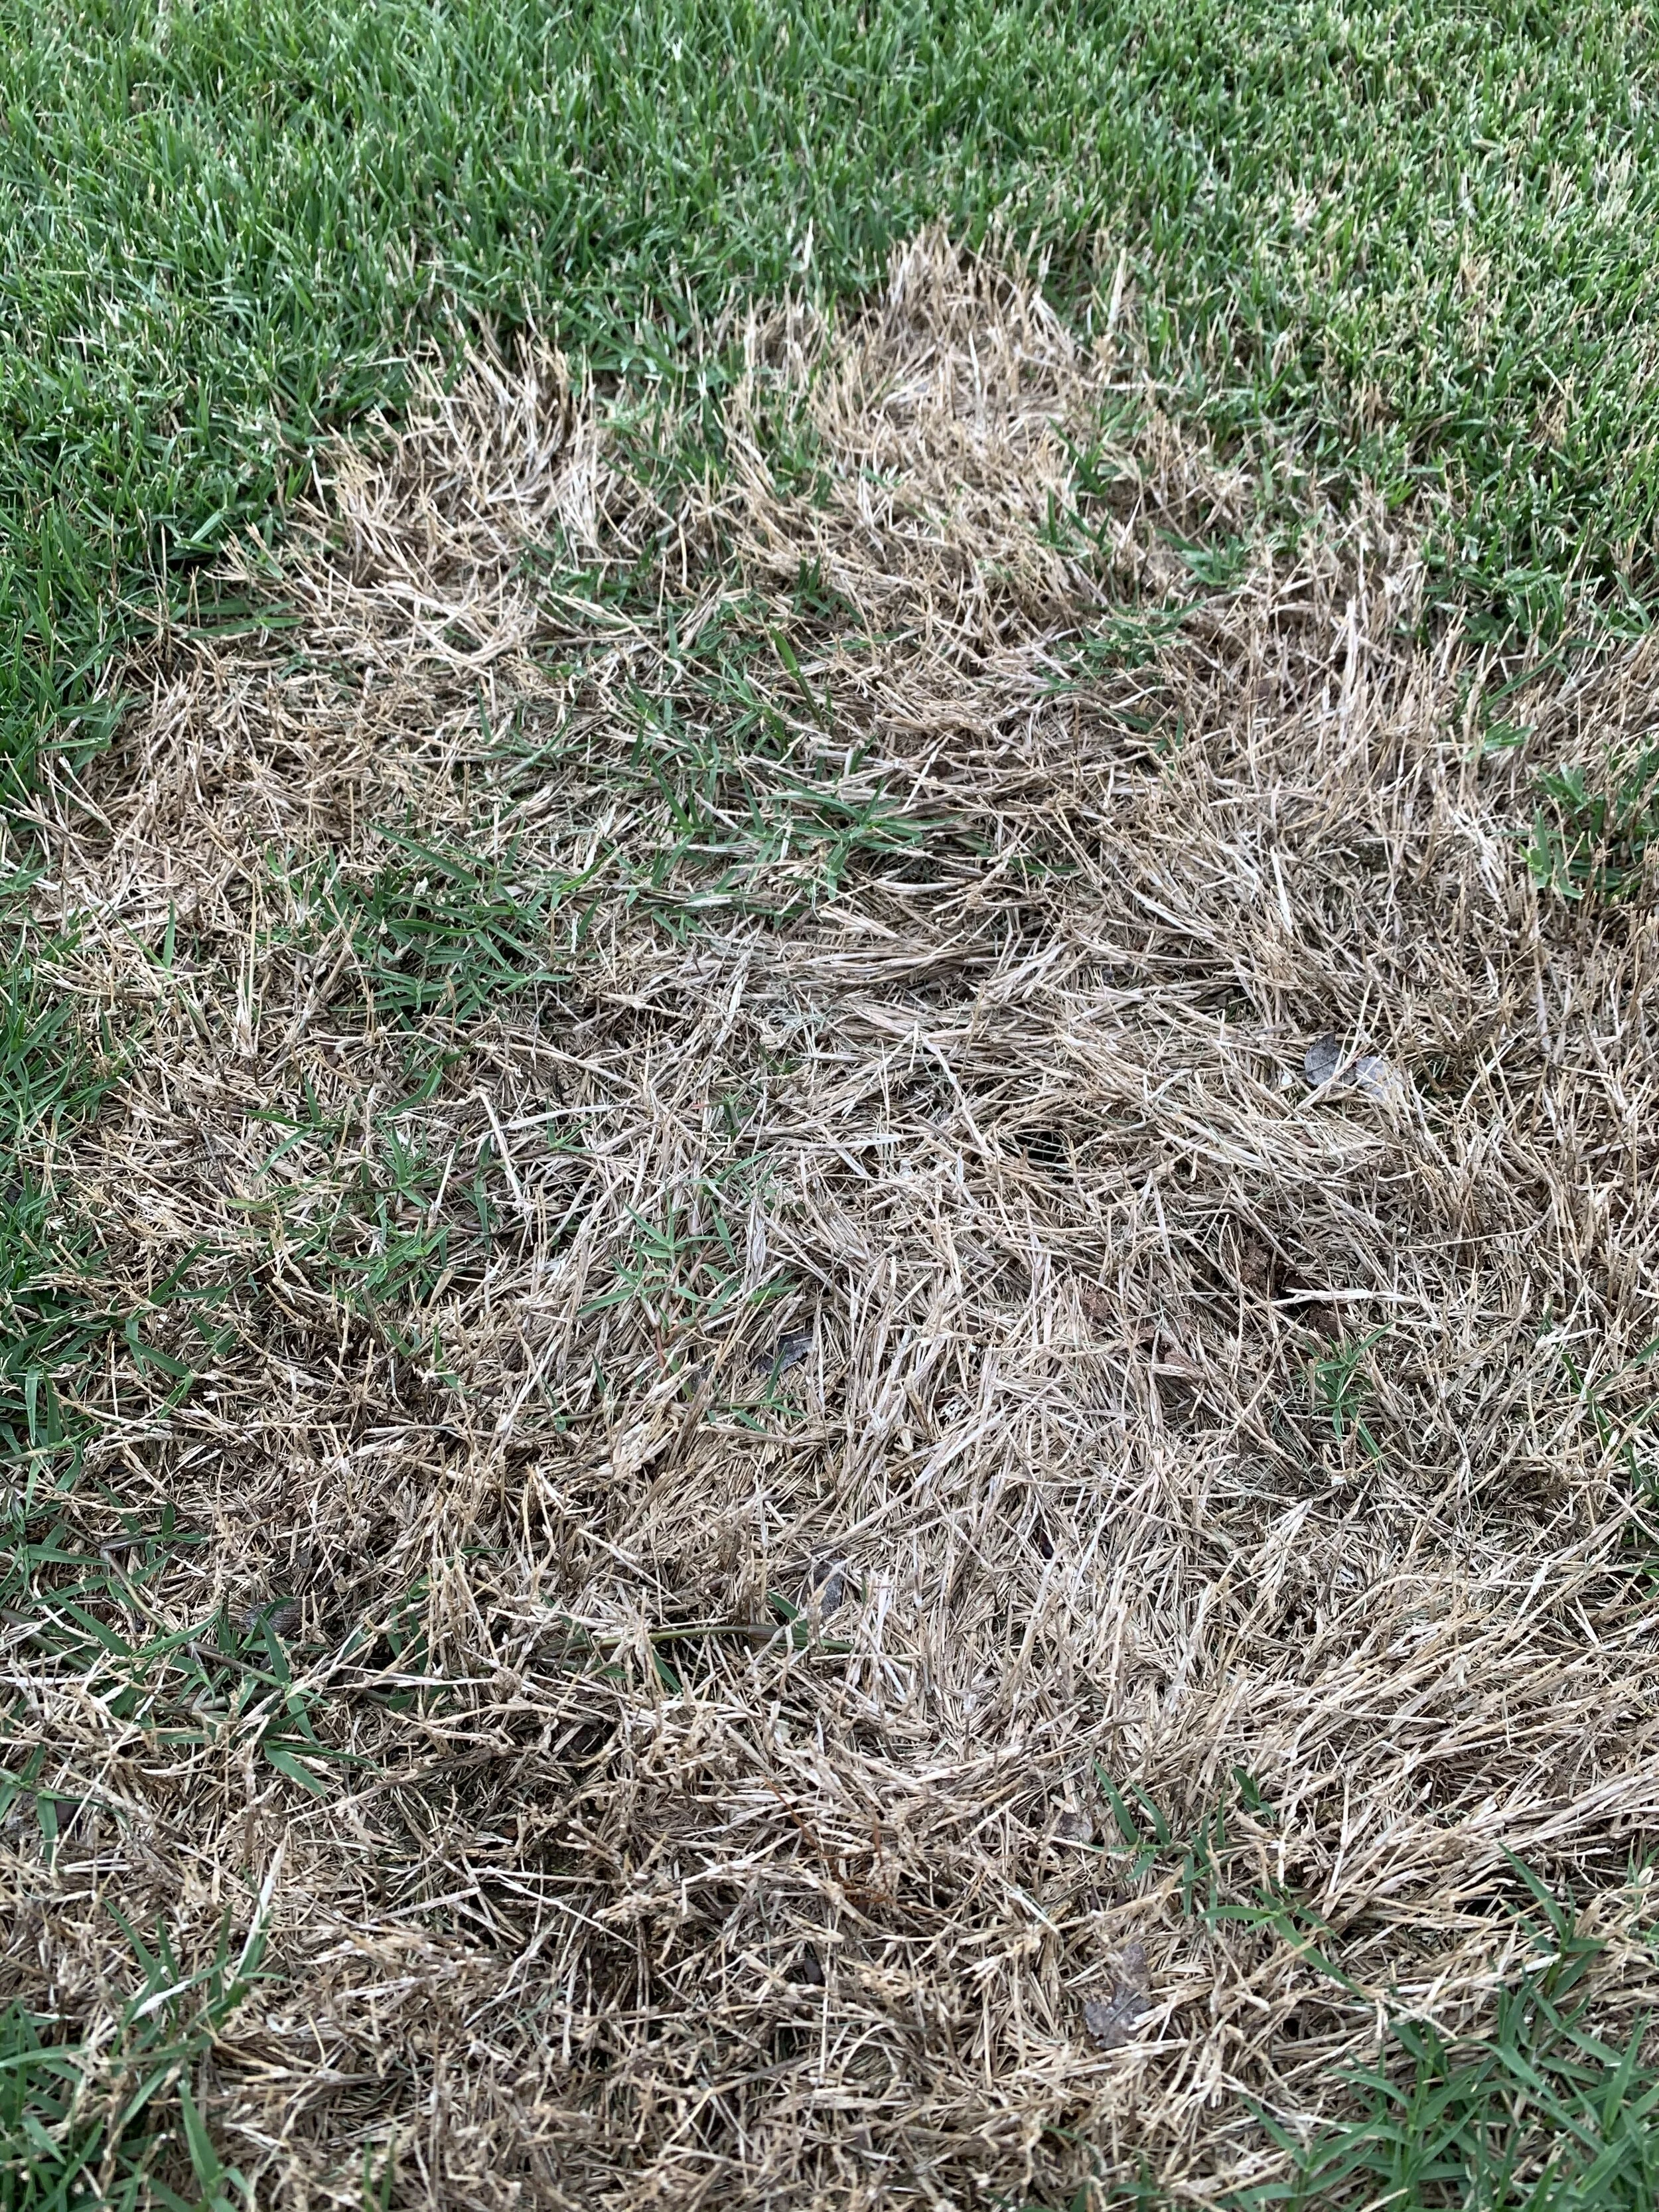
Spring Dead Spot patches will begin to develop grow of healthy grass in the patch after a couple of years.
History
Spring Dead Spot has been a problem for a long time. The first case was discovered in Oklahoma in 1936 by a golf course superintendent following a harsh Oklahoma winter.
By the 1950s, the unknown disease had become so prevalent in our state that Oklahoma State University plant pathologists began simply referring to the disease as Spring Dead Spot.
In the 1960s, the disease became so widespread in suburban Atlanta lawns, particularly hybrid Bermuda, that the University of Georgia launched a research program. After three years of research, the university still didn’t know the cause and never could get the disease to reproduce in test plots.
In more recent years, Oklahoma State University has focused research on the disease. What they have found is the disease is tough to eradicate, tough to manage, and unpredictable.
Symptoms
Spring Dead Spot makes an appearance in the spring with ugly, rounded, bleached white dead spots in Bermuda lawns. The spots range in size from a few inches to a few feet in diameter. If you dig up the roots in the area, they will appear black and rotting.
Damaged patches tend to recur in the same spots year after year. After a couple of years, the center of the spots will begin to develop a patch of healthy turf.
Spring Dead Spot typically isn’t active in newer lawns. It is common for it to first make an appearance 3 or 4 years into a new lawn. Just as strangely, the disease often becomes less active after a few years. All this just adds to the mystery of the disease.
This coincides with my experience: the disease is more common in newer neighborhoods and rarely found in older established areas of the city.
Because the pathogen causes rotting of the roots, rhizomes and stolons, the susceptibility to winter injury increases in the affected areas. The colder the winter or the harsher the April freeze, the more spring dead spot damage we see.
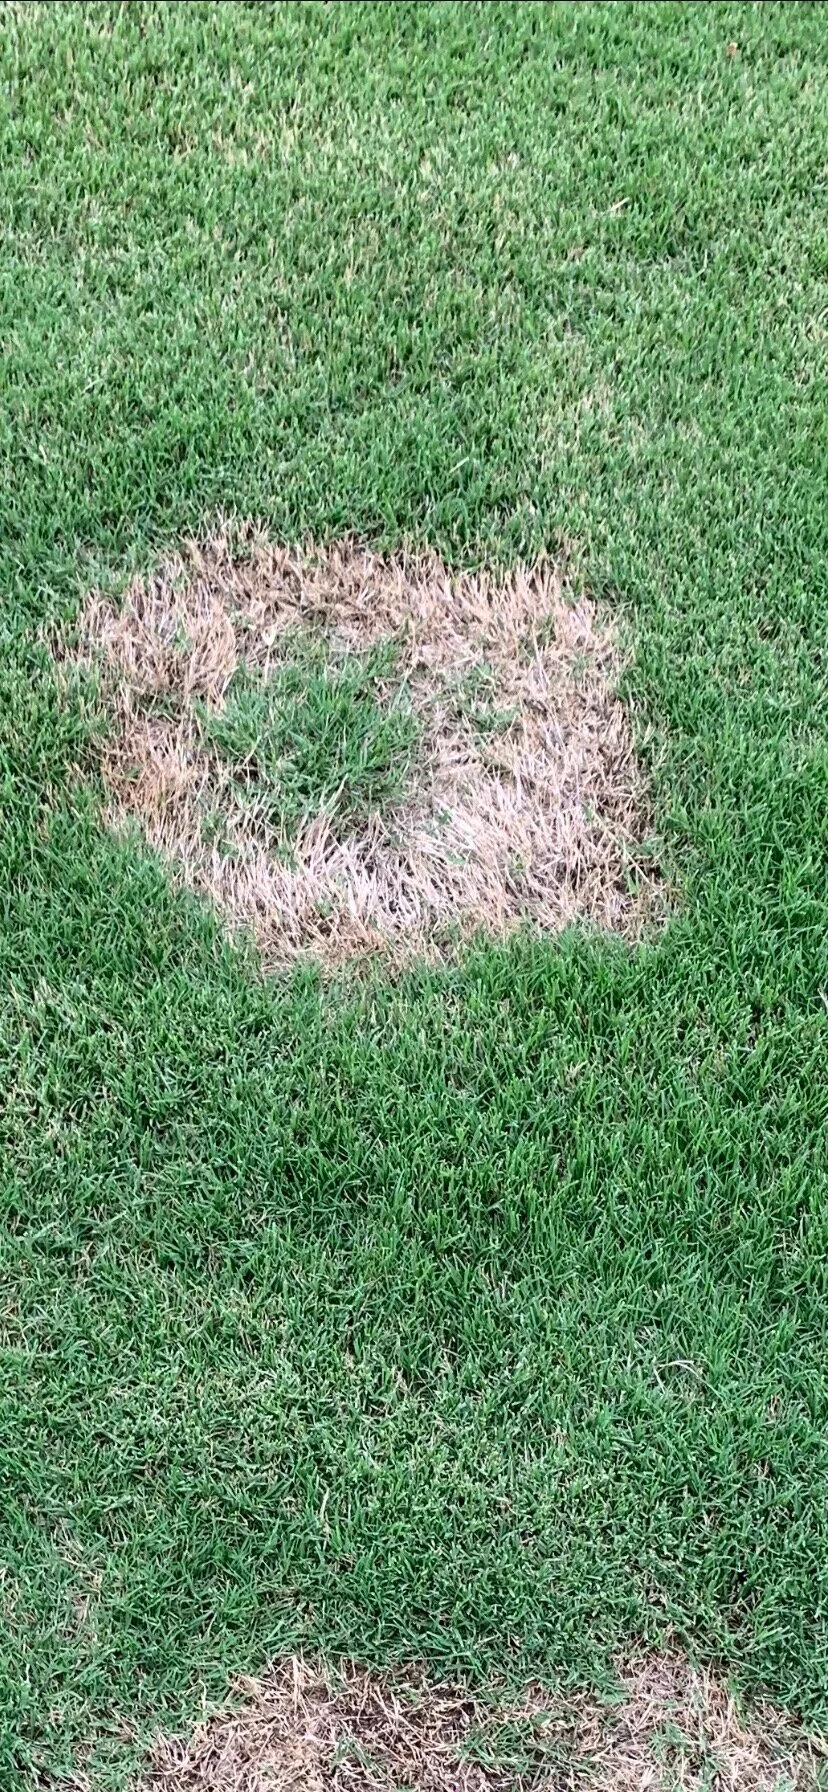
A better example of healthy turf grass growing in the Spring Dead Spot patch after a couple of years.
Disease Cycle
In Oklahoma, the disease becomes active starting in September as soil temperatures begin to cool and reach 70 degrees and remains active through the winter if soil temperatures stay above 50 degrees.
Recovery starts in the late spring and continues through the summer as healthy turf around the Spring Dead Spot area grows into the damaged area.
Because the damaged spot often doesn’t have time to completely heal and develop strong roots, the same spots reappear each spring. Research shows that the spots can reappear in the spring because of freeze damage, even if the disease isn’t active that year.
Causes
The most serious Spring Dead Spot outbreaks occur in highly managed Bermuda, often hybrid types. It is a common problem in turf that receives heavy nitrogen fertilizer applications, mowed at low settings, and receives frequent foot traffic.
Turf grass that receives late-season applications of nitrogen to extend green color are more prone to the development of Spring Dead Spot.
More cold tolerant varieties of Bermuda grasses have less problems with the disease than hybrid types that are less cold hardy.
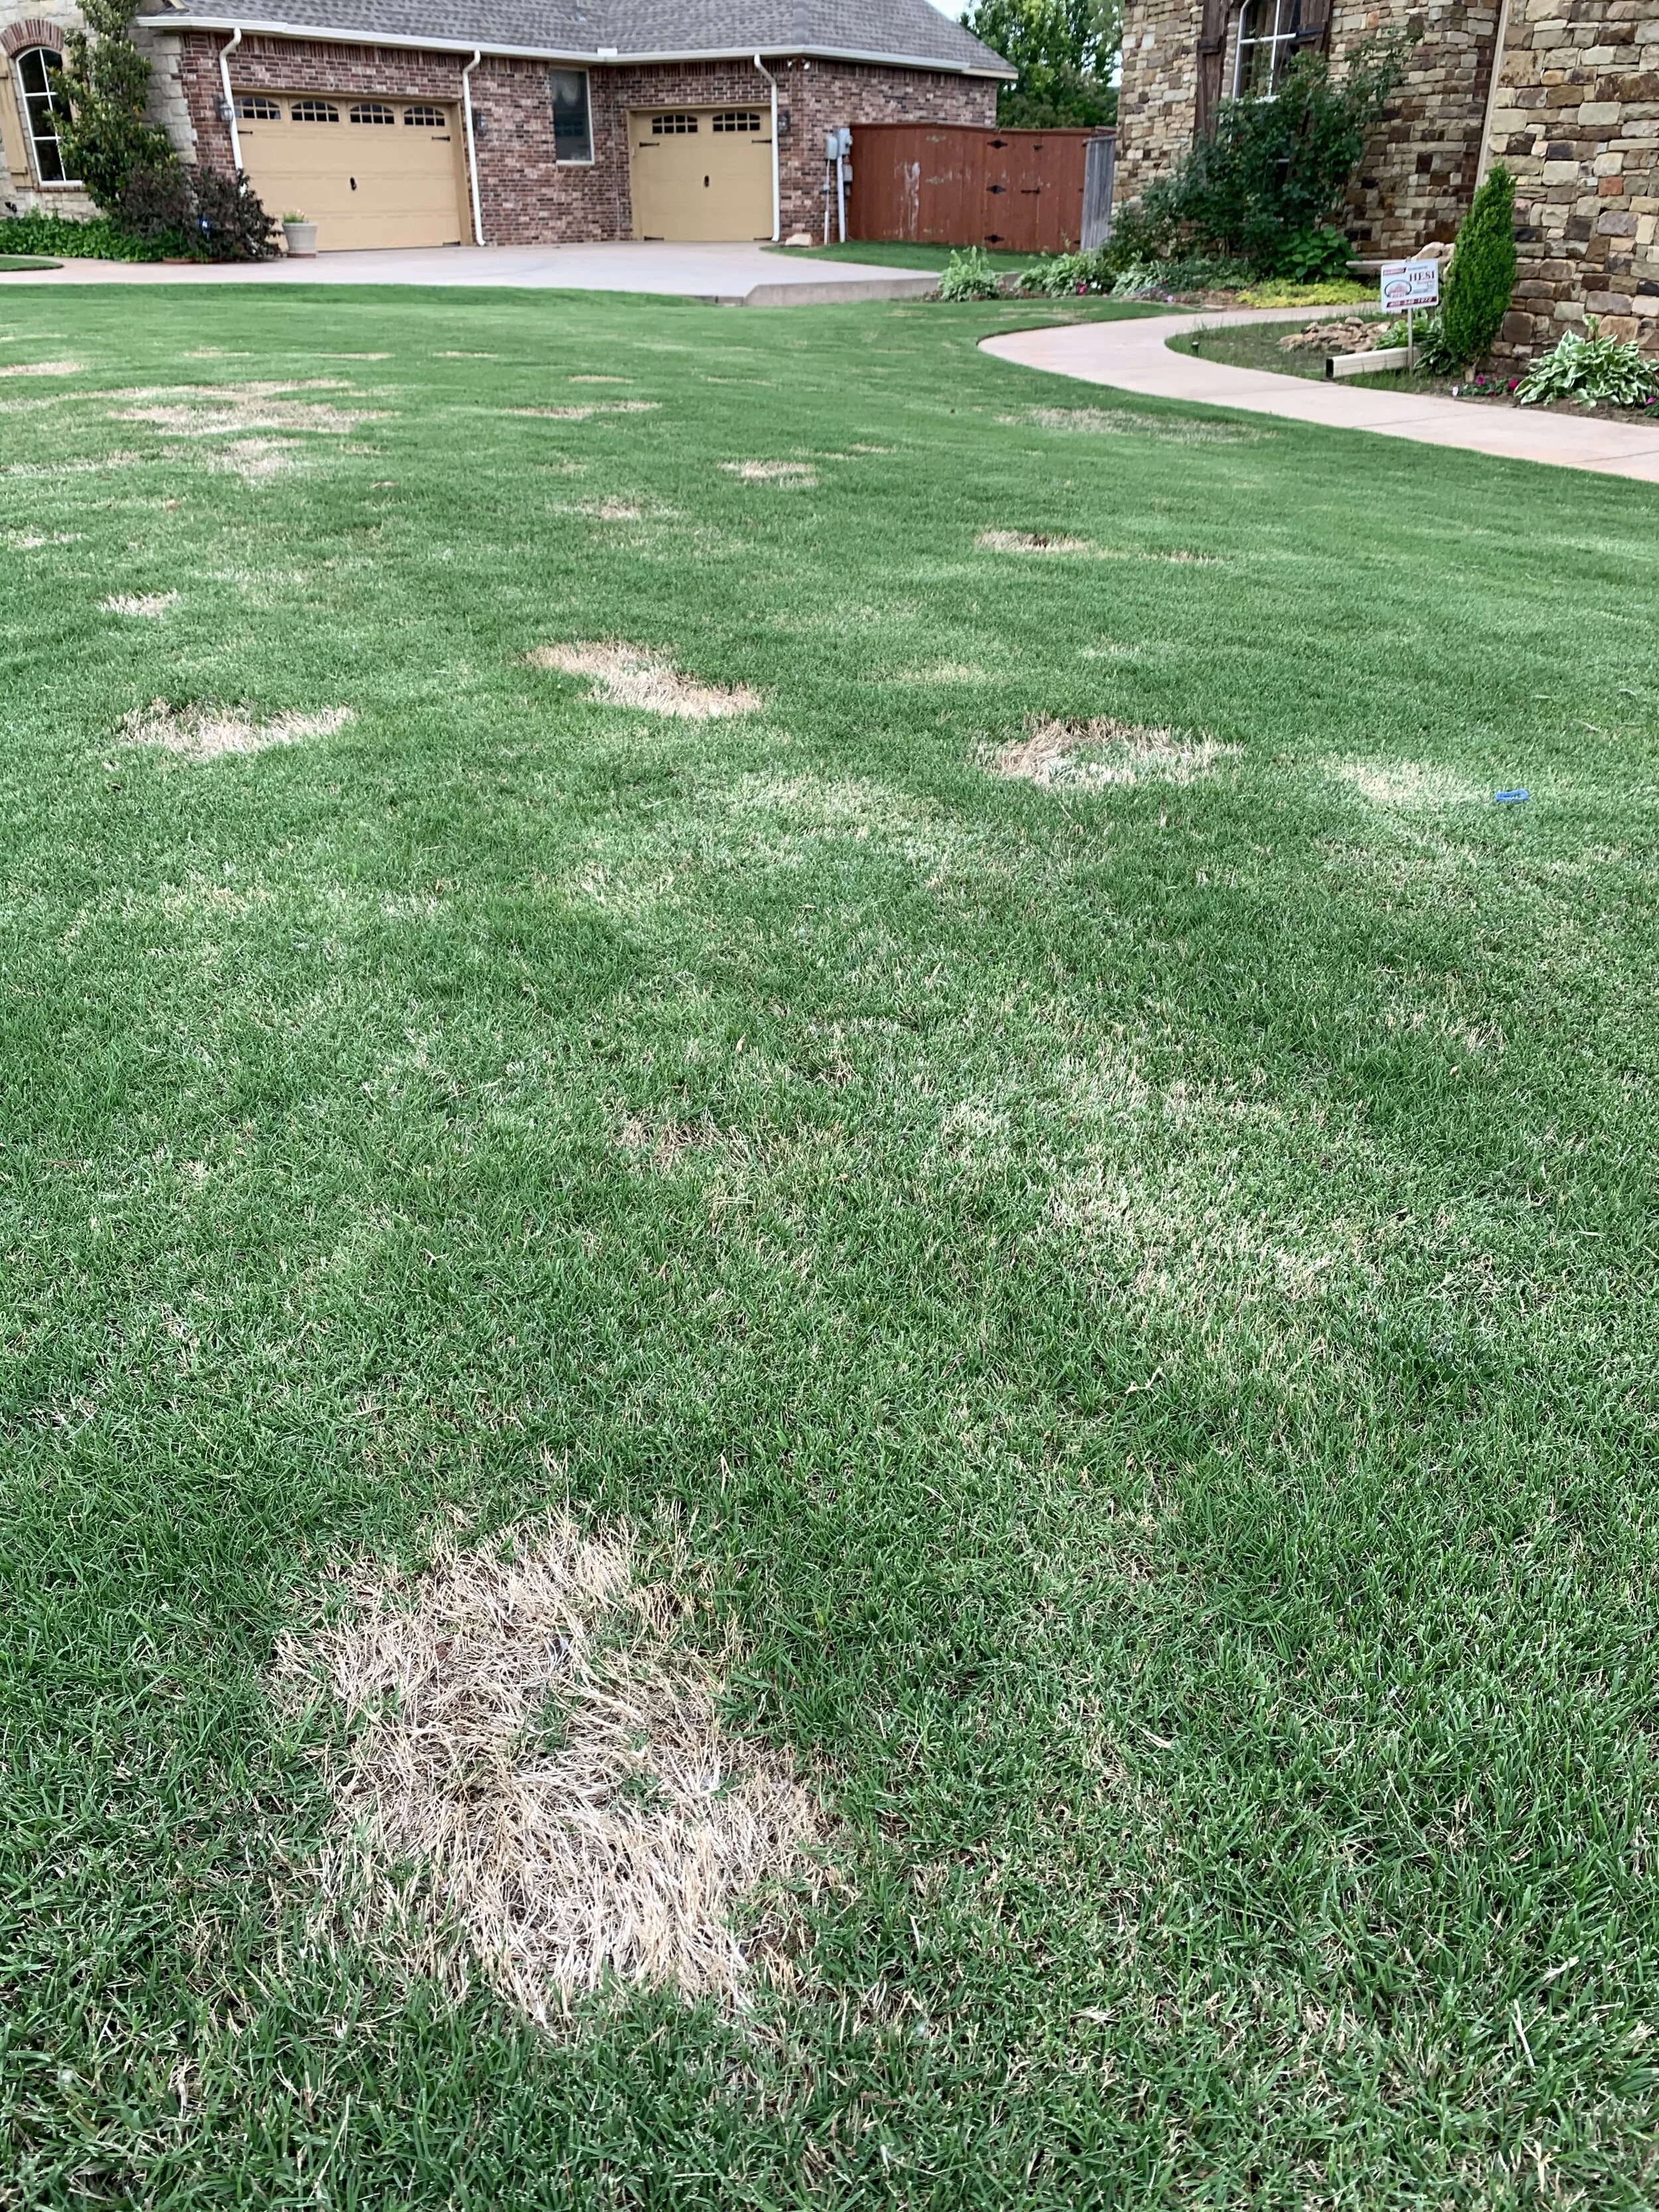
Cultural Practices for Spring Dead Spot Management
No single management practice will provide complete control of Spring Dead Spot. The best prevention and control of Spring Dead Spot comes from practices that promote a dense turf and a healthy root system. Because the disease is more prevalent in tight compacted soils, which often have poor root systems, annual aeration is important as it will promote a healthy root system and lessen the probability of the disease.
Although the impact of soil pH is unclear on the development of Spring Dead Spot, an annual soil test to ensure the correct pH is maintained will encourage plant vigor and reduce turf stress.
Recovery improves with a fertilizer routine that ensures the lawn will receive 3 to 5 pounds of nitrogen per 1,000 square feet during the growing season with the first application being made in April to May as soil temperatures consistently rise.
Applications of more than .5 pounds of nitrogen after September 15 must be avoided. Some research shows that heavier applications of potassium in the fall promotes winter hardiness. Others believe, soils in our region already contain sufficient potassium, if the soil pH is near neutral.
The desire to have a green and actively growing bermuda lawn as long into the fall as possible may be the most common practice that leads to the development of Spring Dead Spot.
If you have small areas of the disease in your lawn, the best solution is to remove the soil in the damaged area to a depth of 12” and replace it with new soil.
Raising the mower height going into September will increase the leaf surface resulting in higher levels of carbohydrate reserves in the roots. The result will be more insulation for winter temperatures.
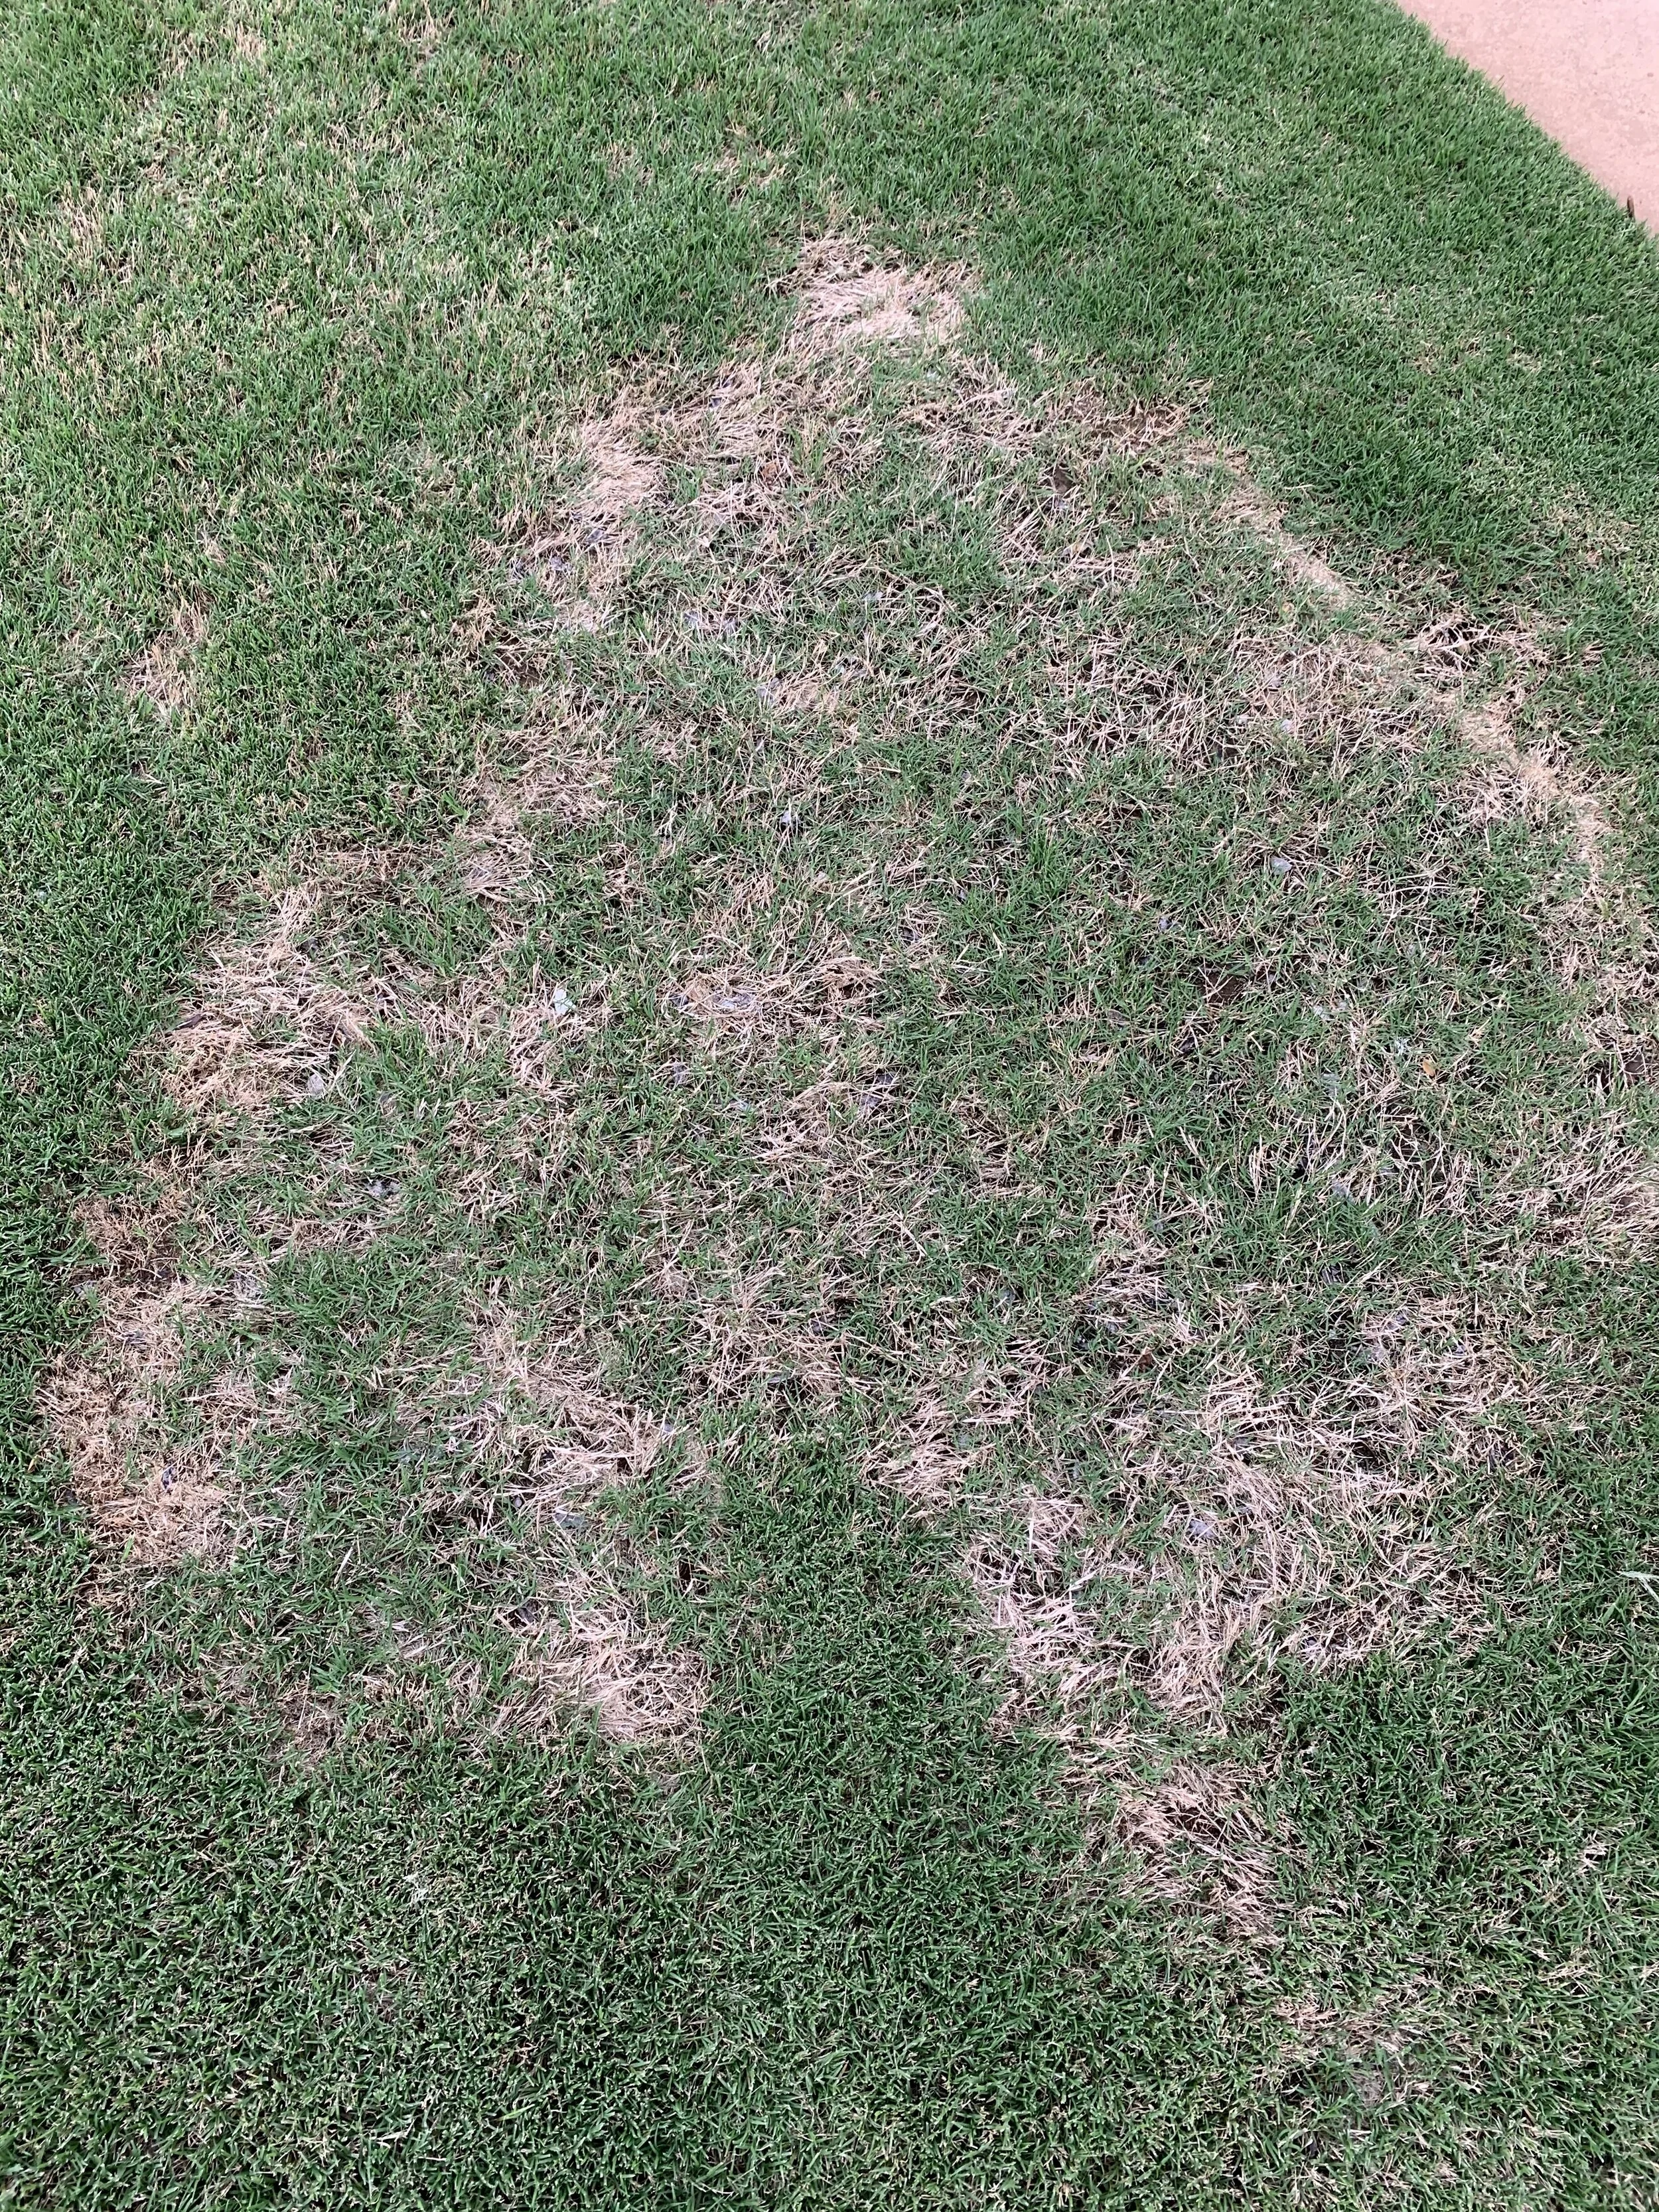
Spring Dead Spot after a few seasons of recovery.
Chemical Management
A fungicide applied in the fall as soon as soil temperatures fall to 70 degrees followed by a second application in 30 days may result in control of the disease. It is important to commit to two applications as research shows a single application is generally not effective. Spring applications of fungicides are not as effective as the disease is not active in the spring.
Keep in mind fungicide results can be inconsistent from year to year. Control through fungicides requires a 2-to-4-year commitment for consistent results.
Prevention and control of Spring Dead Spot can be tricky.
The disease can be very frustrating.
Everyone wants their turf to look the best, but if you have a Bermuda lawn, there is always the chance Spring Dead Spot will make an appearance.
If you are experiencing Spring Dead Spot keep in mind the best recovery occurs over time and with warmer temperatures. Don’t give up!
Commit - To best maintenance practices, including aeration, to develop a thick turf with a healthy root system.
Most Critical - Avoid the temptation to promote late season growth.
Remove & Replace Soil – The best solution is to remove 12” of soil in the affected areas and replace it with new soil.
Schedule - A fall fungicide treatment plan.
If you have more questions about Spring Dead Spot, or any other lawn care issue, please give us a call.
Lorne Hall
Hall | Stewart Lawn + Landscape
(405)367-3873

The best way to repair small areas of Spring Dead Spot is to remove the damaged soil to the depth of 12” and replace with fresh soil.
May Lawn & Landscape Tips

May is an easy month to love. Days in the 80’s… Green, green lawns… Landscapes full of bright colors!
May, a month made for being outside in your lawn and landscape!
May is a busy month for the lawn and landscape.
Here are a some of the most important outdoor tasks to focus on:

Crape Myrtles started putting on new growth this year. Now is the time to inspect and prune out any dead wood.

If you are unsure if the branch is dead, scratch the bark. If the layer just below the bark is green, then the branch is alive.
Turf Fertilizer – Bermuda lawns need a good feeding between late April and the end of May. Bermuda will respond well to a balanced fertilizer with at least 28% to 30% nitrogen and only a small amount of phosphorus and potassium. Fescue turf needs to receive one more application of fertilizer between mid-April and mid-May to get them ready for warm days of summer. Once temperatures consistently reach 90 fertilizing fescue will do more harm than good.
Weed Control - Weeds that were not prevented, both grassy and broadleaf weeds, require additional treatment to control. Now that warm season turf is out of dormancy, control of weeds can be stepped up. During May it is best to spot spray any persistent perennial weeds being careful to limit turf damage. Remember the absolute best weed control is thick and healthy turf.

Nutsedge has begun to show up in lawns. Because there isn’t a way to prevent nutsedge, spot treatments can be expected. If nutsedge has been a chronic problem in your lawn, annual aeration will make a difference. Nutsedge thrives in tight, wet soils and since aeration reduces compaction, we find yards that are aerated annually have less nutsedge issues.

Nutsedge

Maynight Salvia, the perfect name for the perennial that adds bright blues and purples to the May landscape.
Anytime we make an application of weed control or fertilizer, please let us know if you have any concerns 10-14 days after our visit. If the turf isn’t greening up properly, or if weeds are not wilting, we want to know. If you are new to our program, we know it will take time to get your lawn to the healthy condition you desire. But we expect to make progress with each visit. We know this may require additional visits and if you are on our full 7- Step Program, we will make the needed extra visits.

Oakleaf Hydrangeas will start gracing the landscape with their white blooms this month.
Tree & Shrub Care – We subscribe to an integrated pest management approach, which starts with inspecting trees and shrubs and treating as needed. Starting in May and continuing through the growing season, take a few minutes each week to inspect your landscape for insects and disease.
Spider Mites – When it comes to Insect and Disease you always have to be on the lookout. Typically, we are on the watch for spider mites, the Twospotted Spider Mite, in the summer when conditions are hot and dry. But there is also the Spruce Spider Mite that is active in the spring and fall. They can be found on spruce, pines, junipers and arborvitae. It can cause considerable damage early in the season before we are even thinking about spider mites. The first indication of the Spruce Spider Mite damage is off-green color needles. Spider mites are not controlled by normal insecticides. If trying to control them yourself, you must use a product labeled as a miticide. Insecticides will not control spider mites.

The first indication of Spruce Spider Mite damage is an off-green color on your spruce, pine, juniper or arborvitae.
Bagworms - May is the month to be watching for bagworms on needle evergreens. Bagworms are quite easy to control when they are small. But they are very hard to see when they first start to develop. If you notice bagworms, or have a concern about your plants, please let us know.

Bagworms

Spider mites are small and almost impossible to see on the plant. If you are concerned you have spider mites, shake the plant over a white sheet of paper. If the little specks start moving they are spider mites.

Be on the lookout for bagworms this month. They are much easier to control when they are small.

Leaf spot
Leaf Spot - Leaf spots will develop if we have periods of sufficient moisture and temperatures are just right for development of the fungus. The best host for leaf spot is an already unhealthy plant in an area with poor air circulation. Control includes spraying with a fungicide at least two times in a 10–14-day period, keeping fallen leaves picked up and disposed of, and thinning the tree or shrub to improve air flow.
Aphids – A small insect that isn’t easy to spot, but the honeydew, sticky substance they excrete is easy to spot. Aphids develop on the underside of leaves, often reaching large populations before you notice them. Early detection is important, and if caught early, a high-pressure blast of water may do the trick. As the weather warms, populations increase, and insecticide treatment will be needed.
Lawn Maintenance – Both warm and cool season turf grasses need frequent mowing now. One of the most important things for good turf health is to avoid removing more than 1/3 of the grass in one mowing. Not only does it not yield you the best-looking lawn when you cut below the leaf and into the stem of the grass, it also weakens the root system. Try to maintain your Bermuda on the middle setting or just below the middle setting in May. For fescue, raise the setting one notch this month and cut the lawn 2.5-3” tall. By early June it is best to have fescue at a maximum height going into the summer.

When mowing frequently, only remove 1/3 of the grass, don’t bag the clippings. Mulch them back onto the lawn. Grass leaf blades are mostly nitrogen and water and are very beneficial to the lawn.

Dianthus is a perennial that graces the May landscape with vibrant blooms and gray and green foliage.

May Night Salvia, Dianthus and Gold Moneywort make a colorful combination in the May landscape.

Full sun planting of lantana, penta, angelonia, and sunpatiens.

Sun Coleus

Fescue color is at its best this month.

Lantana and Sun Coleus make a great summer combination in full sun, hot areas. May is the month to plant them.
Seasonal Color – May is the month to plant your summer annual color. Most landscapes look best with a splash of bright color creating a welcoming environment near the front door. Impatiens and Caladiums are great choices for full shade areas. Begonias, petunias, and geraniums do well in sun to part shade. And for full sun, periwinkle, lantana, sunpatiens, angelonia, sun coleus and penta are good at handling the heat.

Penta

Caladium

Take into consideration the mature size when planting seasonal color. The temptation is to over plant.
Irrigation – As of Saturday morning the Oklahoma City Metro area has only received 1.5” of rain. In a typical April we receive 3.5-4”. With less than normal rainfall has caught many off guard as we are seeing a lot of lawns suffer from early signs of draught stress, which is not a common condition for this time of year. With your lawn now needing 1” of moisture per week, it is time to start your normal watering routine. But remember - the best irrigation management is one that includes keeping an eye on rainfall amounts, soil moisture, and temperatures. Monitor conditions, turn your system off if when are in a rainy period. Poor water management is setting the irrigation system at the beginning of the season and letting it run regardless of the conditions.
If you have subscribed to our Irrigation Management program with the Rainbird Wi-Fi Link, we will make watering decisions based on soil temperatures, soil moisture, temperatures, and recent rainfall and adjust your controller via the Rainbird app.
Azalea Care – Azaleas were stunning this spring. Azaleas require a little more care, but they are worth it. Fertilize azaleas this month. After blooms fade and before the end of June prune azaleas if needed. Pruning after mid-summer will result in less blooms next year. Azaleas look best when minimally pruned and allowed to retain their natural shape. Prune by removing longer shoots by reaching down and making cuts where they come off a larger branch. This will improve air moment and promote healthy growth. Avoid shearing azaleas. Add a fresh layer of mulch to keep the soil cooler and retain moisture during the warm summer months to come. The best mulch for azaleas is pecan hulls or pine bark.

Peonies have been adding a burst of color to the landscapes for the last two weeks.

The same plantings in July

Wisteria

Periwinkle

Remove the brown stems on your hydrangeas left from the winter back to the first bud this mont.
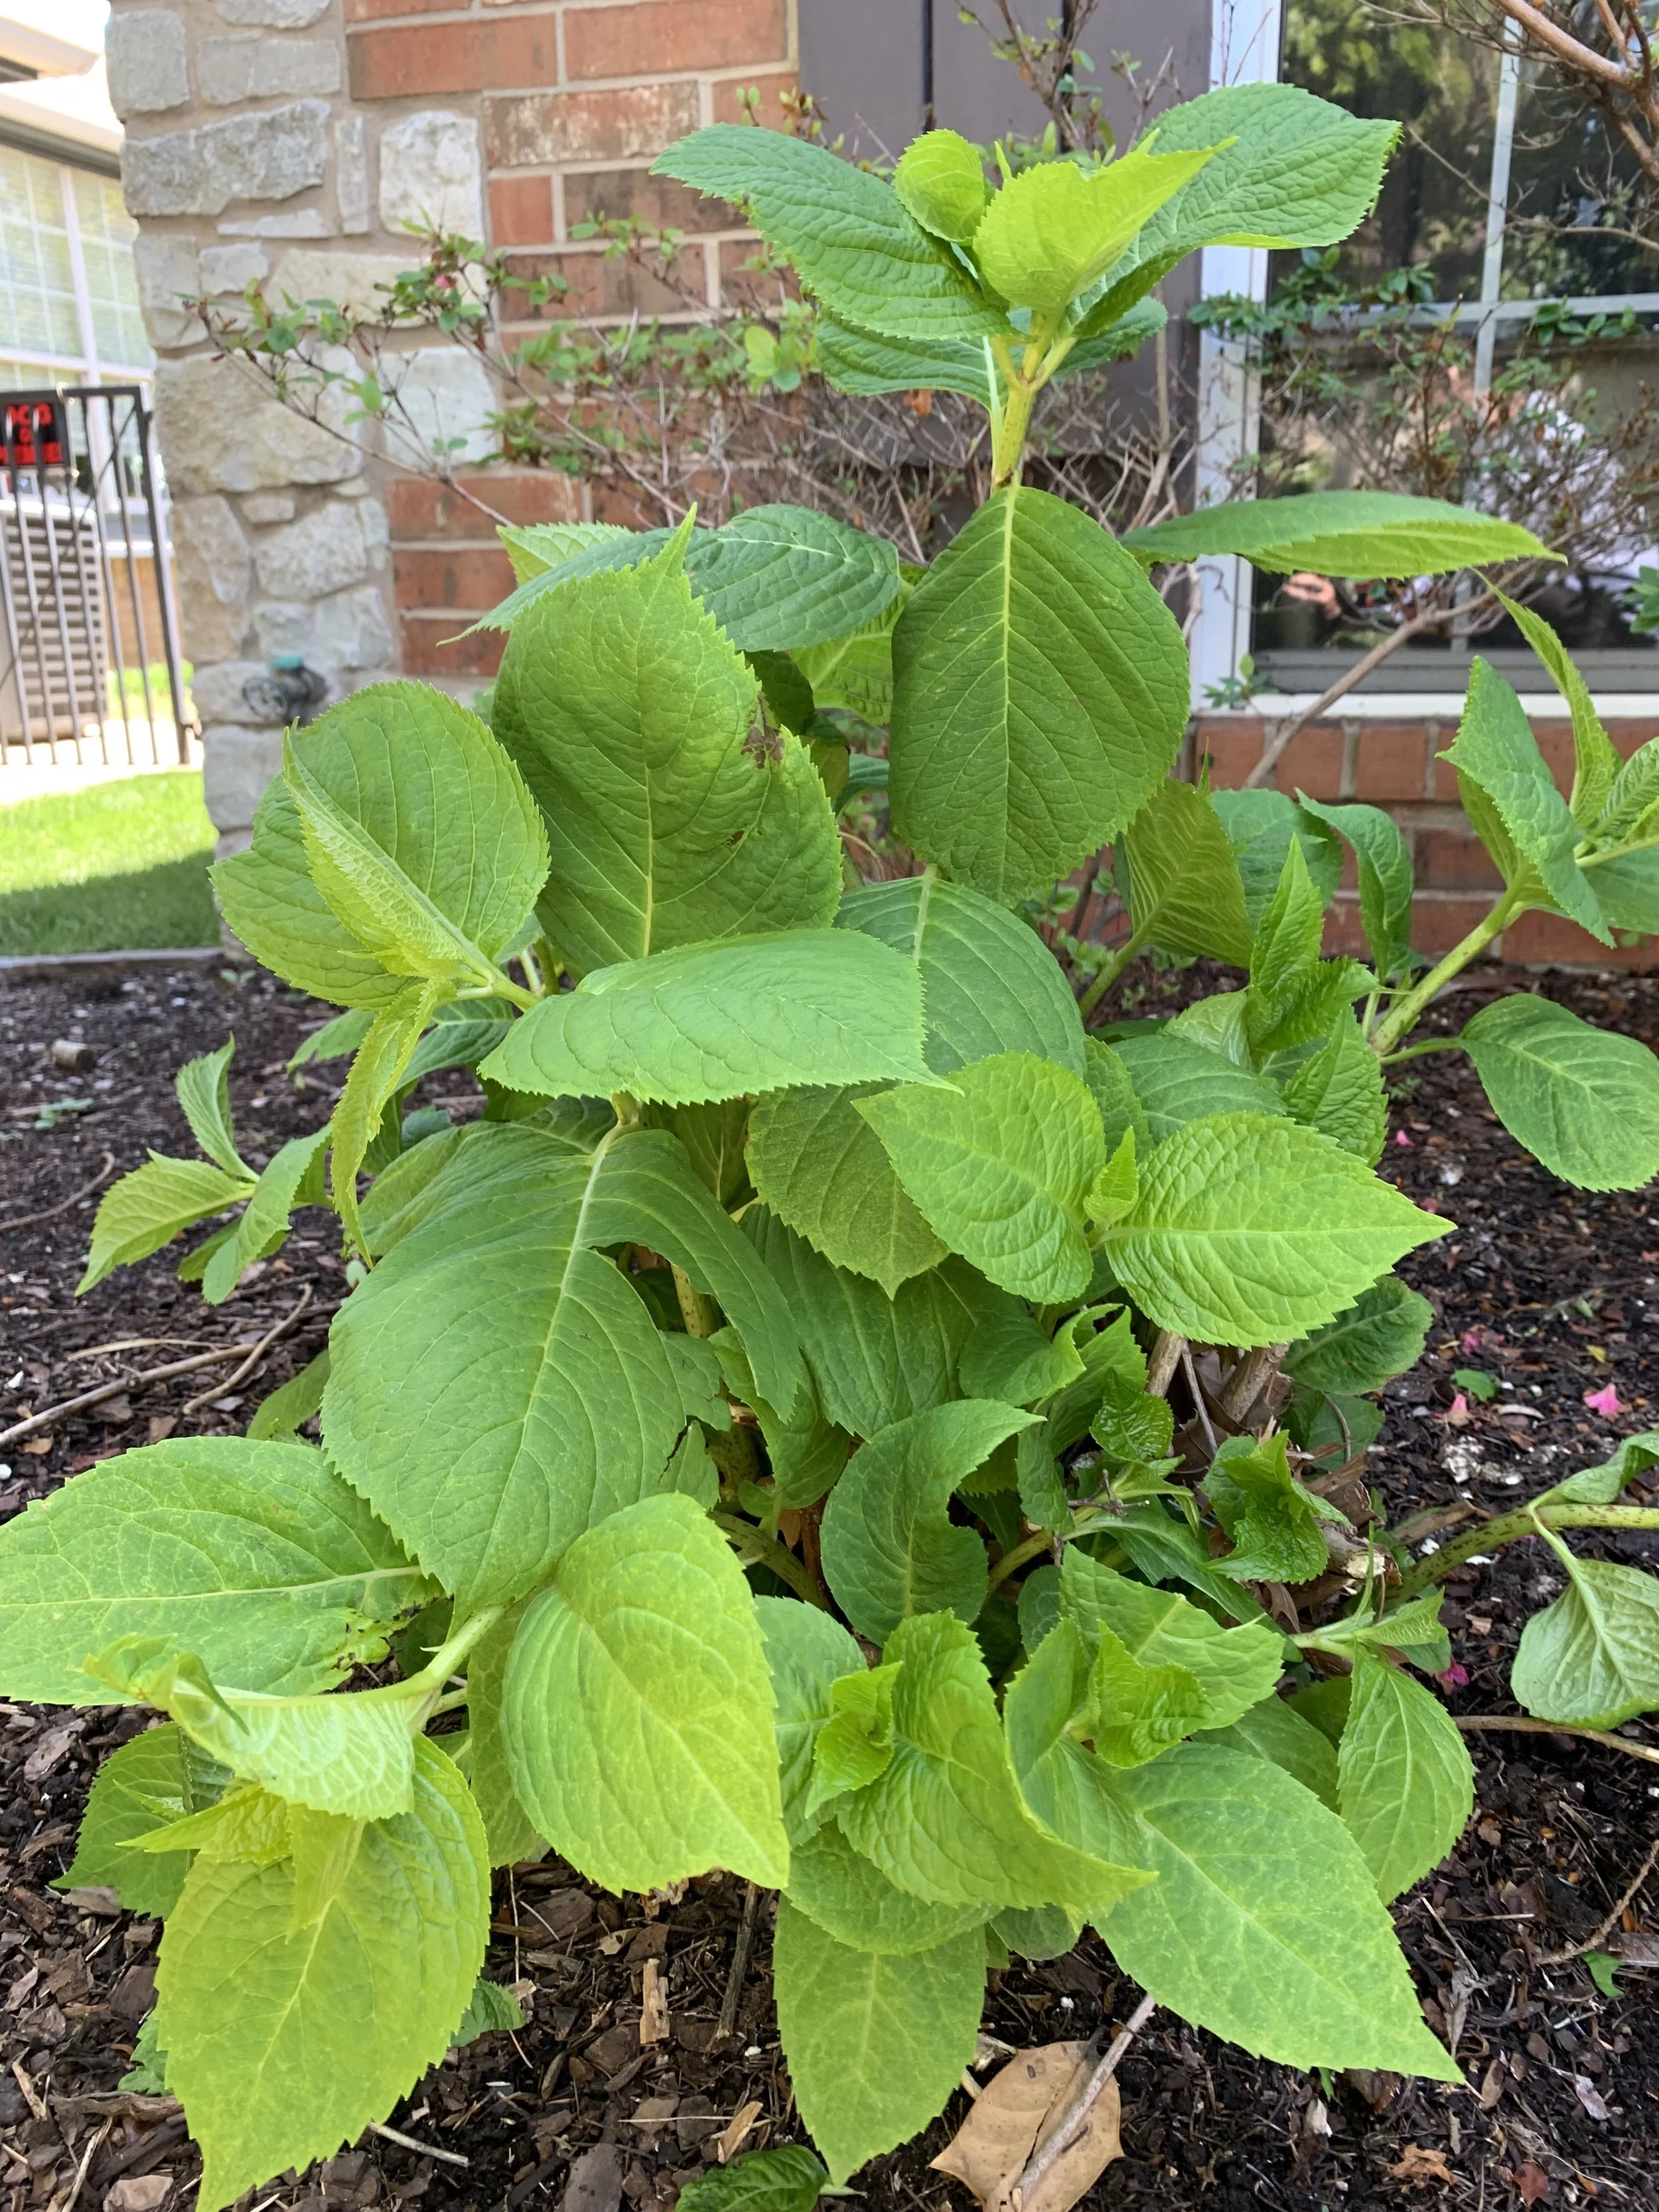
Hydrangea Pruning – If you haven’t already, now is the time to prune the brown stems left from the winter back to the first bud. In most cases this is the only pruning recommended for hydrangeas. During the summer, if you want to you can snip off spent blooms, but it is not required. Otherwise, keep the pruners and shears away from your hydrangeas. And…never prune in the fall.

Gold Mound Spirea not only add interest to the landscape with their foliage, they also deliver an additional touch of color with red-violet blooms this month.
If you have any questions, please drop us an email or give us a call at (405)367-3873.
Our mission is to help you have your best lawn and landscape…one that improves the appearance, enjoyment and value of your surroundings.
Lorne Hall
Hall | Stewart Lawn + Landscape
(405)367-3873
3 Keys to a Great Lawn -- #1 Lawn Care Applications

When it comes to having a great lawn, what is most important?
Lawn care applications?
Maintenance practices?
Environmental conditions?
All three are keys to a great lawn - Lawn Care Applications, Maintenance, and Environmental Conditions.
Great lawns are not a result of getting one, or even two, of the three correct.
Great lawns are equally the result of all three.
Discussing the three keys to a great lawn is too much for one writing, so we are going to cover each key separately.
Today, we will cover Lawn Care Applications. Next month we will visit about how proper Maintenance impacts your lawn and discuss the impact Environmental Conditions have on the greatness of your lawn in June.
Lawn care applications are comprised of two components — weed control and fertilizer.
Weed Control Applications - Correct Timing of Weed Control Applications is Important
Three things you need to know about weeds:
First - Knowing weed life cycle is important when it comes to prevention and control.
Annual weeds germinate from seed, grow and flower (produce seed) all within one year.
Perennial weeds continue to grow year after year increasing in both size and root.

Second - Identifying the type of weed, are either broadleaf or grassy, is equally important.
Broadleaf weeds are the easiest to spot because they look very different from grass. Broadleaf weeds have a stem with leaves attached.
Grassy weeds are actually undesired grass that grow as one single leaf. Grassy weeds are similar to turf grass. Often, they are not as noticeable when they are small but will destroy the aesthetics of a lawn as they mature.
Third – Weeds are either winter weeds or summer weeds.
With annual weeds there is a correct time to prevent and with perennial weeds there is a best time to control. Annual weeds are easiest to prevent, but they can be very difficult to control when mature.
Lawns that are littered with mature weeds during March and April are the lawns that did not receive a fall pre-emergent application last year.

Mature weeds are slower to respond to herbicides. Once a weed starts producing flowers they slow growth and don’t take in herbicides as quickly.
Winter annuals are prevented with a pre-emergent herbicide in late summer and fall. Summer annual weeds are prevented in the late winter and spring. Timing is the key to both. For the best results, the pre-emergent needs to be applied before the weeds germinate.
To prevent summer annual weeds, an application must be made before soil temperatures reach 55 degrees for three consecutive days, which is typically in mid-March.
To prevent winter annual weeds, an application must be made before the first cool spell occurs in late September to early October.
Commonly asked question: “Is it too late to start a lawn care program this year?”
No, it is never too late to start. Weeds will continue to germinate all summer. Turf development is important during the growing season. Starting a lawn care program at any point during the season is better than not starting at all.
Effective prevention of annual weeds is enhanced when a second pre-emergent application is made 30-60 days after the first application. Pre-emergent herbicides have a life. Depending on conditions, the product used and the quality of the application, pre-emergent herbicides will last 60 to 120 days. A second application creates a season long barrier of weed prevention.
A proactive approach to weed control is two timely pre-emergent herbicide applications to prevent summer annual weeds and two timely applications to prevent winter annual weeds.

Mature crabgrass is much harder to control during the growing season.

Now that soil temperatures have consistently been above 55 degrees for a few weeks crabgrass has started growing in lawns that did not receive a pre-emergent early this year. A pre-emergent now will prevent more crabgrass and other summer annuals from germinating.

Crabgrass, a summer annual grassy weed, is very easy to prevent with a pre-emergent applied in before soil temperatures reach 55 degrees. It is also easy to control when it is in the first stage of growth. This picture was taken this week and is the first crabgrass I have seen this year, two weeks later than normal.

Most weeds littering lawns in March, such as henbit, can easily be prevented with fall pre-emergent herbicides.

A well timed lawn care program will result in your best lawn.
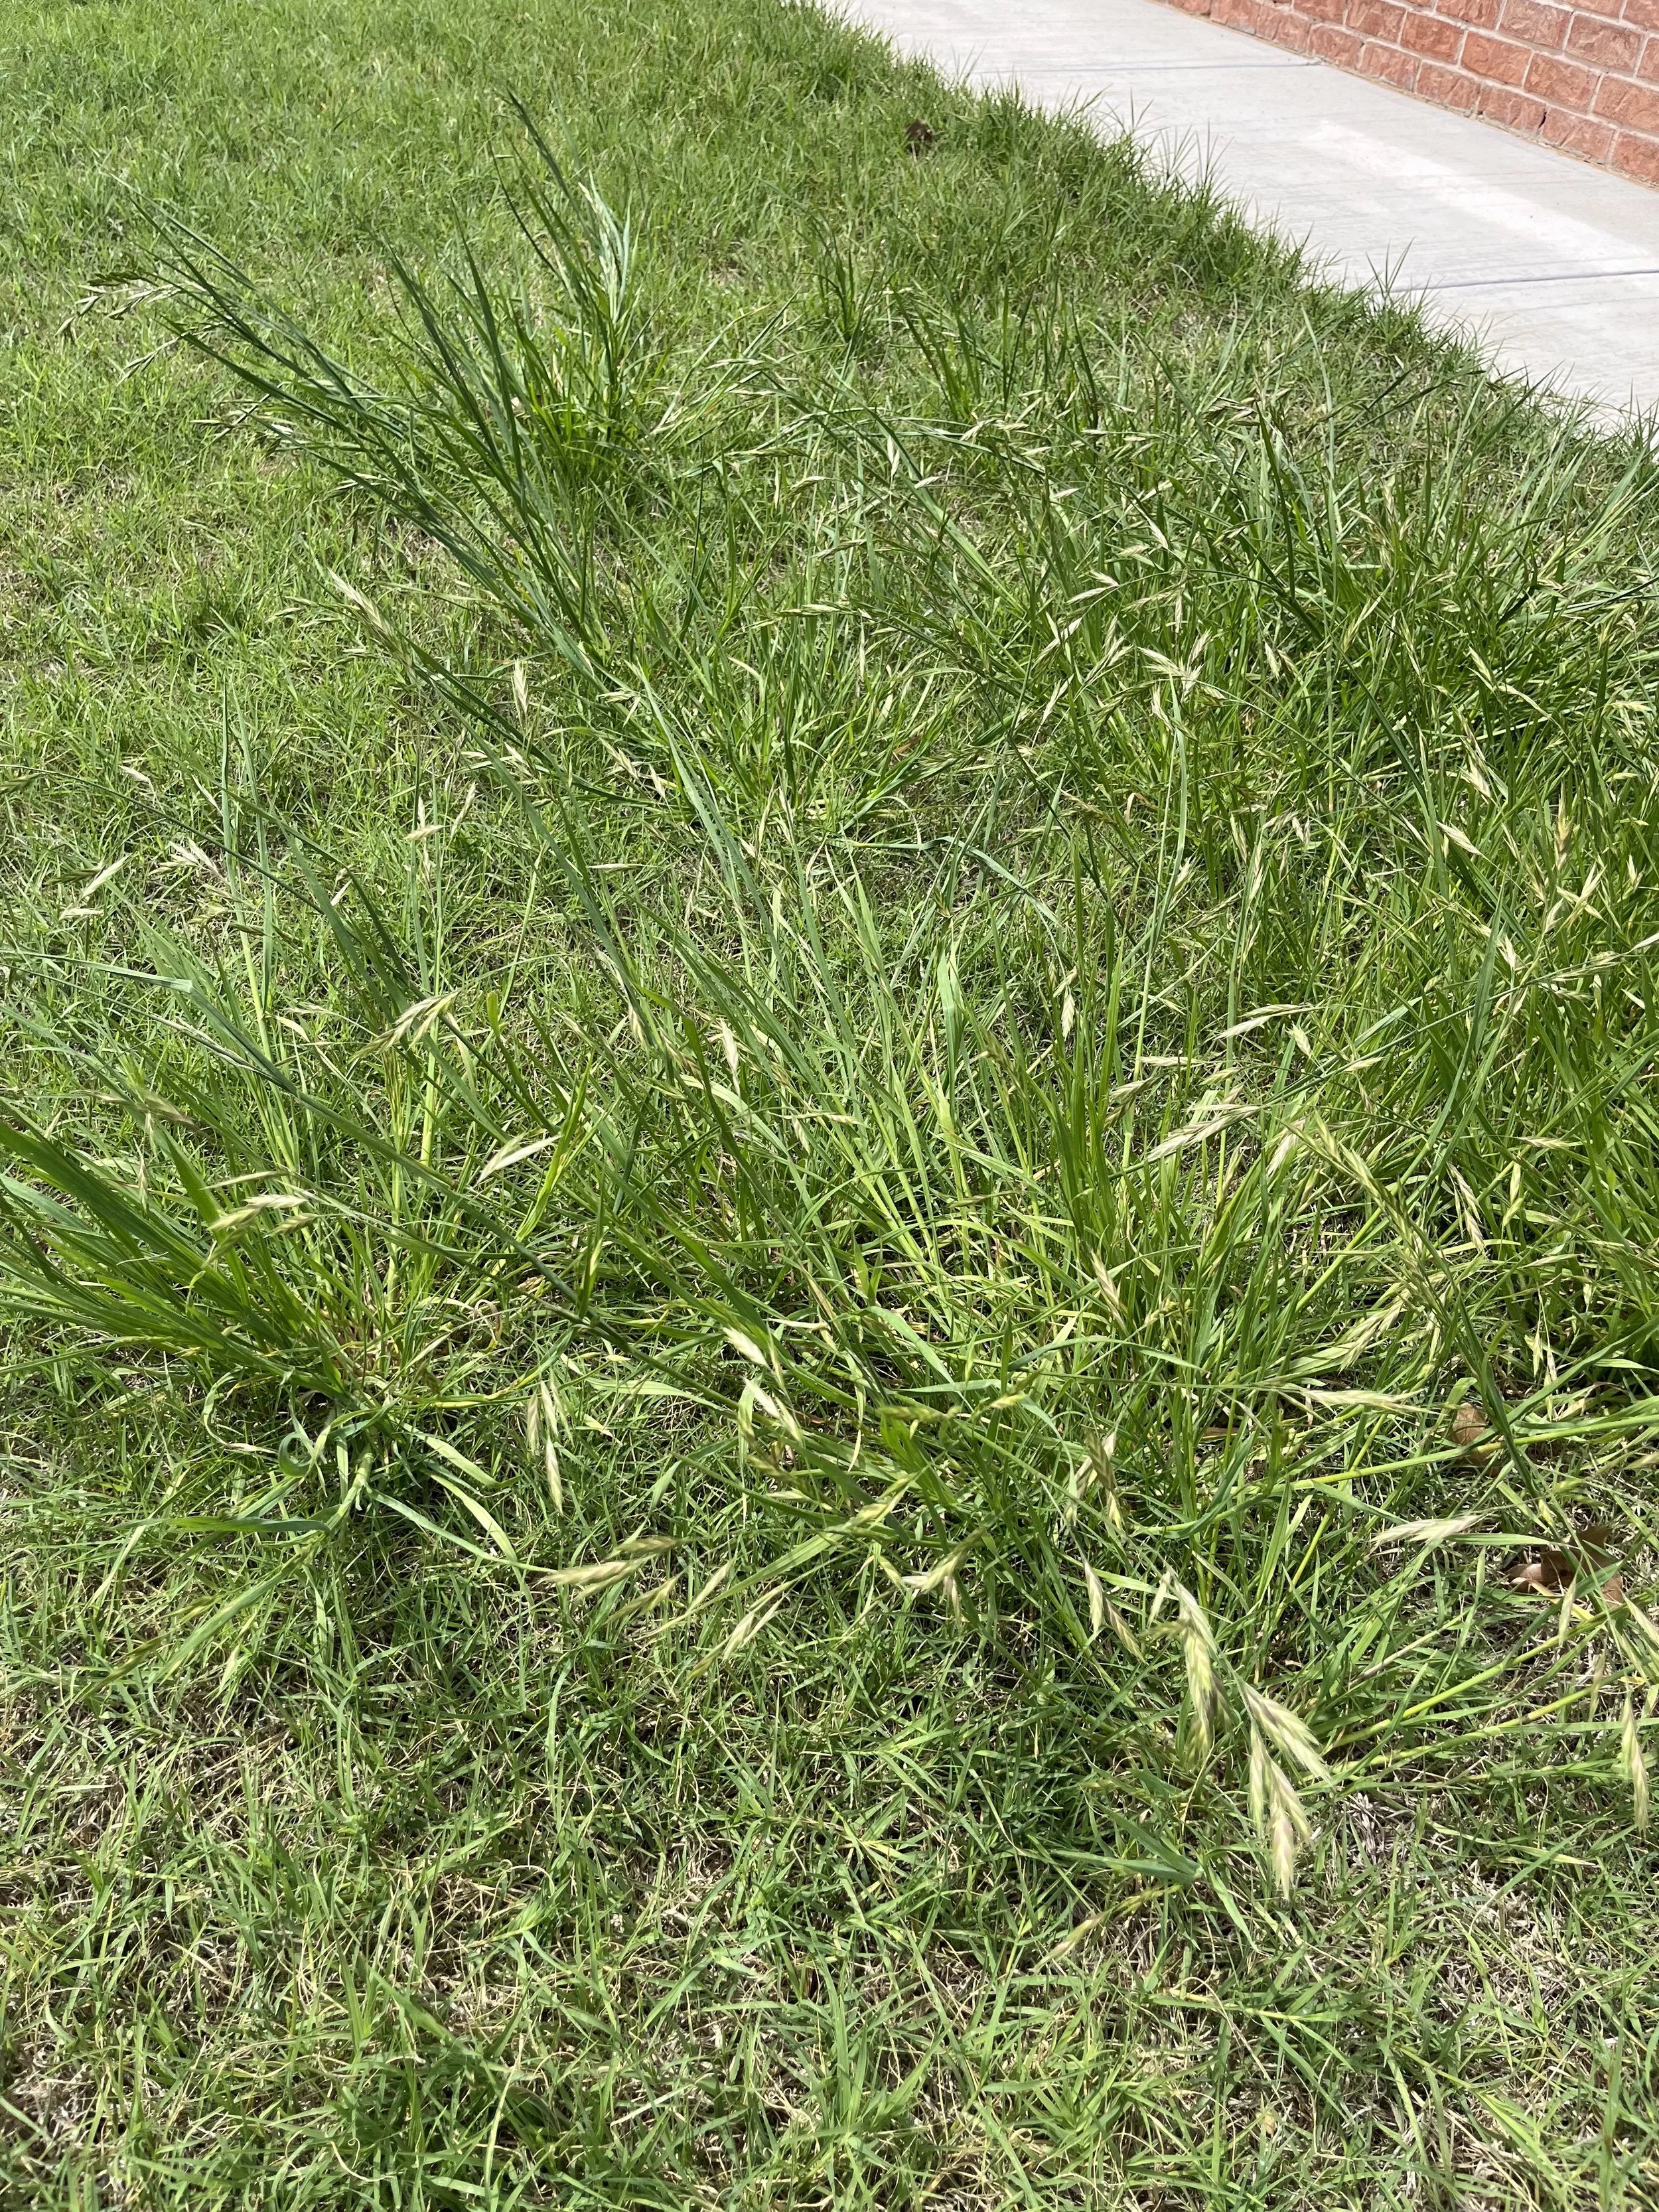
Persistence is a key to gaining control of weeds. Between keeping the area mowed and spraying with herbicides, control can be gained.
Hall | Stewart Lawn Care Programs, both our most popular 7-Step Weed Control & Fertilizer Program and our 4-Step Weed Control Only Program, include 4 pre-emergent herbicide applications each year:
Late Winter - January through early March
Spring – Mid March through mid-May
Early Fall – Mid August through September
Late Fall – October through November
But, not all weeds can be prevented. Existing weeds and perennial weeds require post emergent weed control applications.
The key to controlling perennial weeds and mature annual weeds is applying the right herbicide at the right time and the willingness to make follow-up applications when required.
Post Emergent Weed Control Takes Persistence
Fall (October-November) is the best time to control winter broadleaf weeds when they are small and actively growing. Spring (April-May) is the best time to control summer broadleaf weeds.

When a weed is actively growing it absorbs herbicides much quicker. Once a weed begins flowering growth slows as it focuses on reproduction. During this stage weed control is possible, but slower.

Nutsedge is one of the difficult to control weeds that often requires additional treatments.
Post-emergent weed control is always more difficult when the weed is mature and flowering. Herbicides work by translocating through the plant. When a weed is actively growing, it absorbs the product quickly. Once the weed starts to flower (seed), it slows growth and focuses on reproduction. During this stage, control is much slower.
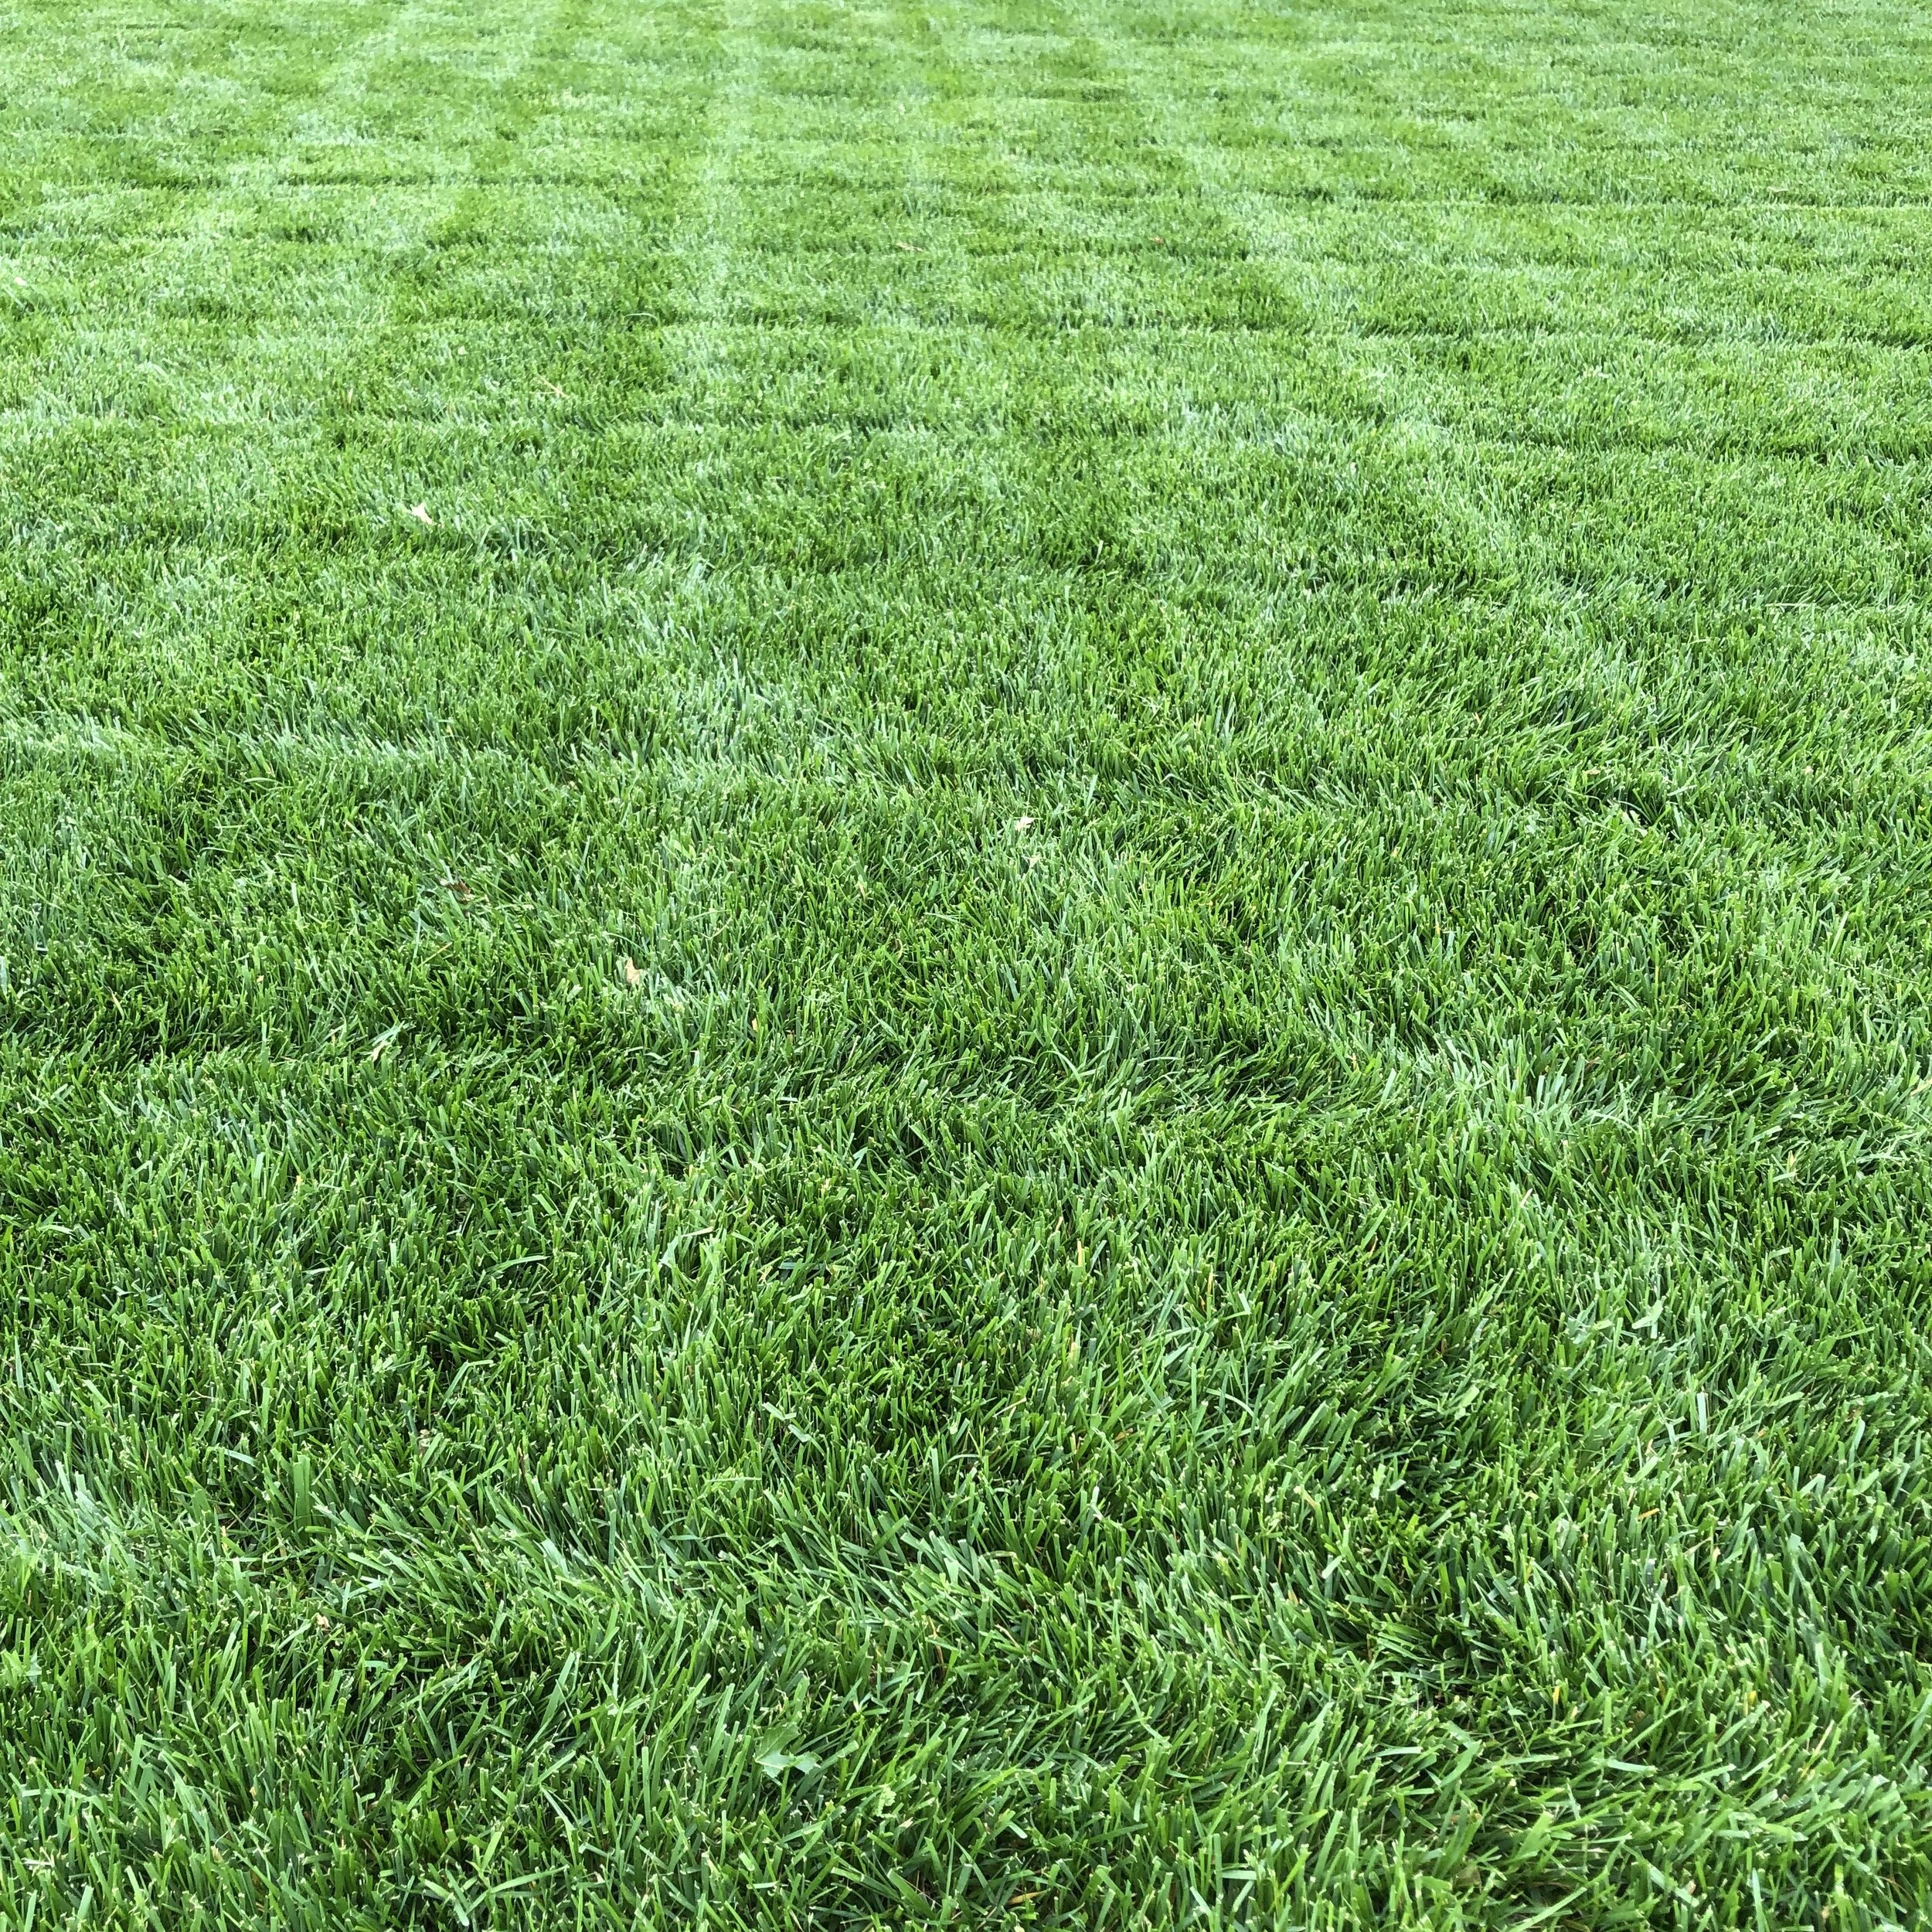
A key to successful control of existing weeds is retreatment if needed 14 days after an application.
Difficult to control weeds, such as nutsedge, violets, geraniums to name a few, take time to gain 100% control. Follow up applications are often needed. Persistence is the key.
Hall | Stewart Lawn Care Programs include follow-up visits when needed to gain control of difficult weeds.

Poa annua, a winter annual grassy weed, thrives in thin turf.

The best defense against weeds is a healthy thick turf.
Fertilizer Applications – Healthy turf is the best prevention of weeds.
Weed control and fertilizer work hand-in-hand to produce a great lawn. Common weed problems are less in an actively growing, fertilized, watered and maintained turf.
A healthy, properly fertilized, dense turfgrass can resist weed invasion and is able to better tolerate heat, cold, drought and wear.
The three key ingredients in fertilizer are nitrogen, phosphorus, and potassium. All three are needed by your turf.
Nitrogen gives a lawn the best quality of color and density, but it is void in our soil. Therefore, it needs to be added the most.
Phosphorus and potassium are required for healthy turf growth but because they are present in our soil they do not need to be replaced as much.
Both Bermuda and fescue are at their best when they receive a total of 4 to 5 lbs of nitrogen per 1,000 sq. ft during the growing season spaced out over 4-5 applications.
Bermuda, being a warm season grass, needs to be fed the most during the summer. The first application should be made within 2 to 6 weeks of spring green up. An application before the lawn has come out of dormancy is a waste of product and does not benefit the turf. The last application should be made by the end of September. Heavy fall fertilizer in an attempt to force growth and color deep into the fall can be a contributor to spring dead spot. Follow this link to read more about spring dead spot.


Bermuda, warm season turf, looks best through the summer heat when nighttime temperatures are consistently 65+. Bermuda respond well to regularly scheduled fertilizer applications, high in nitrogen during the summer.
Fescue, a cool season turf requires a completely different schedule and thought process. Cool season grass is at its peak in the spring and fall. During the summer, growth slows, and the plant actually enters a period of semi-dormancy even though it never actually loses all its color.
Cool season turf needs fertilizer between the first of March and the end of May. This creates a strong and healthy turf with the best opportunity of surviving the summer heat. High nitrogen fertilizer June through August can damage fescue. In the fall, September through November, resume fertilizer applications.

Fescue, a cool season grass, looks best in the spring and fall. Fescue lawns need the same amount of annual fertilizer as Bermuda, but it must be applied in the spring and fall. Fertilizer during the summer will damage a fescue lawn.

Picture of the Week:
Iris are now adding color to our landscapes. Just like all the blooms this spring, they also seem more vibrant than usual. Iris are an old fashioned hardy perennial that require minimal care and live a long time.
Fertilizing fescue in the summer will always lead to disappointment.
Great lawns are the result of a properly timed weed control and fertilizer program that is tailored to your type of grass.
If you are not currently subscribing to a Hall | Stewart Lawn Care Program and have struggled with getting the critical timing right on your lawn, we would enjoy visiting with you.
If you are a Hall | Stewart customer, we look forward to every opportunity to be on your lawn helping you have a great lawn!
We will continue The Three Keys to a Great Lawn series in May with a look at Maintenance Practices and in June with a look at Environmental Conditions.
Lorne Hall
Hall | Stewart Lawn + Landscape
(405)367-3873
Growing Azaleas in Central Oklahoma

When it comes to springs, the Spring of 2024 just keeps adding color to our world!
This week, Azaleas are the plants adding burst of color to the landscape.
“Azaleas are the one plant that will cause a traffic jam.” Allan Storjohann
Can you grow a traffic jam causing azaleas in our area?
The Tulsa area is blessed with wonderful azaleas, but common belief is azaleas just don’t do well in central Oklahoma.
This is a myth. Azaleas can be grown in the Oklahoma City.
But, they require thinking differently about your landscape and a commitment to make it happen.
Azalea success in central Oklahoma won’t happen if you just dig a hole anywhere in your landscape and drop in an azalea.


8 Things You Need to Know to Grow Azaleas in Central Oklahoma
1. Soil preparation is key. Azaleas require well drained acidic soils (5.0-6.0 pH). Central Oklahoma is known for tight clay alkaline soils (6.5-7.5 pH). The first step is to remove all the existing Oklahoma clay and replace it with a mixture of pecan hulls, peat moss, and pine bark. No soil. That is correct – azaleas do best when the native soil in our area is removed. My favorite mixture is 1/3 pecan hulls, 1/3 peat moss, and 1/3 pine bark. But, you will have success with a 50/50 mixture of any 2 of the 3.

20 year old Hino-Crimson Azaleas planted in a raised bed in a mixture of pecan hulls, peat moss, and pine bark with all the native soil removed.

2. The size of the hole you dig is important. The standard for planting most trees and shrubs is a hole twice the size of the plant root ball. But, when planting azaleas dig the hole 3 to 4 times the size of the plant root ball. You don’t need a very deep hole – it only needs to be 6-10” deeper than the level of the root ball once it is planted. Azaleas roots are shallow and like to grow out. So, think wide and not deep when digging.


3. Raised beds are best. Azaleas like moisture but they do not like to have their roots sitting in water. The best way to achieve a well-drained planting in tight soil is to raise the planting. A great option is to install a 4-12” stone border to gain height or, incorporate a berm in the landscape planting for your azaleas. When placing the shrub, keep the top of the root ball 1-2” above the grade and gently slope your planting mixture away from the shrub. The number one reason azaleas die is from root rot.

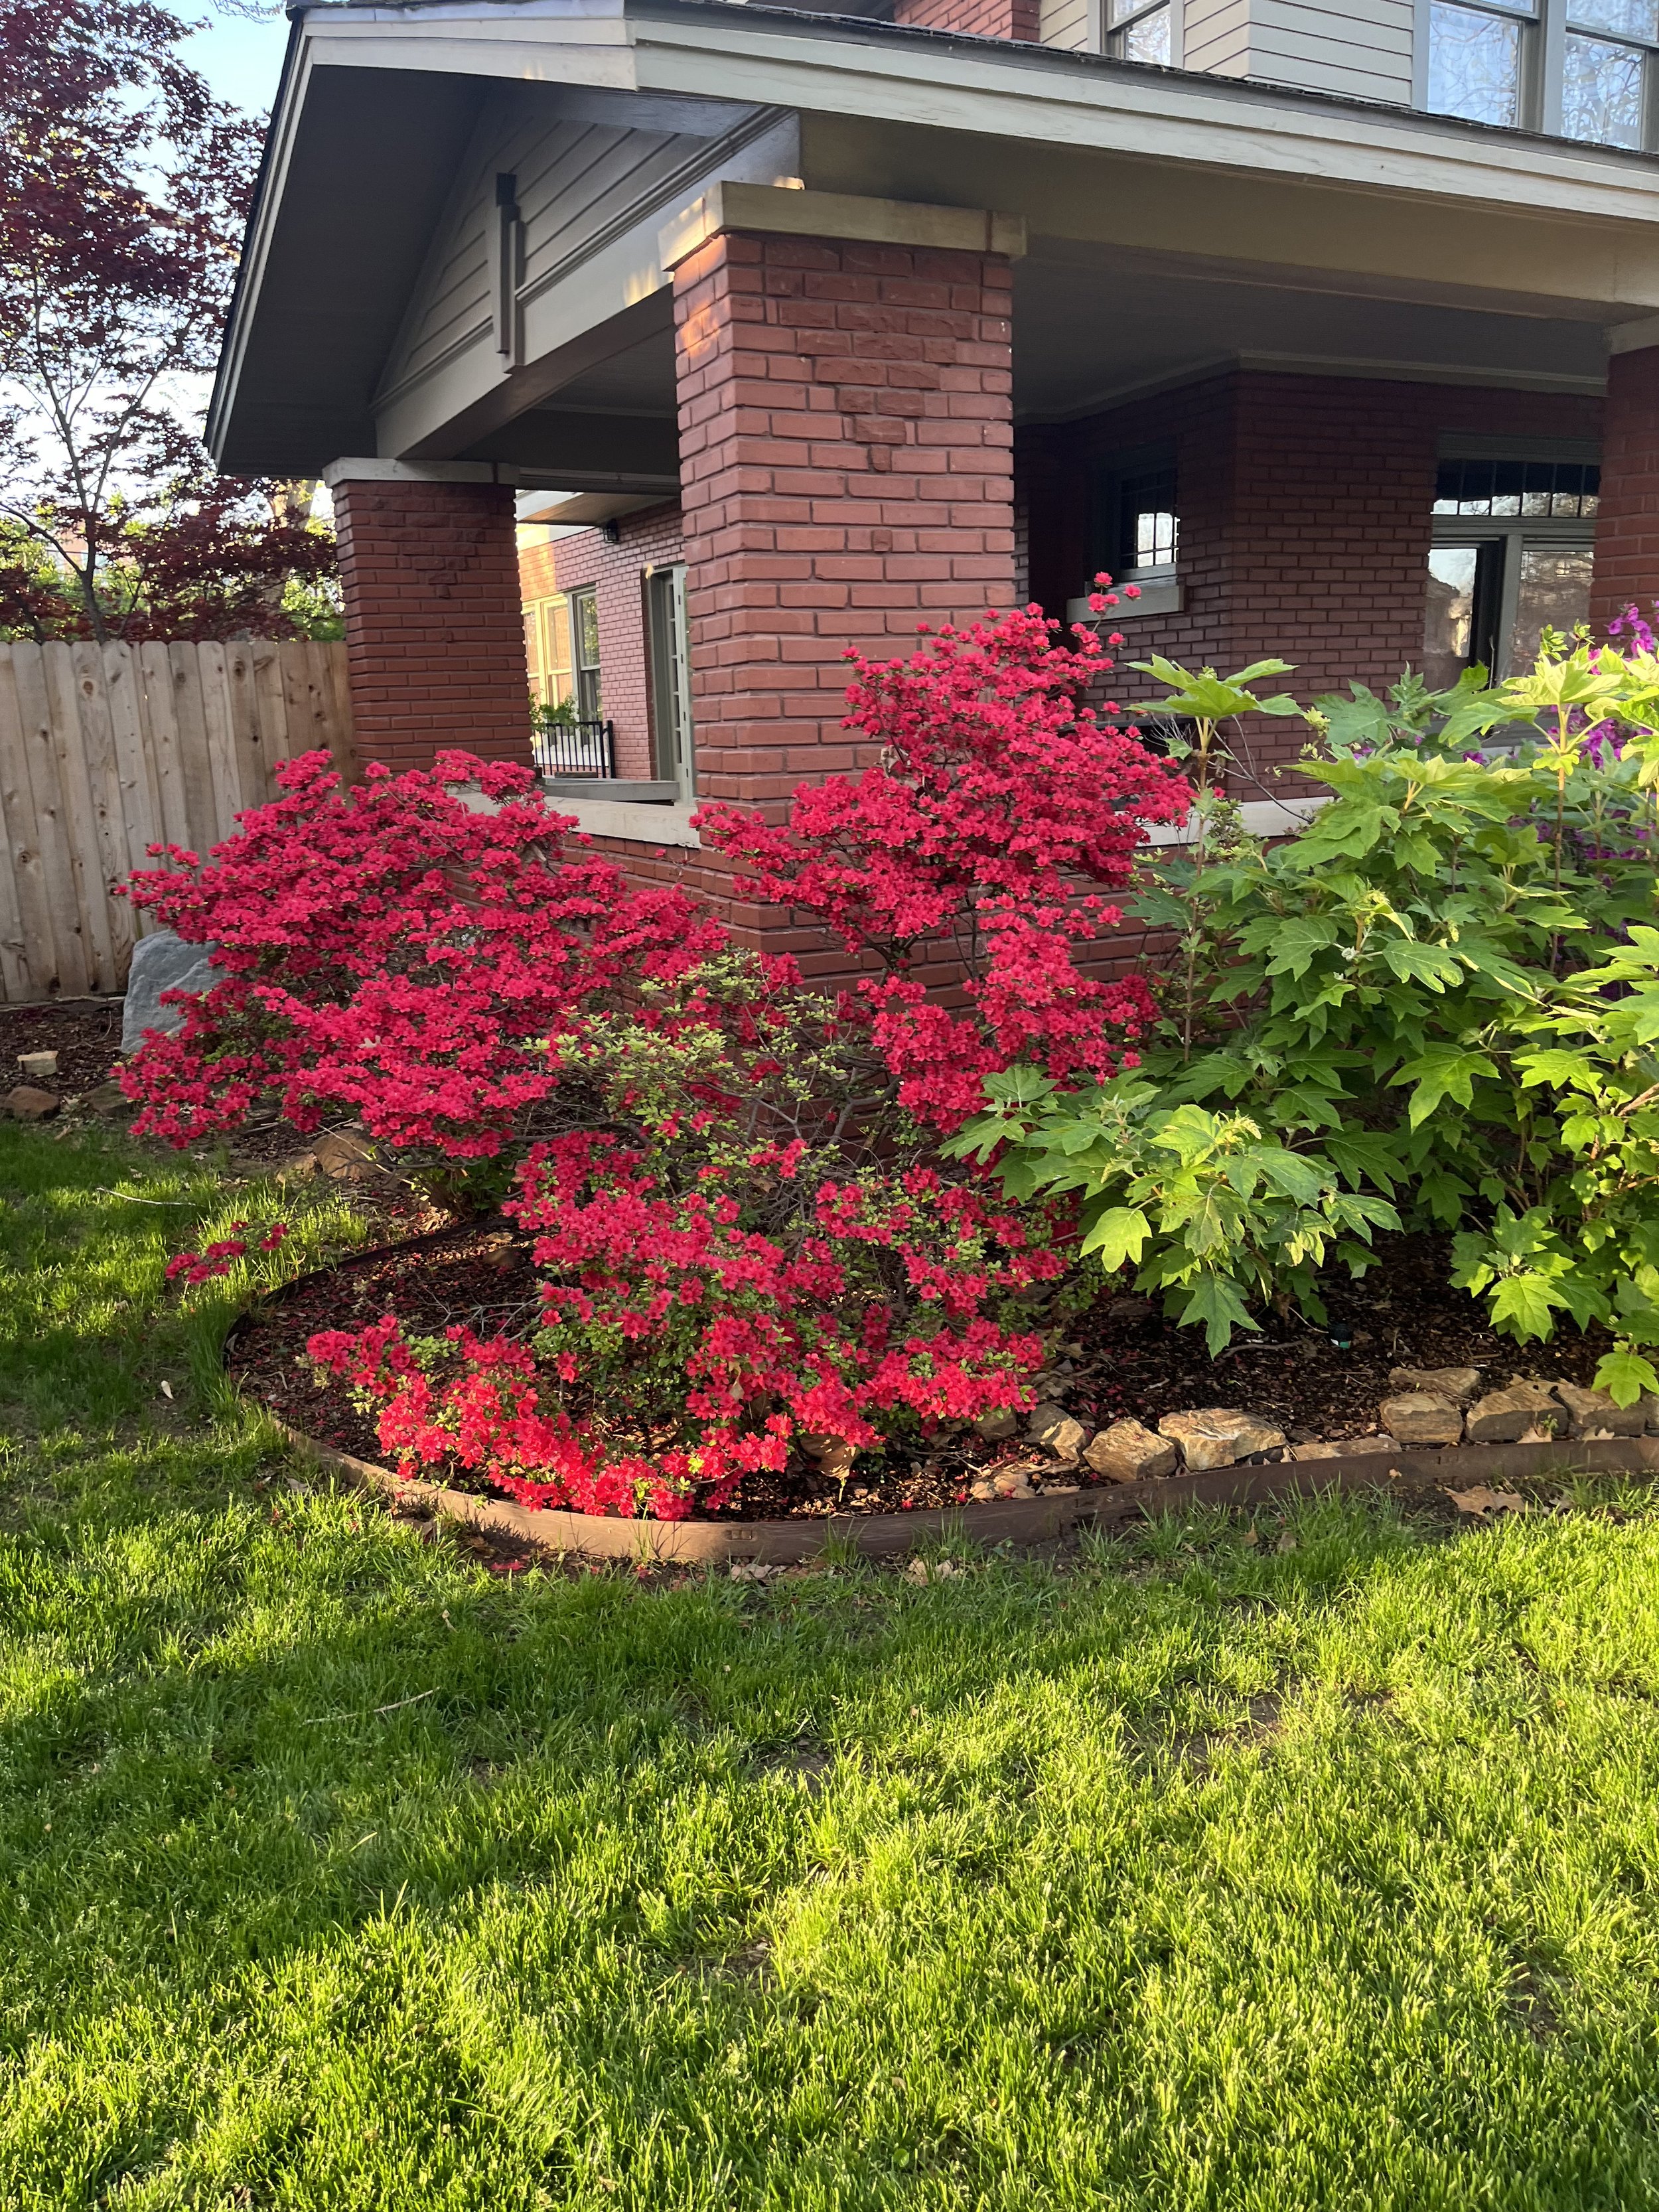
4. Plant in the shade. Azaleas need mostly shade. They like the morning sun and filtered sunlight. A great place for an azalea is under large trees, particularly oak and pine. Pine needles and oak leaves will add acid back to the soil. If you lack large shade trees, plant them on the north and east sides of your home. Never plant azaleas where they will be exposed to the hot afternoon and evening sun. Also, avoid windy locations.
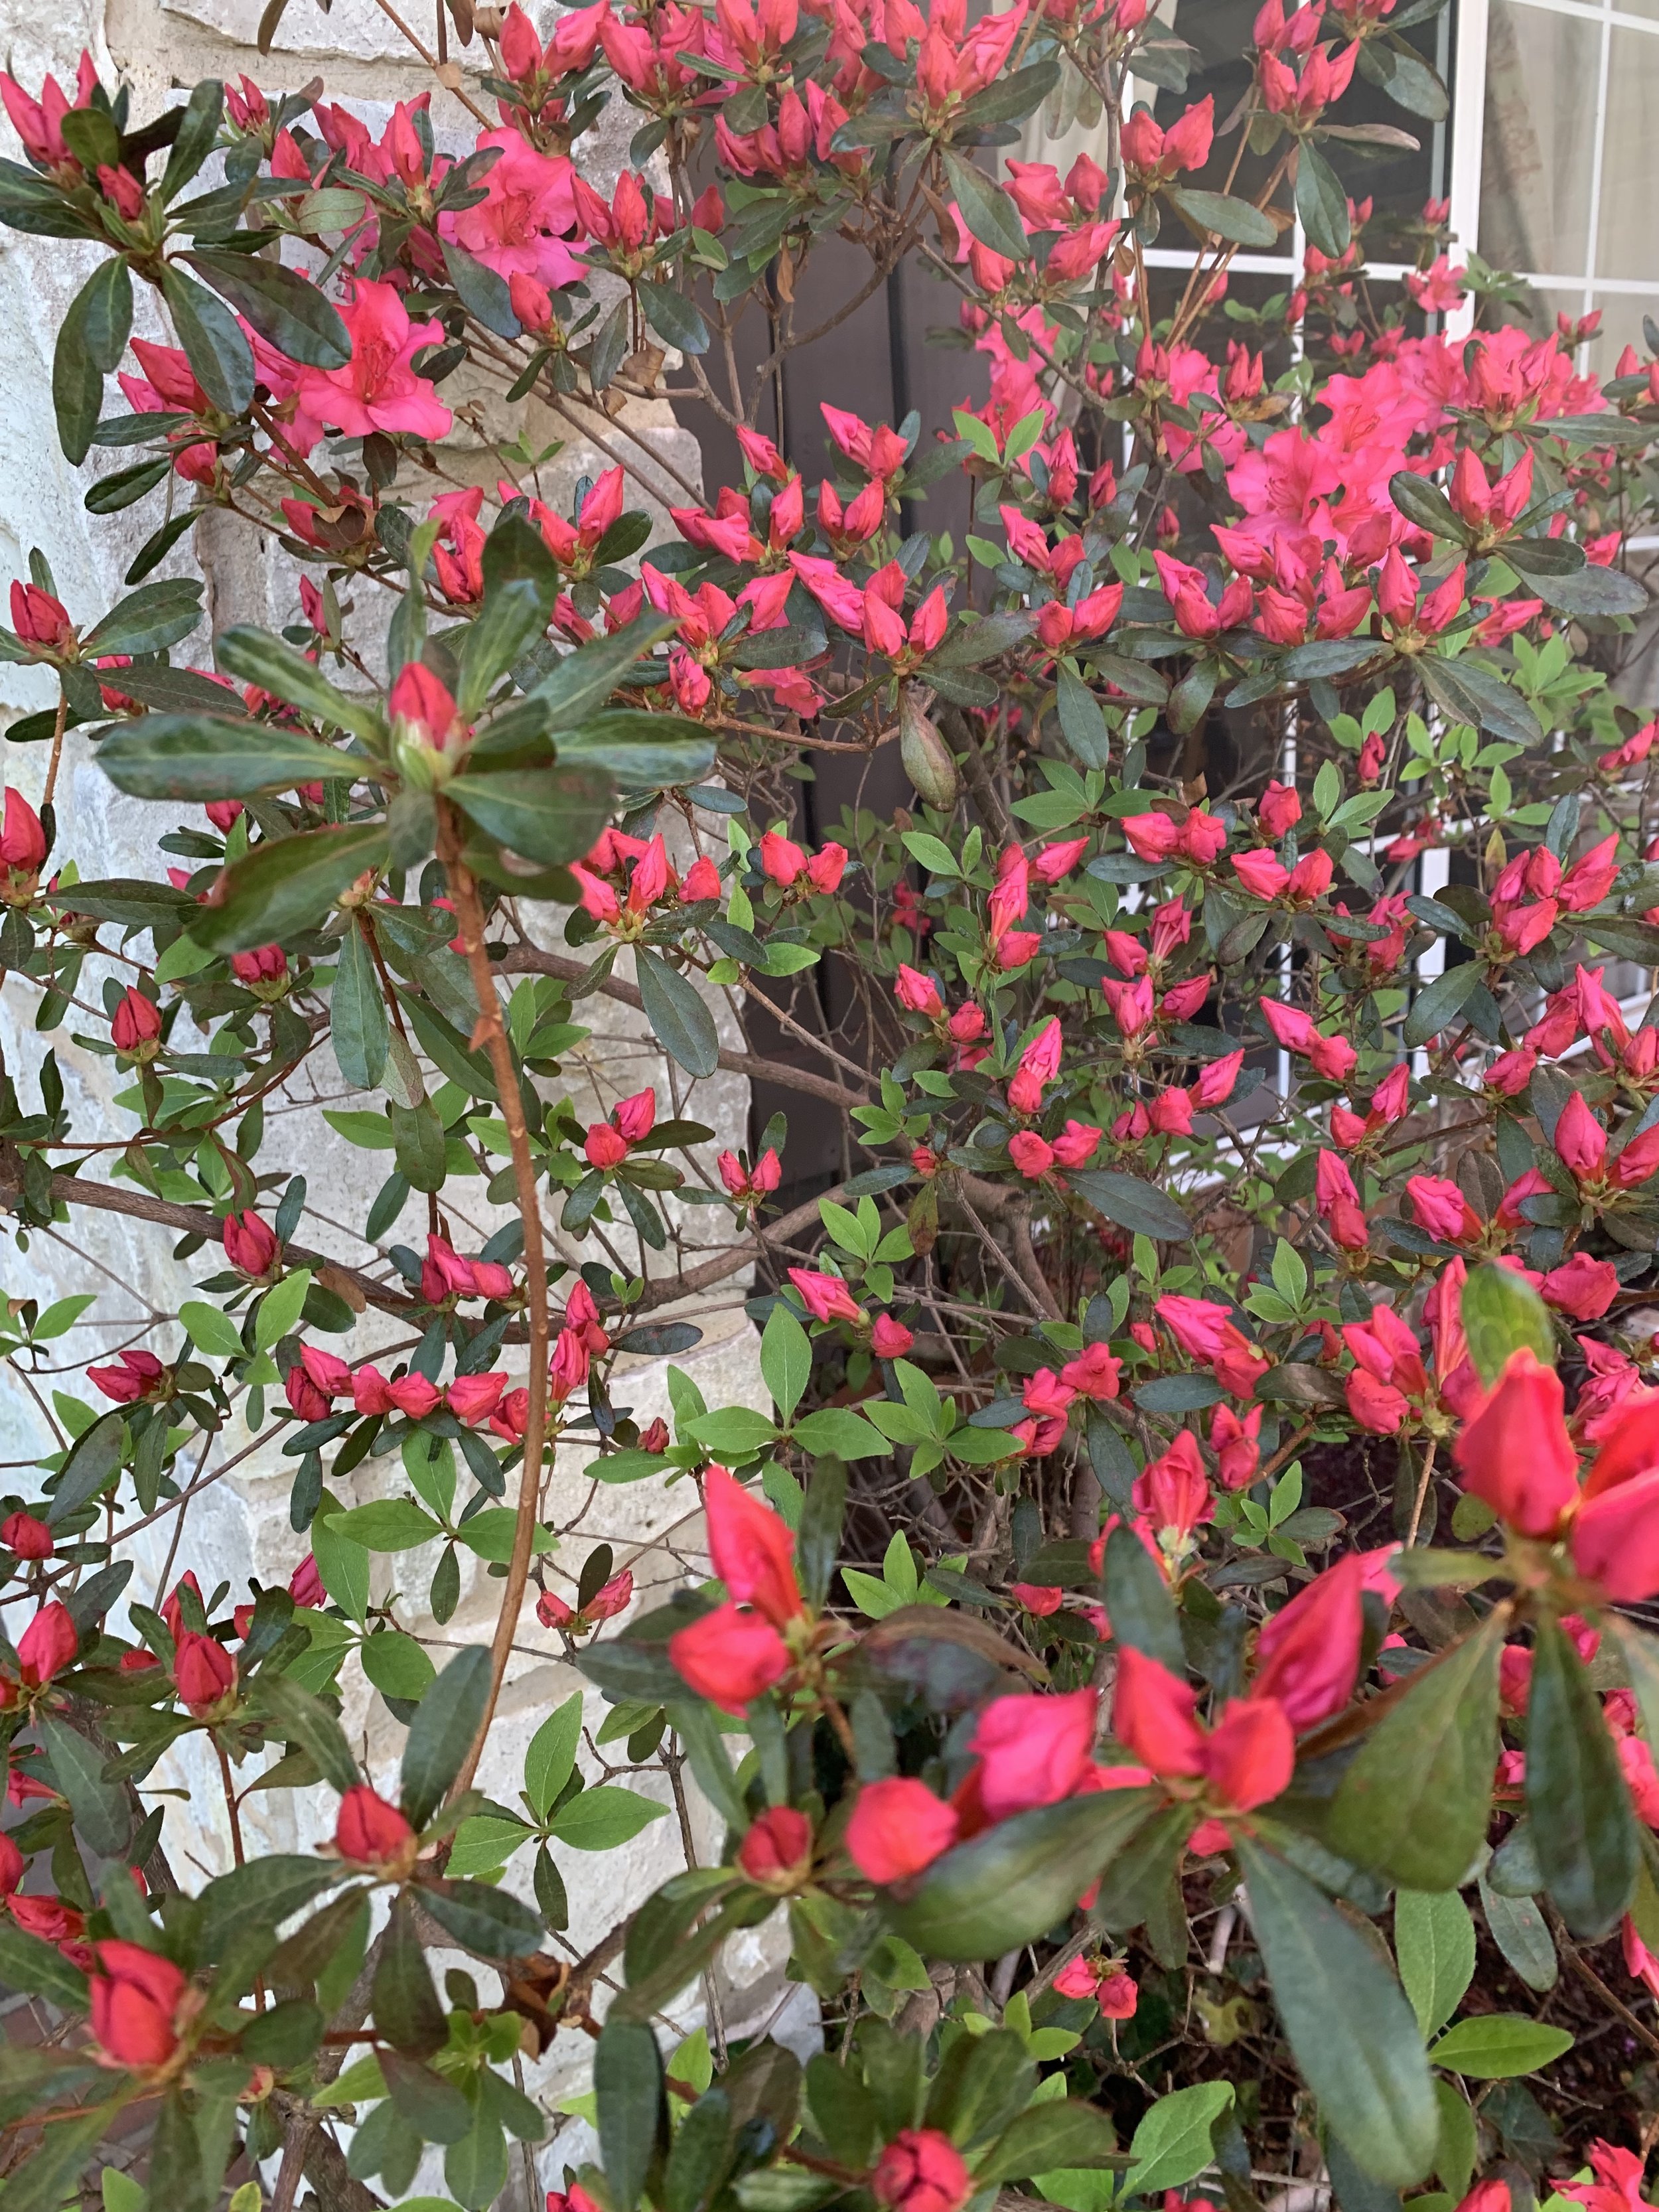
Red Ruffle Azaleas that have been lightly pruned over the years to maintain their natural shape.

5. Consistent water. When we are receiving sufficient rainfall azaleas do not need any additional water. But, when temperatures rise and moisture declines, regular watering is very important. Try to provide 1 – 1.5” of water per week during the summer months. Due to their shallow root structure, roots can dry out quickly. When temperatures are in the 90s or higher, water every other day with a deep soaking.
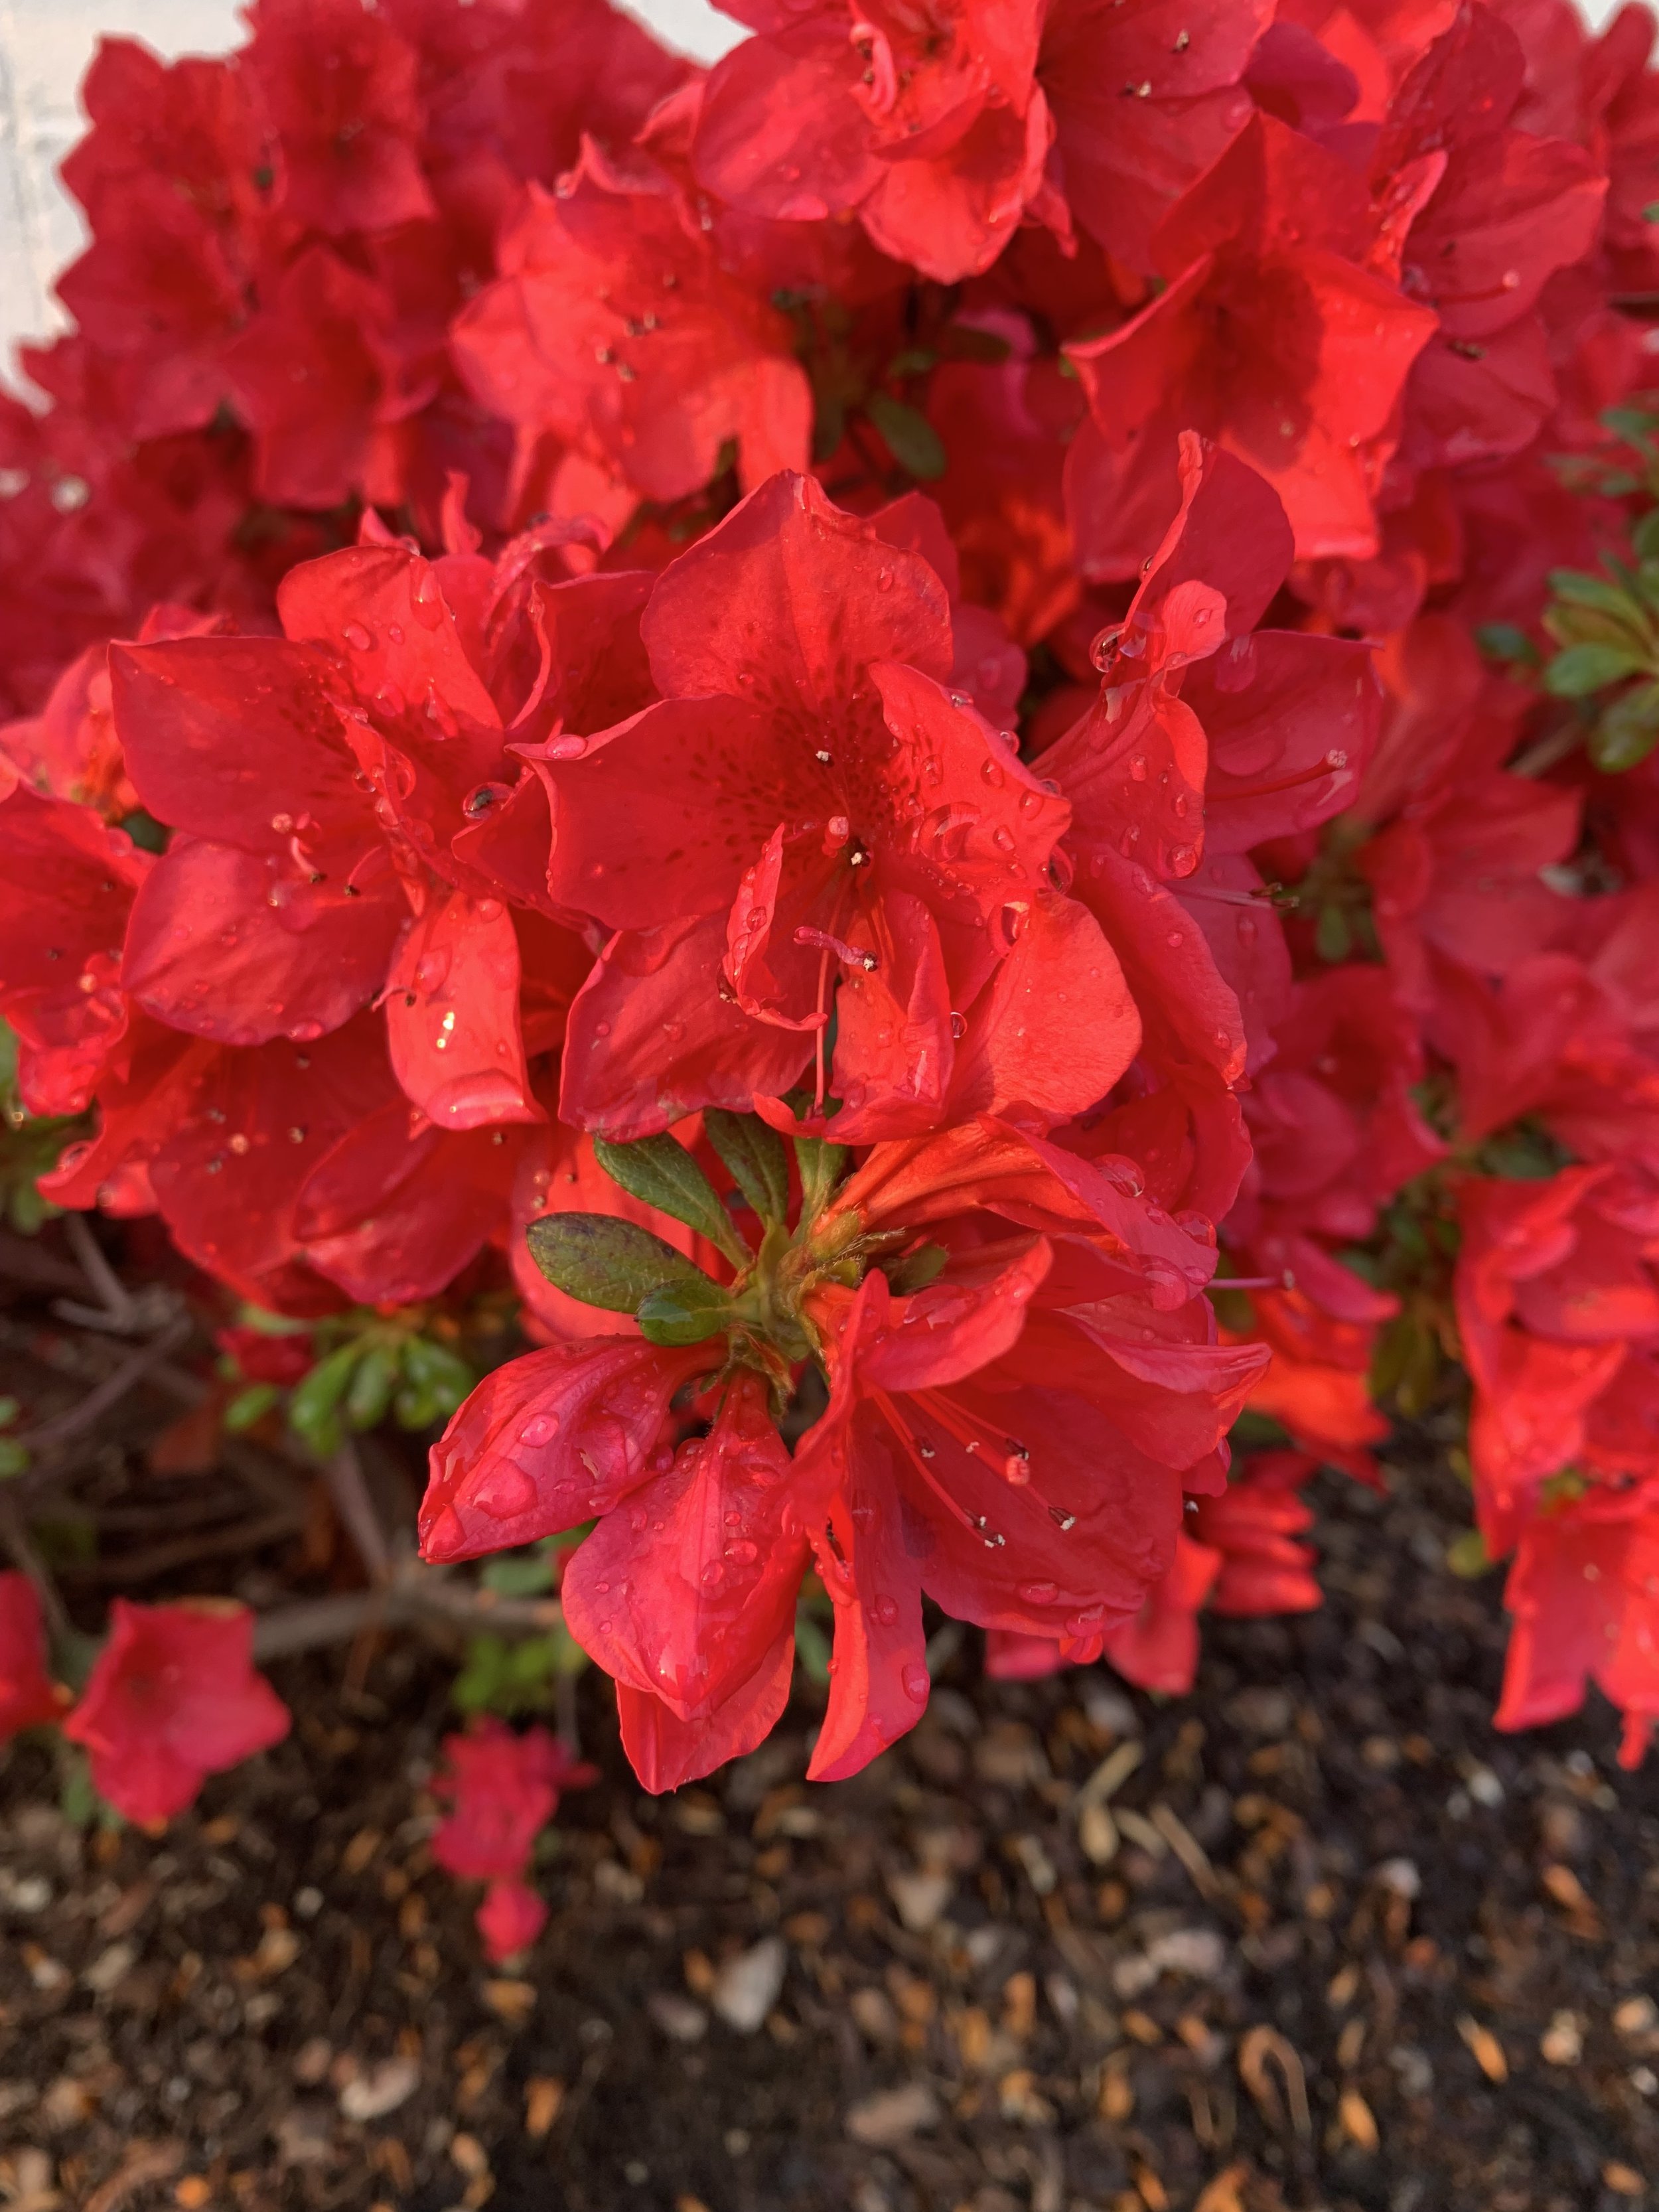
Encore Autumn Embers Azaleas

6. Avoid soil cultivation. Cultivating the soil will disturb the shallow roots. Control weeds by hand pulling and by mulching with 2-4” of pecan hulls, pine bark, or pine needles. These mulches will increase the acidity of the soil, cool the soil, and retain moisture.

Encore Autumn Embers Azaleas planted three years ago on the north side of an office building.

7. Correct pruning. Prune azaleas after the blooms drop in May or June. Do not prune after July 4th because you will be removing next spring’s blooms. Azaleas respond well to having branches that have grown too long pruned back to the branch. This will help maintain a natural shape of the plant and maximize blooms next spring. Sheering is not recommended. Dead wood can be removed anytime.

Azaleas just starting to bloom.

8. Feed them. Fertilizer applications after blooming in May and June are best. Fertilizing in early spring isn’t recommended as it will promote leaf growth and reduce the amount of blossoms. Use an azalea/camellia/rhododendron food with trace elements for acid growing conditions. Miracle-Gro Water Soluble Azalea Plant Food and Ferti-Lome Azalea/Evergreen Food Plus are a couple of good examples.

Encore Azaleas have the added benefit of a fall bloom.

When it comes to azaleas, there are a lot of varieties and colors to choose from. Traditional azaleas that do well in Central Oklahoma include Hino-crimson and the Ruffles series. Over the past few years, the Encore varieties have become very popular and performed well. Traditional varieties are heavy spring bloomers. Encore Azaleas bloom in the spring with a second lighter bloom in the fall.
Here are a couple of good sources for azalea varieties: https://www.monrovia.com/search/?q=azalea and https://encoreazalea.com/the-collection/
I planted Hino-Crimson and Red Ruffle Azaleas at our house over 20 years ago using the methods above. Every spring the colors are stunning. This time of year, you can’t drive down our street without slowing to steal a glance.
When planted correctly and maintained well, you won’t regret the time
and effort you put into growing azaleas.
Lorne Hall
Hall | Stewart Lawn + Landscape
(405)367-3873


PS - Next weekend is one of my favorite TV weekends of the year!
Starting Thursday, the networks will start broadcasting and continue through Sunday hours of live coverage of azaleas, dogwoods, and well-maintained turf. It is just wonderful!
You do have to tolerate an occasional professional golfer blocking your view of the rich dark green hues of fescue, topped with vibrant pinks, reds, and purples of azaleas, with splashes of white dogwoods.
I know…I know... Most people are tuning to see who will win the Masters.
Not me! I’m tuning in to see the best televised display of spring color in the world.
Follow our 8 Things You Need to Know to Grow Azaleas in Central Oklahoma and create your own Master’s landscape in central Oklahoma.
When is the Right Time to Apply a Pre-Emergent Herbicide?

The short answer –
Before weeds germinate.
Ok, maybe we need the long answer –
The window for applying the first pre-emergent application is broad.
If you have already had your first application, it was done at the right time.
If you have not had your first application, you are NOT too late.
Summer annual weeds begin to germinate when soil temperatures reach 55 degrees. Mid-March is the normal time for soil temperatures to reach 55 degrees. We have seen years when soil temperatures didn’t reach 55 degrees until the last few days of March, which is what happened the last two years. And, on occasion, we have years when soil temperatures reach the point of summer annual weed germination the first week of March.
Pre-emergent herbicides create a blanket over a lawn preventing seeds from germinating on the soil surface. Pre-emergent weed controls are designed to stop weed seeds from germinating. So, as long as they are applied before weeds germinate, the timing is perfect.
To be on the safe side, the best practice is to have the first application of pre-emergent herbicides on your lawn by the first week of March.
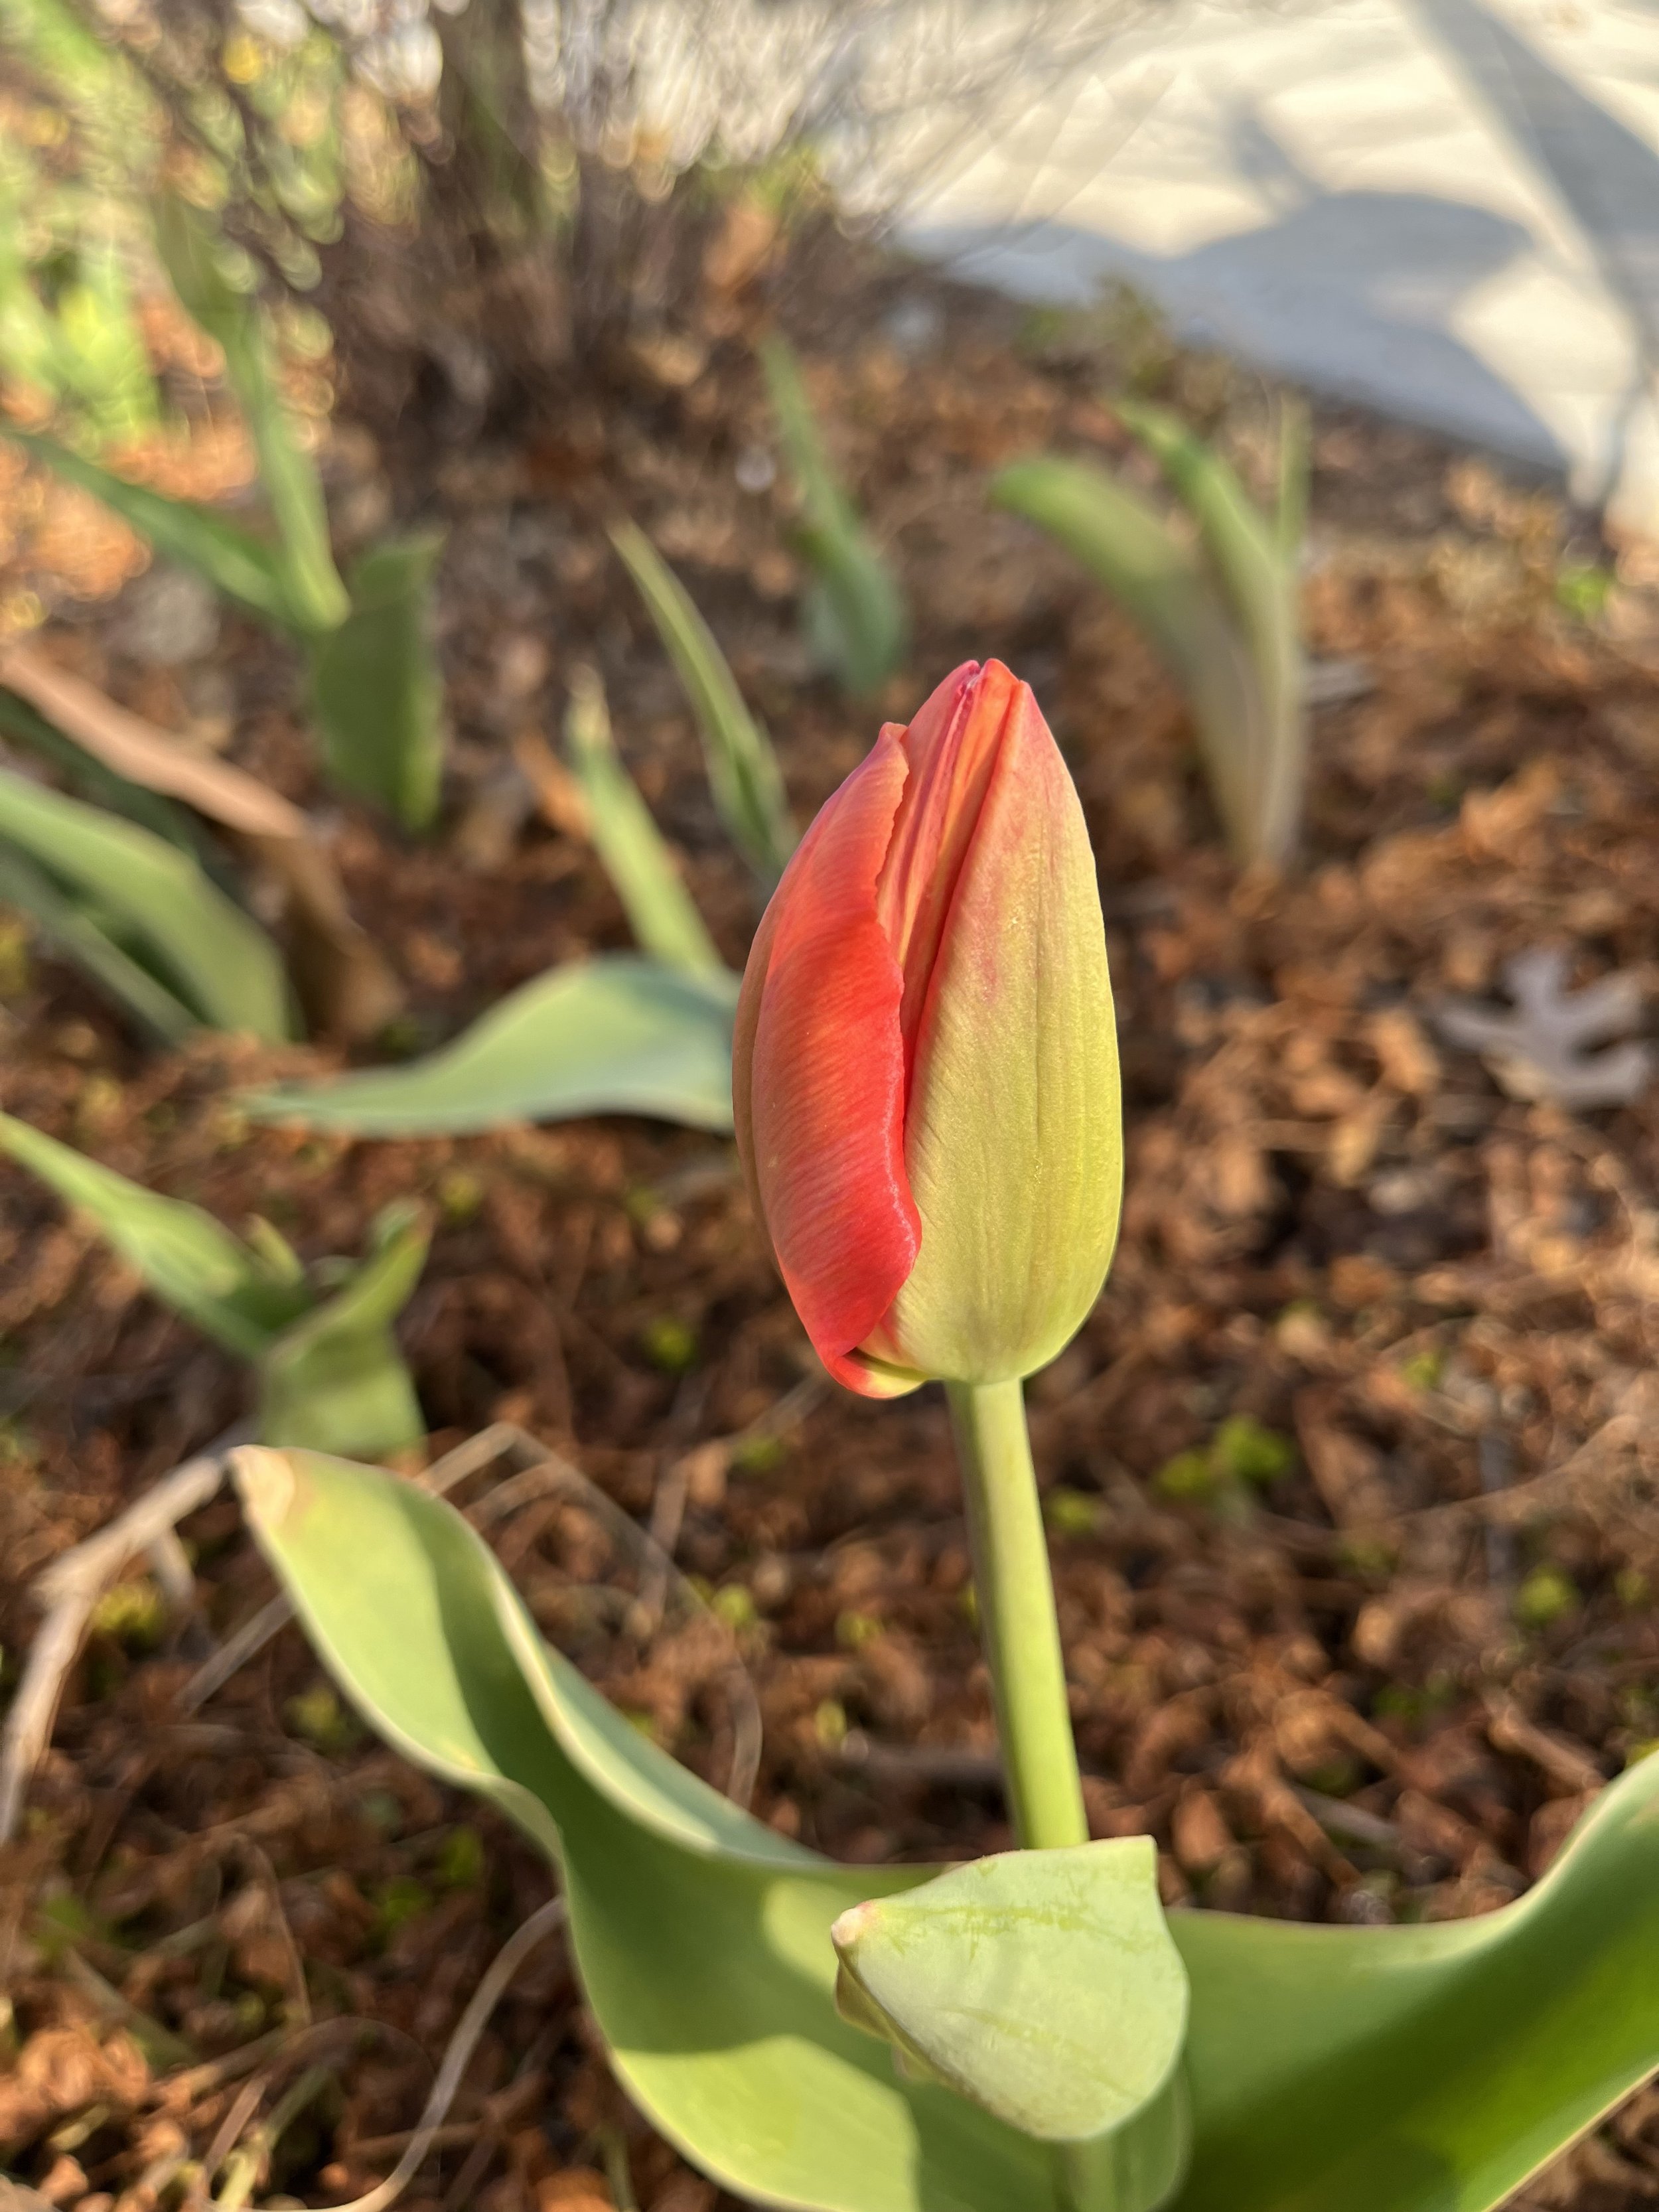
The warmer than normal temperatures since the first of February have convinced some tulips it is time for spring.
This year, we experienced a colder than normal January with temperatures below normal 21 of 31 days. Then, the switch got flipped at the start of February with 11 of the 17 days so far this month with temperatures above average.
Trees, shrubs and even tulips are starting to think spring has arrived.
And, based on the phone calls to our office this week, the feeling of spring in the air also has many wondering if they missed the opportunity to put down a pre-emergent this year.
You haven’t. Soil temperatures are still well below 55 degrees.
The current 3-Day Average Soil Temperature in the Oklahoma City area is 45 degrees, 10 degrees below the temperature required for summer annual weeds to start germinating.
So…. If you have already had your first application, it was done at the right time.
And, if you have not had your first application, you are not too late!
Cold spells, like yesterday and today’s morning temps in the 20’s, are very common throughout February. We can expect soil temperatures to range between the mid-40’s and low 50’s in the next couple of weeks.
So, when is the right time to apply a pre-emergent herbicide to prevent summer annual weeds?
Anytime in January, February or early March before weeds germinate.
There is one very important factor when it comes to the effectiveness of a pre-emergent no matter when you apply it…. Water!
A critical factor in the effectiveness of a pre-emergent application is water.

Because crabgrass is an annual grassy weed, without a spring pre-emergent even the best lawns will have crabgrass this summer.

Watering in the application activates the herbicide creating a barrier. A best practice is to water within 2-3 days of when the application is made. But, quality herbicides still retain effectiveness as long as they are watered in within 10-14 days.
Good news this winter… Since early January metro area lawns have benefited from 4 to 5 really good winter rainfalls, just right for moving pre-emergent herbicide into the soil creating a barrier against weed germination.
There are a lot of factors that go into creating your best lawn, but the most critical at this time of year is the application of the spring pre-emergent before weeds germinate.

One indicator that soil temperatures are warm enough for summer annual weeds to start germinating is bright yellow blooms of forsythia.

Even though we have had plenty of spring like days, forsythia has not started to burst with yellow yet.
Two More Important Weed Control Details:
1. Pre-emergent herbicides are not designed to control existing weeds in your lawn. If you have weeds in your lawn now, a post-emergent grassy weed killer or a broadleaf weed killer must be applied. Weeds commonly present in lawns now are winter annuals best prevented with the fall and early winter pre-emergent applications. Control now is possible, but the sooner an application is made, the better the results will be.
Best Practice – A clean lawn in January and February is the result of effective fall pre-emergent applications.

The best way to have a weed free lawn in February is to never skip the fall pre-emergent applications.
2. The pre-emergent barrier gradually weakens over the season from foot traffic, mowing and periods of heavy rain. The edges of the lawn are the first to break down. Additionally, summer annual weeds continue to germinate throughout the season. It is recommended a second pre-emergent application be made mid-March to early May for season long prevention.
Best Practice – A second pre-emergent application 6-8 weeks after the first application will provide season long prevention of summer annual weeds.
So, when is the right time to apply a pre-emergent herbicide?
If you have received the first application of the season, you did it at the right time.
If you have yet to receive the first application, you perfect…there is still time to prevent summer annual weeds!
If you have any questions about pre-emergent applications, please give us a call!
Lorne Hall
Hall | Stewart Lawn & Landscape
(405)367-3873
Dallisgrass – The “Address It As Soon As You See It” Weed

VIEWER DISCRETION ADVISED:
This email may not be suitable for all lawn and landscape lovers.
WARNING: This week’s post does not contain any pretty lawn and landscape pictures. Only ugly pictures of dallisgrass infestations. If you only click on our emails for inspiring pictures, please do not continue. We promise to return to normal content next week.
Often the content of our weekly emails is the result of what we are seeing in lawns and landscapes. This time of year, while doing lawn evaluations for soon to be Hall | Stewart clients, it is common to encounter lawns with dallisgrass issues.
Let’s spend a few minutes learning about this invasive weed and learn why it is so important to “address it as soon as you see it.”
Dallisgrass is a perennial grassy weed that was introduced to the US from Uruguay and Argentina in the 1800’s by A.T. Dallis as a fast-growing forage plant. Unfortunately, dallisgrass liked the environment a little too well and soon was growing out of control.
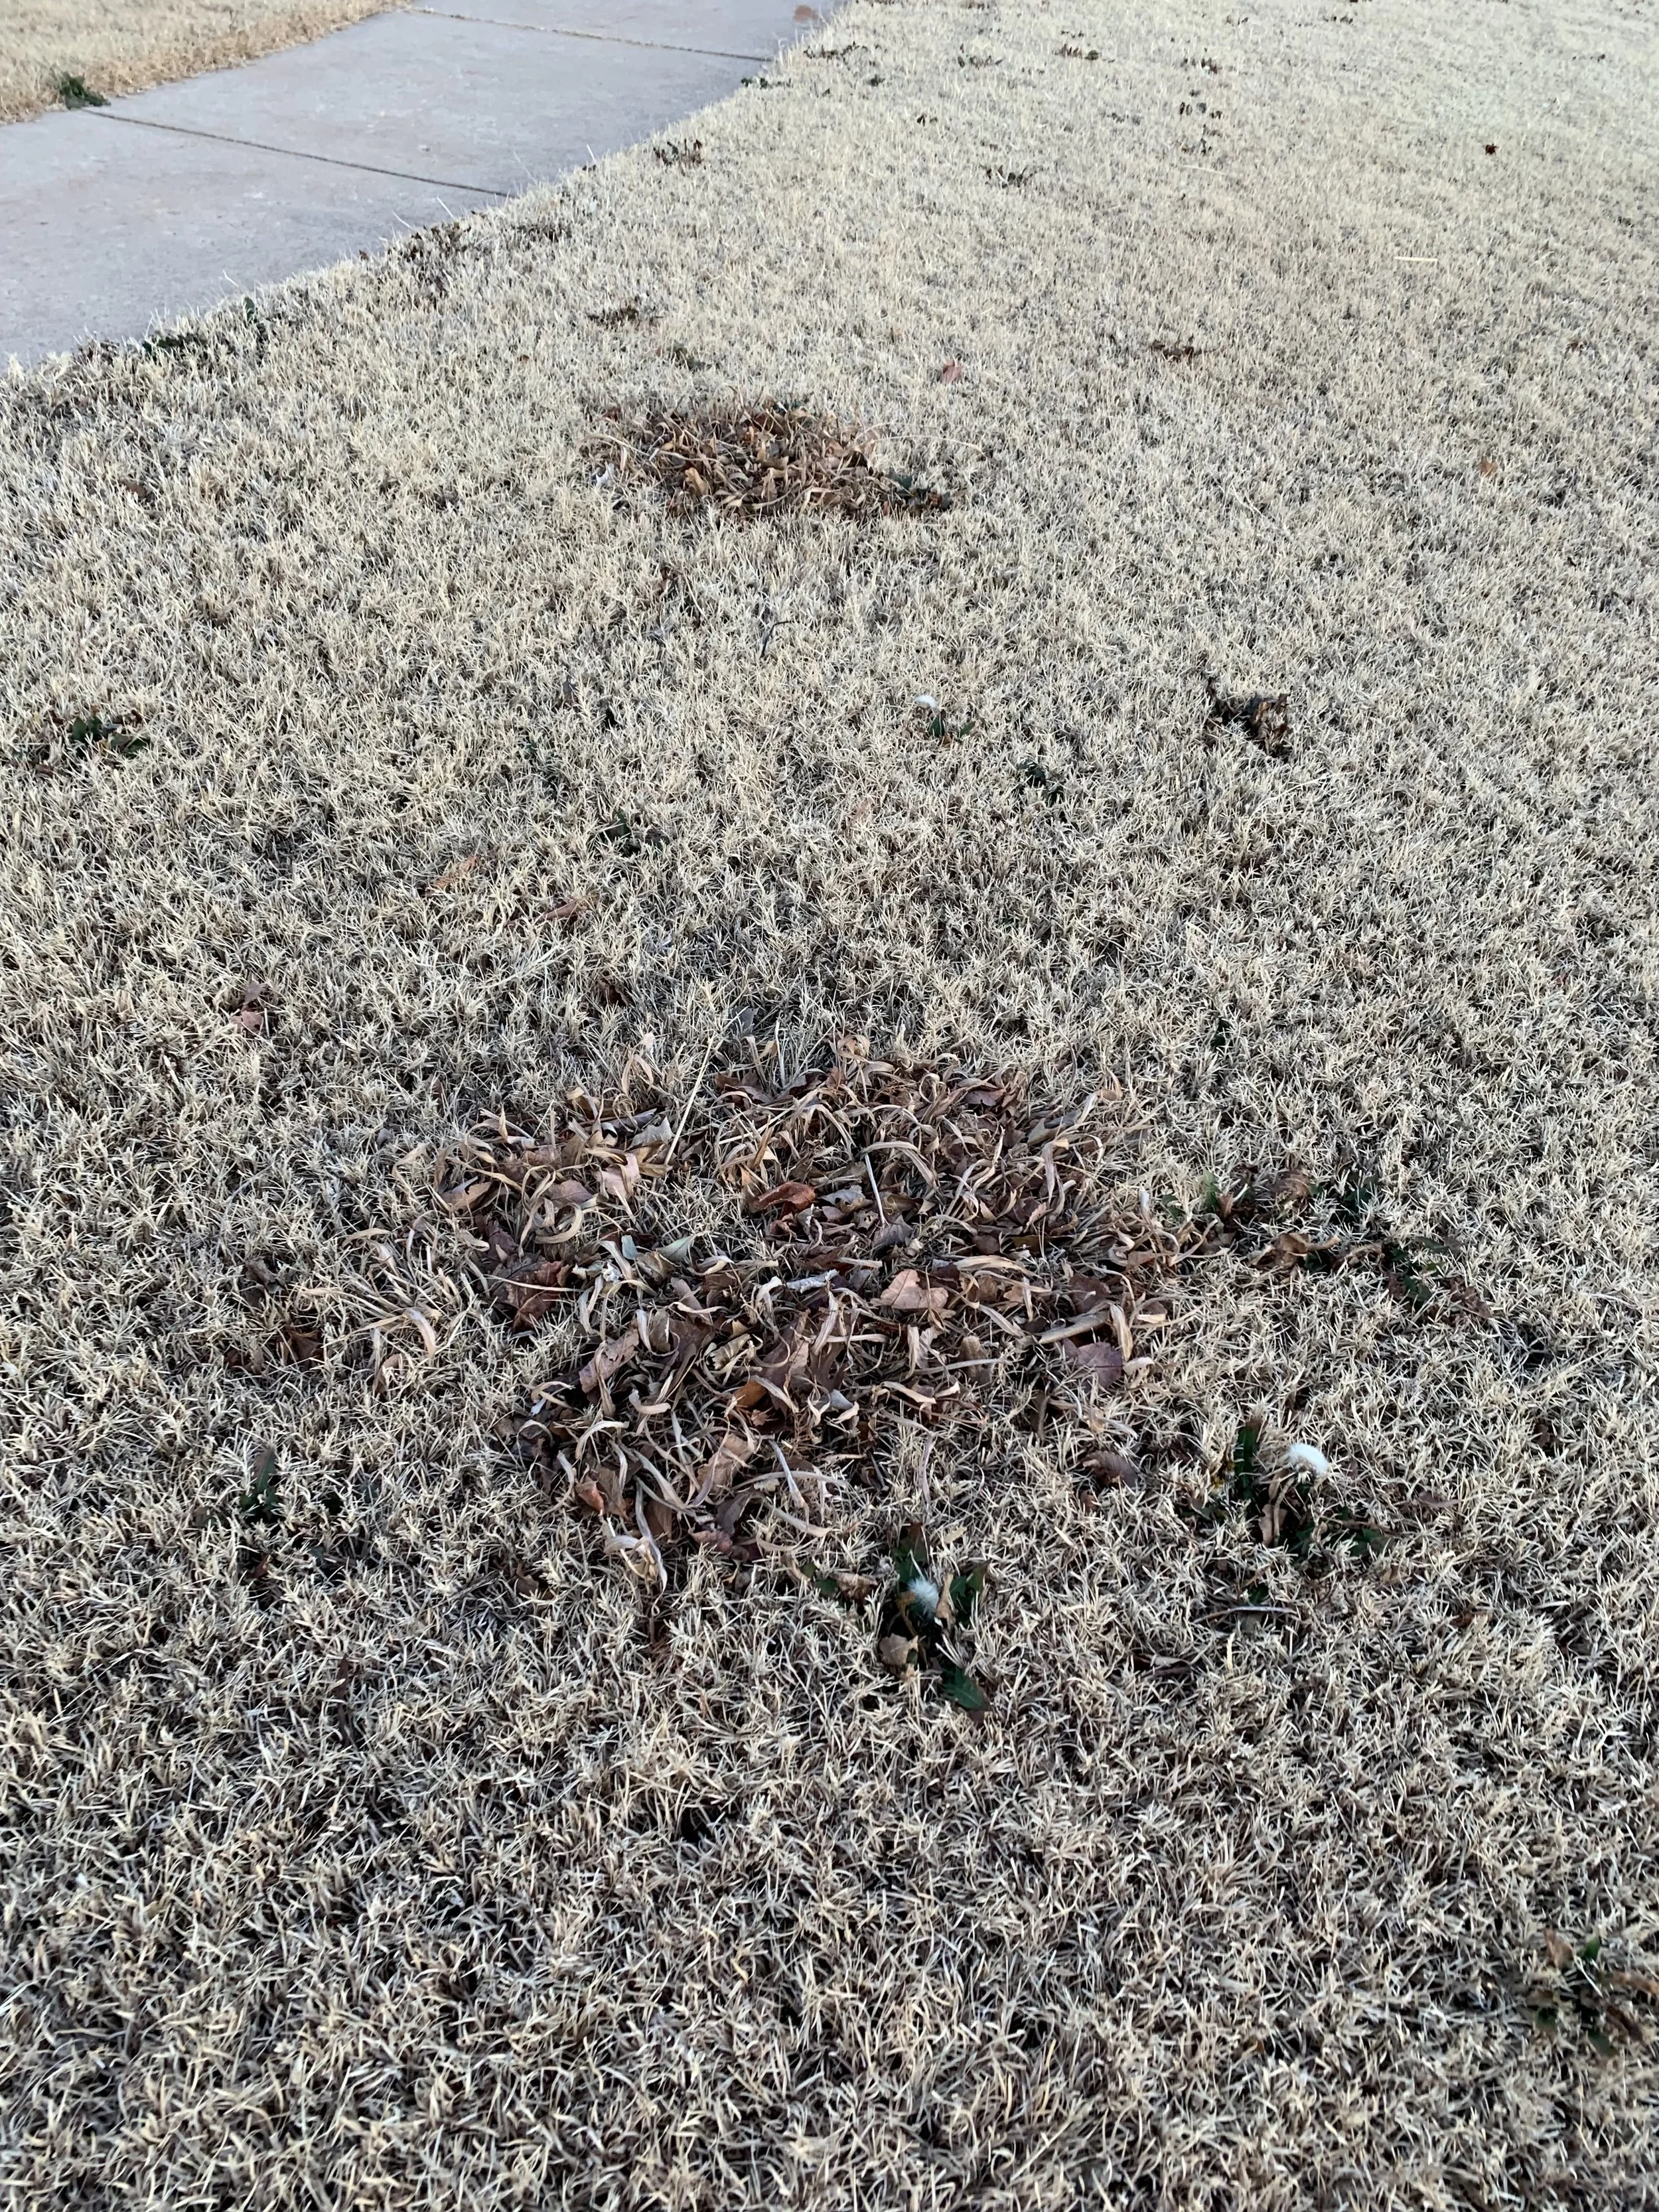
Dallisgrass is a grassy perennial weed that is very noticeable this time of year in dormant bermuda lawns.
How fun would it be to bring to market a plant that is beneficial for generations to come and have it named after you! Poor A.T., he thought he was helping, but instead of a plant people love named after him, he has a weed with his name that is the catalyst for a lot of foul language.
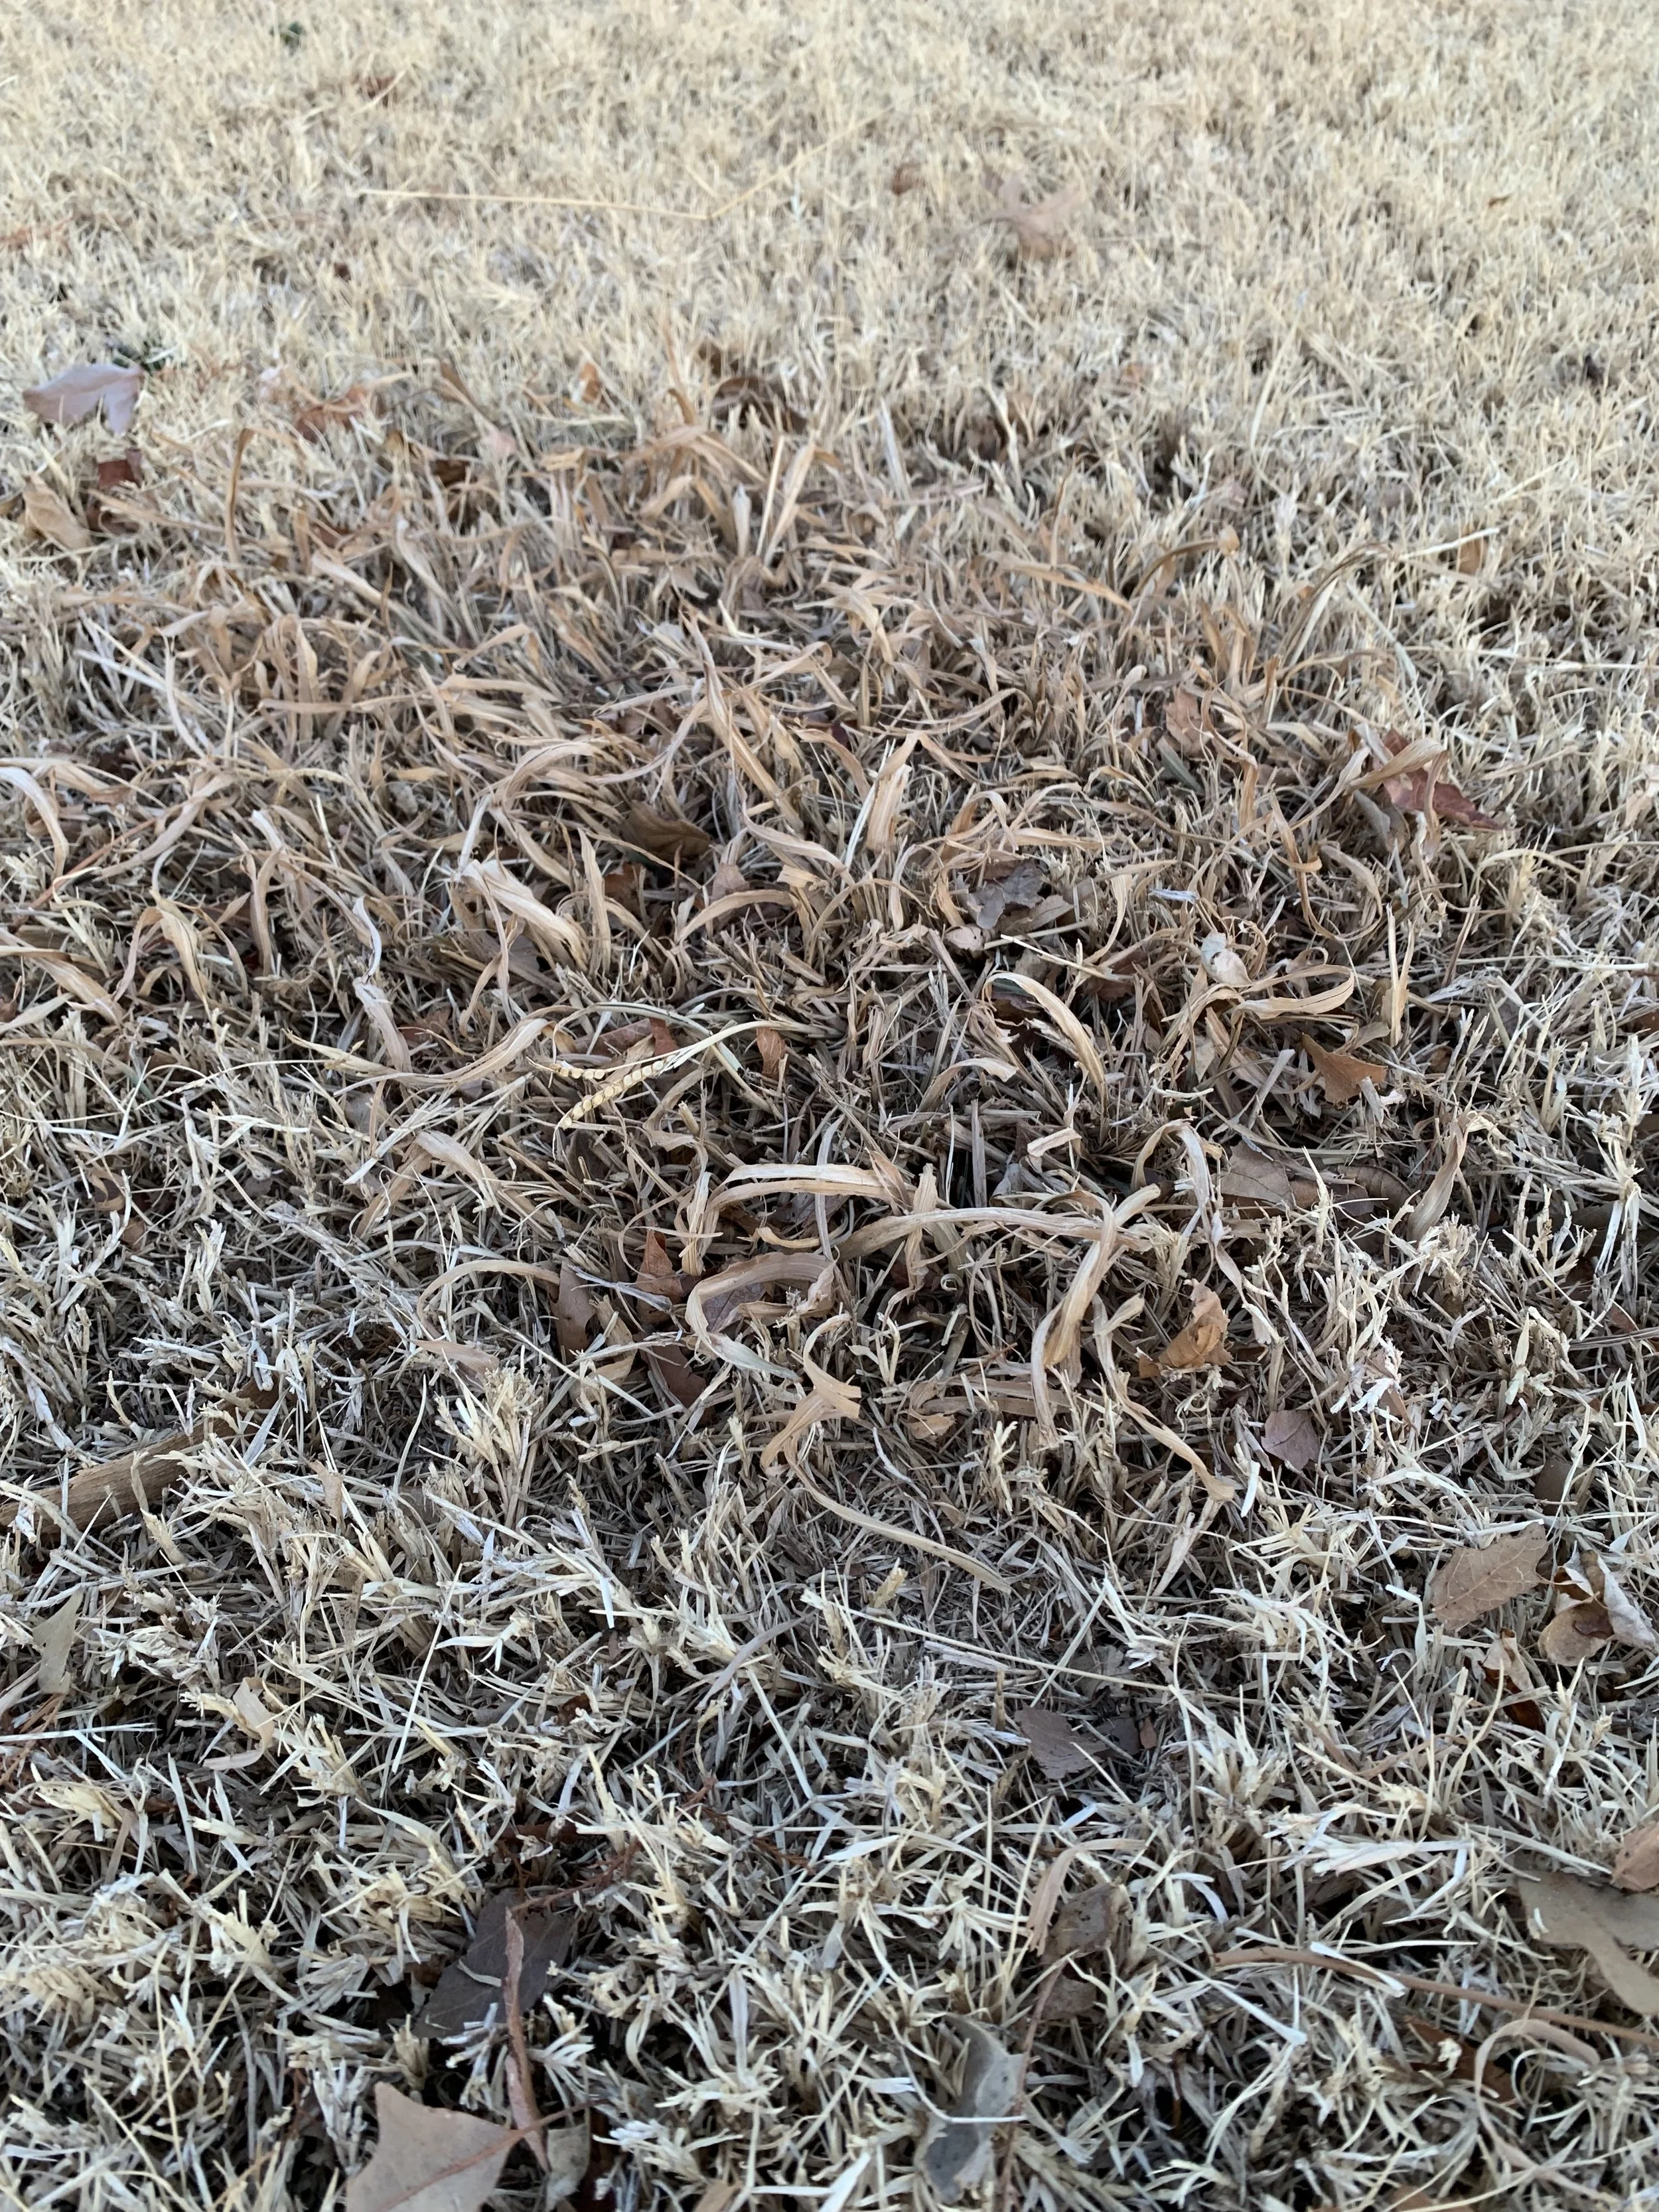
Dallisgrass is often confused with crabgrass. Crabgrass is an annual, meaning it dies every winter and can be completely prevented with a pre-emergent. While dallisgrass is a perennial, a pre-emergent will prevent the spread of new clumps but repeated post-emergent grassy weed control is required to eradicate existing clumps.
What is Dallisgrass?
Dallisgrass is a coarse textured perennial that grows in an ever-enlarging circular clump and is often confused with crabgrass.
A perennial is a plant that comes back year after year. Dallisgrass goes dormant during the winter, but the rhizomes do not die. In the spring, new growth appears from the roots.
Dallisgrass has short underground rhizomes that gradually grow outward. It has wide ¼ to ½” leaf blades that grow 4-12” long when not mowed.
Mature clumps typically have dying centers while the outer edge continues to grow smothering turfgrass as it spreads.
Individual plants increase in size while new clumps start from weed seeds.
Dallisgrass flourishes in all soils, sandy to clay, but is partial to compacted, wet soils.
Dallisgrass is a very common problem for lawns throughout the south from coast to coast.
How To Control Dallisgrass
1. Healthy Turf - As with all weeds, maintaining a healthy, dense turf is the first step. Good mowing, watering, fertilizing and aeration practices result in a thick turf leaving less area for dallisgrass seeds to come in contract with and germinate. Thin turf and bare soil areas are an invitation to all weeds, especially dallisgrass.
2. Pre-Emergent Applications – Although dallisgrass is a perennial, it does produce an abundance of seeds that are spread by wind, animals and lawn equipment. Pre-emergent applications will not control existing dallisgrass, but it will prevent it from allowing more clumps to develop in your lawn. Seeds germinate in 60-65 degree soil temperatures, a few weeks after crabgrass germinates.
The second spring pre-emergent application between mid-March to early May is critical in stopping the spread of dallisgrass.

Dallisgrass goes dormant in the winter but the rhizomes stay alive and often keep some green color near the soil surface.
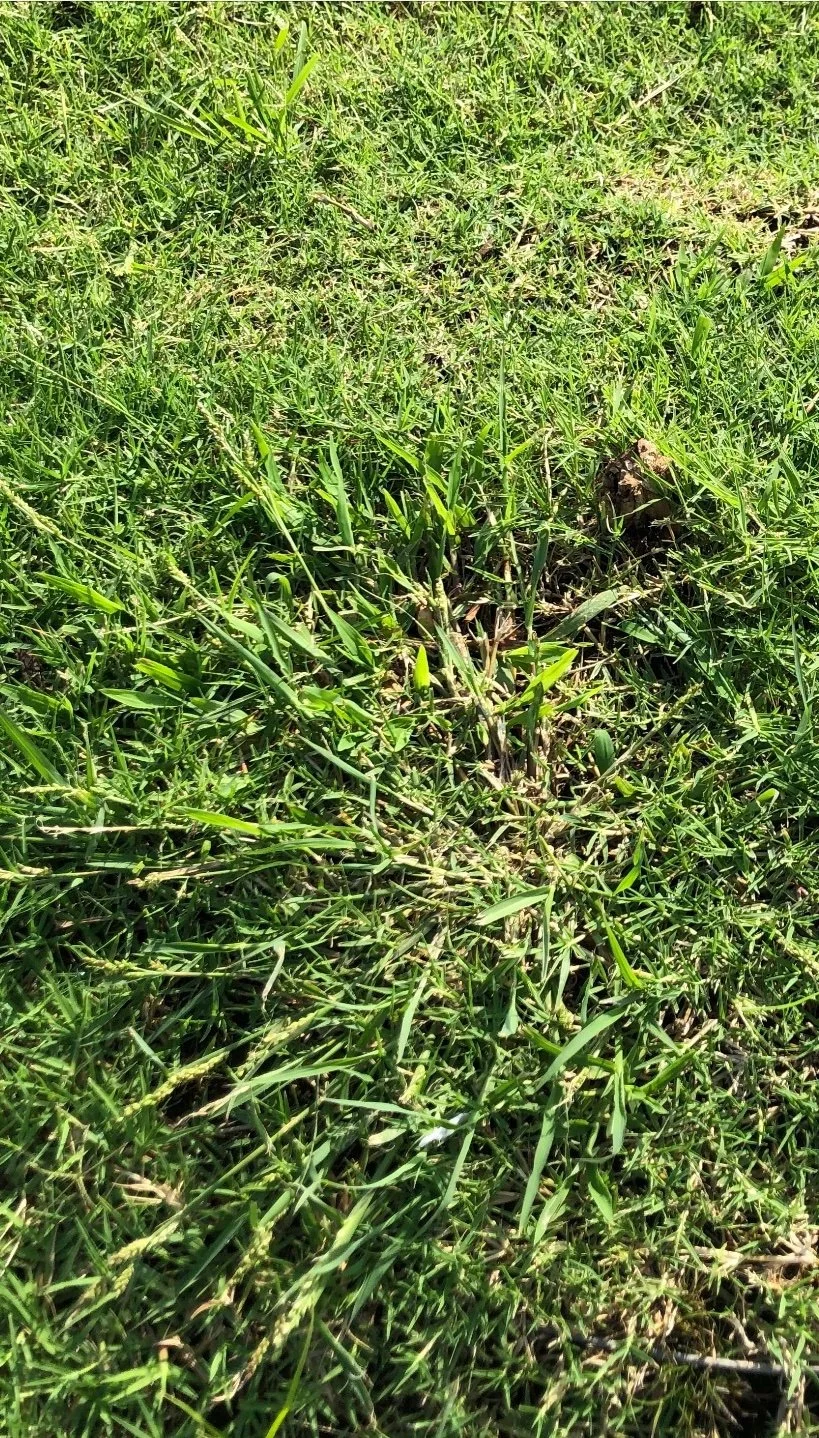
Dallisgrass grows outward smothering turfgrass as it spreads. Over time the center of the weed dies out while the rhizomes continue to spread.
3. Selective Post-Emergent Applications – Grassy weed control products labeled for crabgrass will work on dallisgrass, but repeat applications are required every 2-3 weeks until the rhizomes are completely dead. MSMA was the go-to product for years, but it is no longer available for home lawn use. One product labelled for homeowner use is Weed-B-Gone Crabgrass Killer. Always follow label instructions. Know your type of turf, and make sure the product is labeled for your turf type. Licensed lawn care professionals have restricted use herbicides available to use that provide better control of dallisgrass.
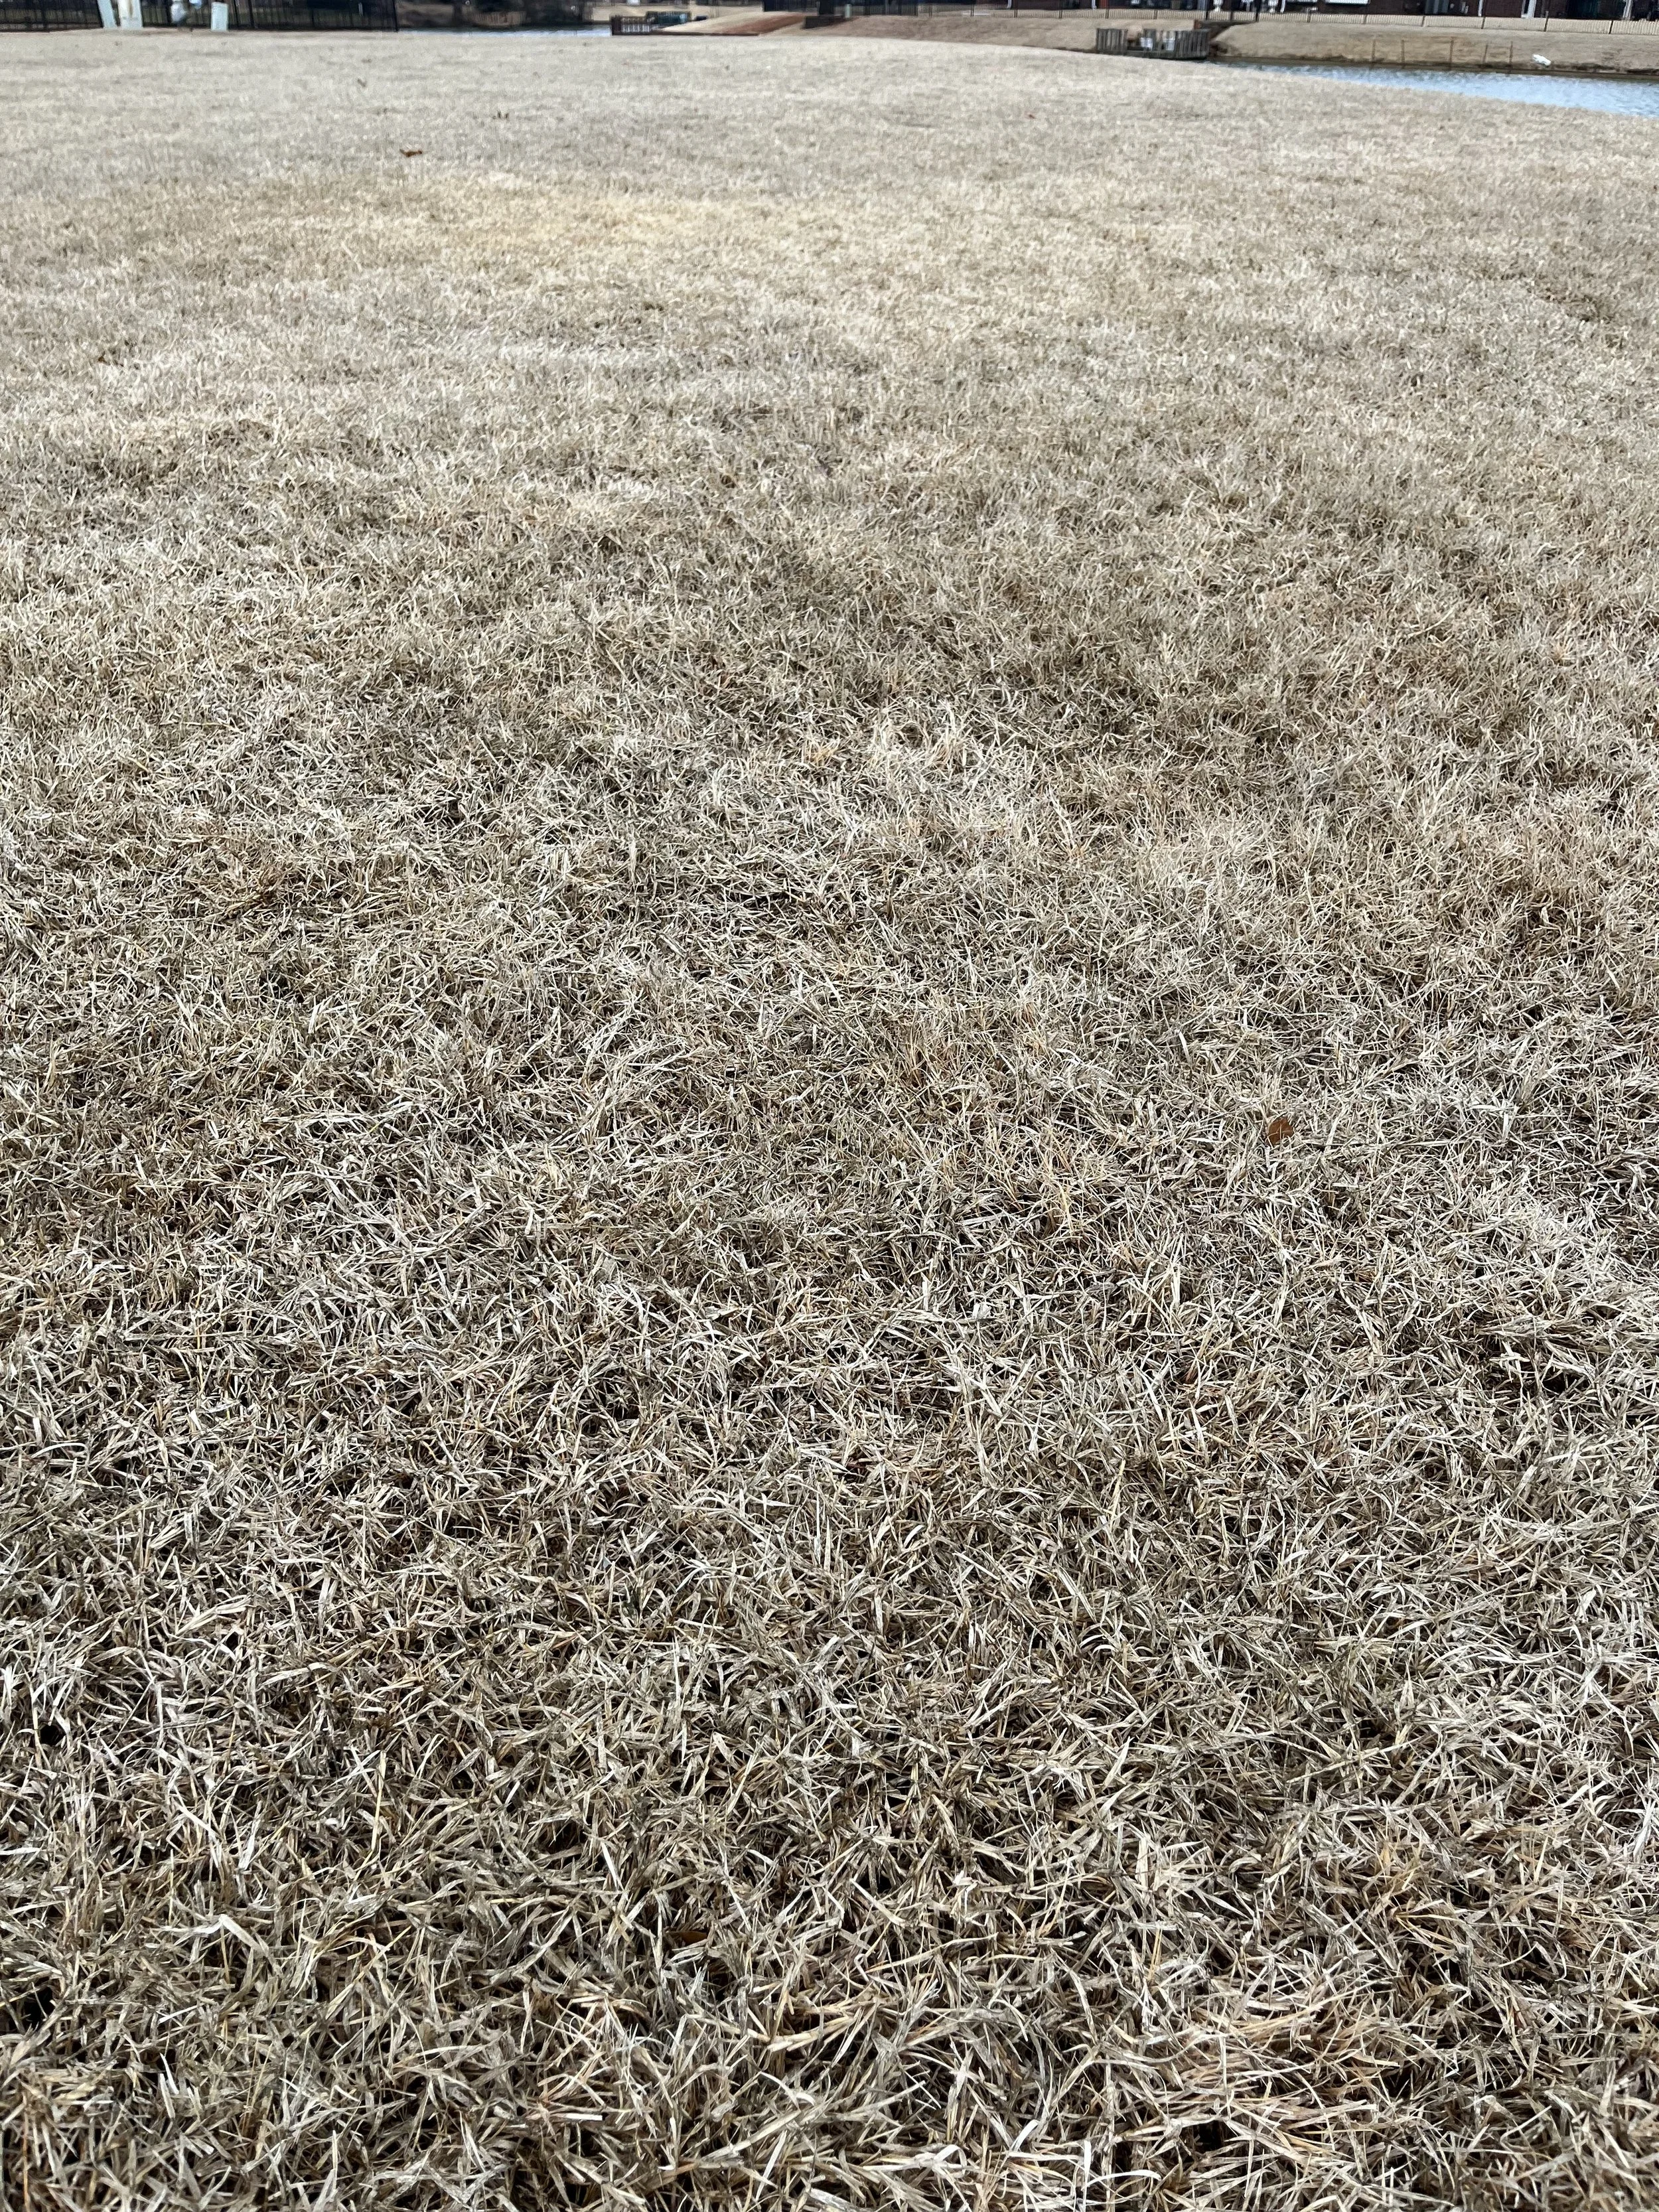
This lawn was overtaken with dallisgrass when we started working on it last spring. The owner agreed to allowing us to use glyphosate early in the growing season to aggressively control dallisgrass resulting large bare areas. Over the summer, most of the areas recovered. But another year of good turf management practices and this lawn is needed to return the lawn to looking great. Control of dallisgrass and recovery is often a two year process.
4, Non-Selective Post-Emergent Application – The best control of large areas of dallisgrass infestations where there is little to no desirable turfgrass remaining is to treat with glyphosate. Glyphosate is a non-selective herbicide, meaning it kills everything it comes in contact with. Repeated applications are still required. If spot treating clumps of dallisgrass in your lawn, take care not to allow the spray to reach desirable turf. Once the weed is completely killed, rhizomes included, resodding may be required.
5. Digging It Out – The most environmentally friendly, but the most time consuming and physically demanding, is to dig out the invasive weeds. A good step in preventing a dallisgrass outbreak is to dig out small clumps, rhizomes and all, as soon as you see them in your lawn.
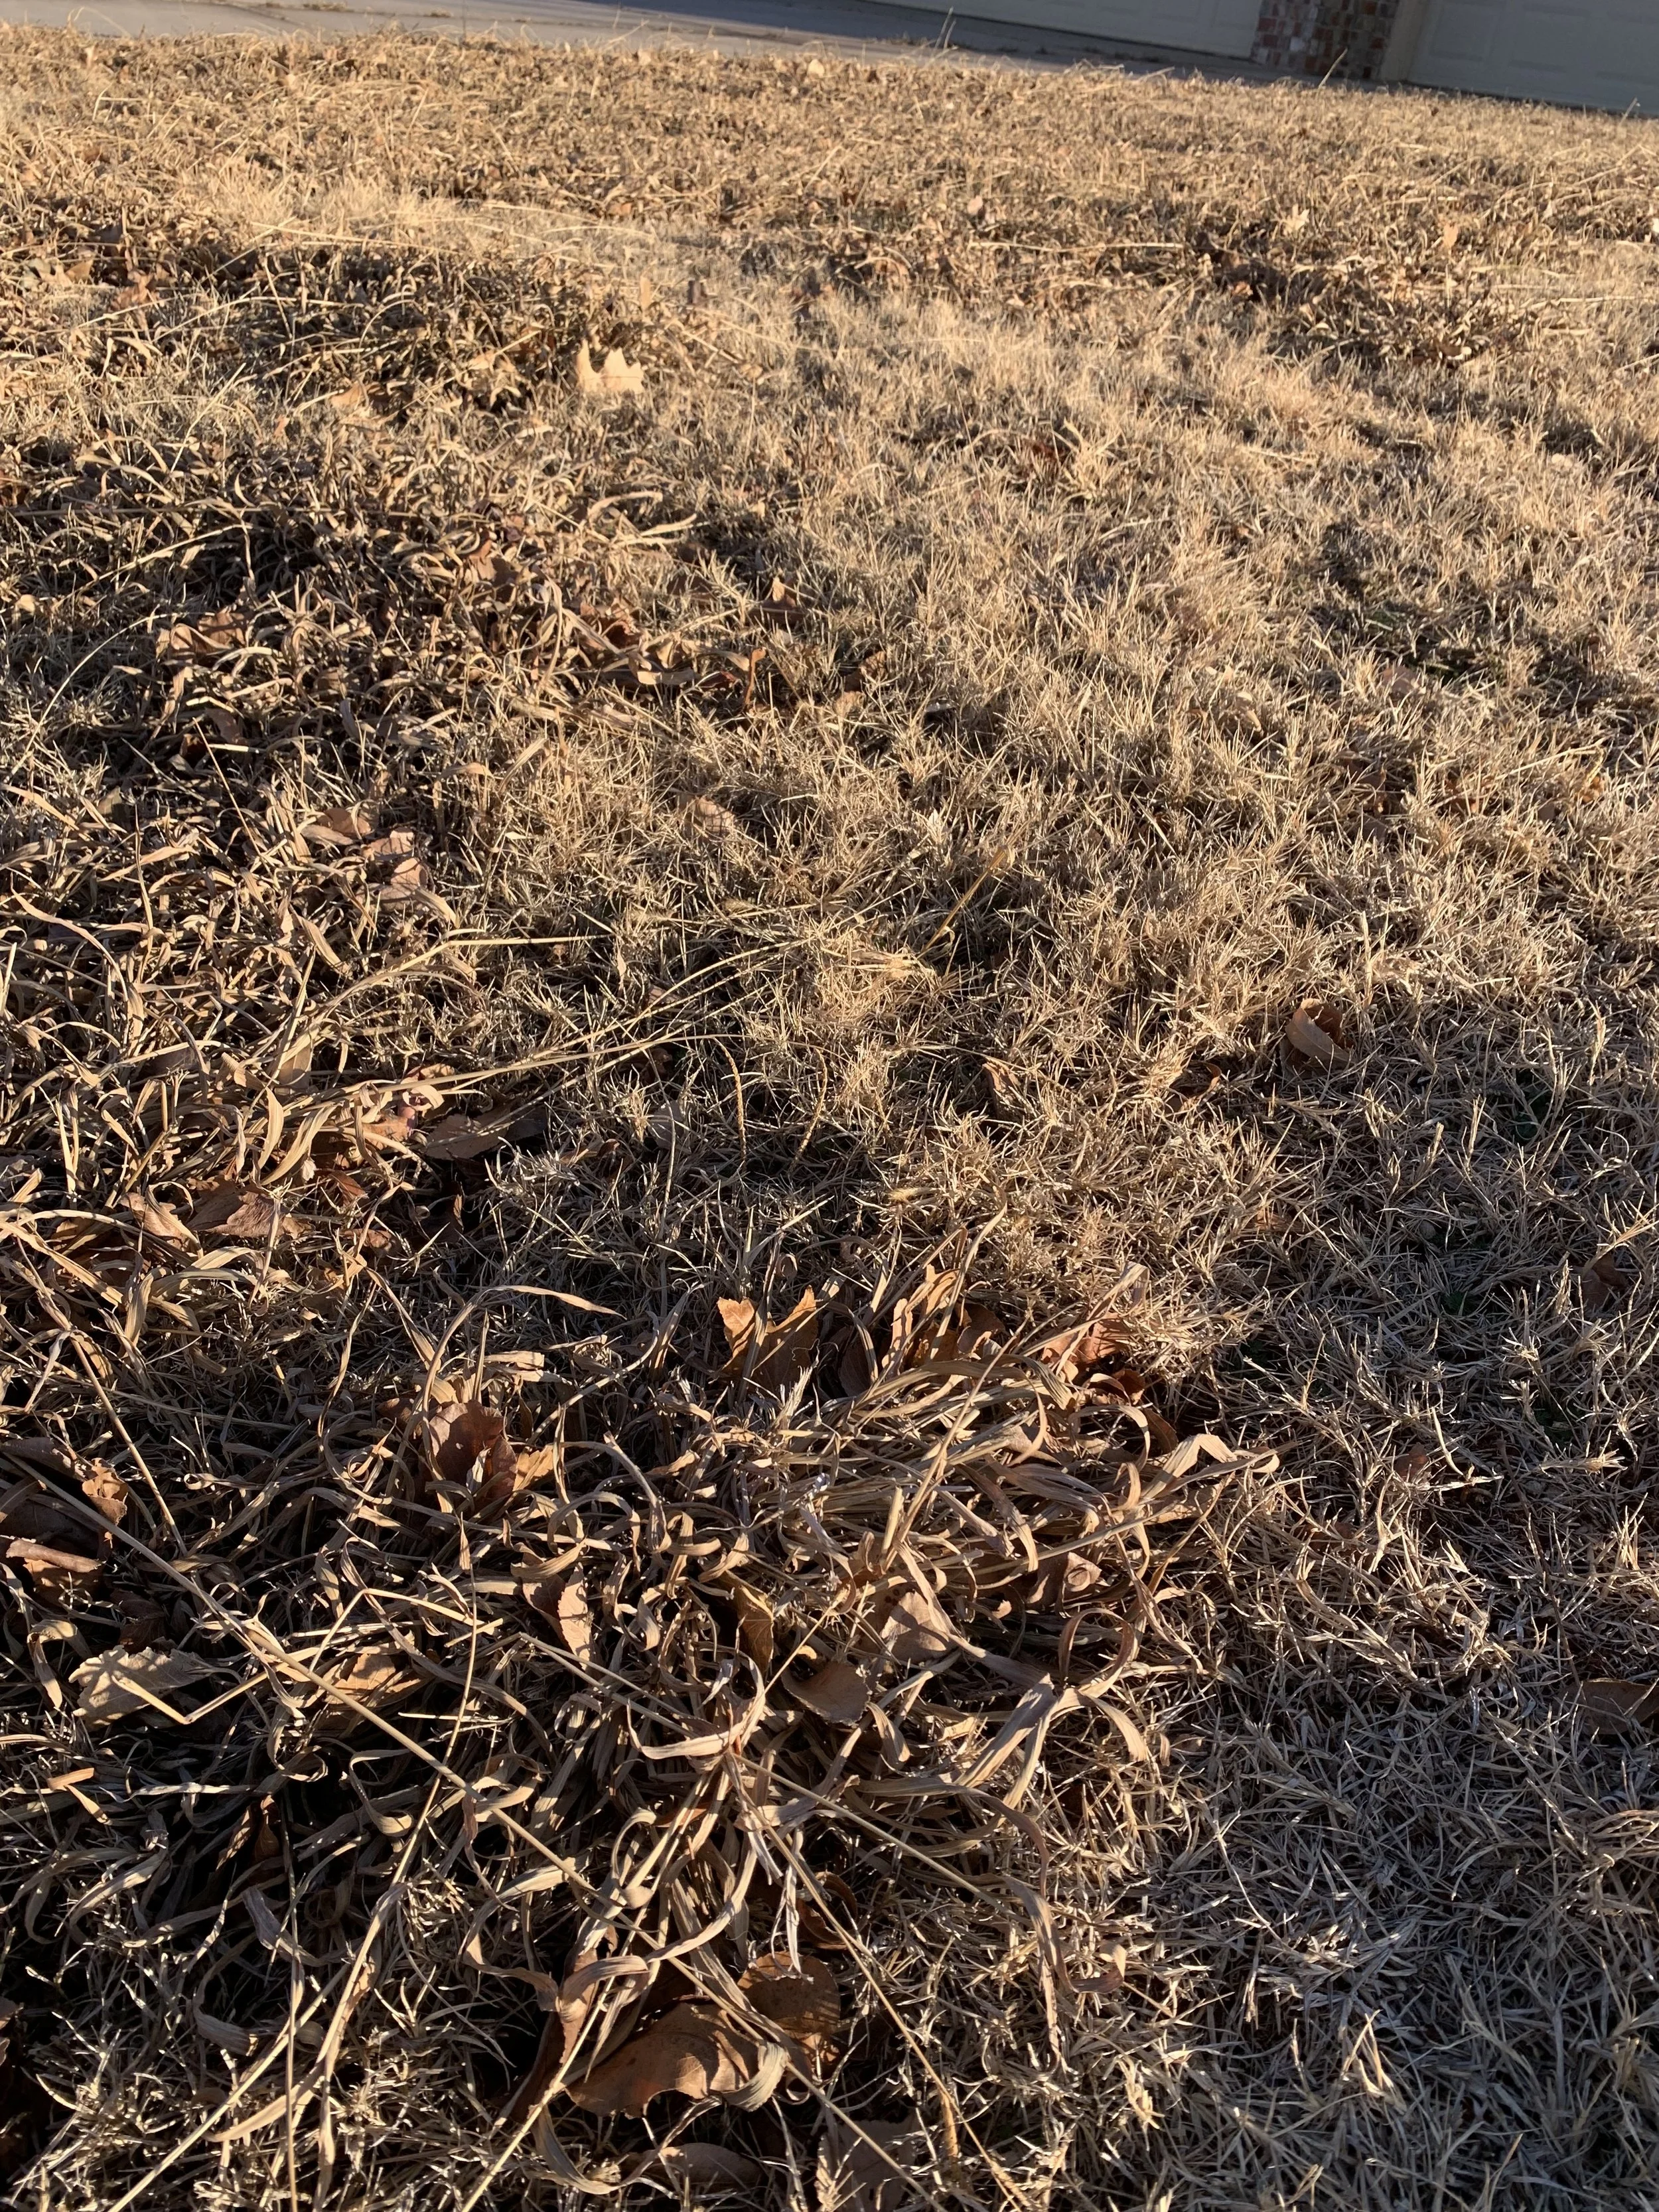
Large areas of dallisgrass where little to now desirable turfgrass remains are best completely killed out with a non-selective herbicide and then resodded.

Non-selective herbicides were used in June to control dallisgrass in this lawn. After the dallisgrass was completely controlled, the areas were sodded with Bermuda.
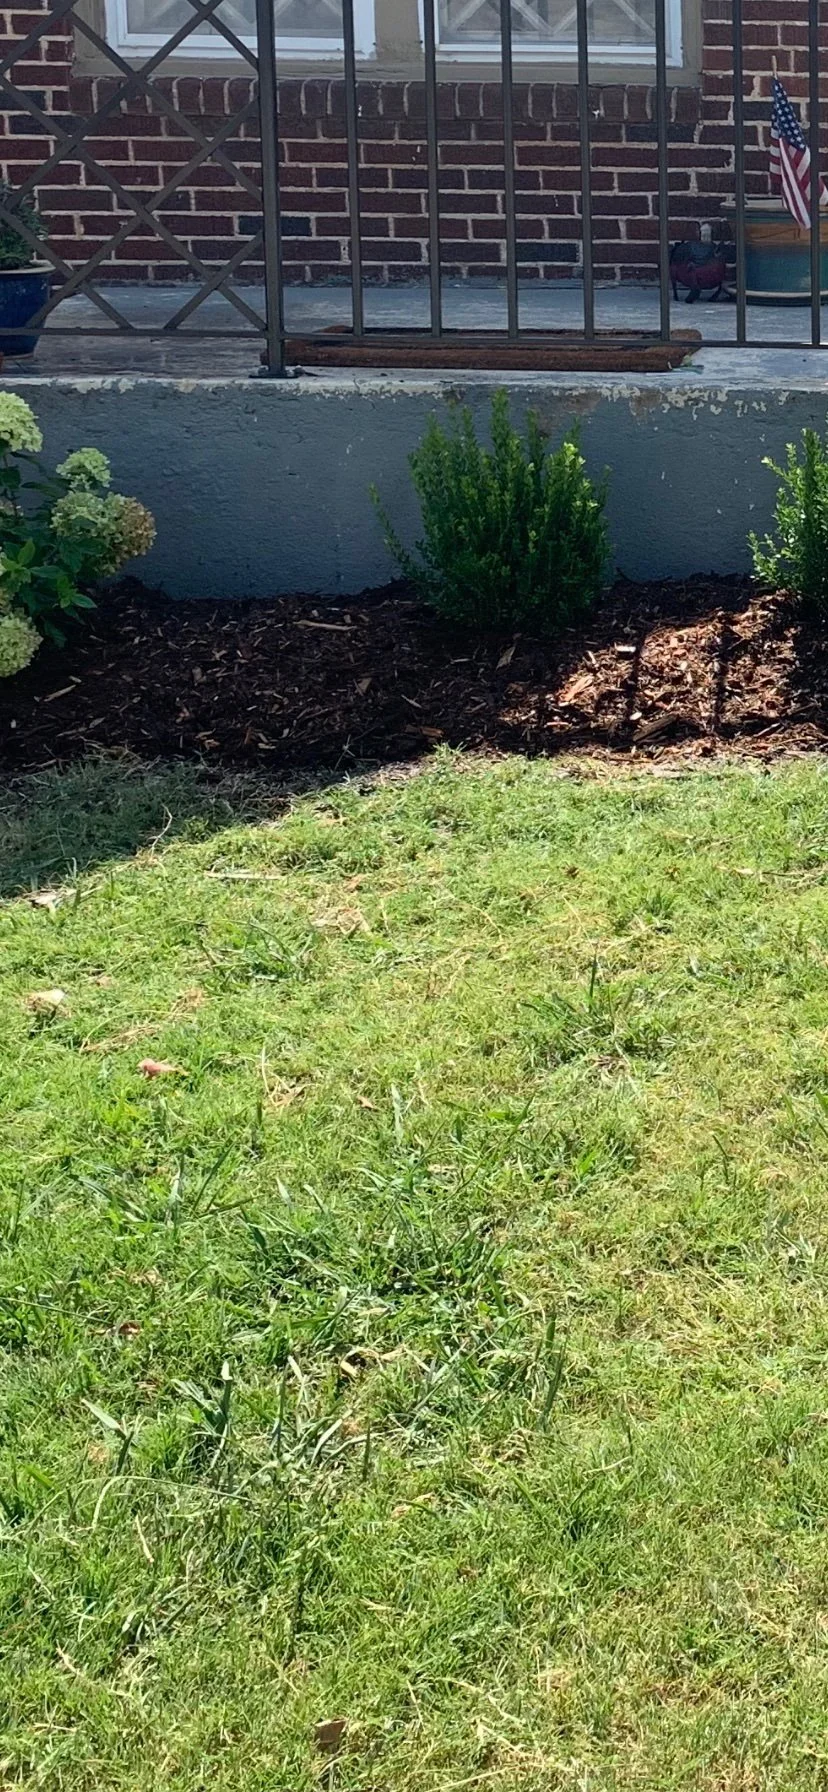
Dallisgrass grows faster than turfgrass spoiling a well maintained lawn and landscape.
Because dallisgrass is a perennial, persistence is required. Total eradication of a large area may take more than one season. Multiple treatments over a two-year period can be expected.
It is one of the more difficult to control weeds homeowners will face and the longer it has been established the harder it is to gain control.
Address dallisgrass as soon as you see it. The longer you wait the more invasive it will become.
If you have dallisgrass problems, or if you need help in identifying dallisgrass, please give us a call or respond to this email.
Lorne Hall
Hall | Stewart Lawn + Landscape
(405)367-3873
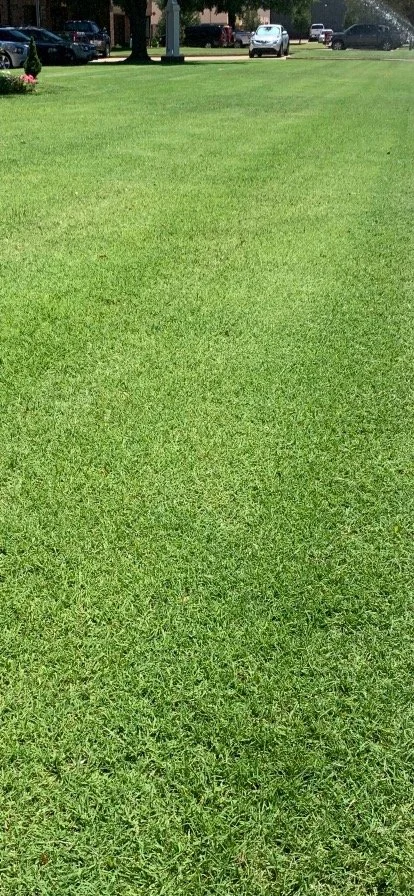
The goal is to have a clean and healthy lawn this summer. It is critical you address dallisgrass as soon as you see it.
Japanese Maples – Year Round Interest

With over 140 hours of the past 7 days below freezing with very little snow cover, our lawns and landscapes look as if they have been left uncovered in the deep freeze and are now suffering from a bad case of freezer burn.
After a long cold week of long johns, heavy coats and gloves, I doubt you are looking for a list of lawn and landscape tasks to accomplish over the next few days.
So, go ahead, pour yourself another cup of coffee, grab a blanket, and head to your comfy chair closest to the fireplace and spend a few minutes dreaming about beautiful landscapes.
Specifically, let’s dream of Japanese Maples – The Aristocrat of the Landscape
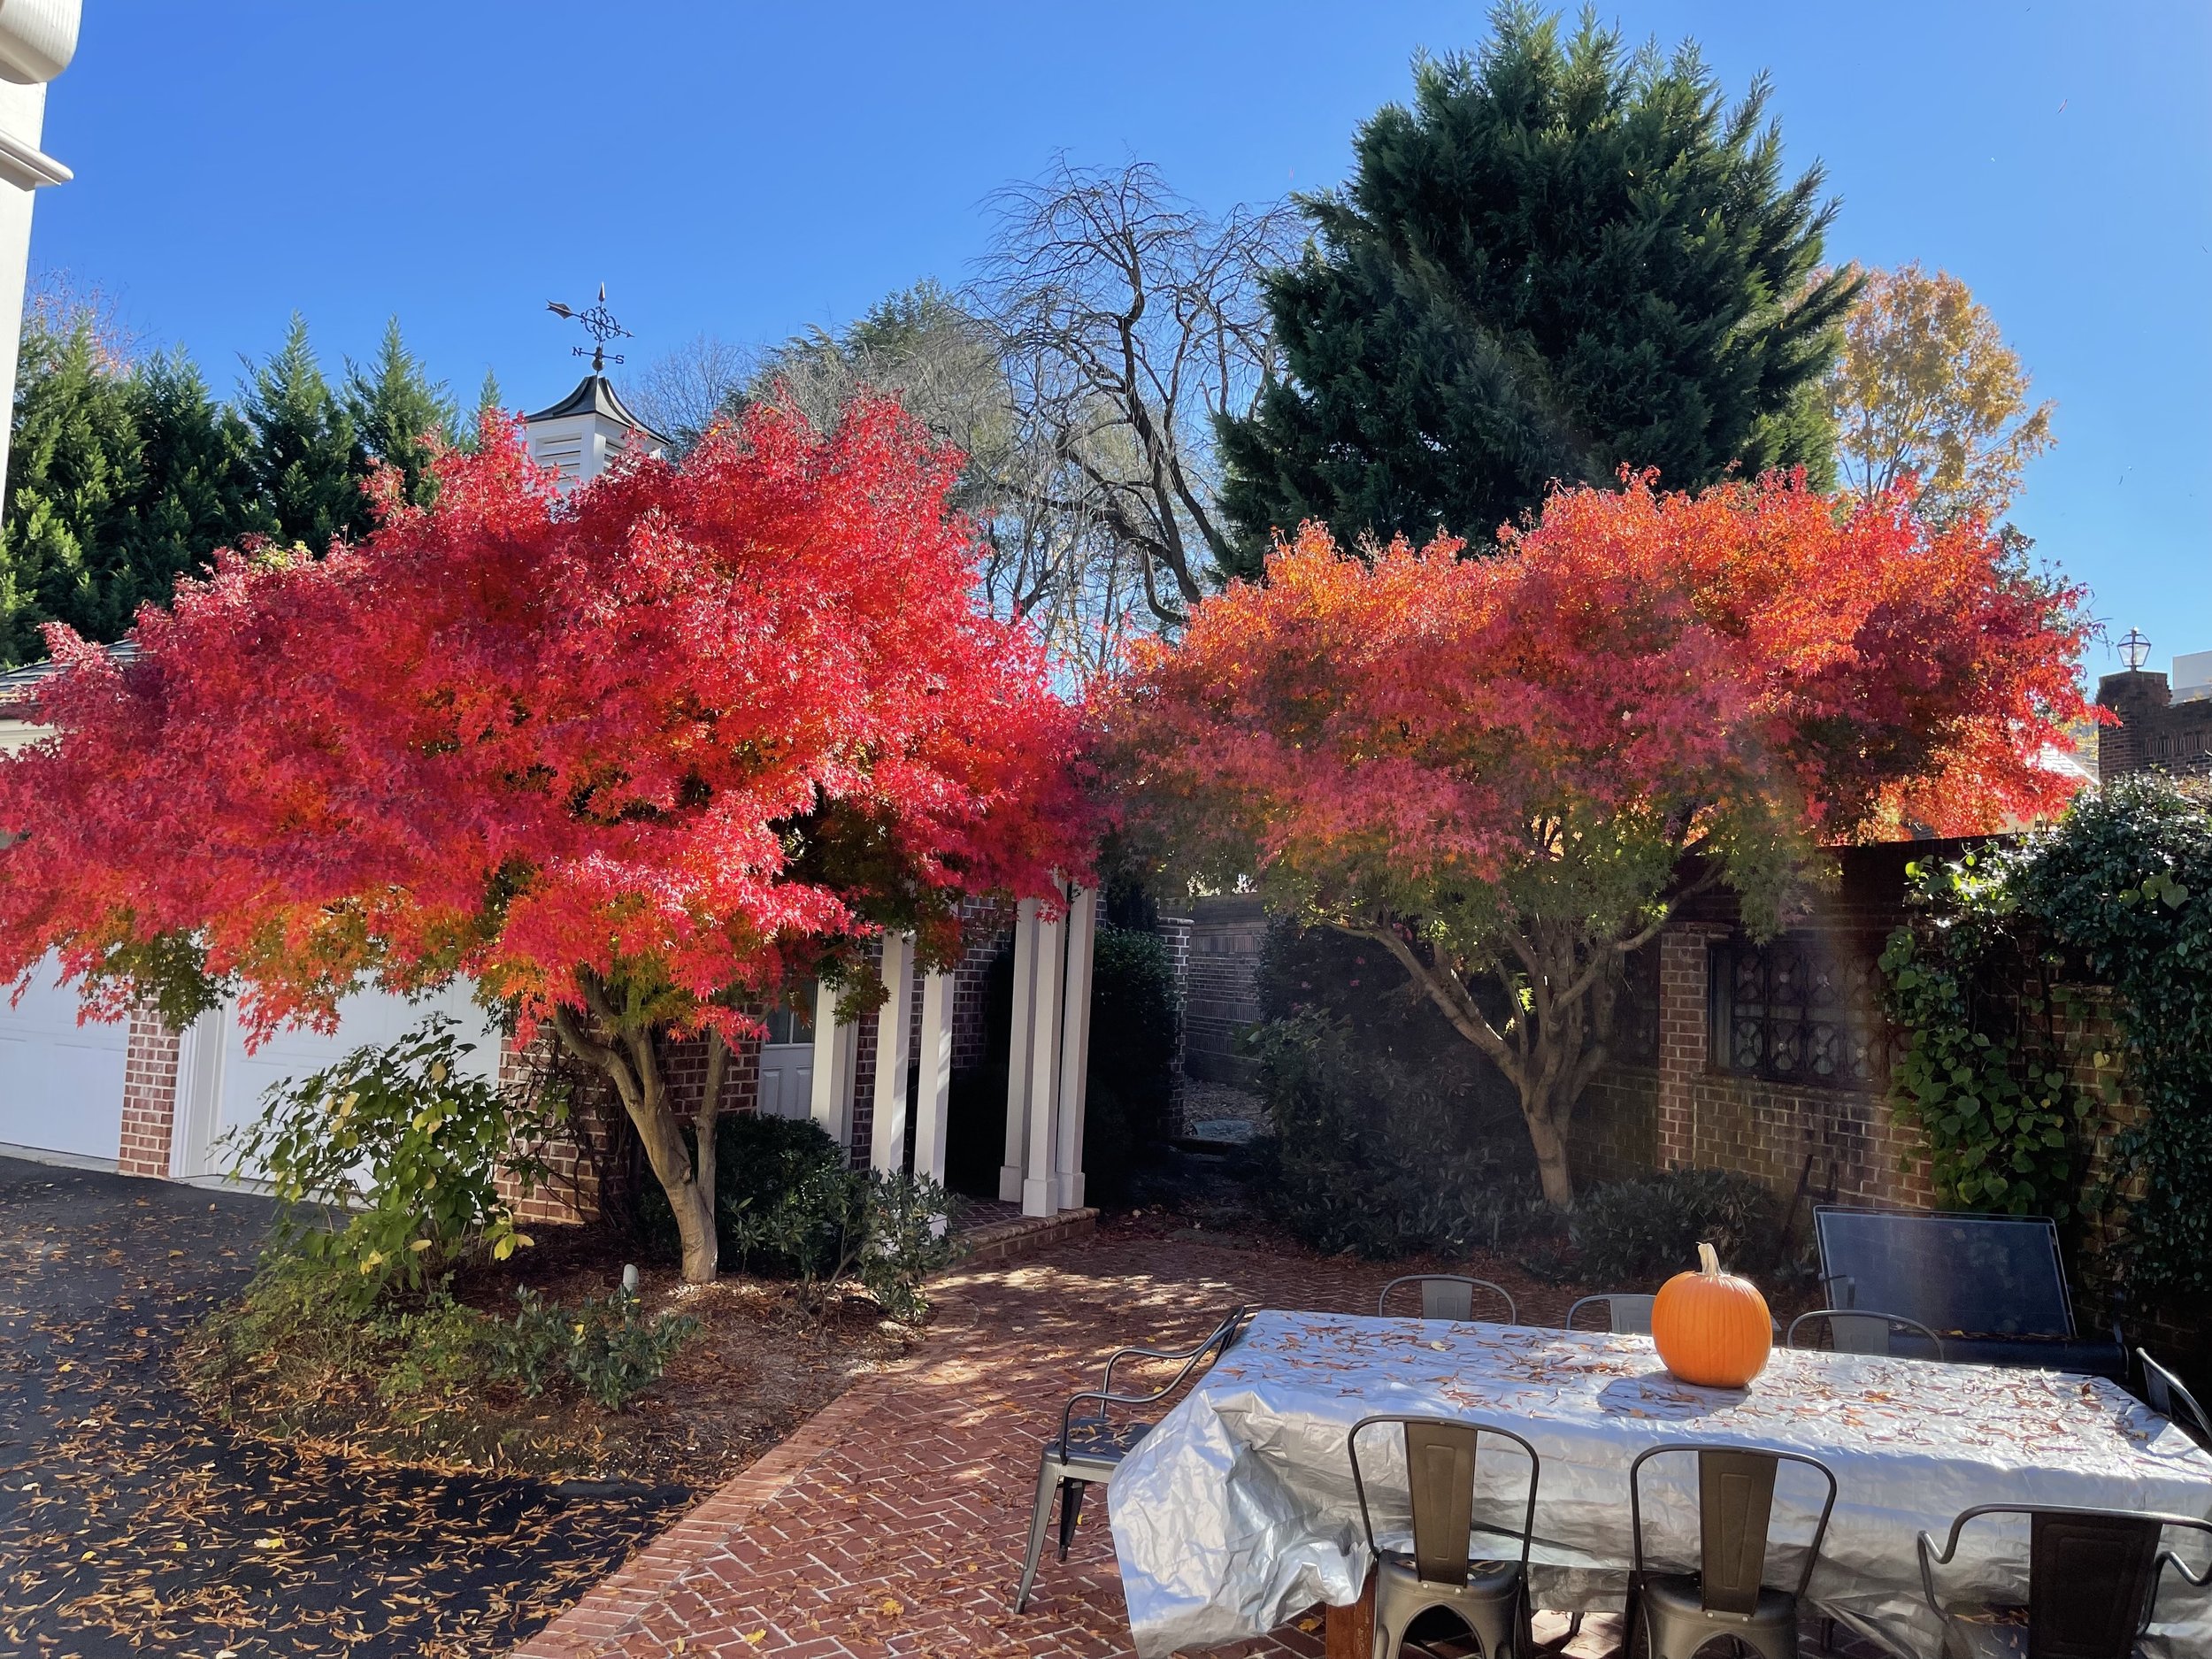

Japanese Maples are sure to add bright colors to your fall landscape.
Michael Dirr, author of the Dirr’s Hardy Trees and Shrubs textbook, writes:
“True aristocrats are rare among people and trees, but Japanese Maple is in the first order.
It is difficult to imagine a garden that could not benefit from one of the many forms of Acer palmatum.
The normal habit is round to broad-rounded, with the branches assuming a layered,
almost stratified architecture similar to Flowering Dogwood.
Leaves are light green to dark green, to reddish purple.
Fall color is sensational with rich yellow and reds through the fall.
The winter silhouette is attractive, providing interest during the off season.
Landscape uses for the species and its many cultivars are limited only by
the imagination of the gardener.”
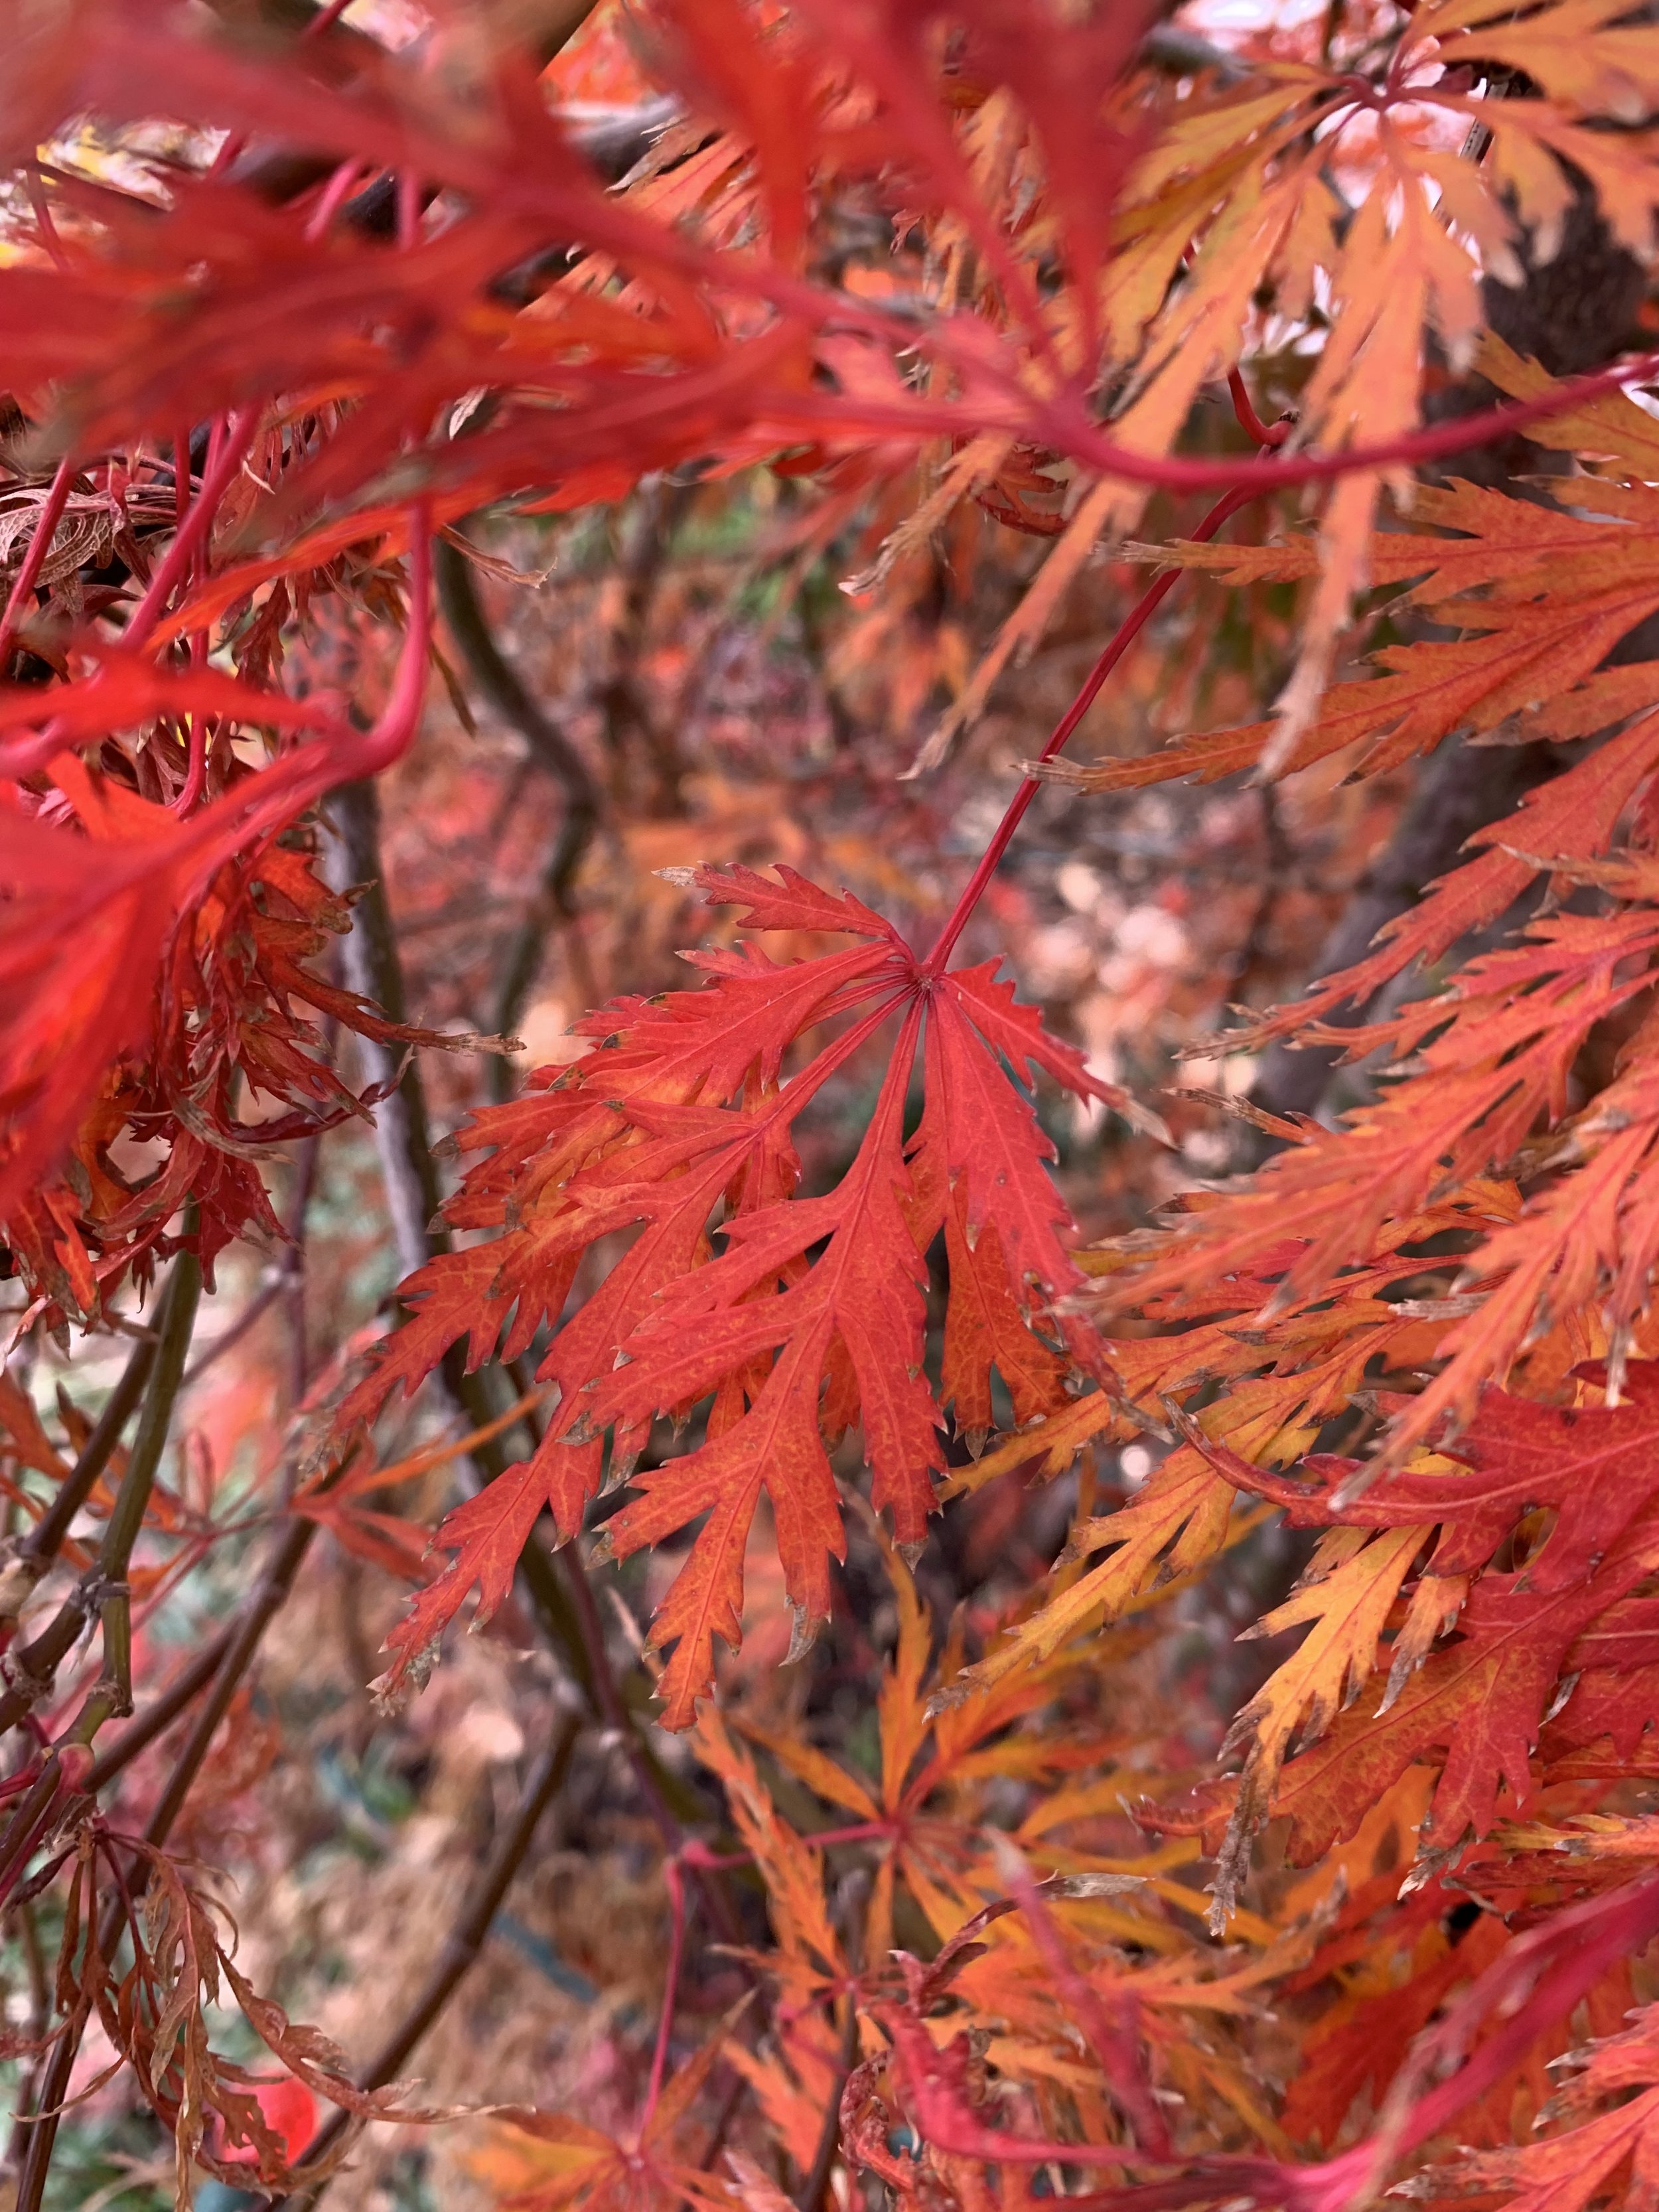
Japanese Maples have added spectacular color to the fall landscape this year. Garnet is a graceful small variety with lacy leaves and a weeping growth habit.
A few things everyone needs to know about Japanese Maples:
Site
Japanese Maples grow well from zone 5-8, making them a good choice for Oklahoma City’s zone 7. They perform best when planted in dappled sun to shade and out of direct afternoon sun. Shade does have its limits…they need some sun for the best fall foliage color. During the summer heat, it is common for them to experience some leaf scorch, especially if they receive direct sun. They prefer well-drained soil and consistent moisture. During the heat of the year, you can expect them to need extra deep watering the first couple of seasons. But once they are established, they are essentially carefree.
Monrovia, a leader in the development and growing of landscape plants, refers to “Japanese Maples a statement plant…one of the most compelling plants you can add to your landscape.”
With over 1,000 varieties and cultivars of the Japanese Maples, there has to be one perfect for your landscape.

Tamukeyama Japanese Maple has deep red-purple leaves through the summer and bright red fall foliage. With cascading branches it grows in a mounding shape 10’ fall and 10’ wide.

Coral Bark Japanese Maples have pale green leaves in the summer, Golden yellow fall color, and bright red-coral branches in the winter.
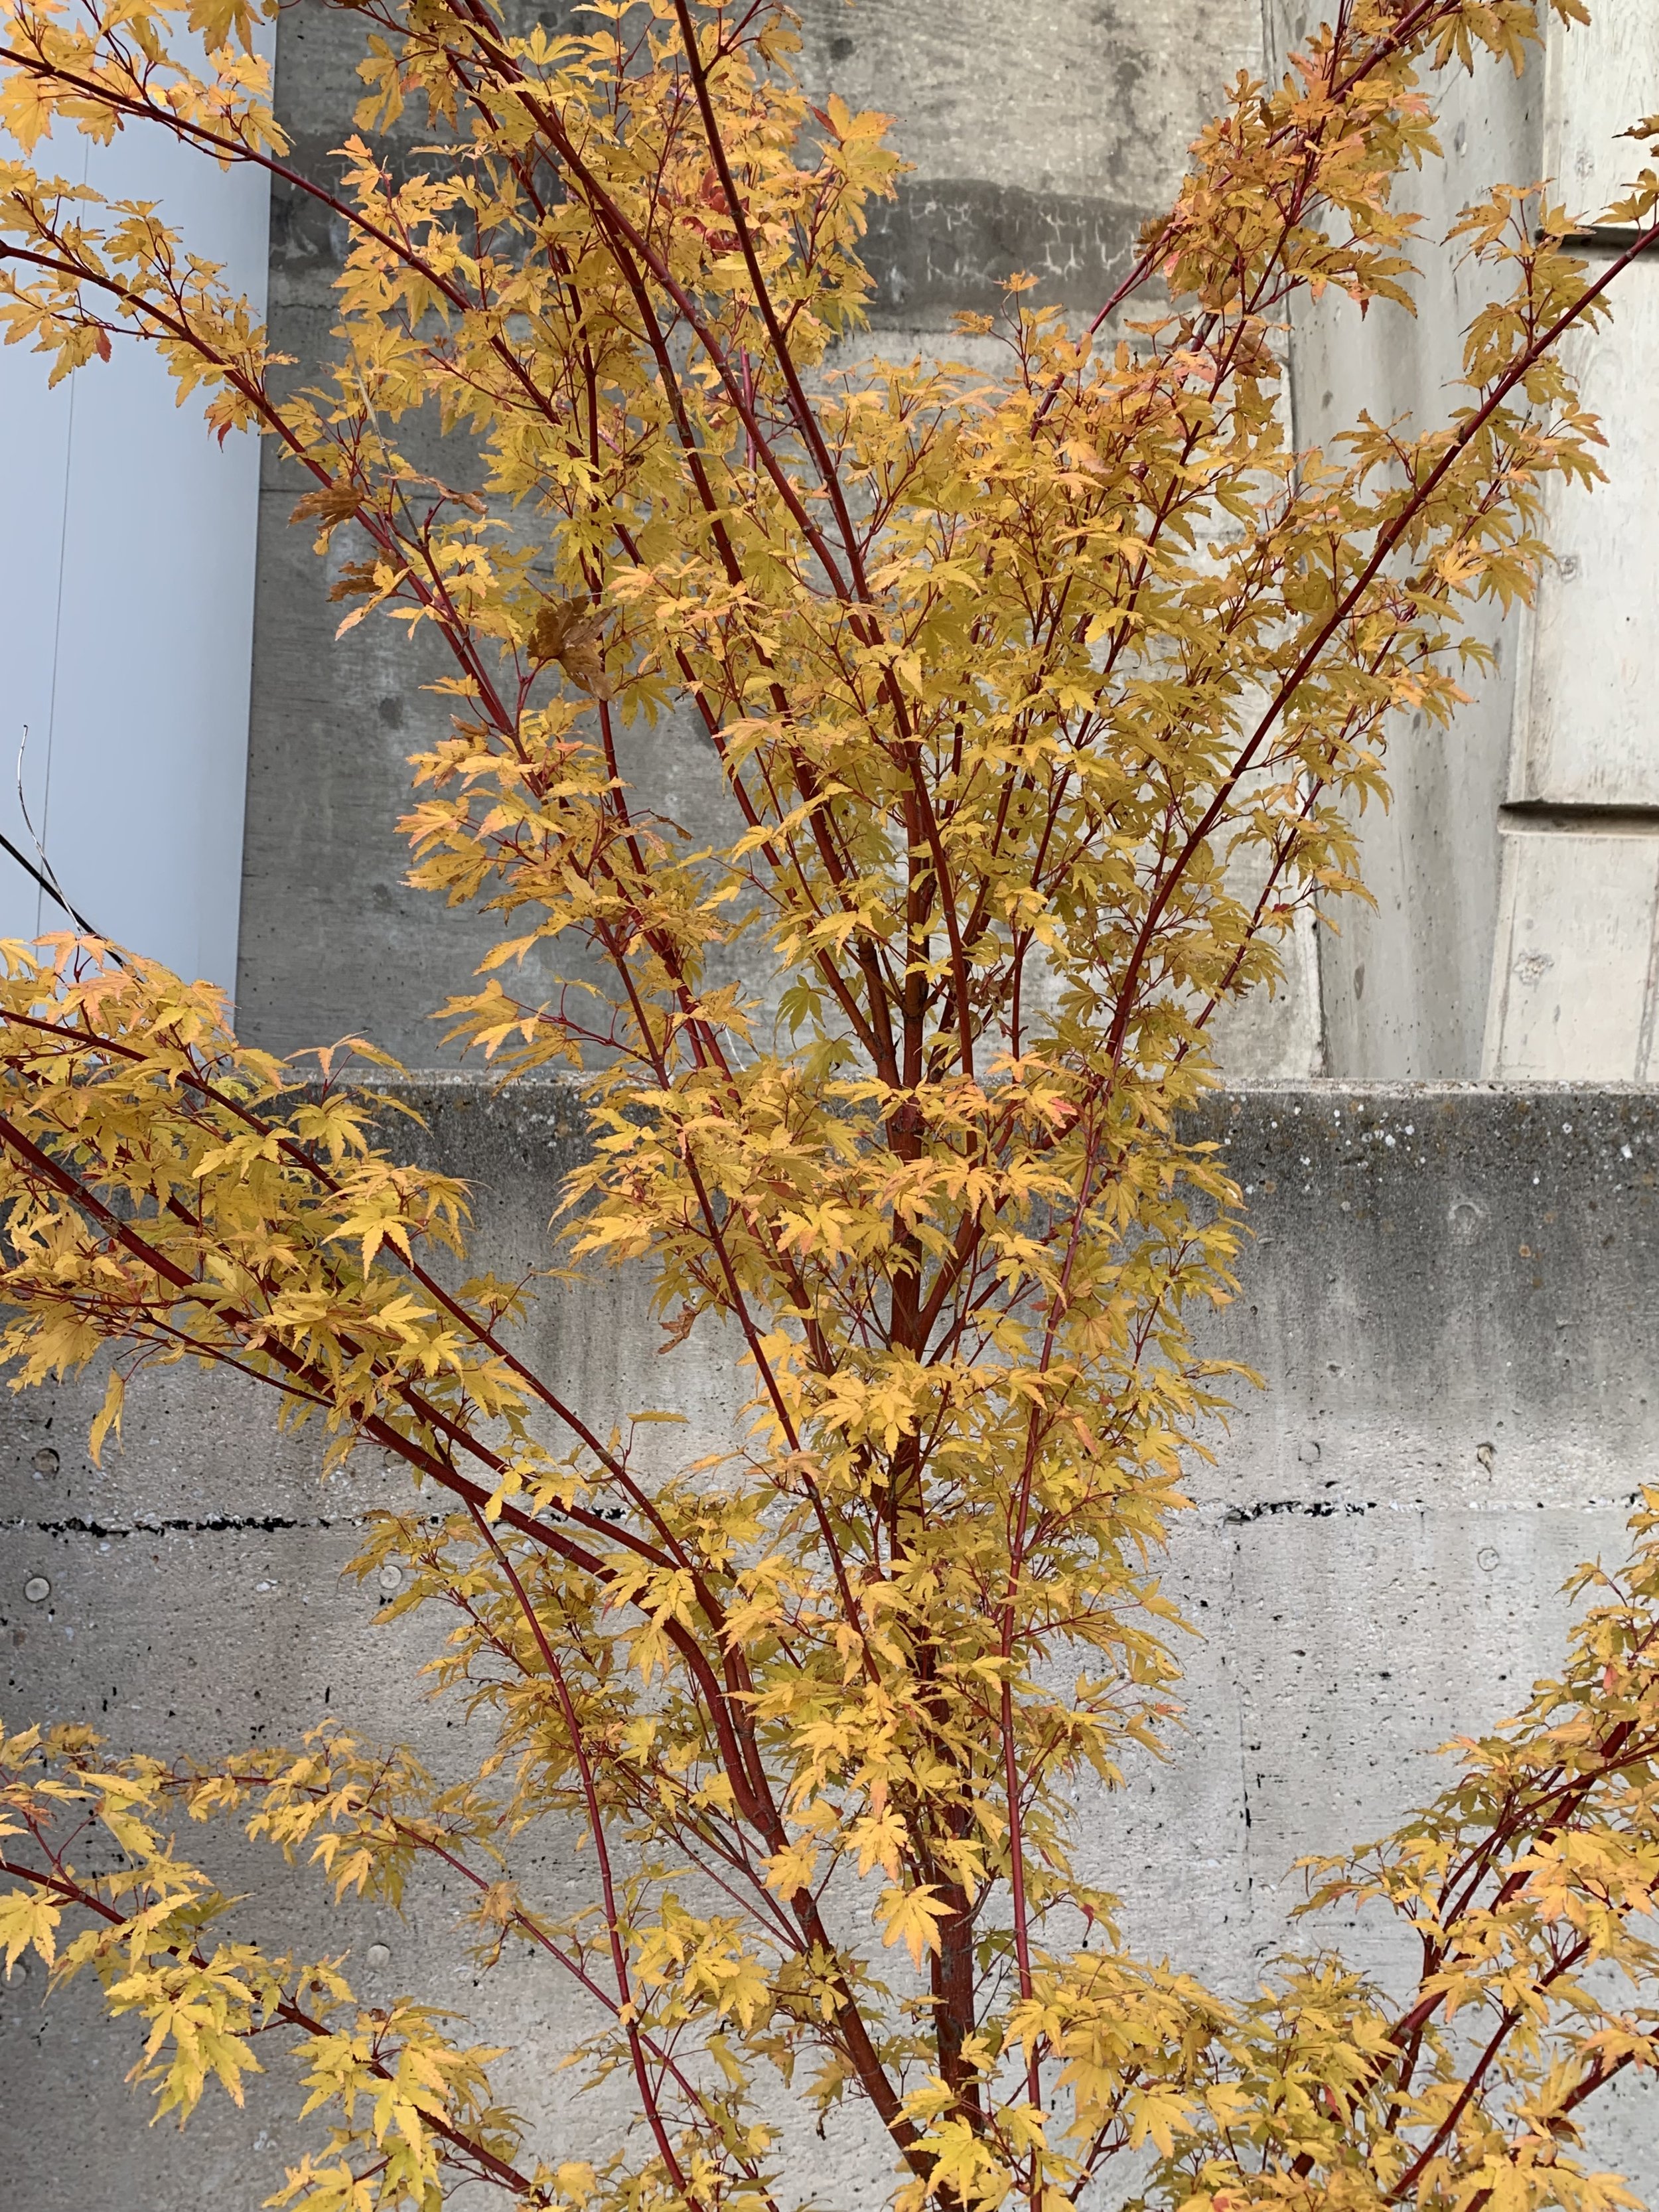
Coral Bark Japanese Maple

Japanese Maples are a staple landscape plant that will add interest to a landscape year round.

A mature Japanese Maple, such as this Bloodgood, will grow in full sun locations where the soil is shaded.
Size & Form
Japanese Maples range from a few feet tall to 25’. Considered a deciduous small tree or shrub, there are rounded, dwarf, weeping, upright, cascading, single trunk, multi-trunk…. varieties.
How can you use a Japanese Maple in your landscape?
You can create a solitary specimen as a spotlight in the landscape.
You can plant them in a group as a grove.
Or, you can use them in large containers.
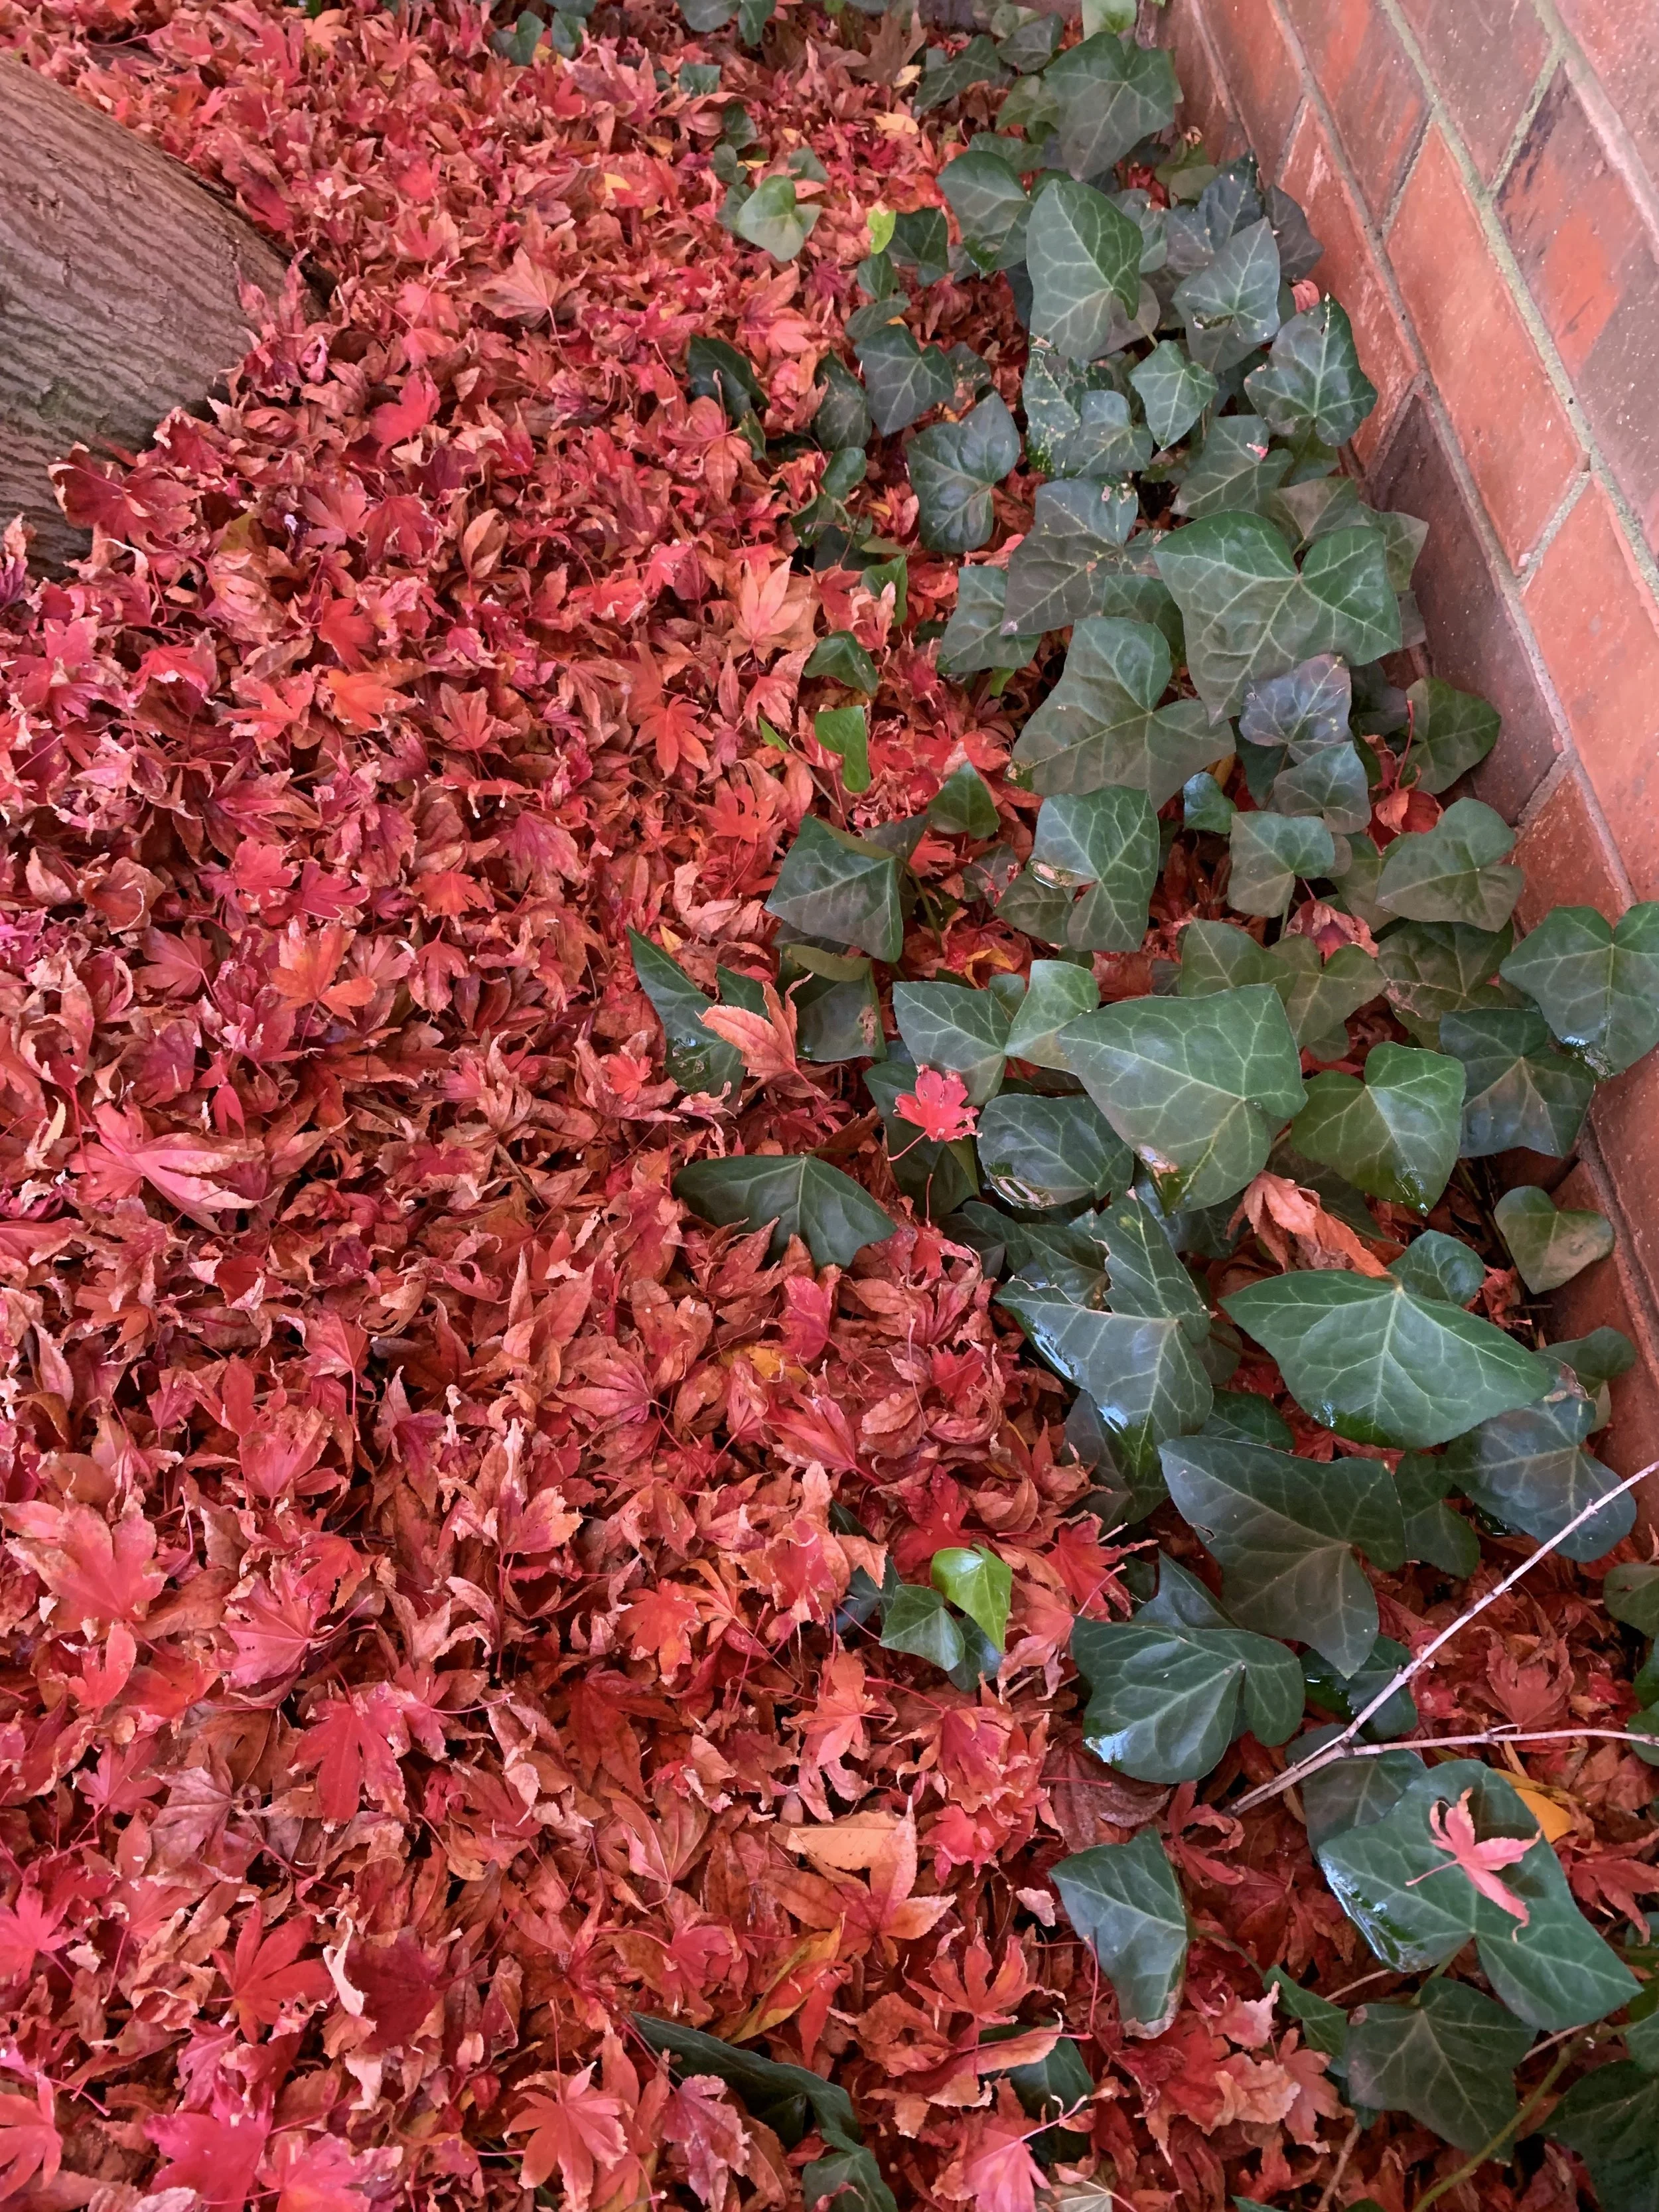
Leaves from a Bloodgood Japanese Maple cover the ground with a red carpet as they drop from the tree.
Leaf Shape
Japanese Maple foliage is divided into two types: traditional maple type, 2-5” wide palm-shaped with 5-7 lobes, or delicate and lacy.

Japanese Maples varieties will have either traditional maple shaped leaves or delicate and lacy leaves like this weeping variety.

Green and red Japanese Maples planted in a group to create a grove.

Bloodgood Japanese Maples make a bold statement in April when their leaves emerge a brilliant red.
Leaf Color
Japanese Maples are among the most wide-range, colorful trees. The foliage ranges from red, green, orange, deep red-purple and bright red-pink depending on the time of year. Some leaf out brilliant reds in the spring, change to green in the summer, and finish the year in bright reds, yellows and oranges. Other varieties start red in the spring, keep a red cast all summer keeping the red color through fall.
Monrovia’s website is a great place to explore Japanese Maples.
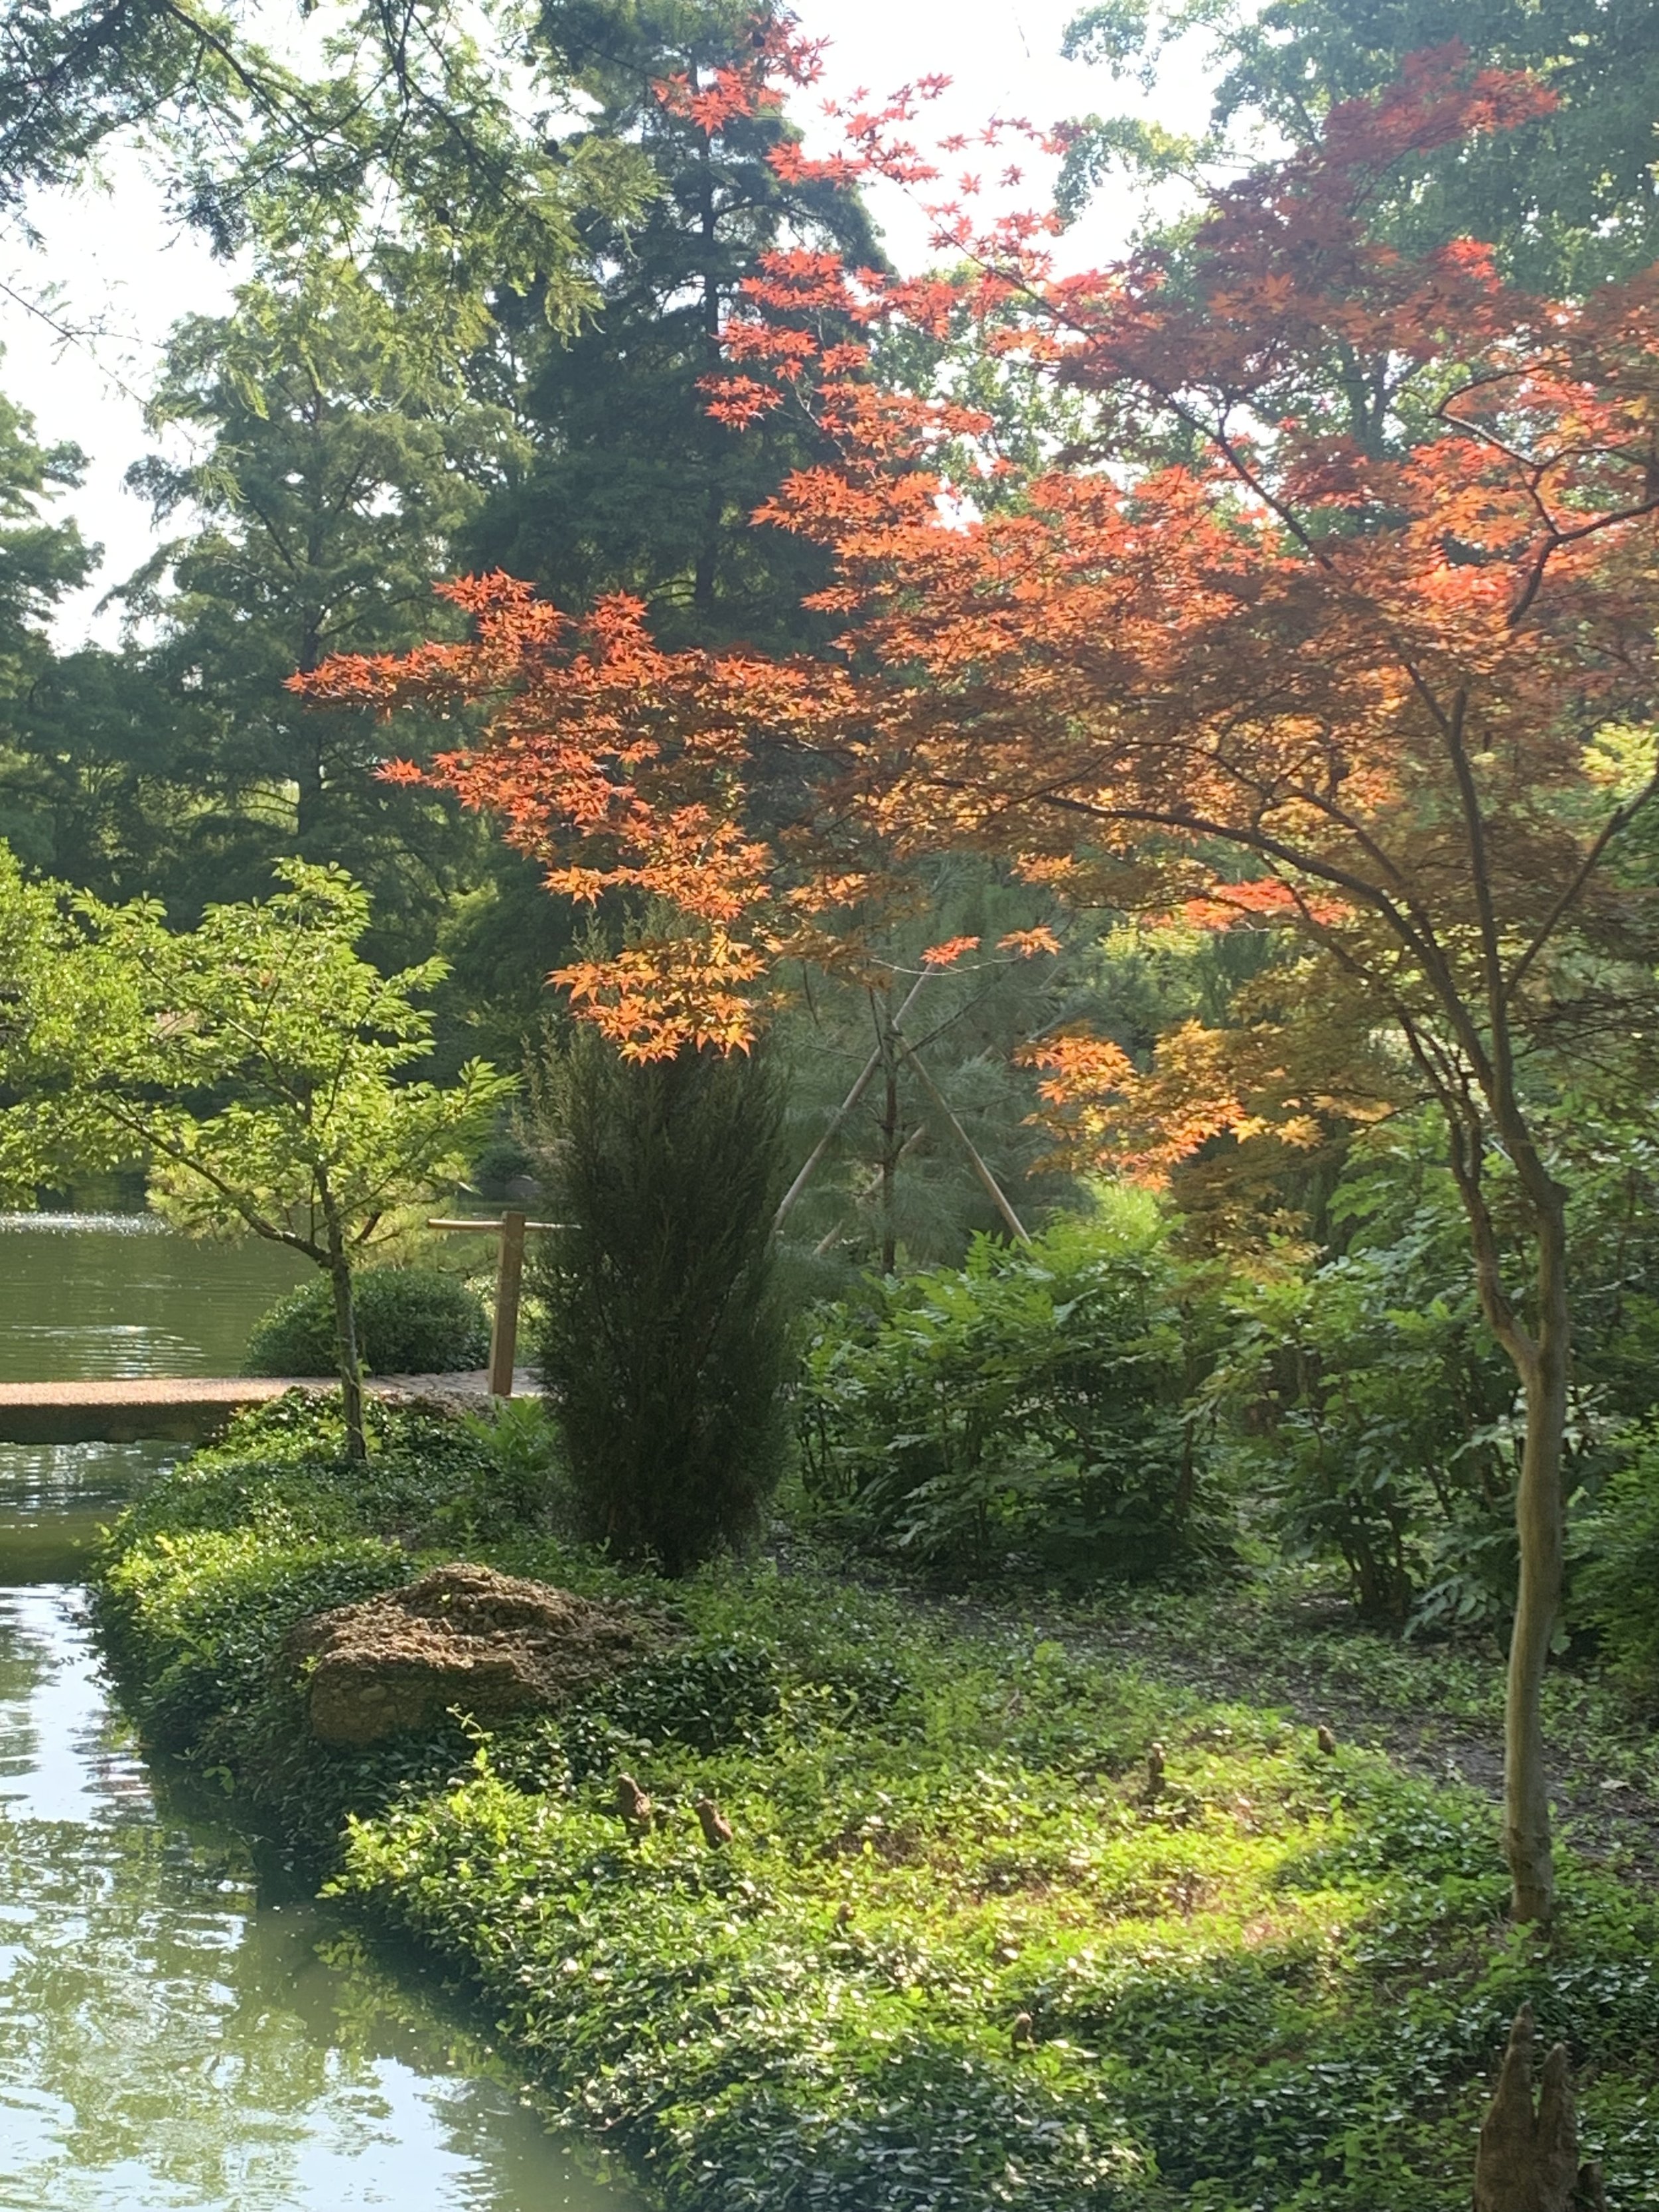
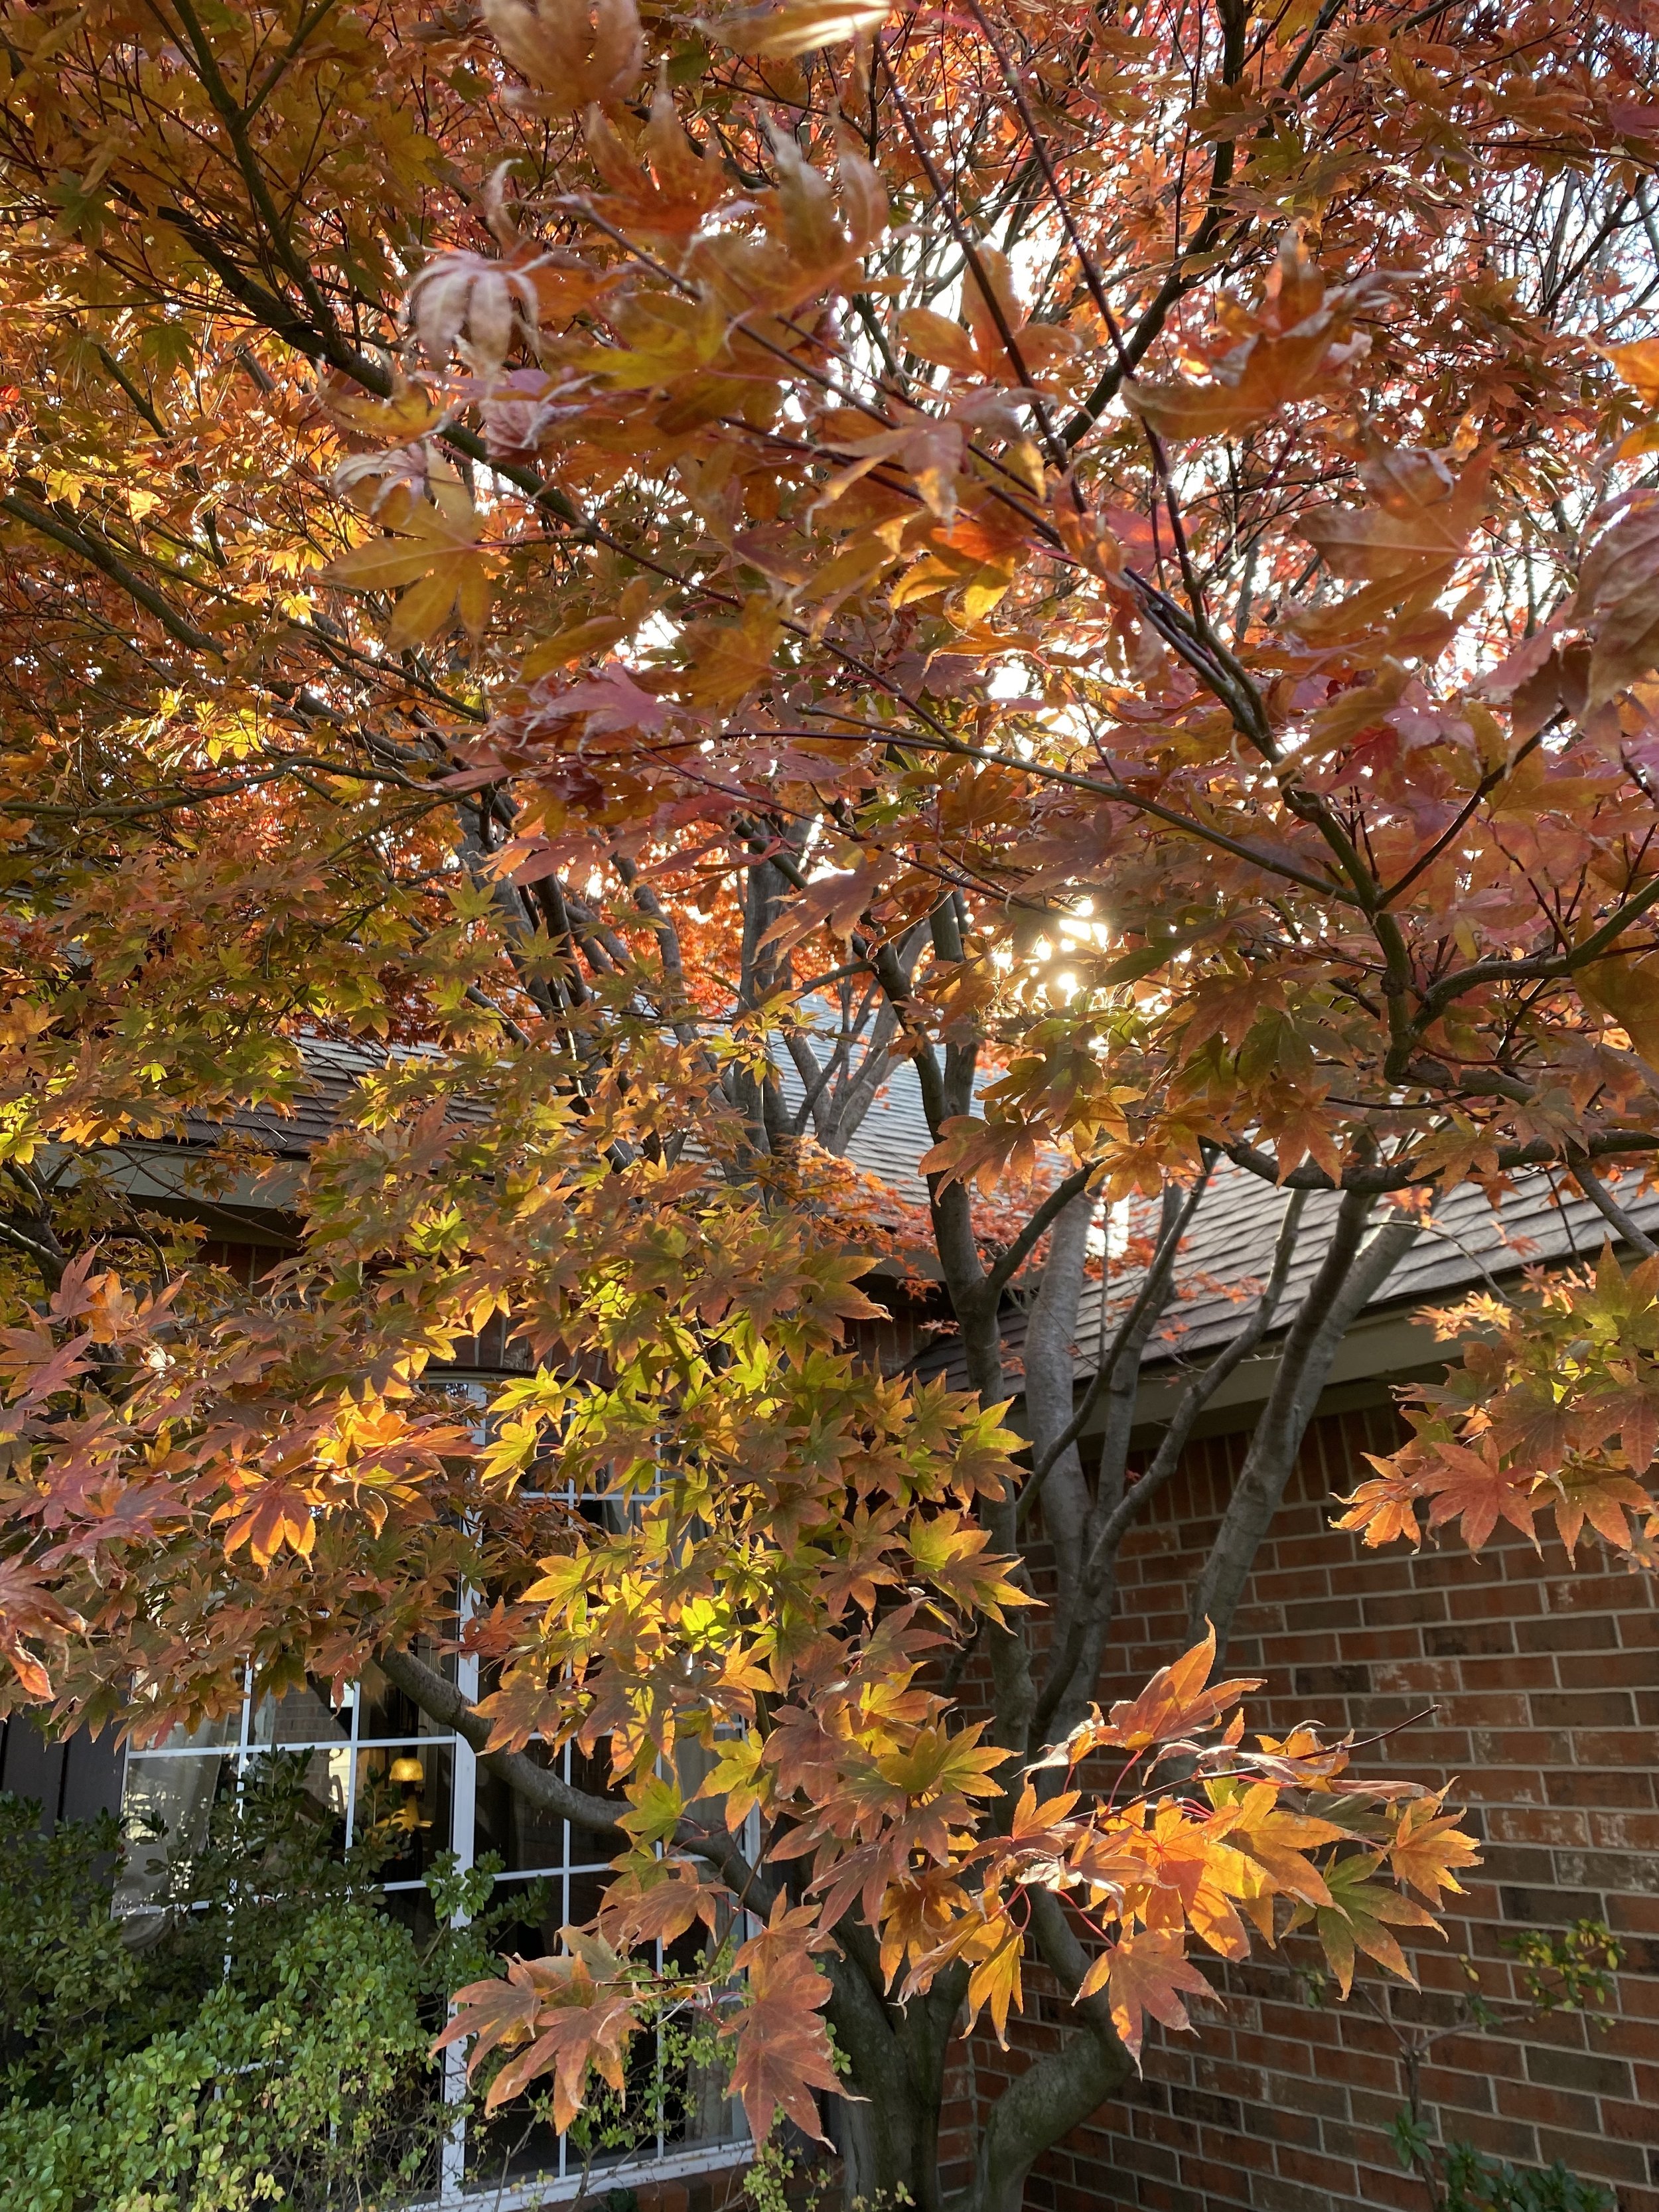

Fun Fact – Fried maple leaves are a very popular snack in Japan. The city of Minoh is famous for their fired maple leaves. The leaves are dipped and fried in tempura batter.
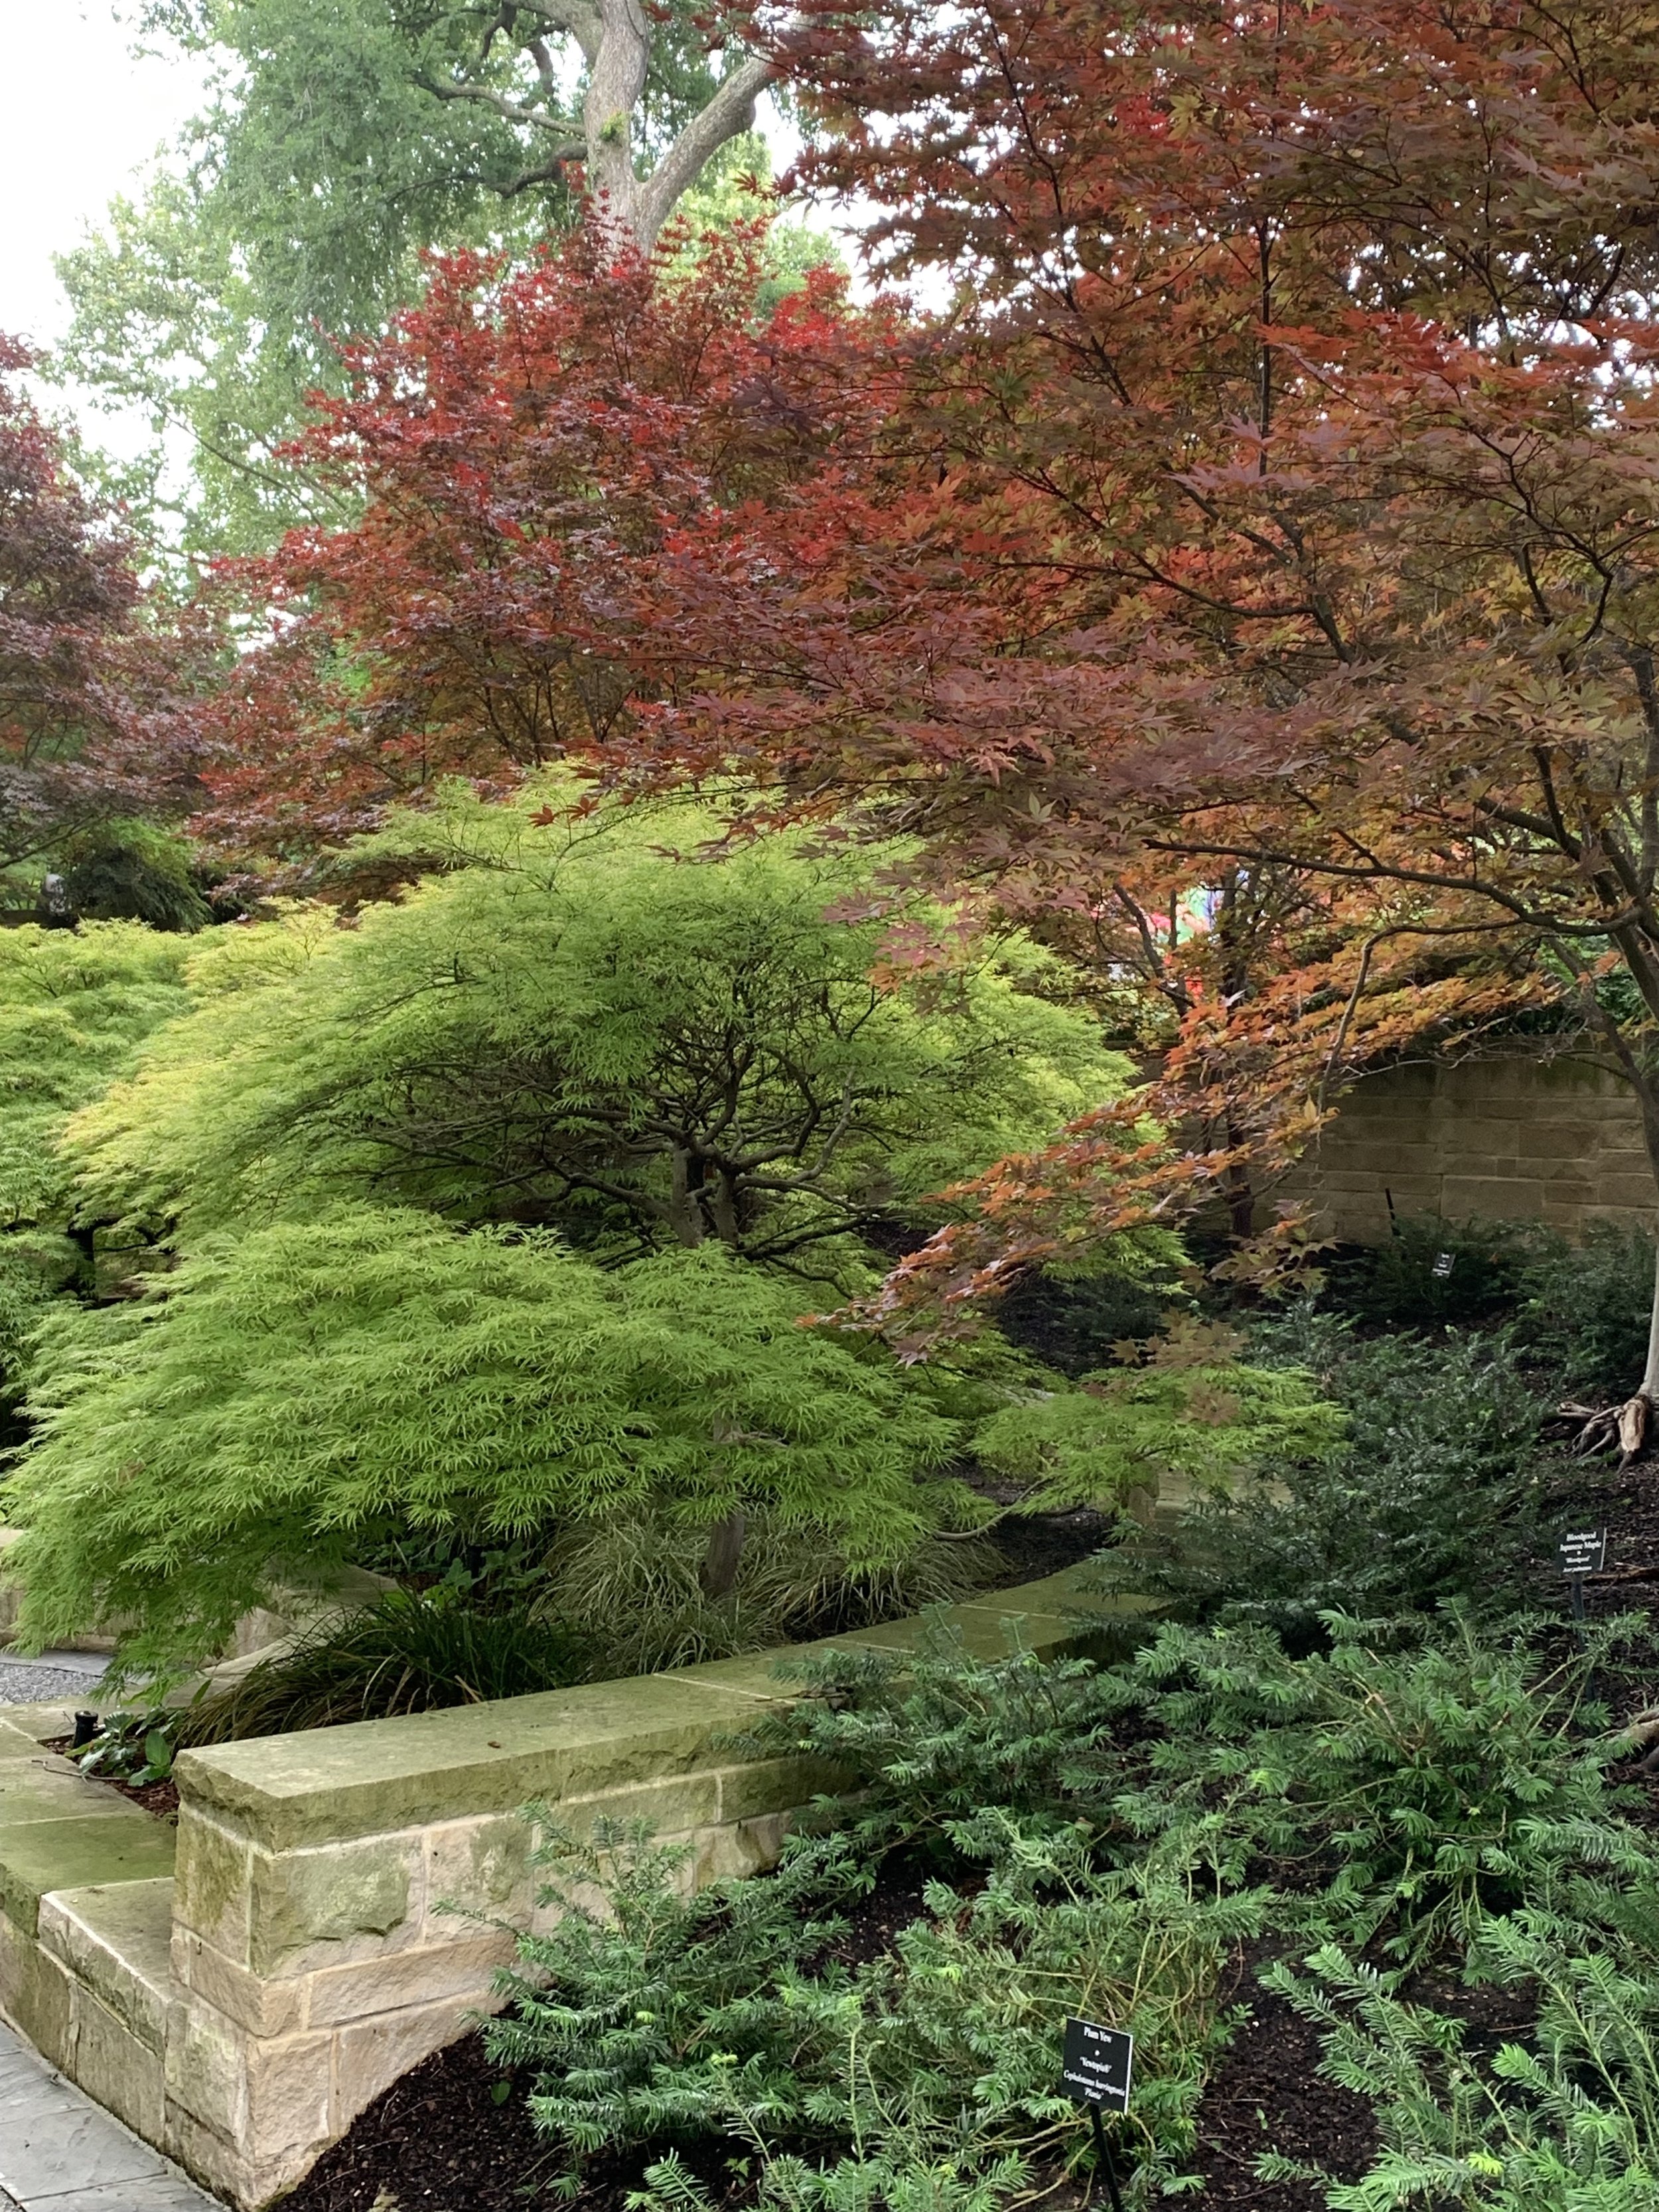
How To Plant A Japanese Maple
Dig a hole twice as wide as the tree container and a few inches deeper.
Backfill the bottom of the hole with a mixture of the soil from the site and a compost material (Back to Nature or Landscape Grower’s Mix are a couple of favorites). Tamp firmly the soil in the bottom of the hole.
Place the tree in the hole with the top of the root ball approximately 2” higher than the surrounding grade.
Back fill halfway with your soil and compost mixture.
Lightly tamp down the soil and water well.
Finish filling around the tree.
Mulch with a 2” layer of a Grade A Cedar Mulch and water well.
Japanese Maples are a great staple plant for every landscape. If you don’t have one, you should consider adding a Japanese Maple to your landscape this year.
Oh, you have one? Don’t you think you should add another?
Lorne Hall
Hall | Stewart Lawn + Landscape
(405)367-3873
Winter & Your Landscape

It’s January and the local weather forecasters are warning us about winter weather approaching in the days to come.
What does winter weather mean for your lawn and landscape?

For young trees and trees with thin bark, wrapping the trunk in the winter will protect the tree from damage due to freezing and thawing temperatures.
If you have perennials or winter annuals such as pansies or kale, winter moisture is critical to their performance going into the spring.
Fescue lawns will retain more color in the winter and rebound quicker in the spring if they are not allowed to become bone dry during the winter.
Newly sodded lawns, due to a shallow root system, can experience freeze damage if the roots are dry during a winter cold spell.
Finally, all newer landscapes, those installed in the last two years require a little more watering attention over the winter.
The goal is to make sure the top few inches of soil is moist well ahead of freezing temperatures. Roots are still active and providing moisture for the plant. Once the soil freezes, the roots no longer have the ability to replace moisture lost to transpiration.
Our rule of thumb is to keep your irrigation operational through the winter, monitor the weather, and be ready to water once every 7-14 days if we have not received a good rainfall.
Biggest Winter Issue – Lack of moisture
Lack of adequate soil moisture is often a major cause of winter damage. All lawns, shrubs, trees, perennials, and annuals need moisture during the winter. This is particularly true about evergreens. Remember, your lawn and landscape are dormant, not dead, and moisture is still important.
Most winter plant injury occurs when we receive a harsh cold spell while plant root systems are dry.
Winter watering is particularly critical for evergreen shrubs and trees. Windy days zap the moisture stored in their leaves making them sensitive to winter injury when we receive a harsh cold snap when they are dry.
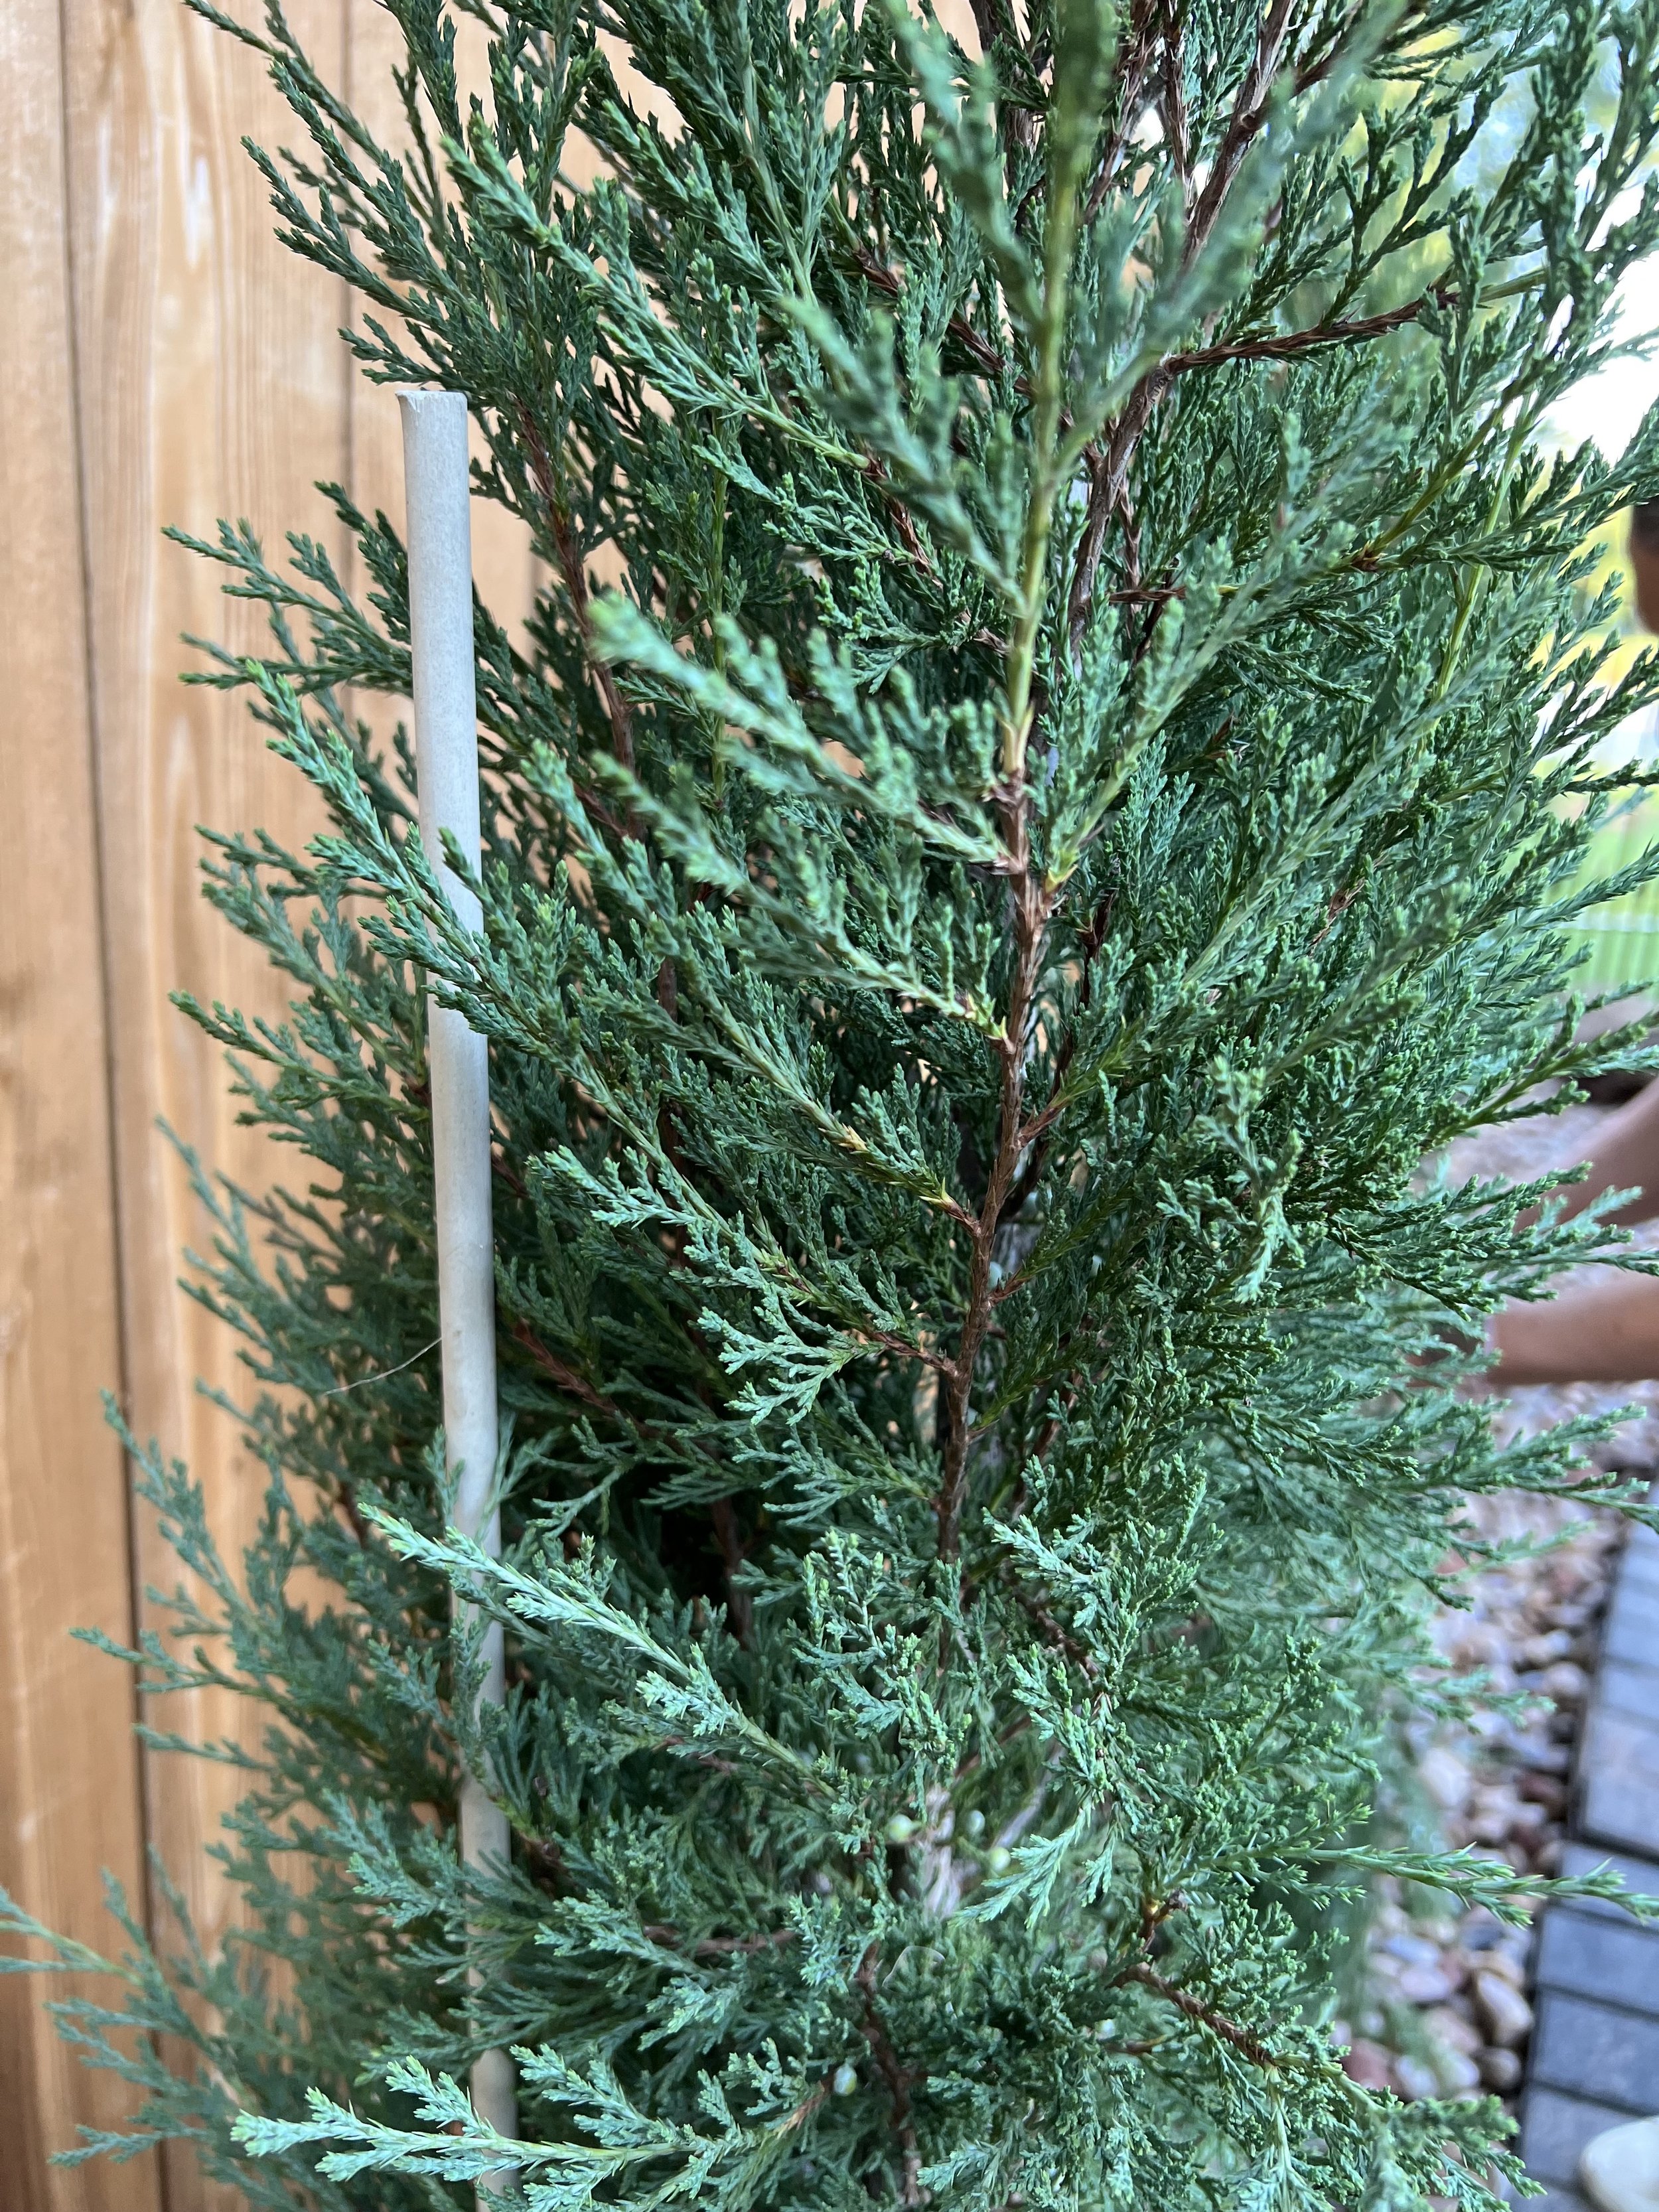
Windy and cold winter temperatures dry needle and evergreen plants foliage. It is important they have moist soil for the days leading up to extreme winter weather.
Shallow-rooted plants, such as azalea and Japanese maple, are also prone to winter injury when they do not receive regular moisture during dormancy.
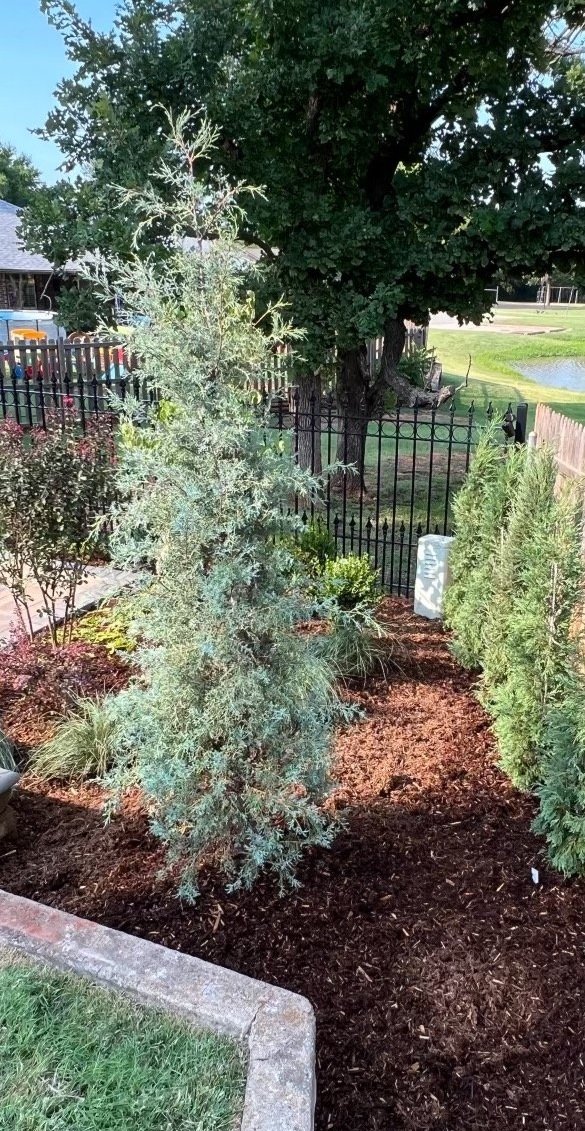
Newly planted landscapes need additional water in the winter for the first two years until the roots are established in the native soil.
Current Watering Recommendation:
We received ¼” of rain this week. If we do not receive at least a ½” of rain early this week, give your lawn and landscape a good deep soaking before the next cold front arrives.
First Step in Avoiding Winter Damage – Select plants that are winter hardy in our area.
Plant cold hardiness is based on the USDA Hardiness Zones. Central Oklahoma is Zone 7A. Plants with a 7A rating can withstand temperatures of 0 to 5 degrees. Northern Oklahoma is Zone 6B, -5 to 0 degrees. And southern Oklahoma is Zone 7B which can survive temperatures of 5 to 10 degrees.
If you live in central Oklahoma and are tempted to experiment with a plant that grows best in Zone 7B, plant it in a protected area that is shielded from dry winter winds.
Also, when selecting plants, look for plants that perform well in our tighter, clay soils. A 7A plant that grows best in loose soil may live for years when we have mild winters only to fail when we have a winter of extreme temperatures.

When making plant selections, don’t overlook ones that add winter interest such as Nandina with their bright red berries.

The best weather for your plants during extreme temperatures is a snowfall of 2 or more inches.
Snowfall is moisture!
If we get a ½” rainfall, there is a lot of runoff. But, when the snow melts, it slowly soaks in. Every single drop benefits the roots of your turf, flowers, shrubs, and trees. On average, a 4” snow equals nearly a 1/2” rainfall.
The Old Farmer’s Almanac calls snow a “poor man’s fertilizer.”
Snow is full of nitrogen. As snow falls it collects nitrogen that is naturally in the air and distributes it evenly over your lawn and landscape.
Best Weather Condition for Extreme Cold – Snow.
Fresh snow is like a warm blanket when temperatures dip into the teens or lower!
Snowfall is nature’s way of insulating your valuable landscape from cold temperatures. A fresh snow cover of more than 2” is very beneficial to the landscape by trapping soil warmth below the snow.
Without snow, soil temperatures fluctuate more, dipping deeper during cold spells. It is common for soil temperatures to be as much as 10 degrees warmer when there is a snow cover.
Your landscape is thankful for a blanket of snow to trap the warm soil temperatures around its roots and keep the cold windy temperatures at bay.


A Key to Preventing Winter Damage – Healthy Plants.
Rarely does a healthy plant die due to winter injury. Plants in poor health are the first to die during cold periods.
Keep your plants healthy during the growing season and they will be better suited for the winter cold. Inspect often for insects and disease. Make sure they are receiving the correct nutrients in the correct amounts. Practice good watering techniques throughout the growing season.
The healthier your plants, the better they will do in the extreme temperatures of winter.
One More Great Winter Practice – Mulch.
A fresh 2-3” layer of mulch will provide insulation for your plant roots, retain moisture, and moderate soil temperatures.
As always, let us know if you have any questions or if we can help you have your best lawn and landscape.
And…stay warm…. after all, it is January.
Lorne Hall
Hall | Stewart Lawn + Landscape
(405)367-3873

Merry Christmas!

Christmas…the season of hope!
What are you hoping for this Christmas? The top item on your wish list? Time with family and friends? Joy? Health?
Hope is a feeling of expectation and desire for a certain thing to happen.
Everyone is hoping for something.
But, what happens when the thing you are hoping for does not happen?
The feeling of hope is replaced with a feeling of disappointment. When the feeling of disappointment lingers it is easy to find ourselves feeling hopeless. Hopelessness is the feeling of despair about something.
I don’t like the feelings of disappointment. I really don’t like the feeling of hopelessness. We have all been there. Especially when we have placed our hope in finances, relationships, health, and careers…...
But this is Christmas… the celebration of real hope!
A hope that does not disappoint!
A hope that erases hopelessness!
Christmas, the celebration of the birth of Christ.
Christmas, the celebration of the birth of hope and love for all mankind.
May your entire holiday season be filled with the true hope and love of Christ!
Merry Christmas from your friends at Hall | Stewart Lawn + Landscape

Small Trees in the Landscape
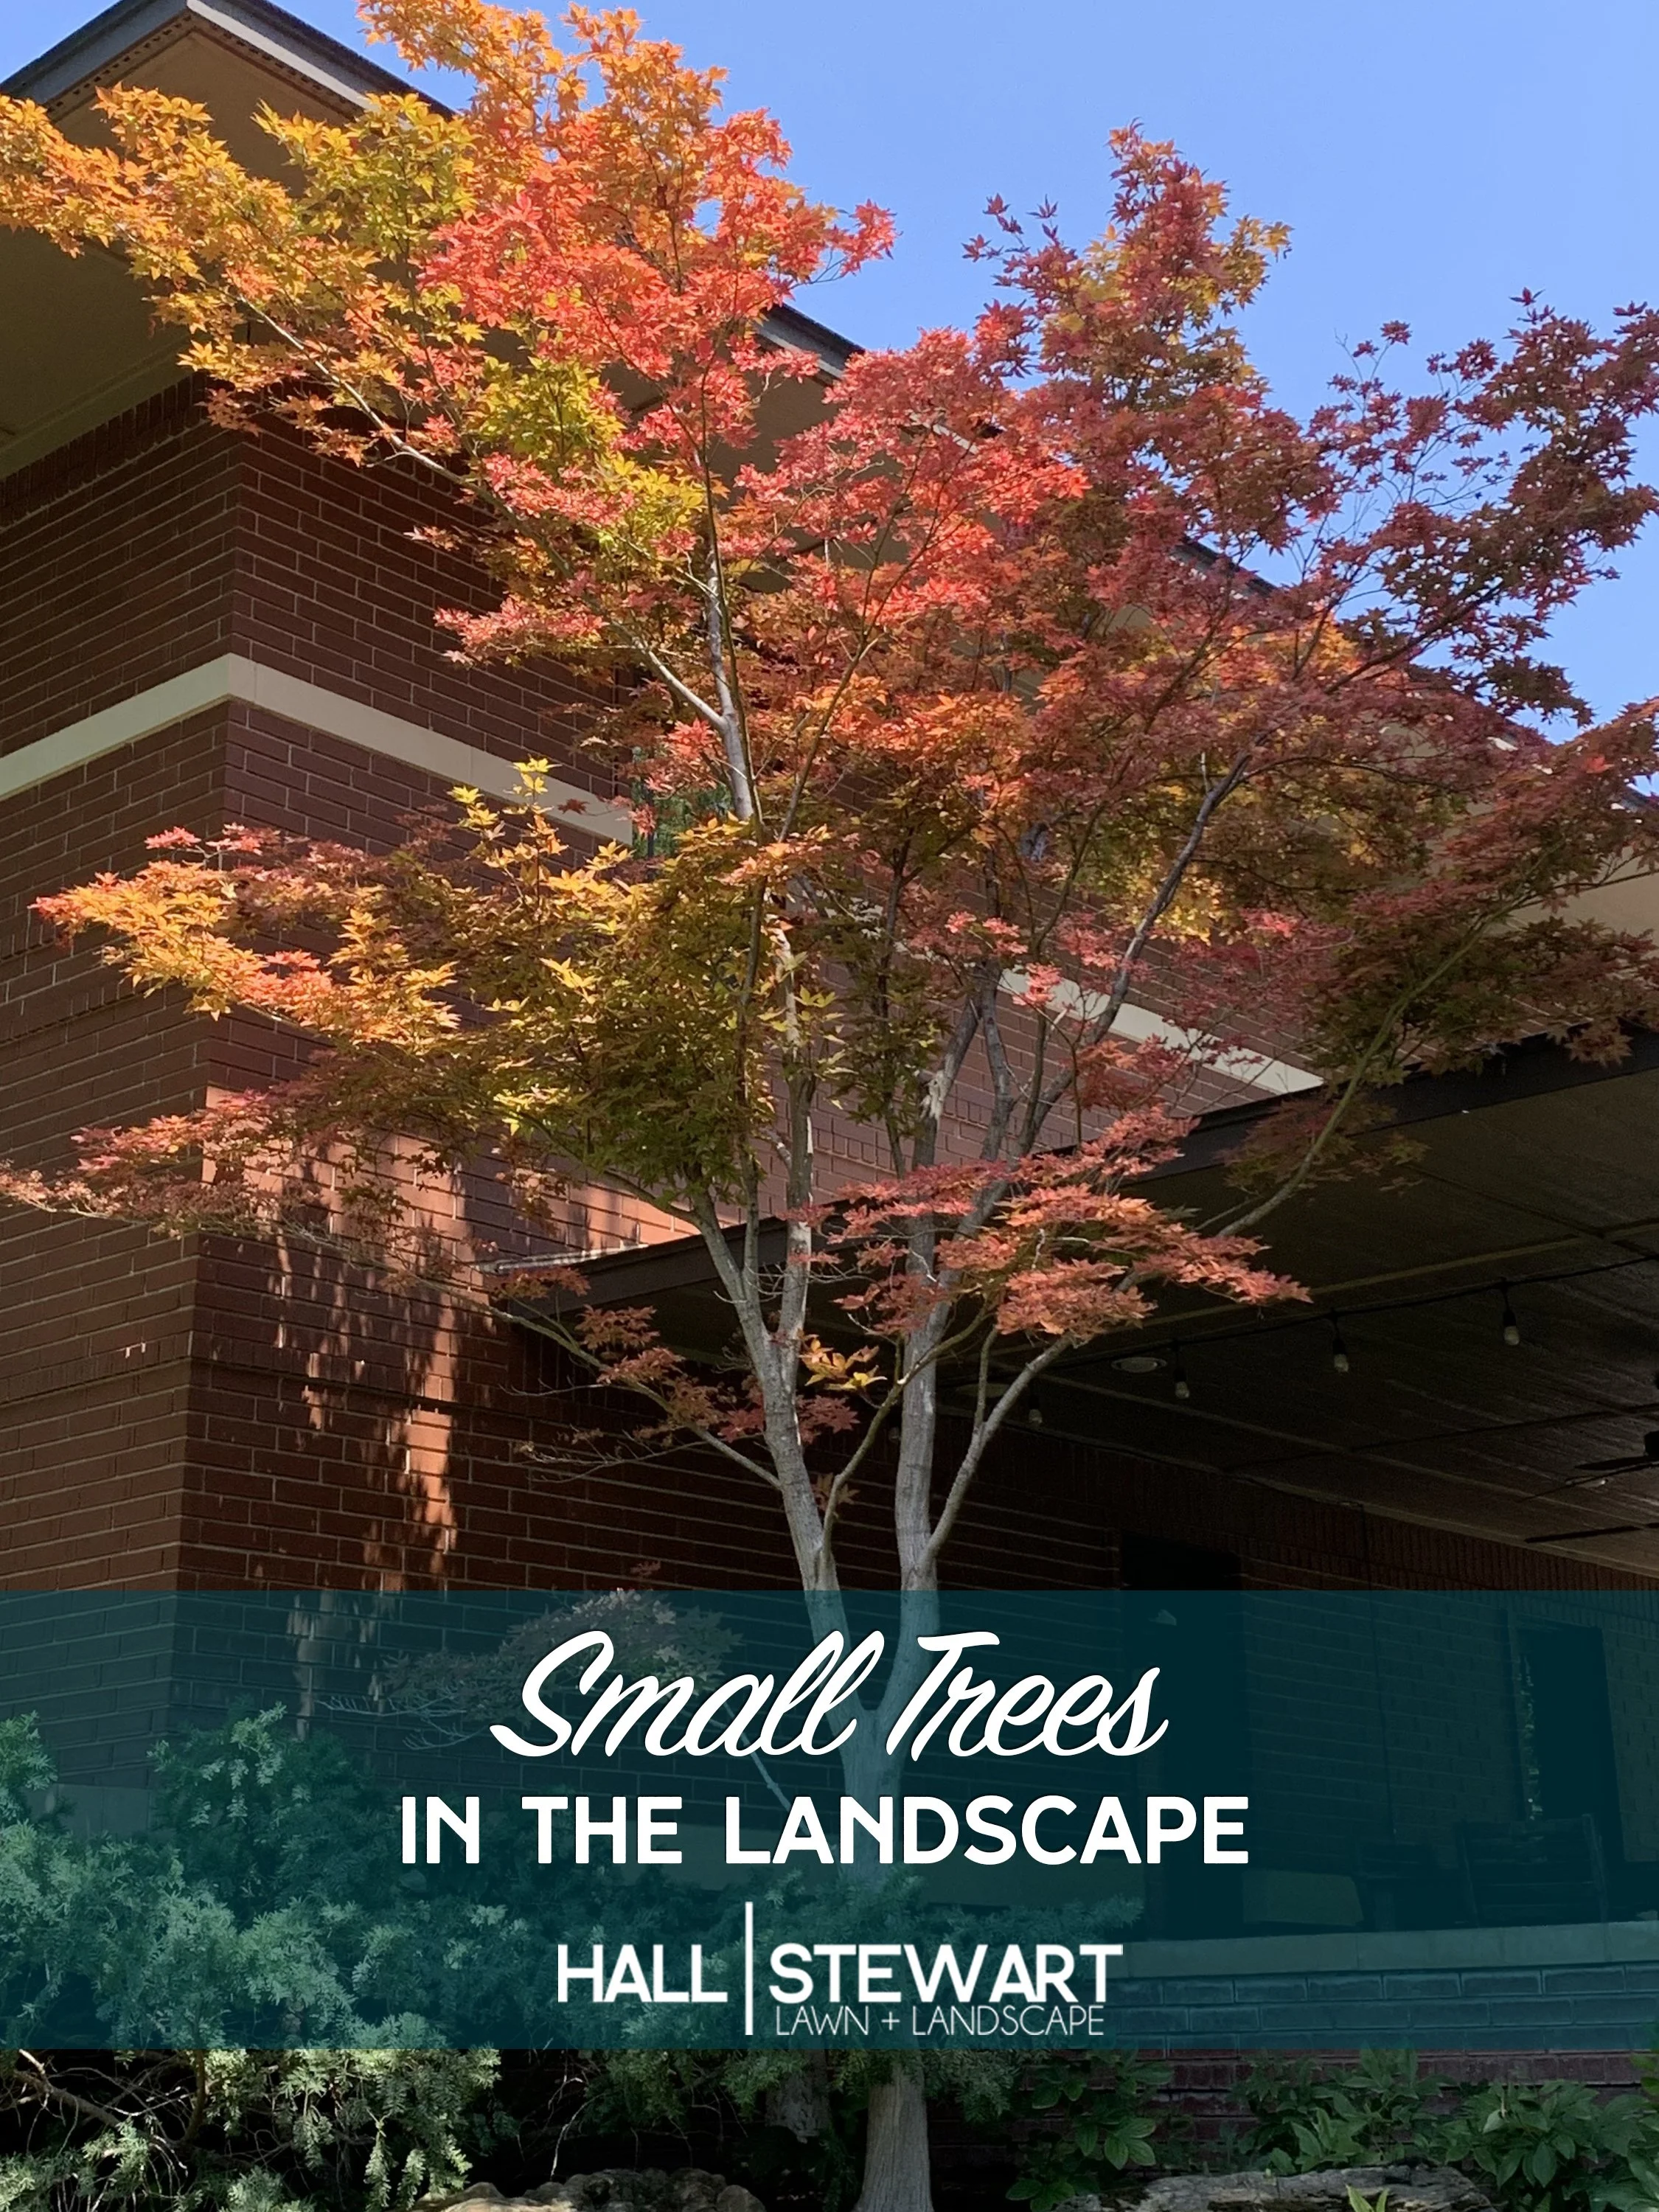
A few times we have posted an article titled Great Landscapes Have Three Levels. In the article, we mention the use of small trees as one of the ways to create three levels.
Wintertime, with fewer lawn and landscape maintenance activities dominating your time, is the perfect time to evaluate your landscape. Let’s spend a few minutes learning about the importance of small trees in the landscape.
Reasons For Using Small Trees
Small trees often are the punctuation points of your landscape. They are the anchor plants that give the landscape balance.
Small trees are the stars of the landscape with the rest of the landscape playing a supporting role.
Often, they are the first to be placed in the design and commonly the first to be planted.
Small trees add height, color, and texture to the landscape.
They complement the landscape.
They direct the eye to key features or views.
Small trees can frame a house or an entry.
They can be used to create privacy or screen an undesirable view.
Small trees give the landscape balance.
Small trees are defined as those that have a mature height of 12-30’.
Small trees are typically multi-stemmed but can be a single trunk plant as well.
The list of small trees is long.
Here are a few to consider:
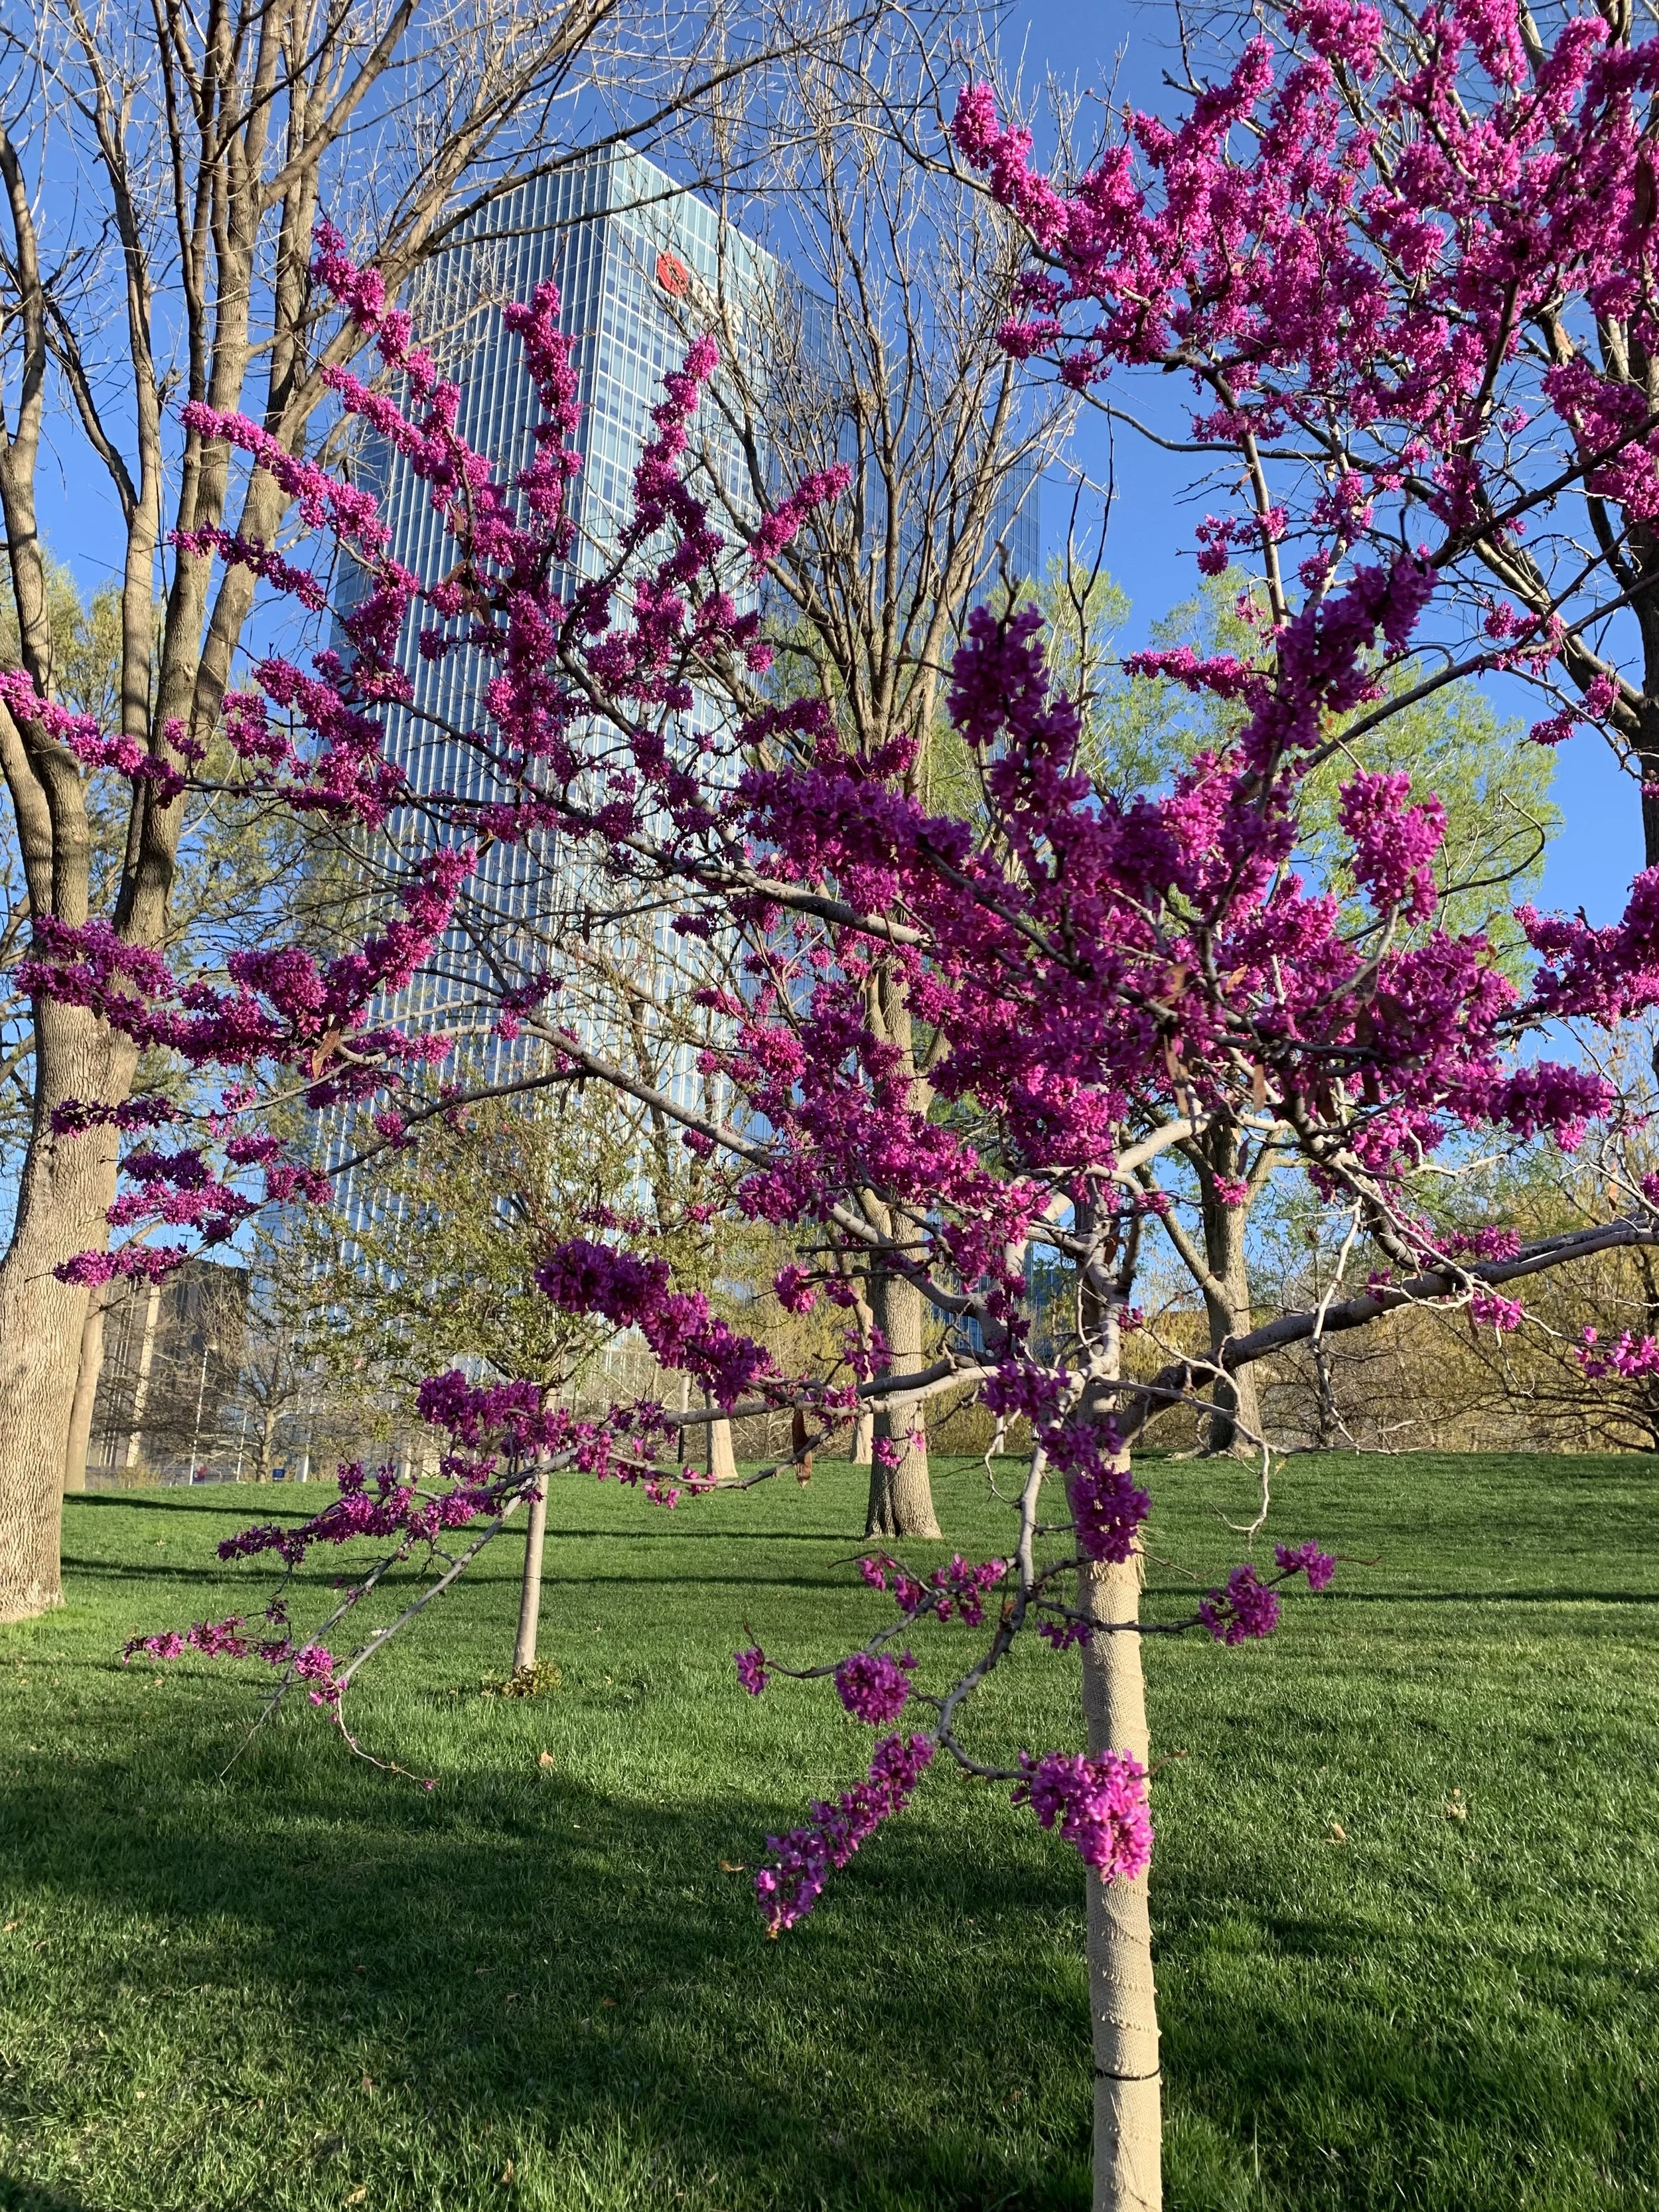
Redbud
Redbud – There are many varieties, but the Oklahoma Redbud stands out as a great landscape specimen with vibrant pink-purple flowers on bare branches in the early spring and glossy heart-shaped leaves during the growing season. 15-20’ tall and wide.
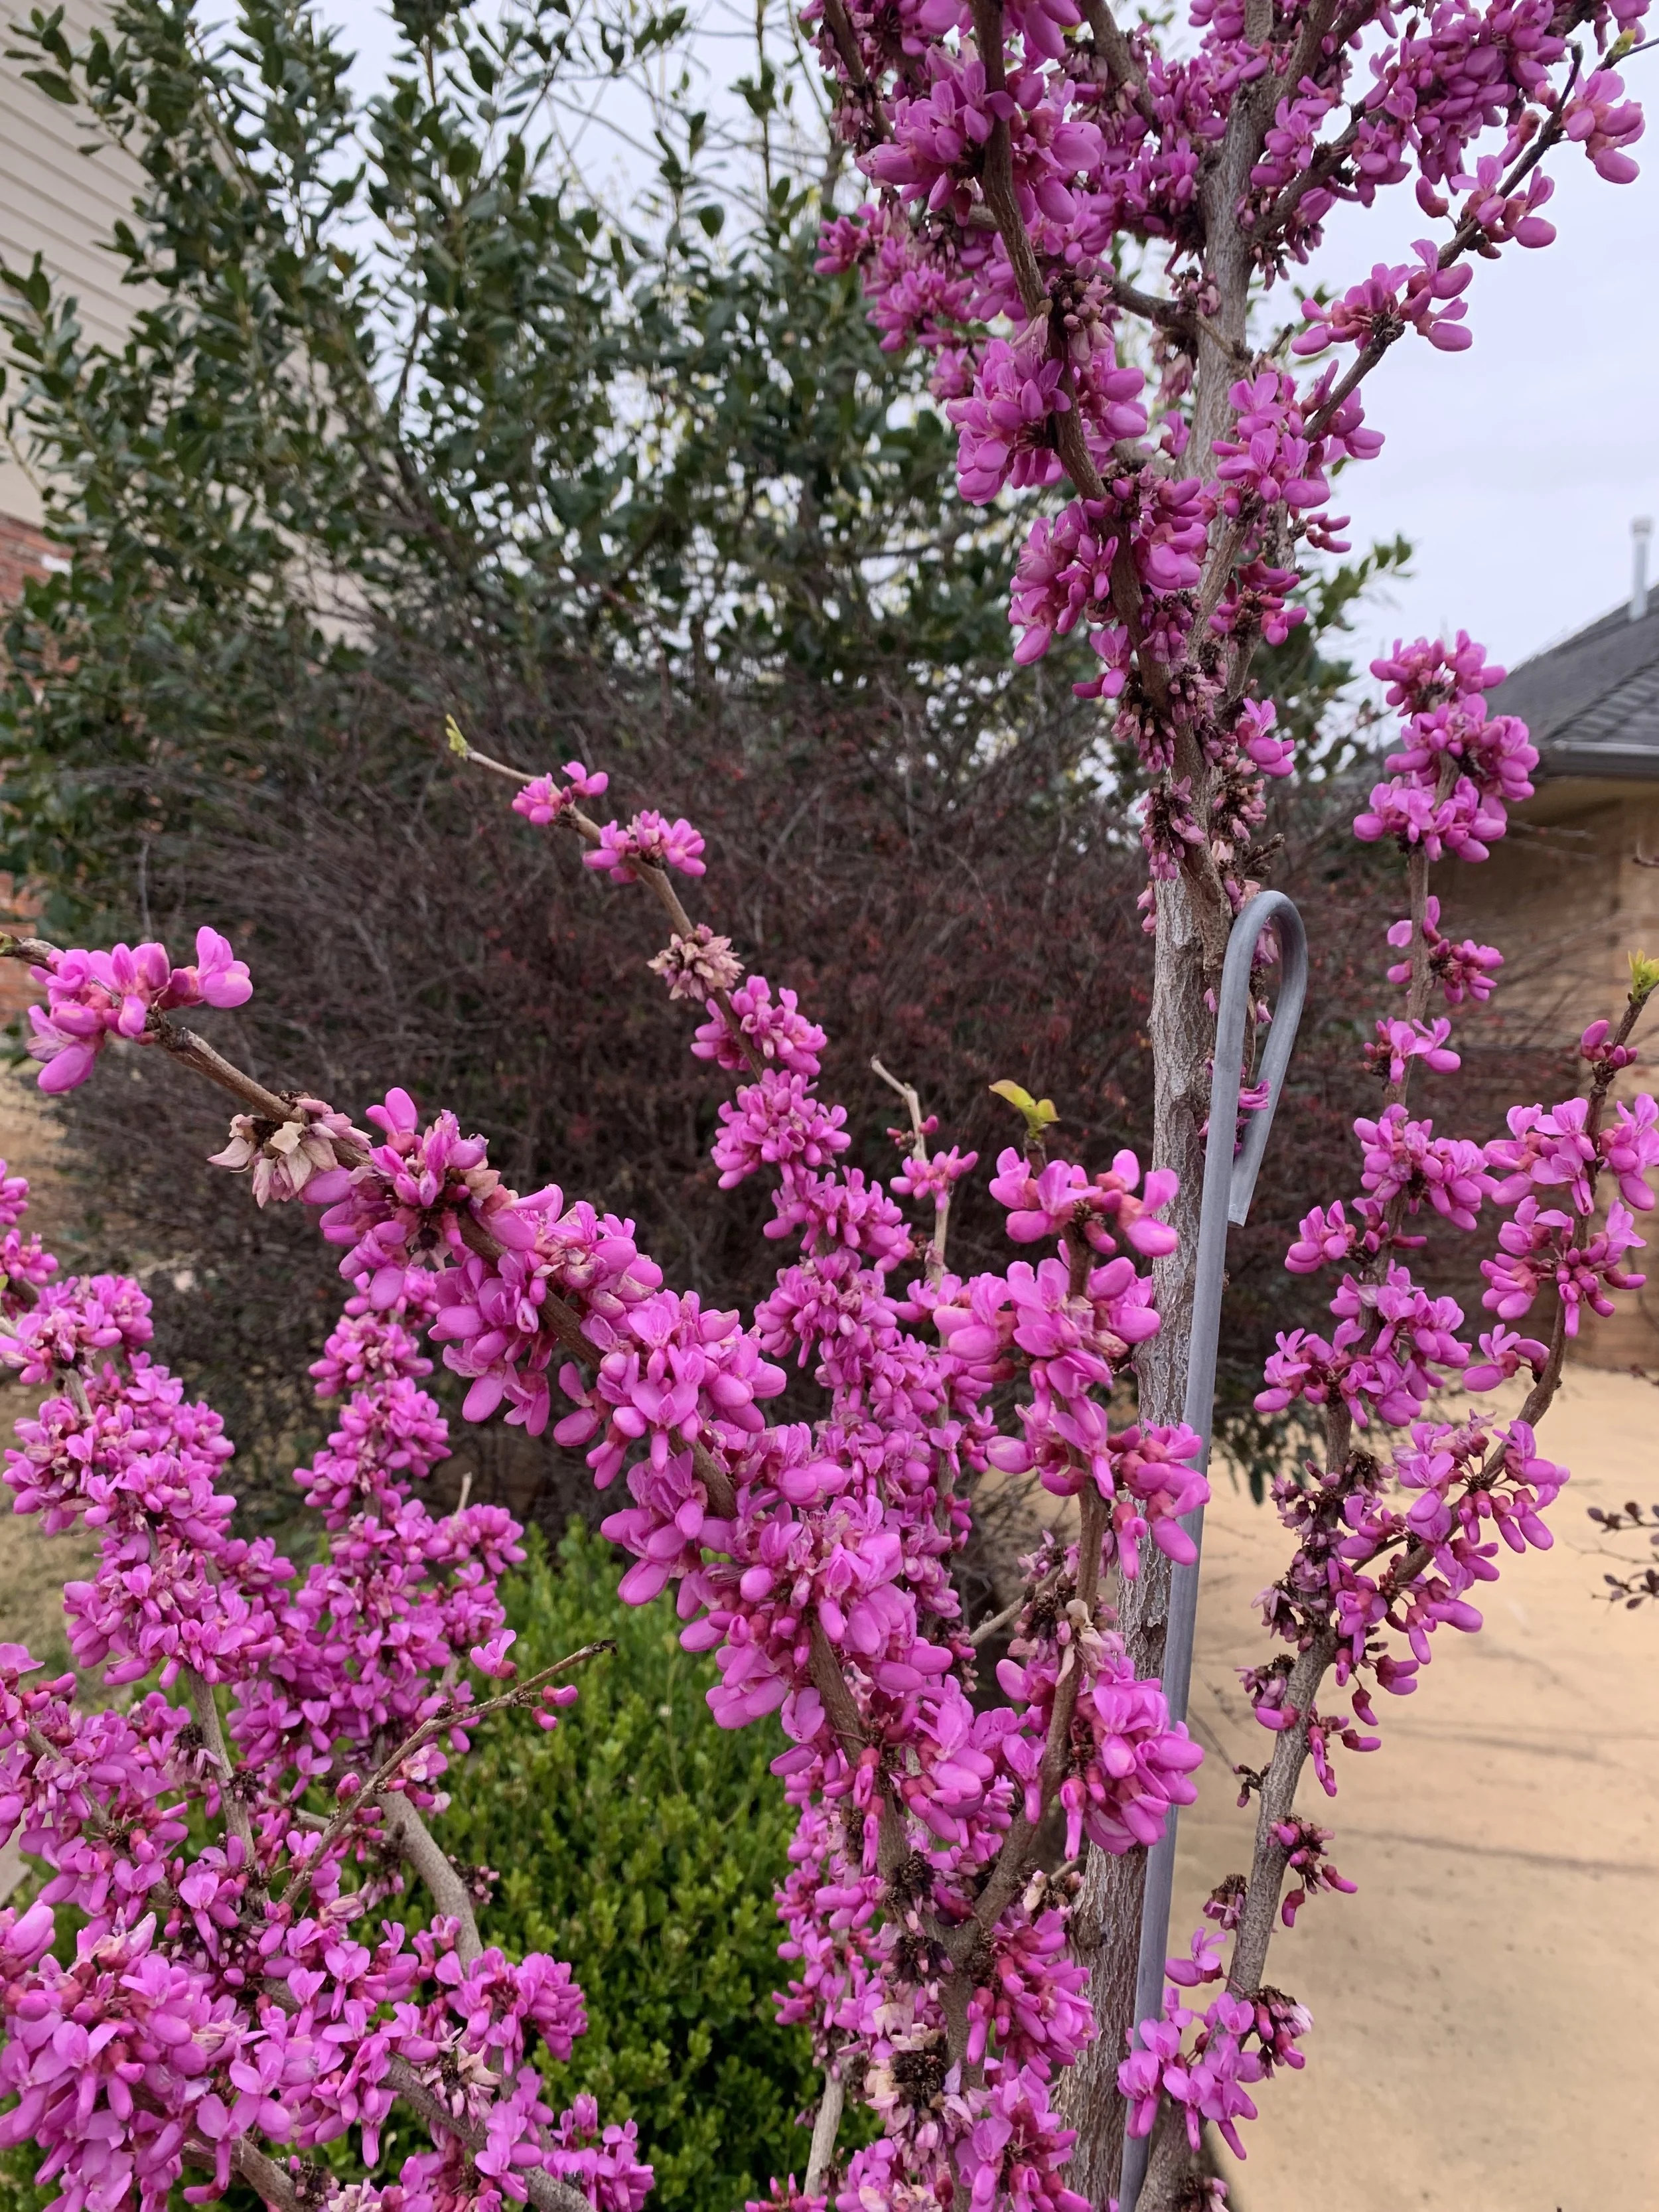
Redbud
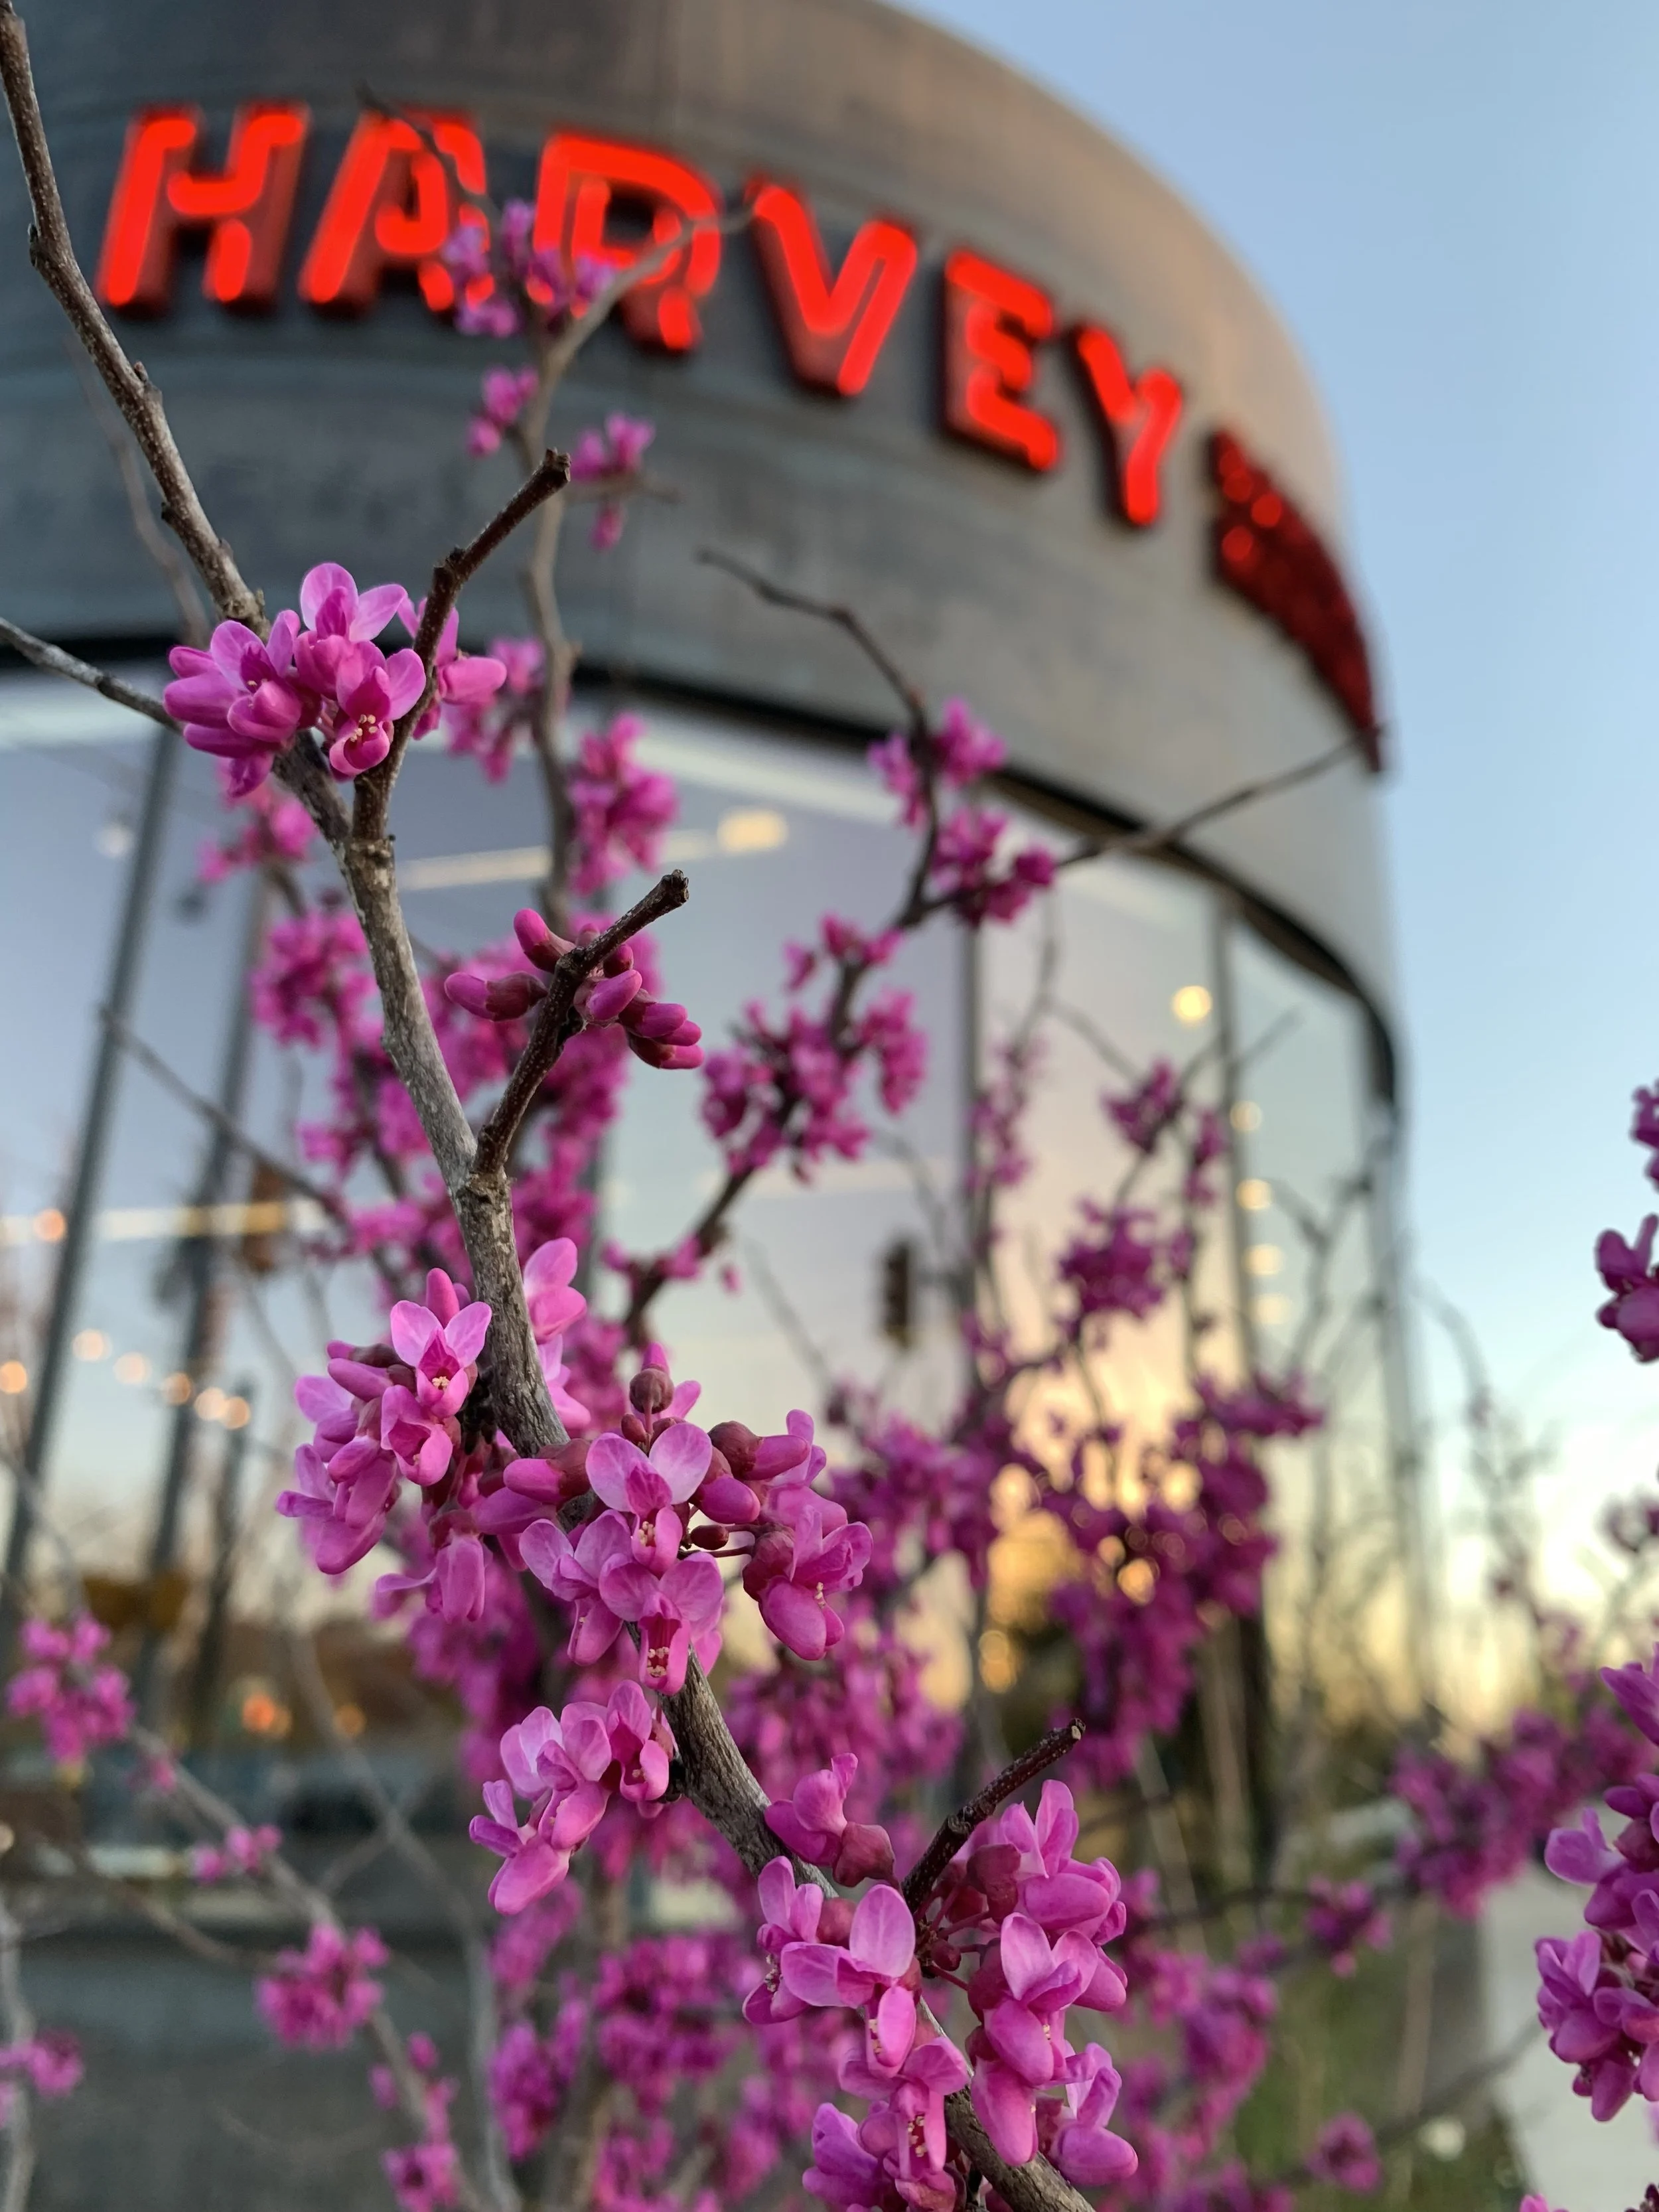
Redbud

Japanese Maple

Japanese Maple
Japanese Maple – A favorite small tree for the north or east side of a house. There are weeping, upright, and spreading varieties. Varieties with red leaves, purple leaves, green leaves, and yellow leaves. Their color and texture create interest in any shady to dappled sun area. 10-25’ high and wide.
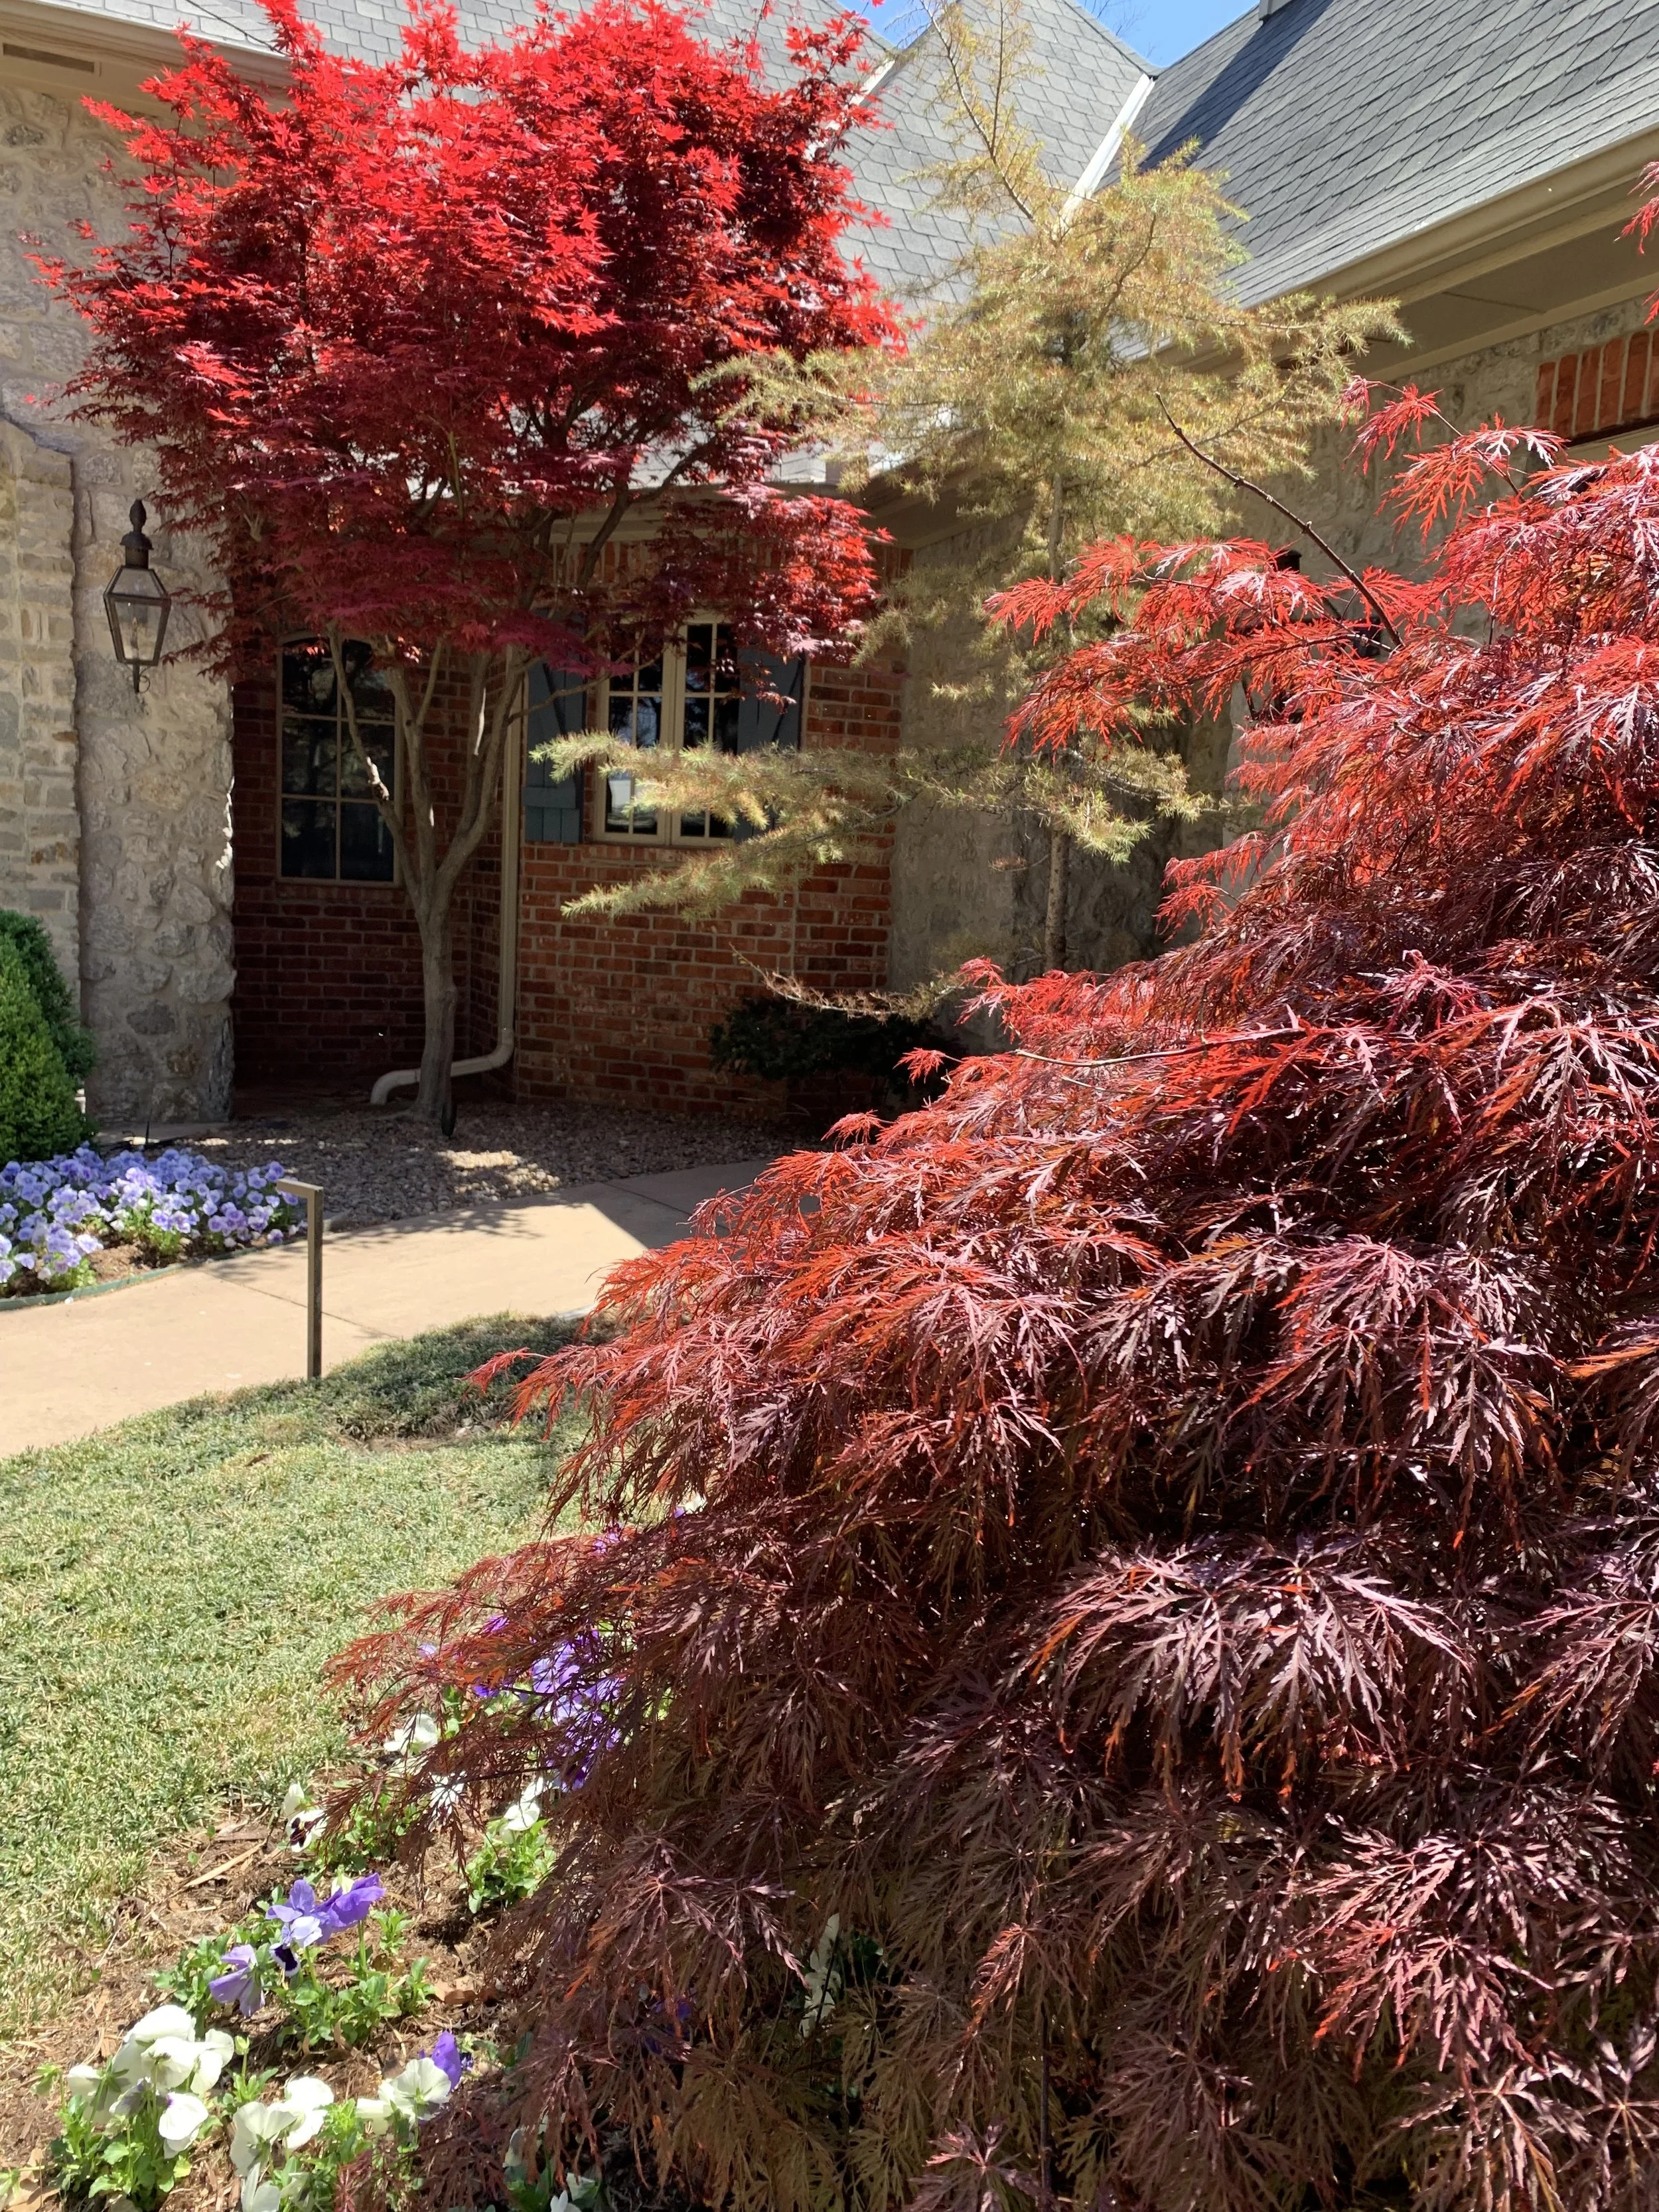
Japanese Maple
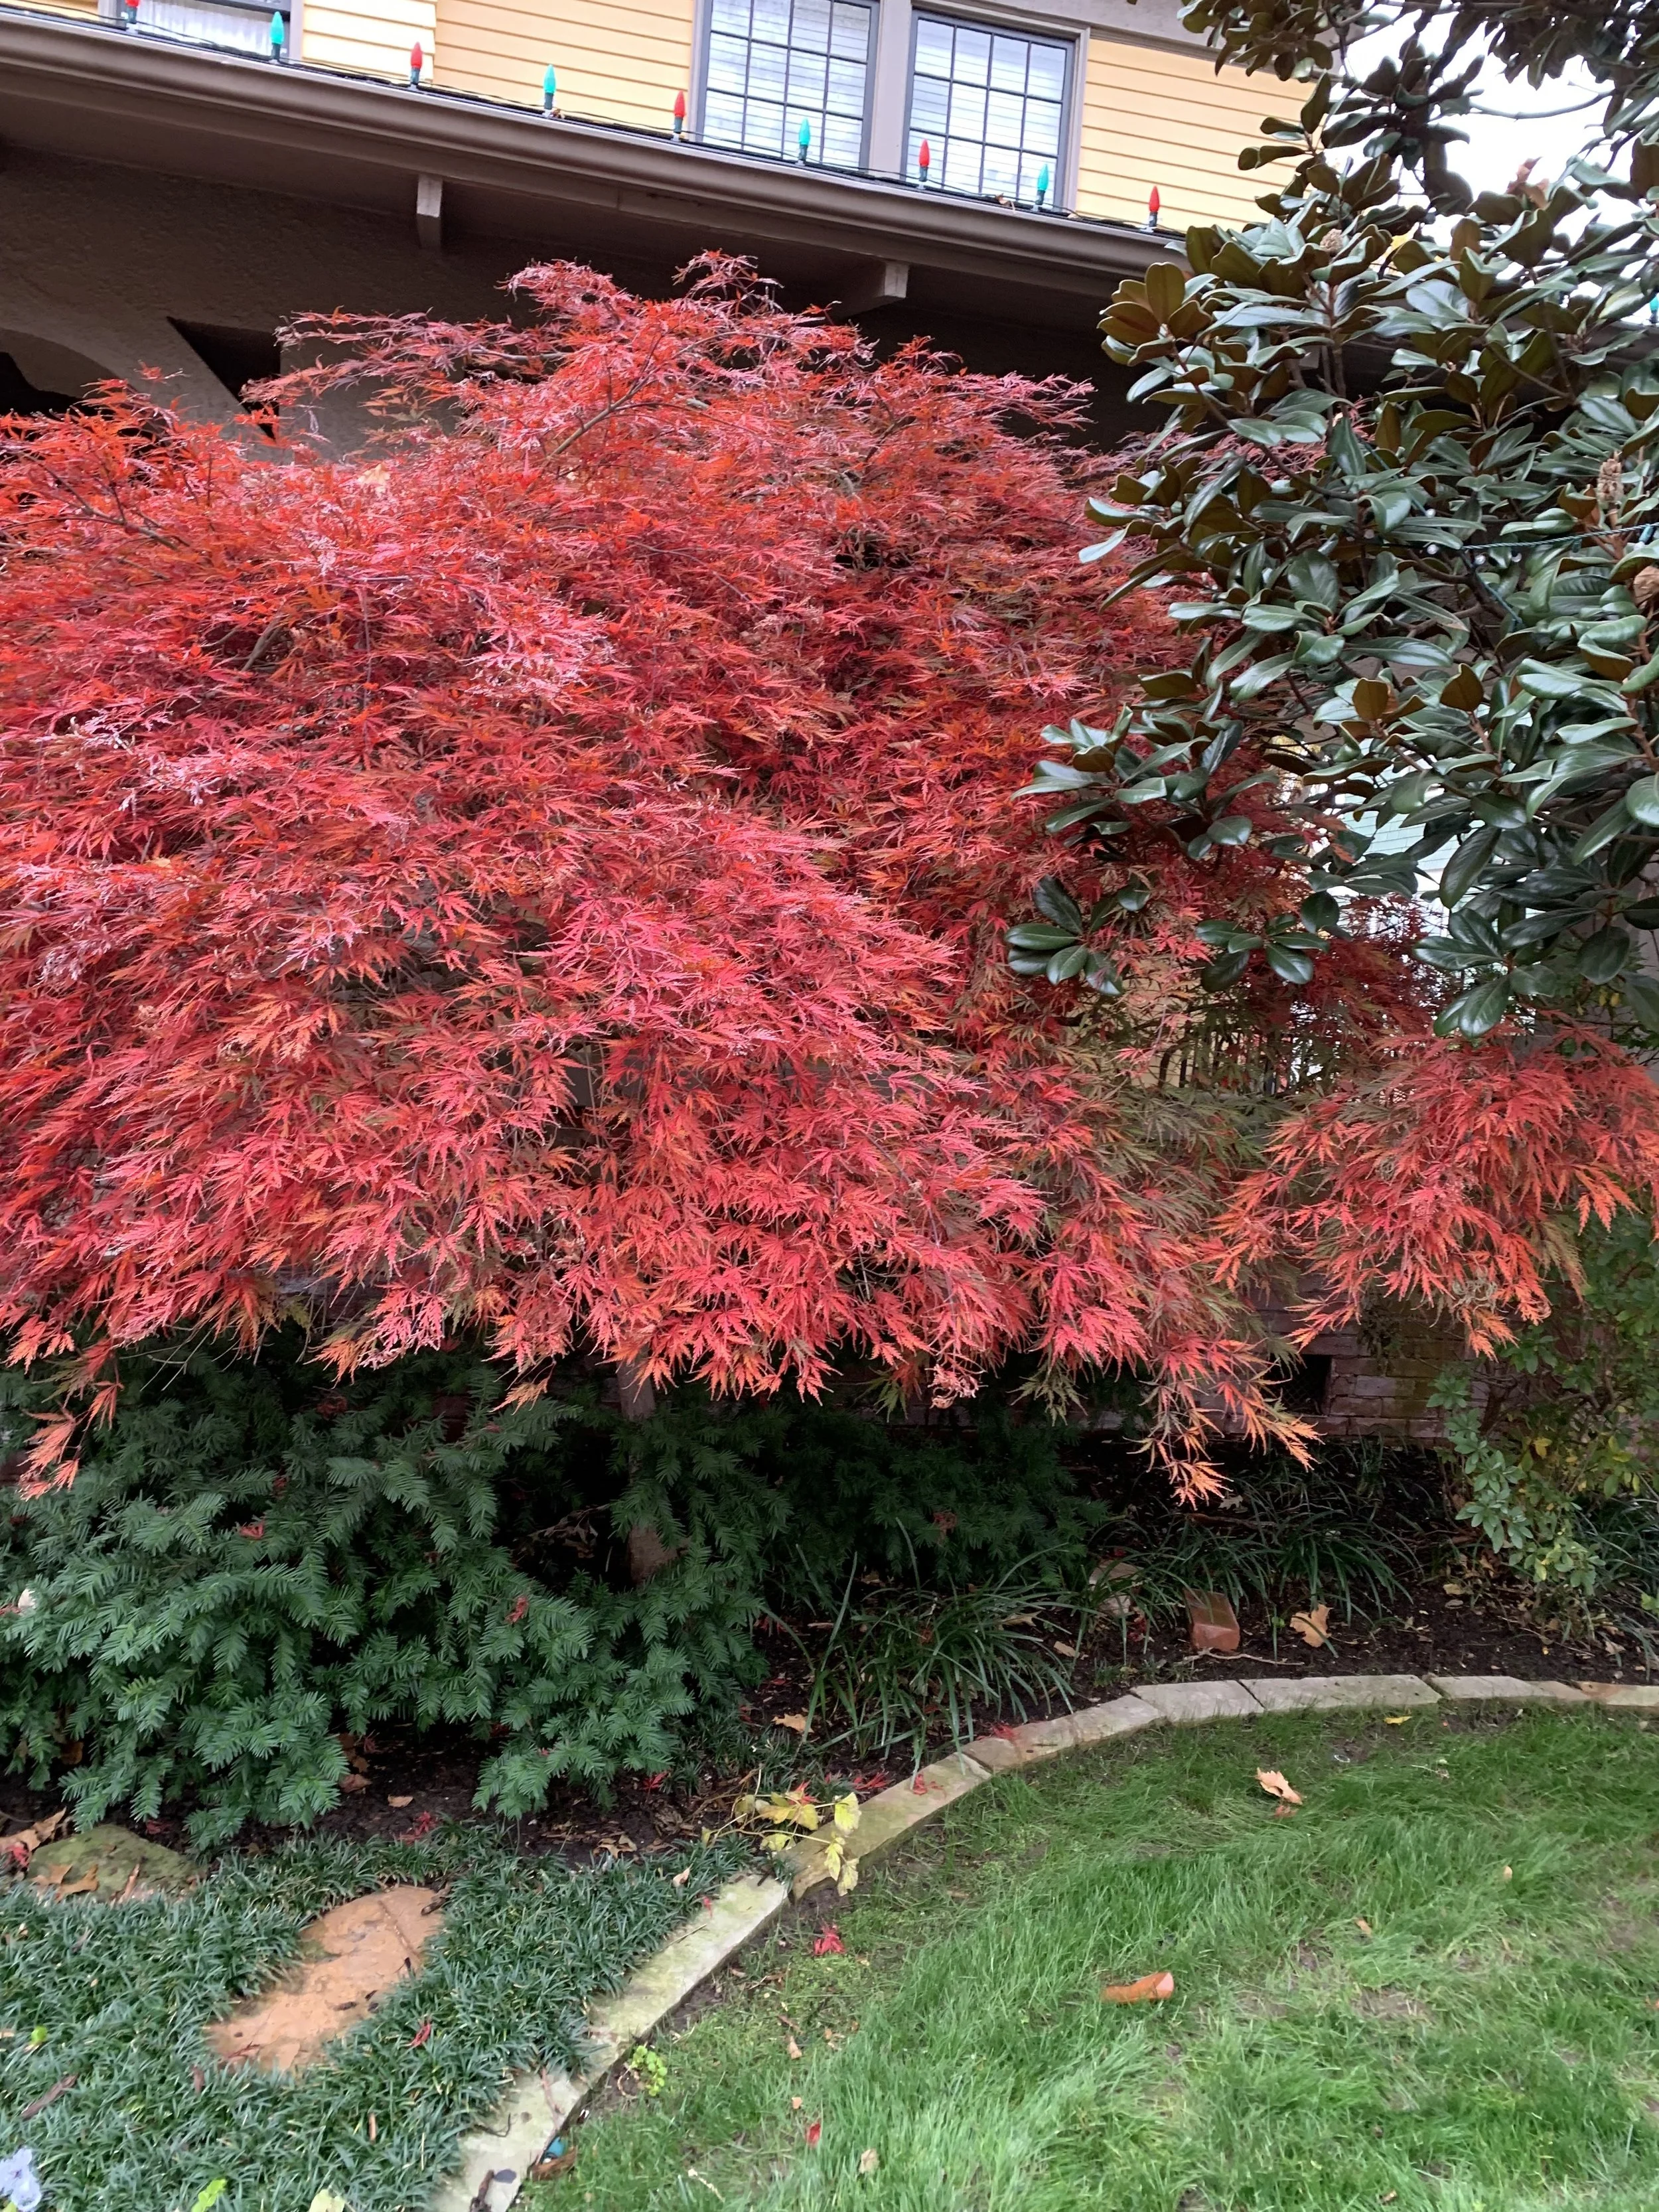
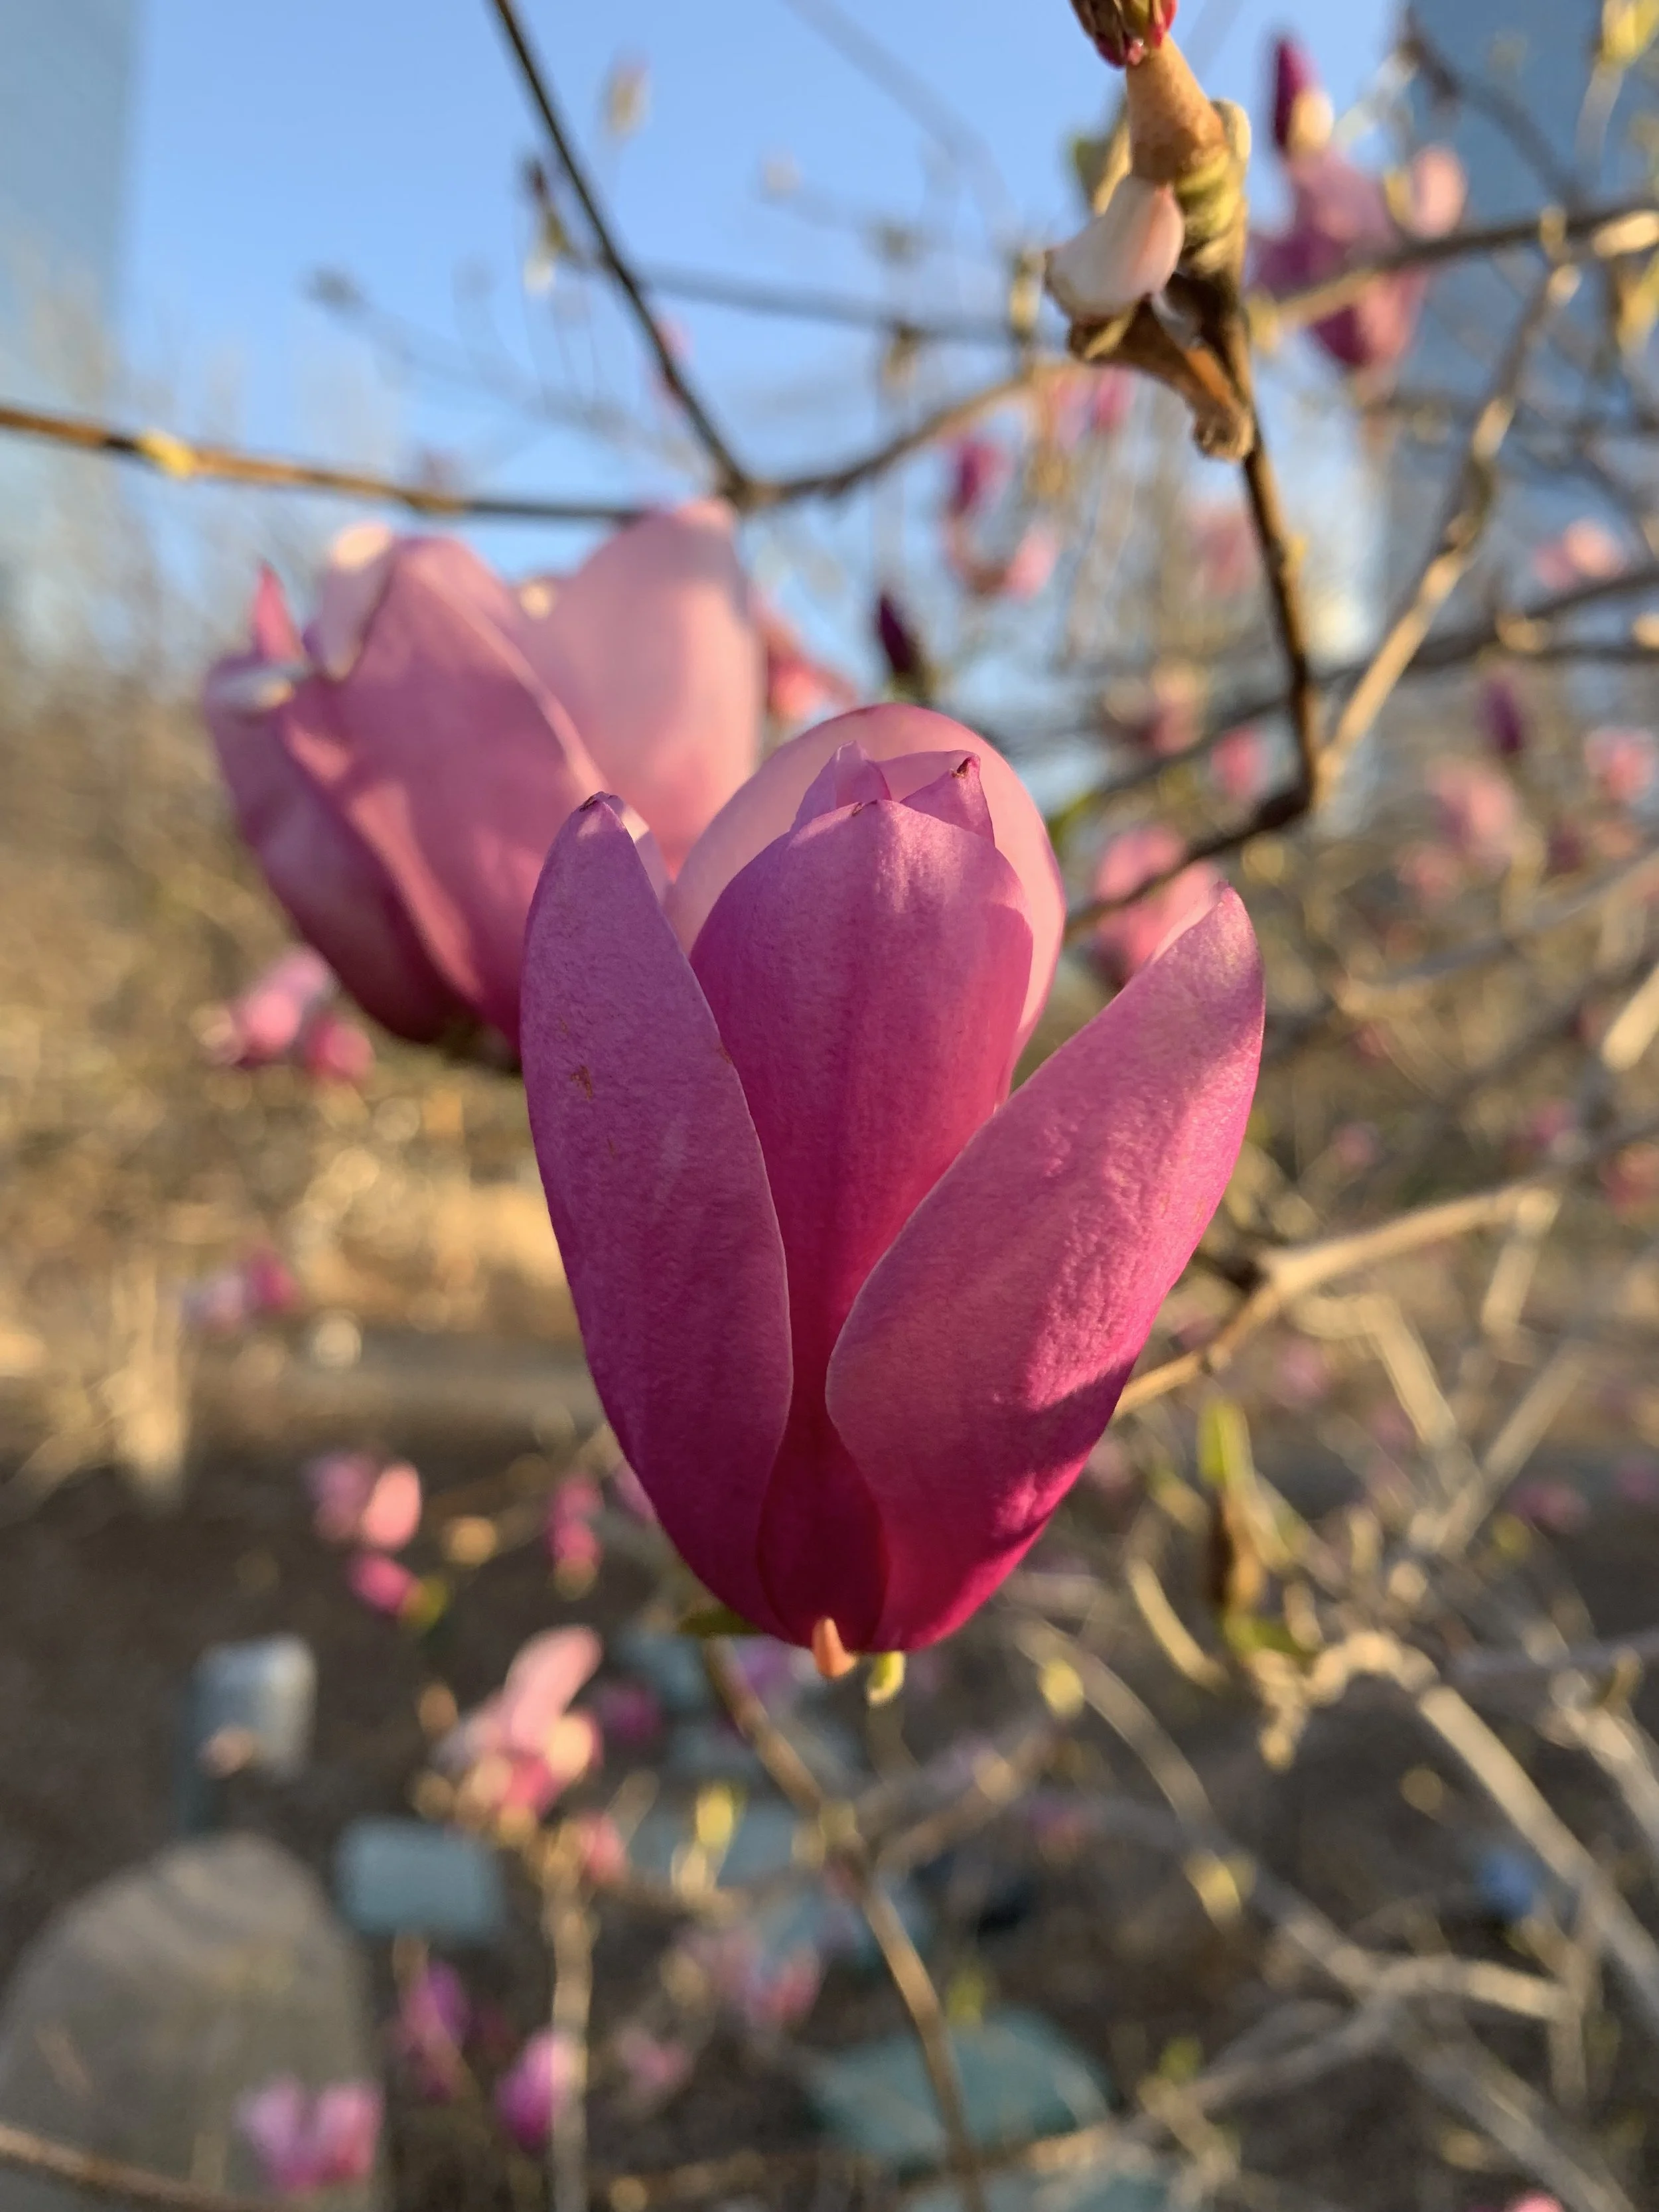
Saucer Magnolia
Saucer Magnolia – Large saucer-shaped blooms of white, pink, or purple in the early spring on spreading multi-trunk branches. 20’ tall and 20’ wide.
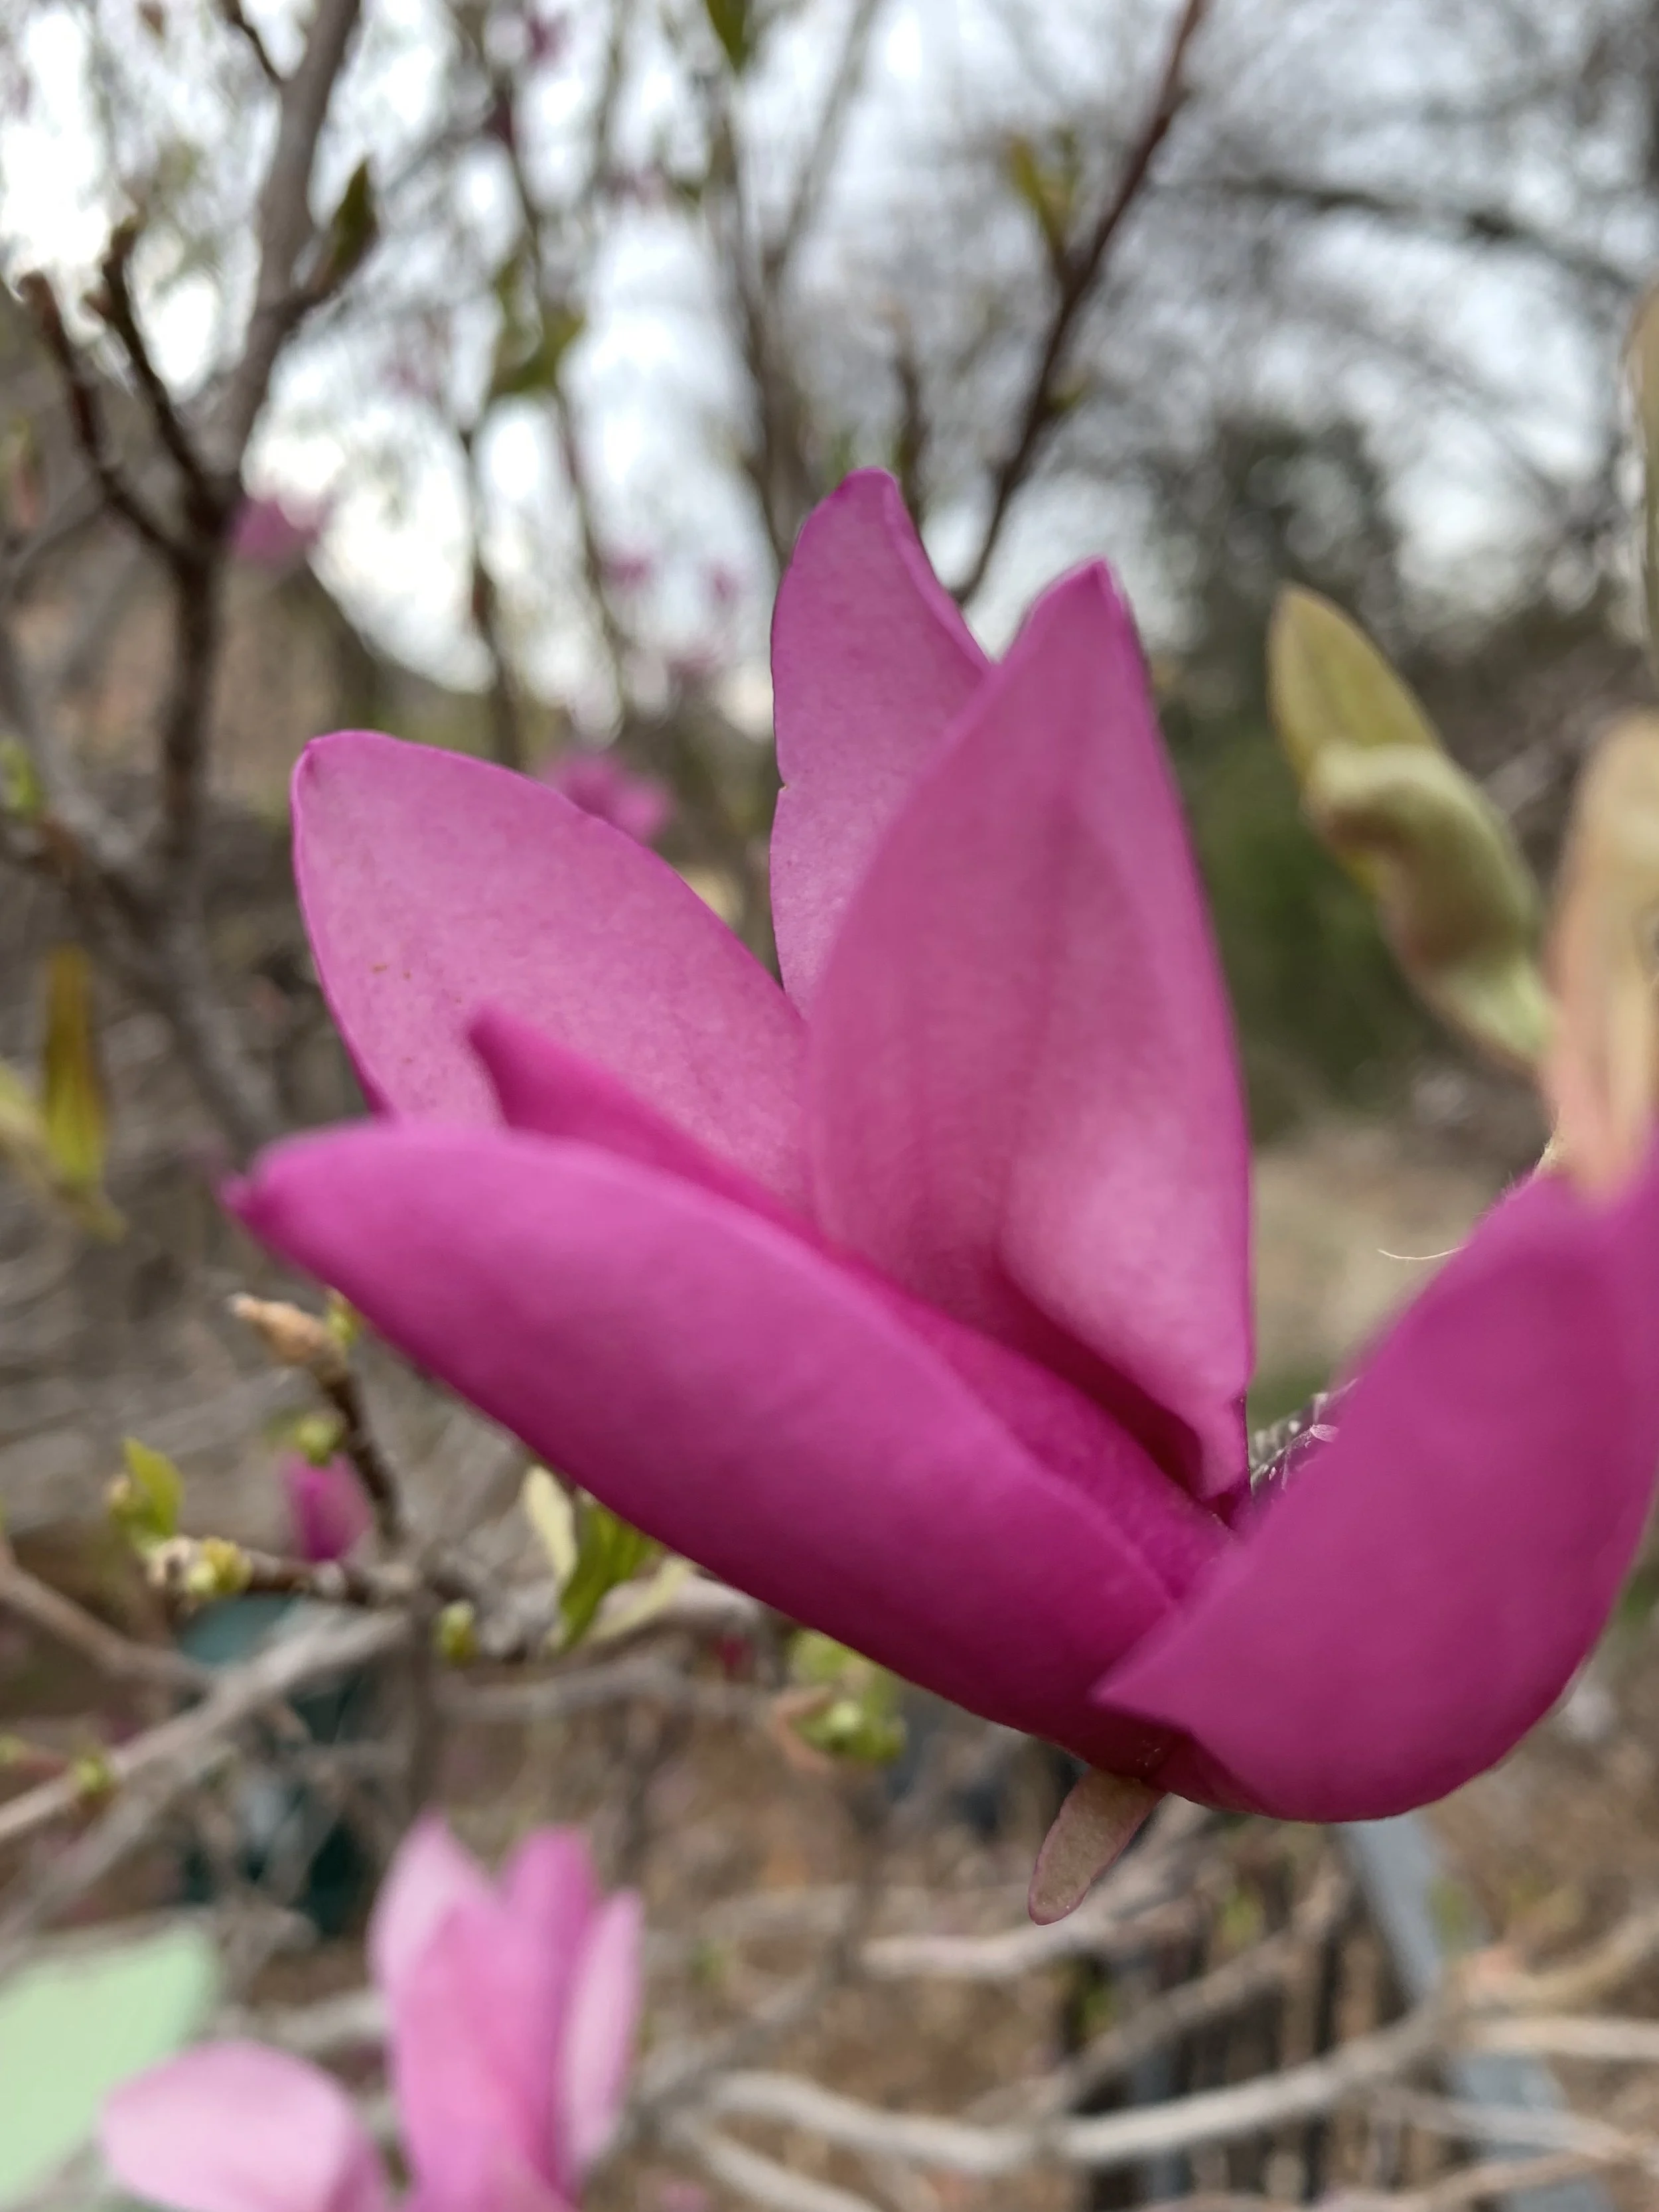
Saucer Magnolia
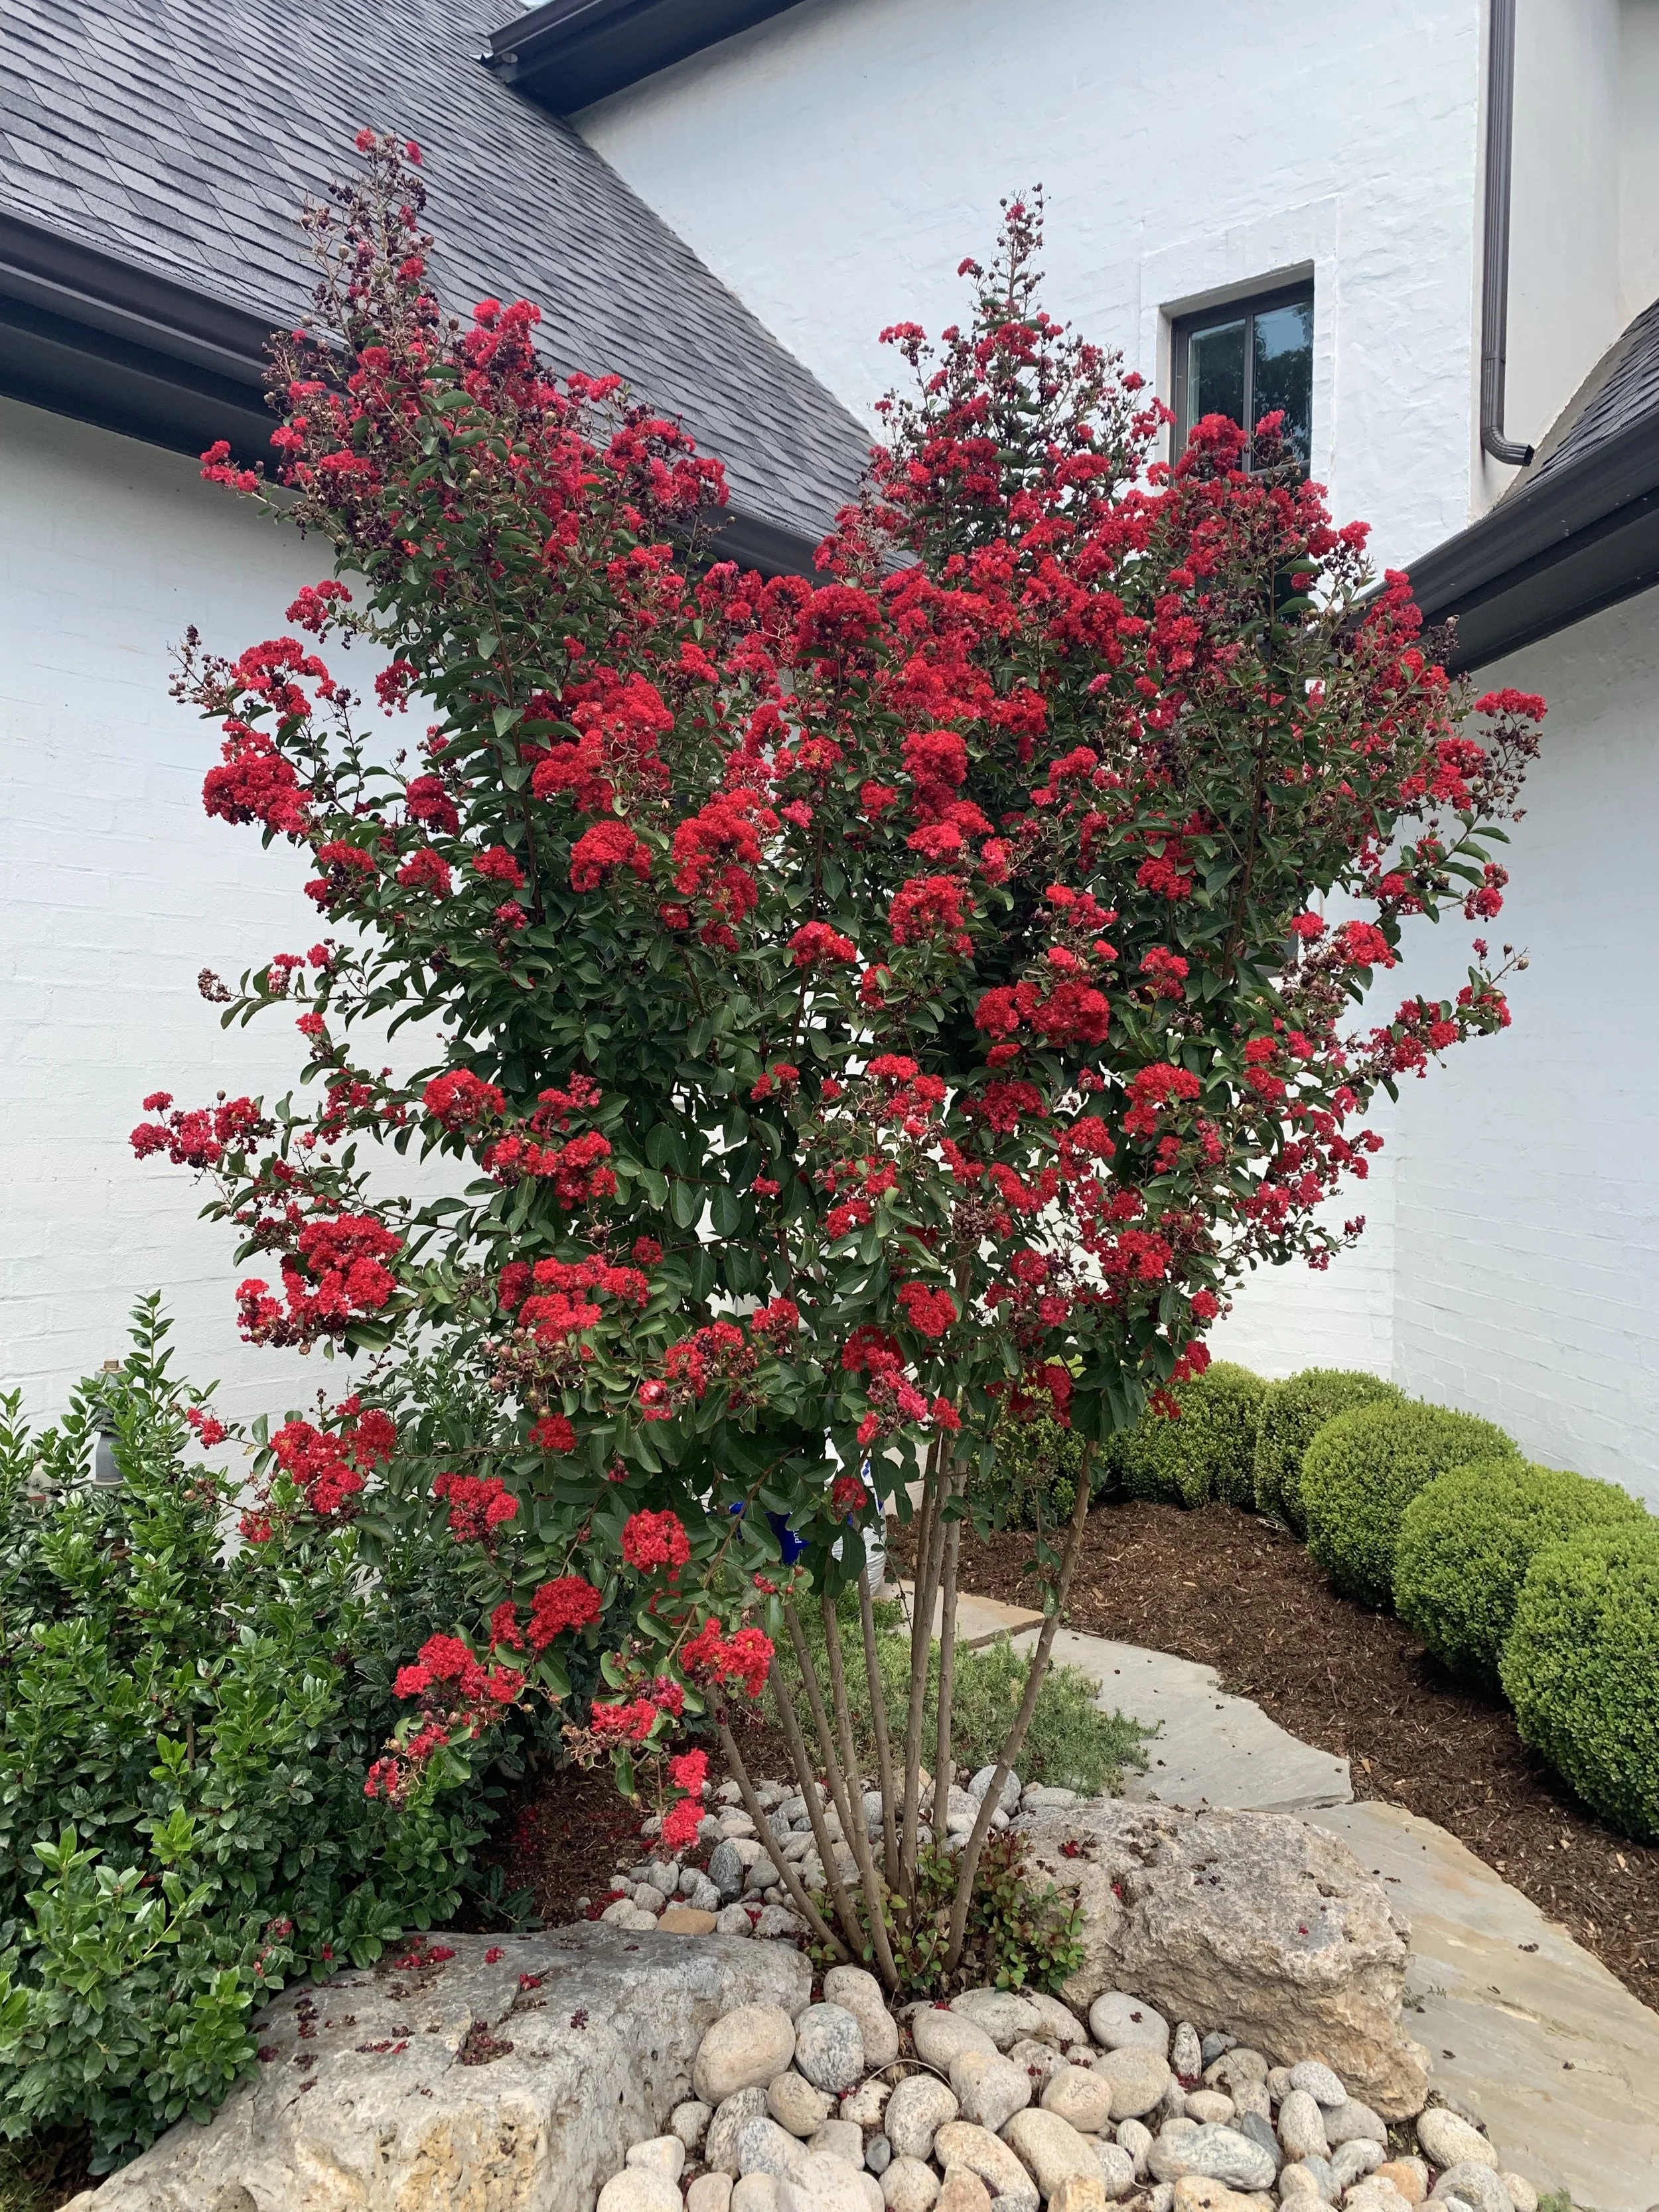
Crape Myrtle
Crape Myrtle – Our longest summer blooming plant with so many colors and growth habits to choose from there has to be one just right for any landscape. 12-30’ tall and 10-20’ wide.
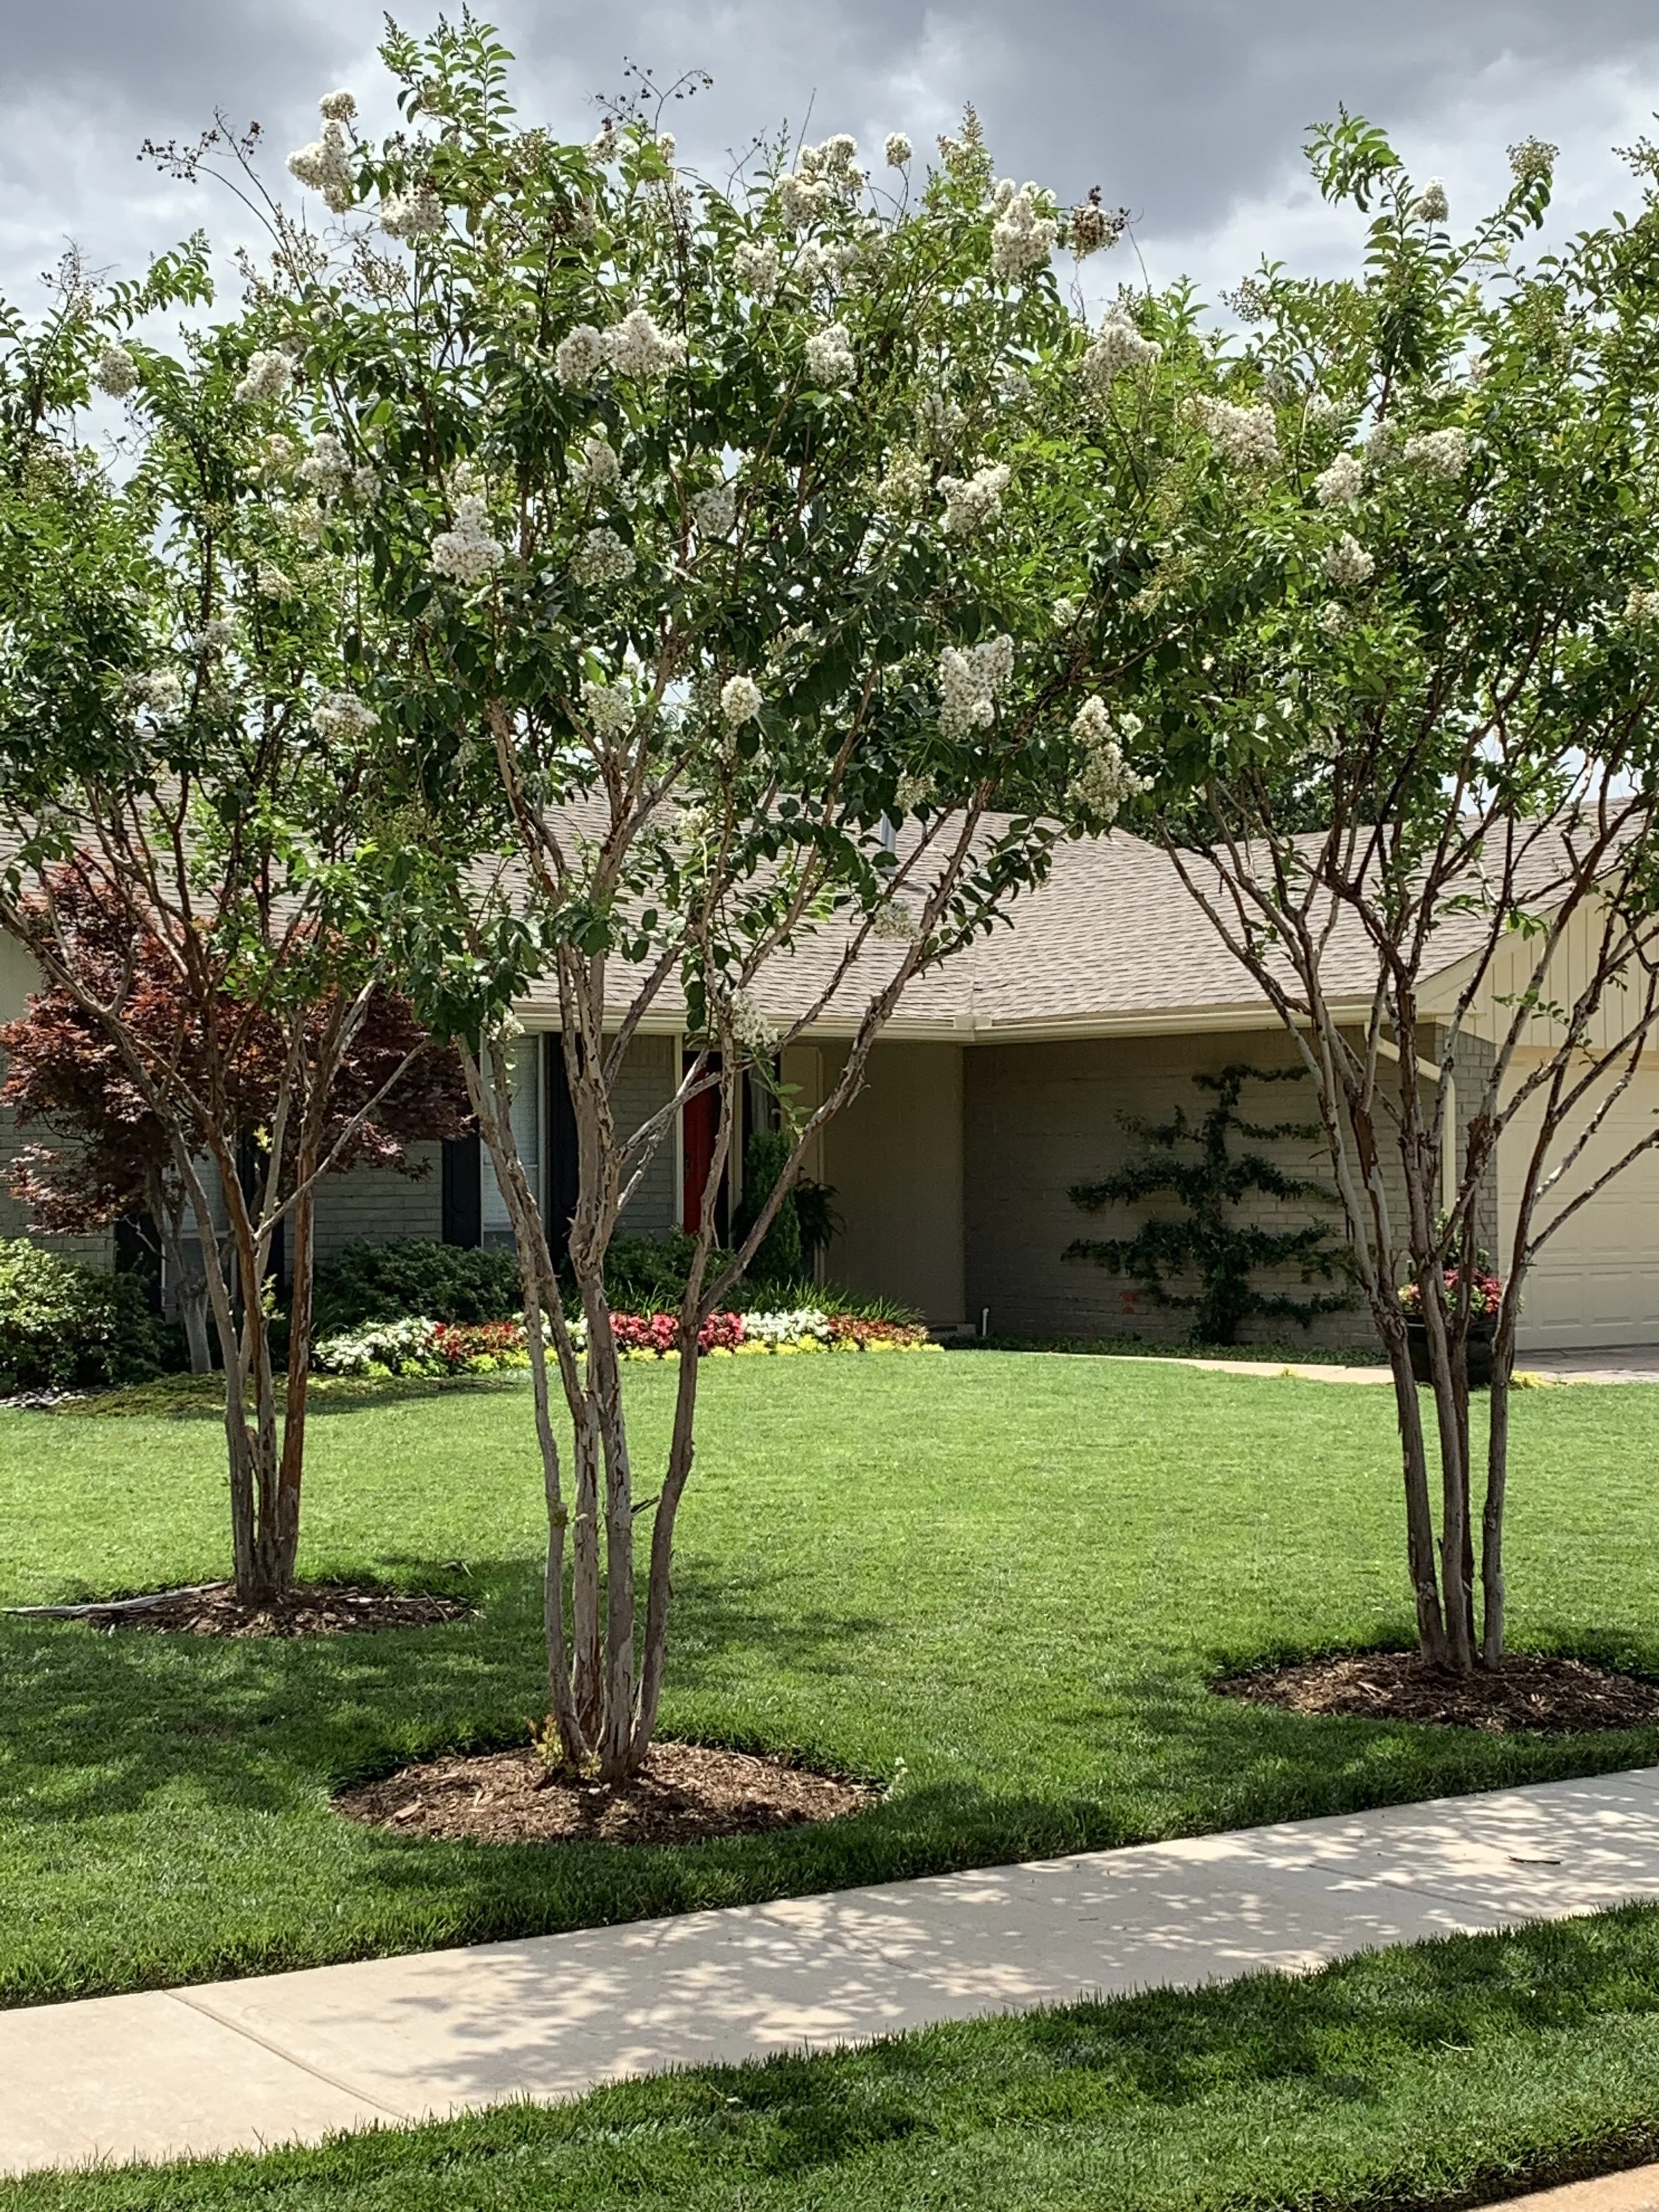
Crape Myrtle
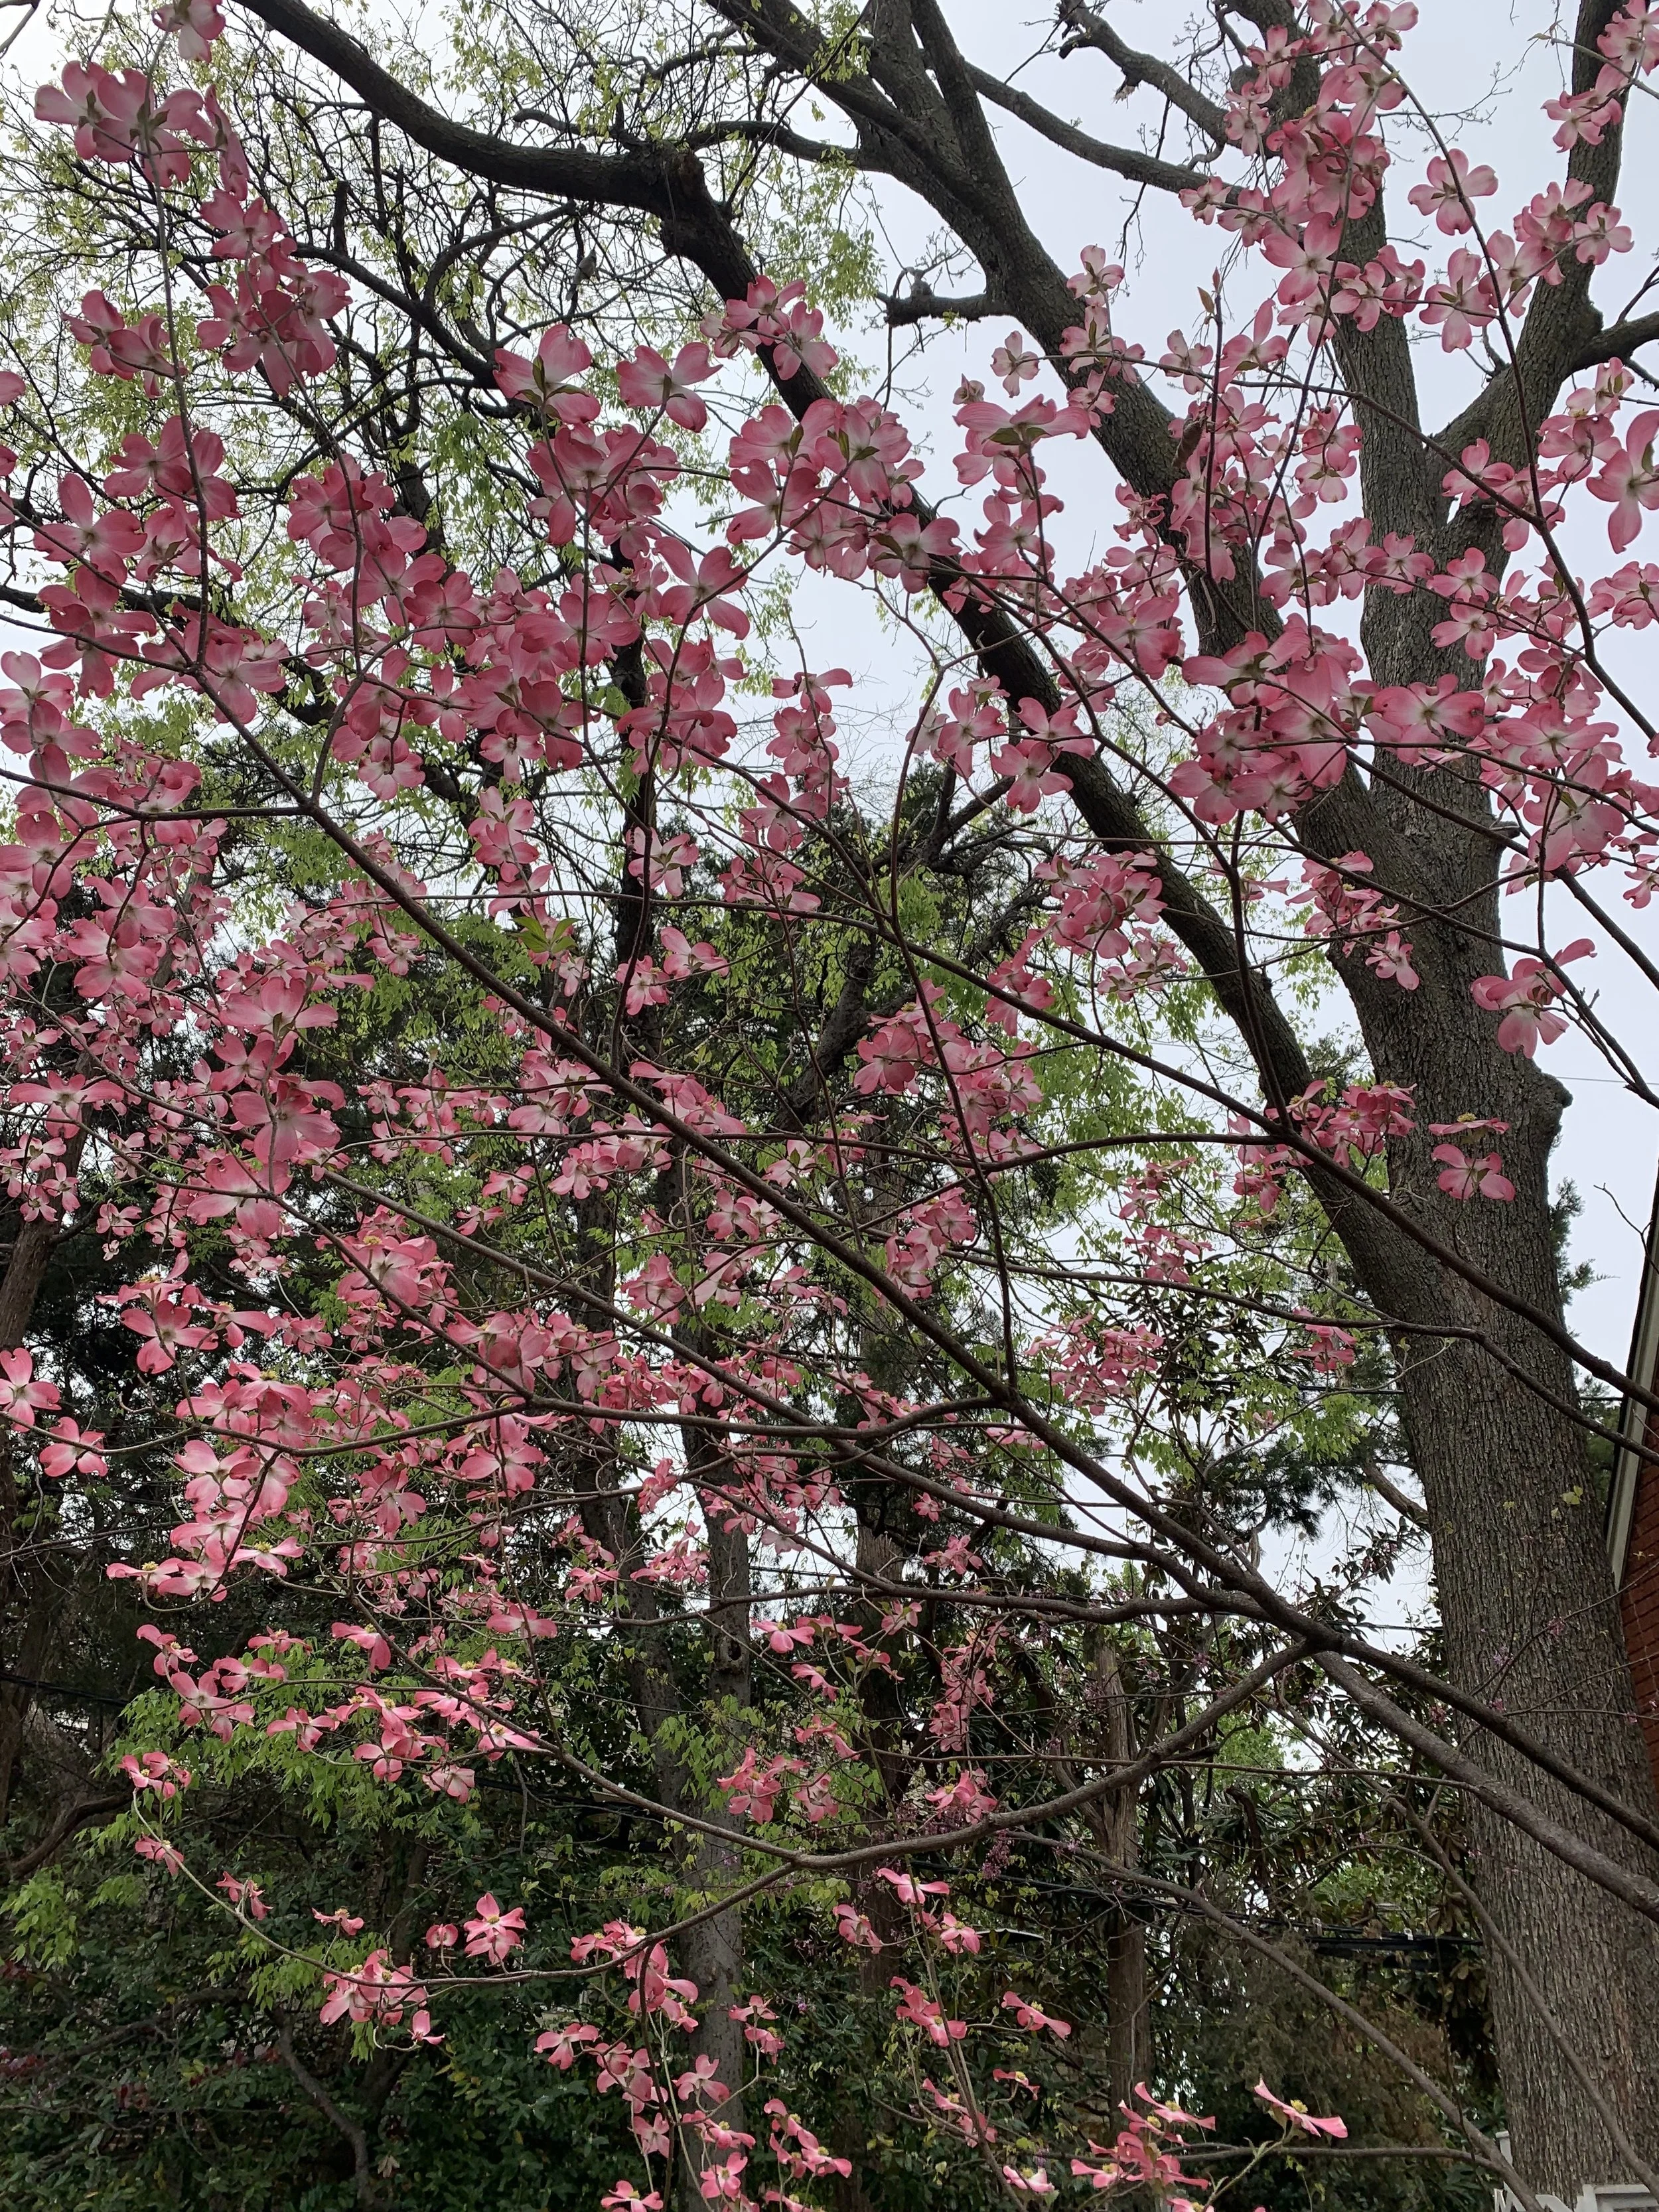
Dogwood
Dogwood – White or pink blooms in the late spring. Great for areas protected from the afternoon sun or as an understory accent tree. 15’-20’ tall and wide.
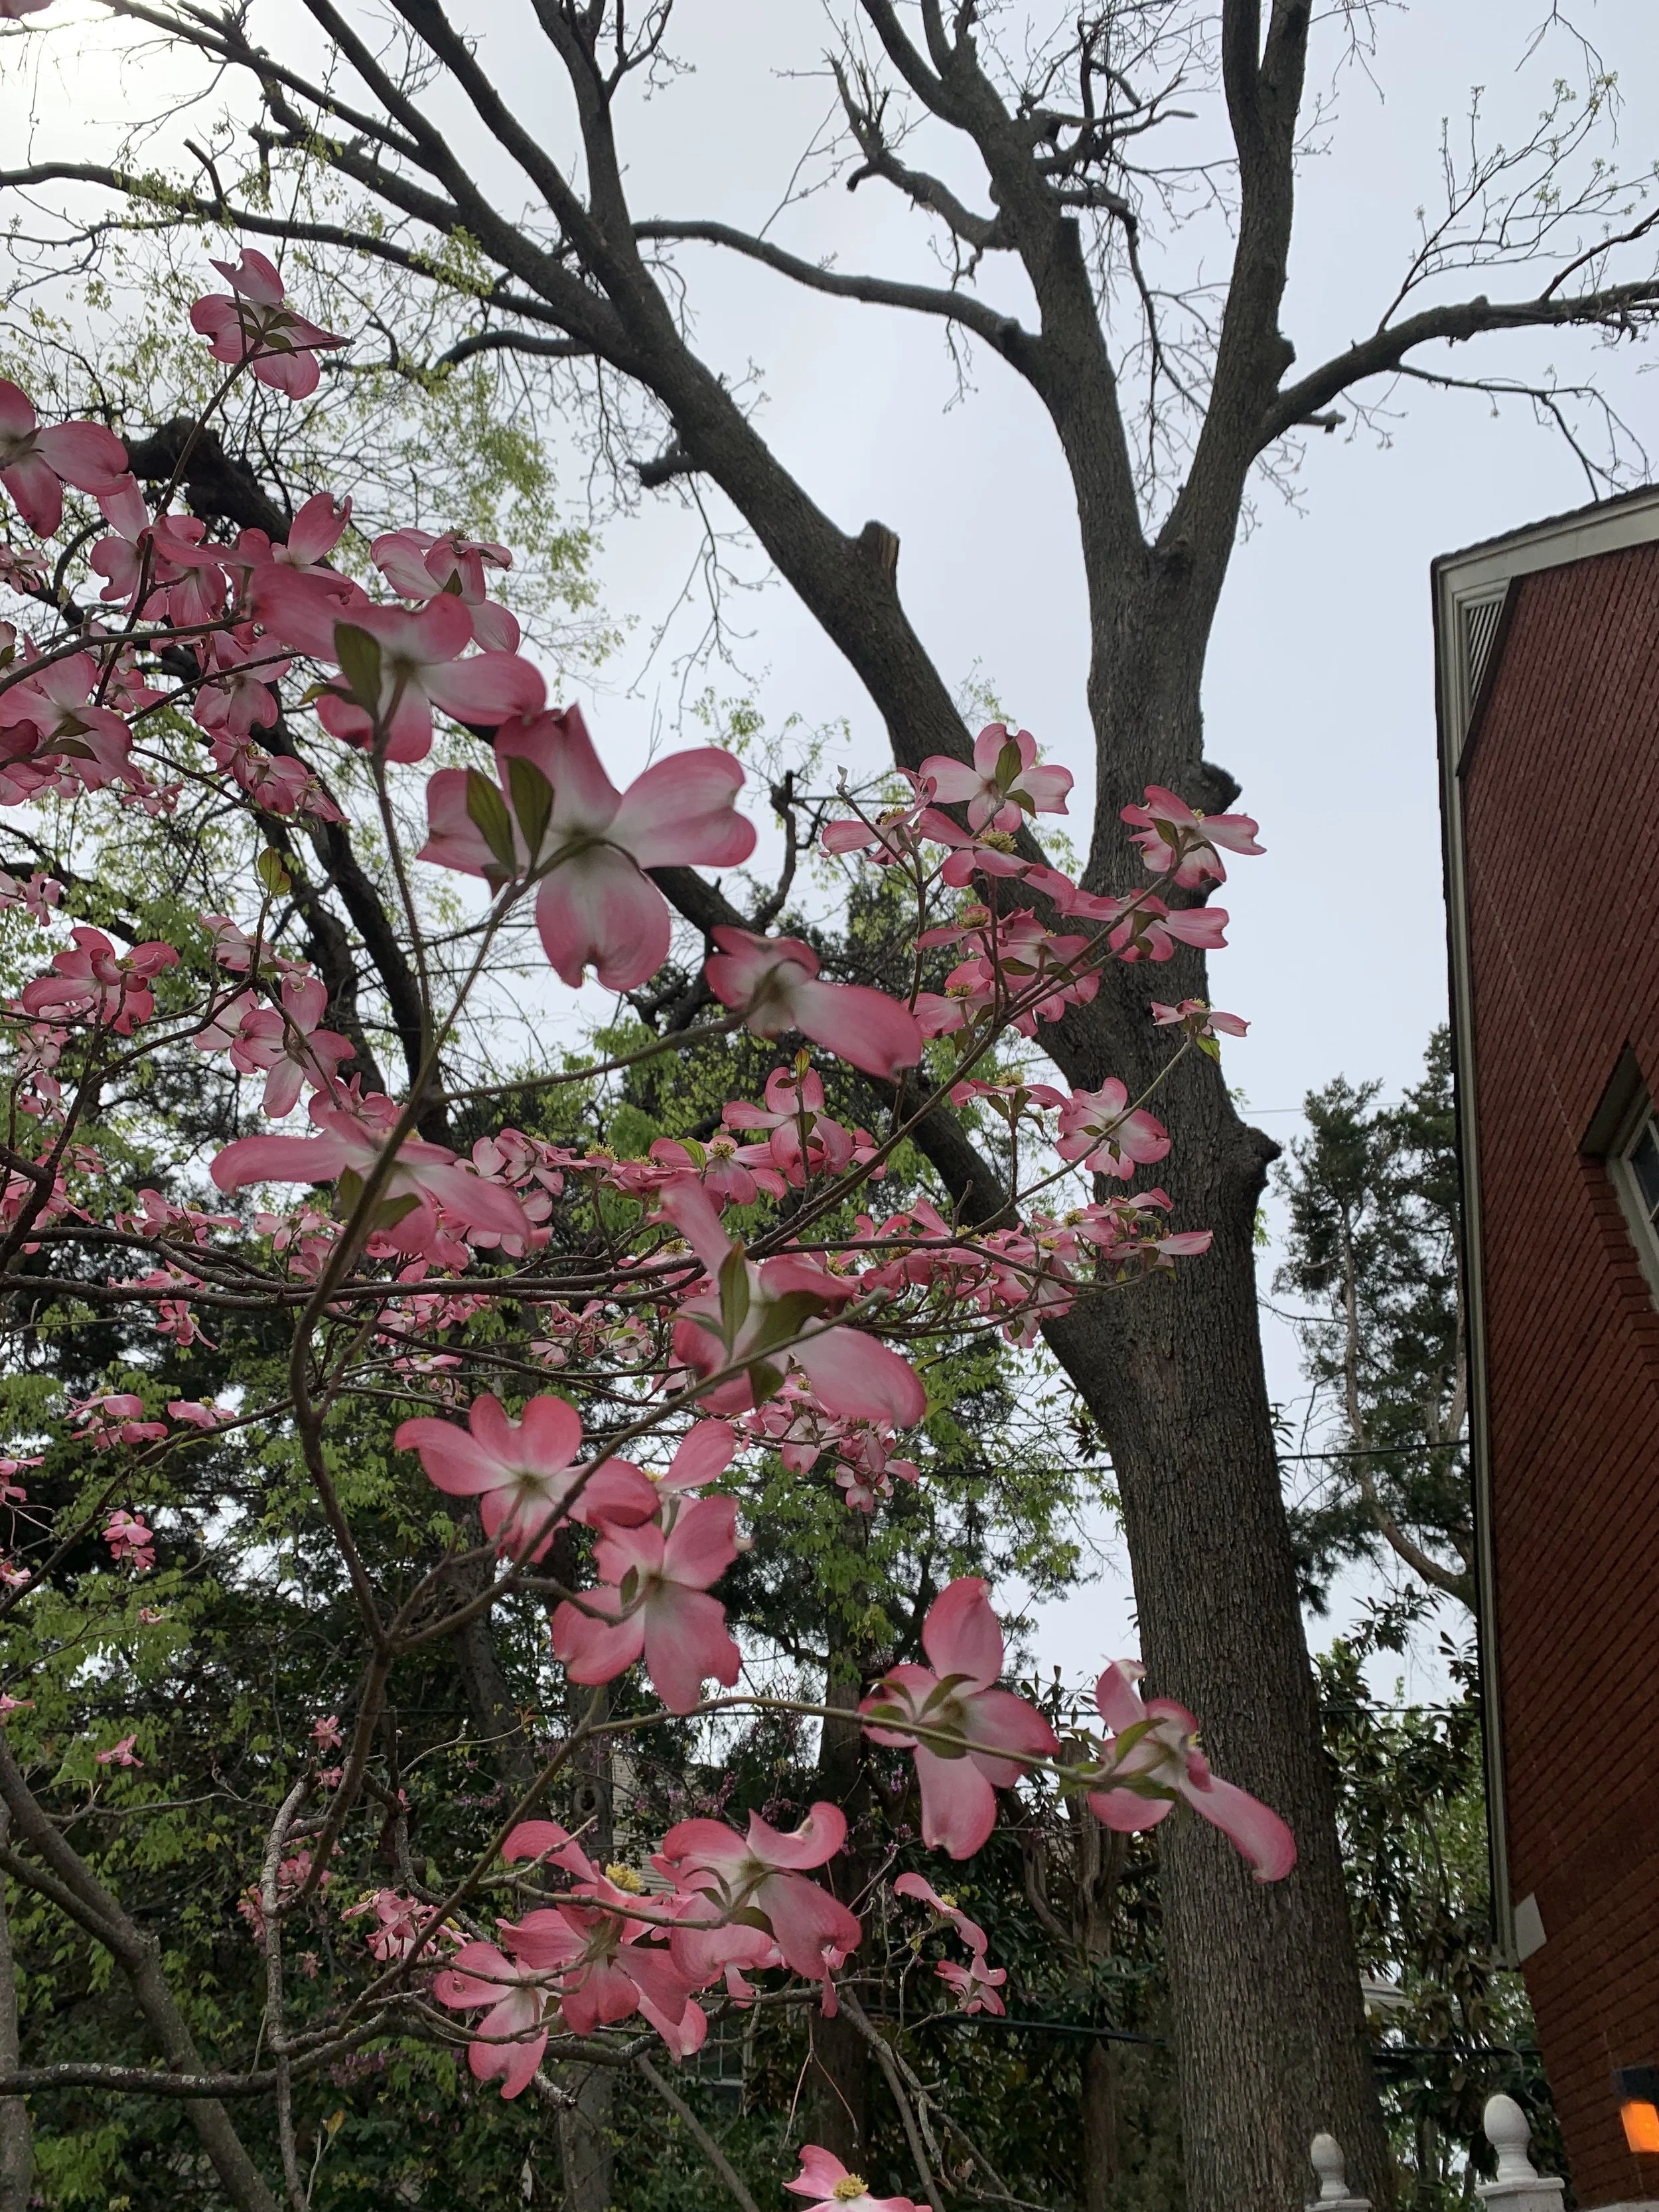
Dogwood
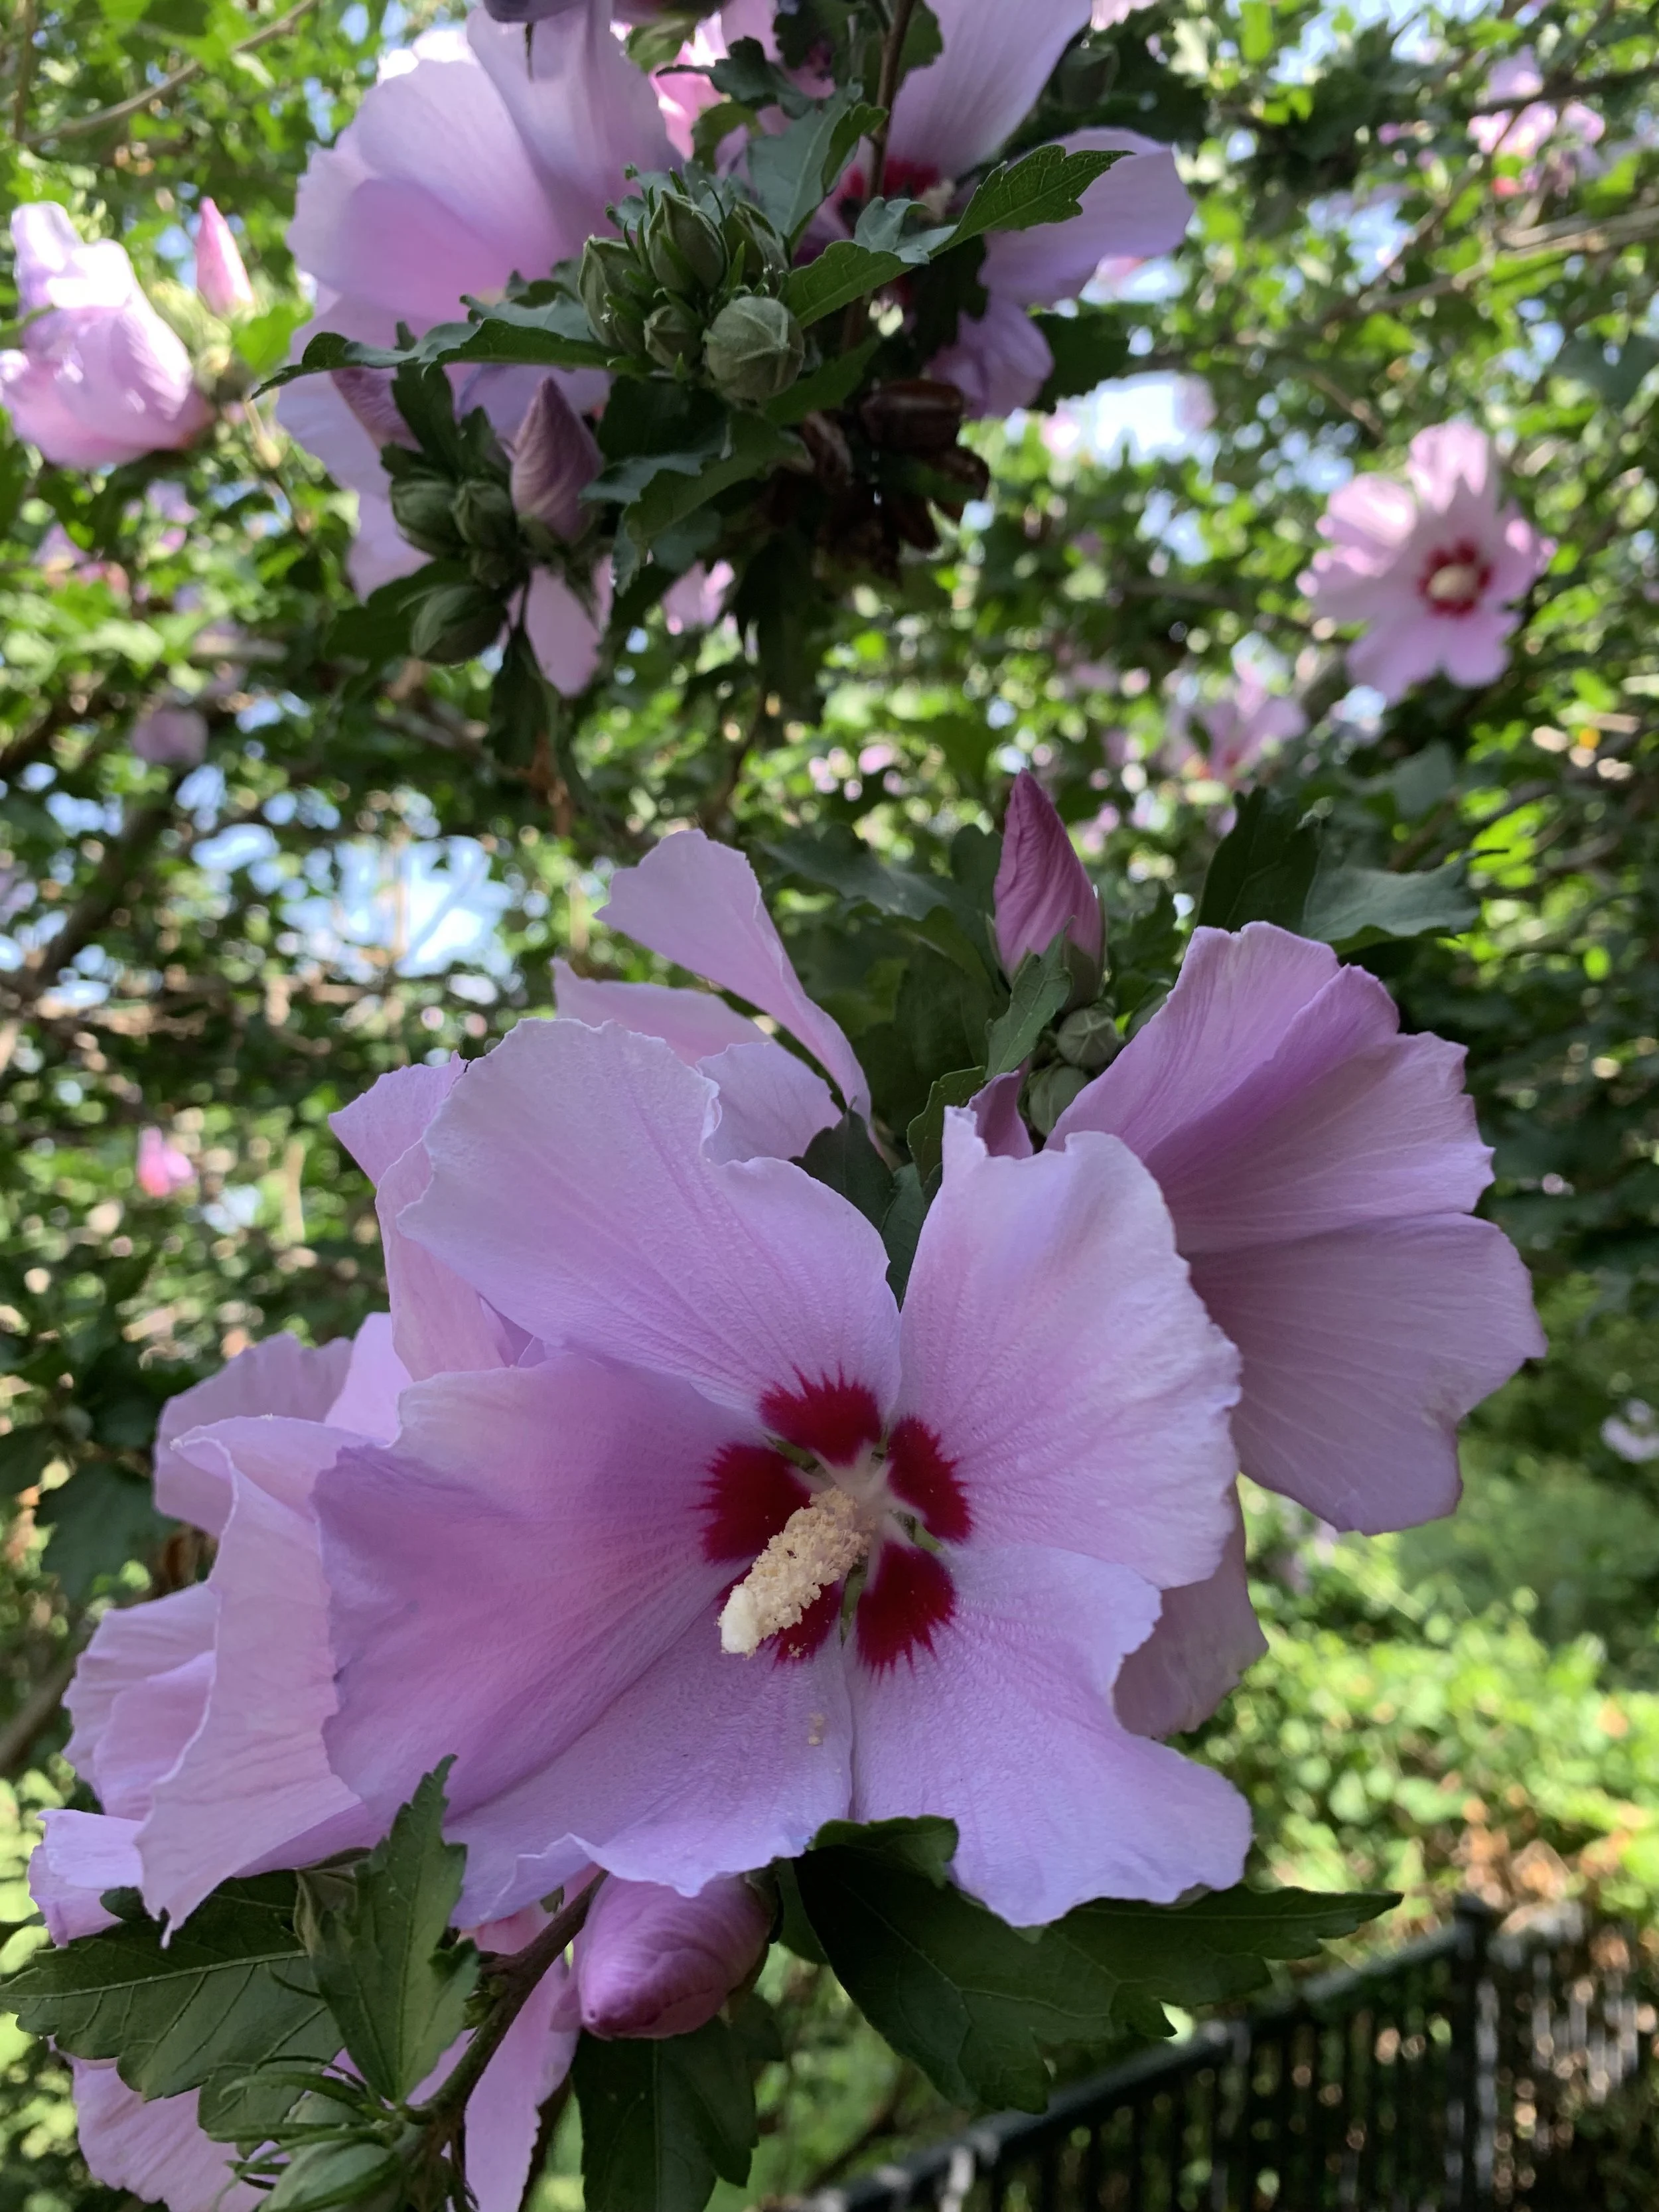
Rose of Sharon
Rose of Sharon – A graceful vase-shaped small tree that adds a tropical look to the landscape. A mid-summer to fall bloomer available in shades of white, red, pink, lavender, and blue. 15’ tall and 10’ wide.
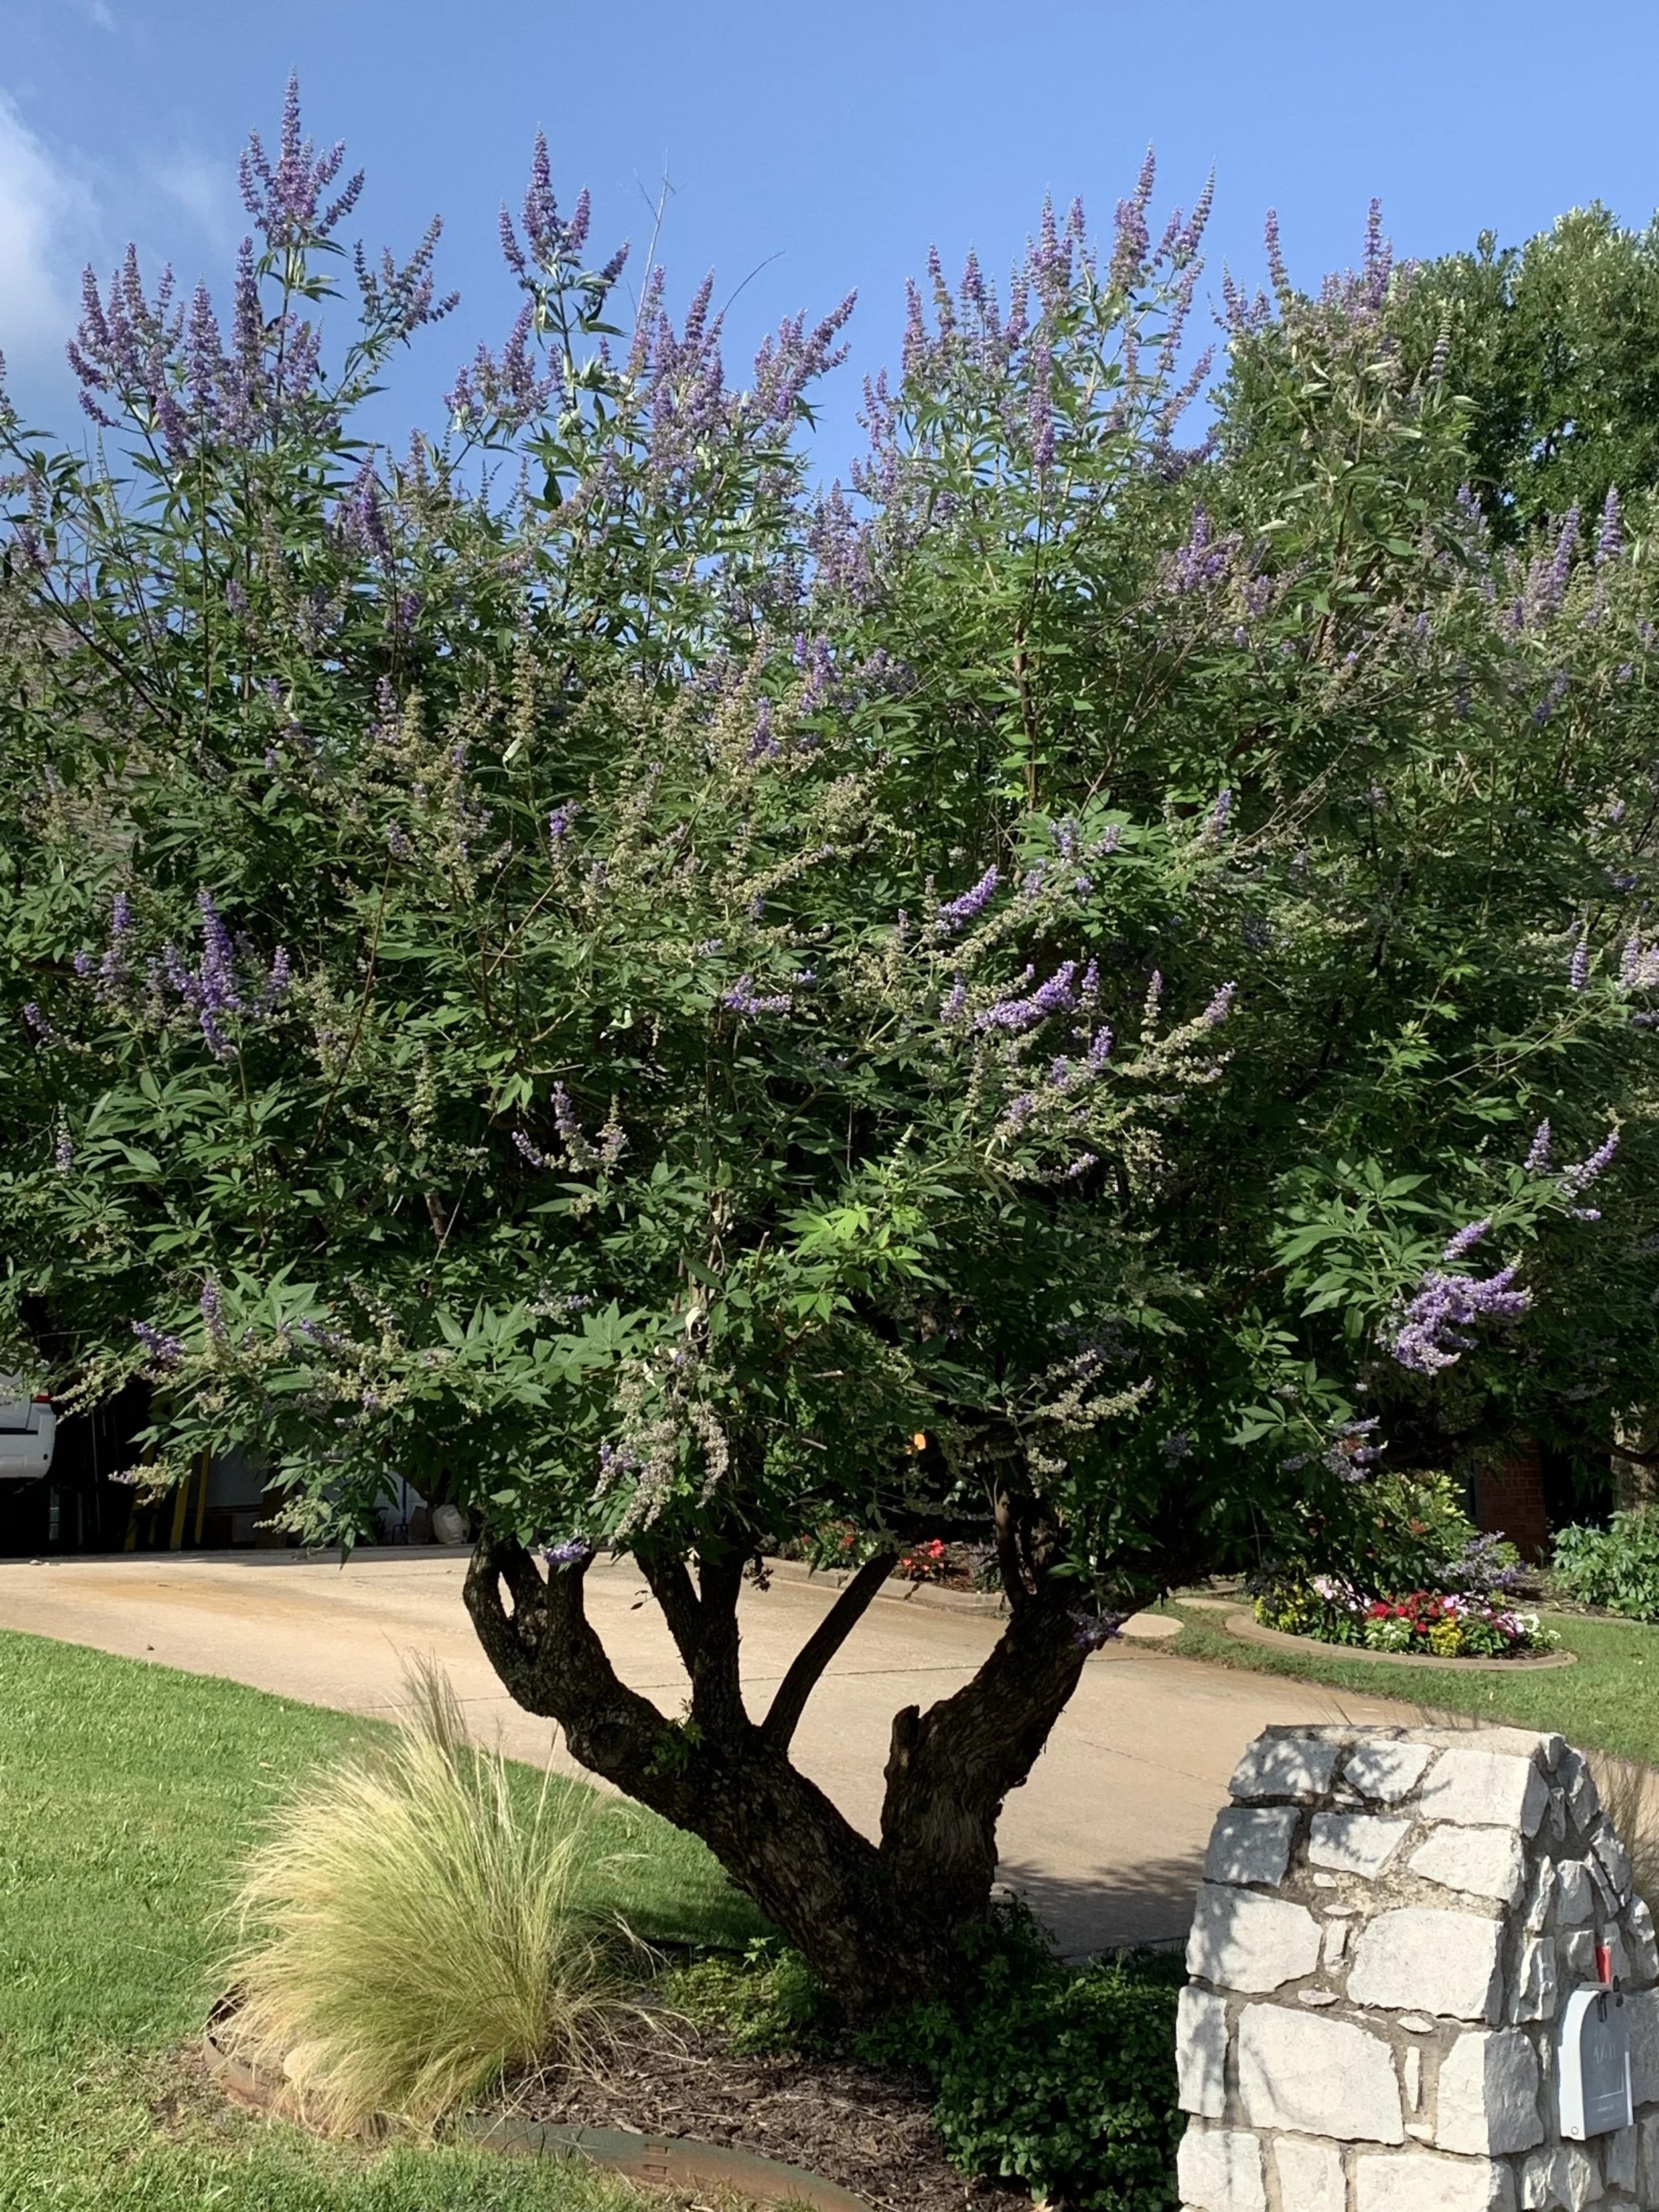
Chaste Tree
Chaste Tree – Also known as Vitex, has summer lilac-colored blooms with grayish-green foliage on a broad, spreading multi-trunk frame. 15-20’ tall and wide.
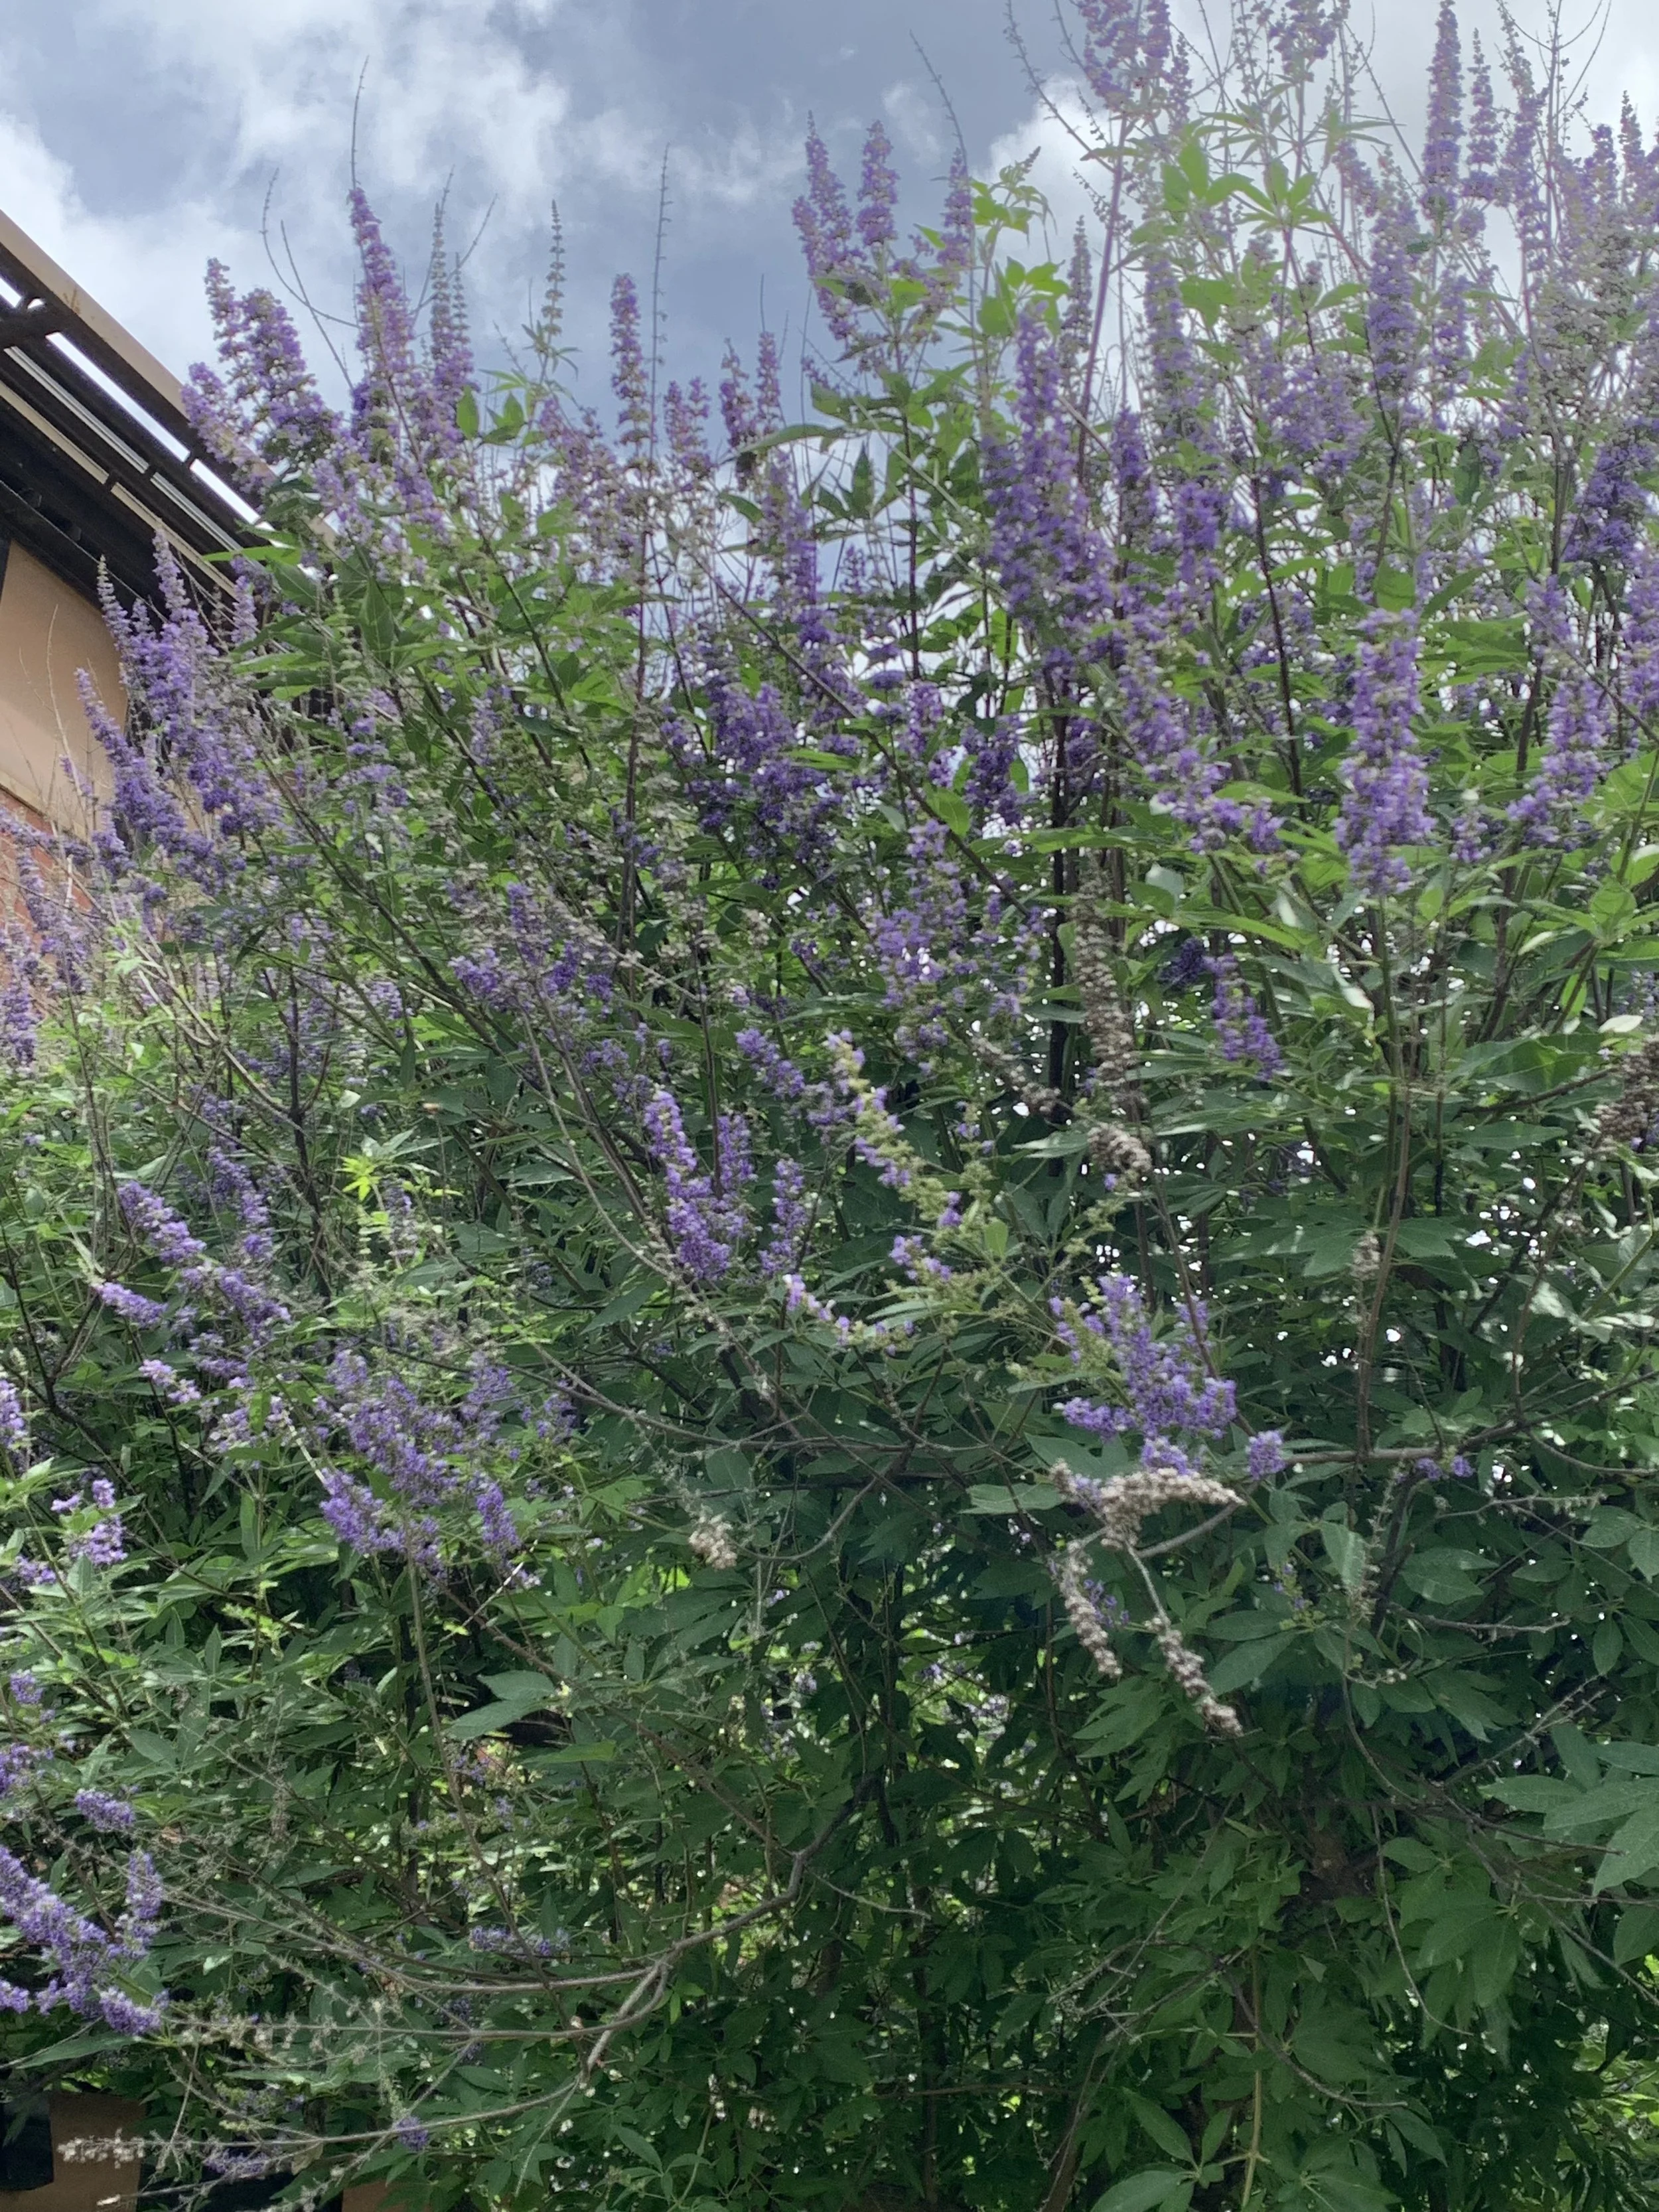
Chaste Tree
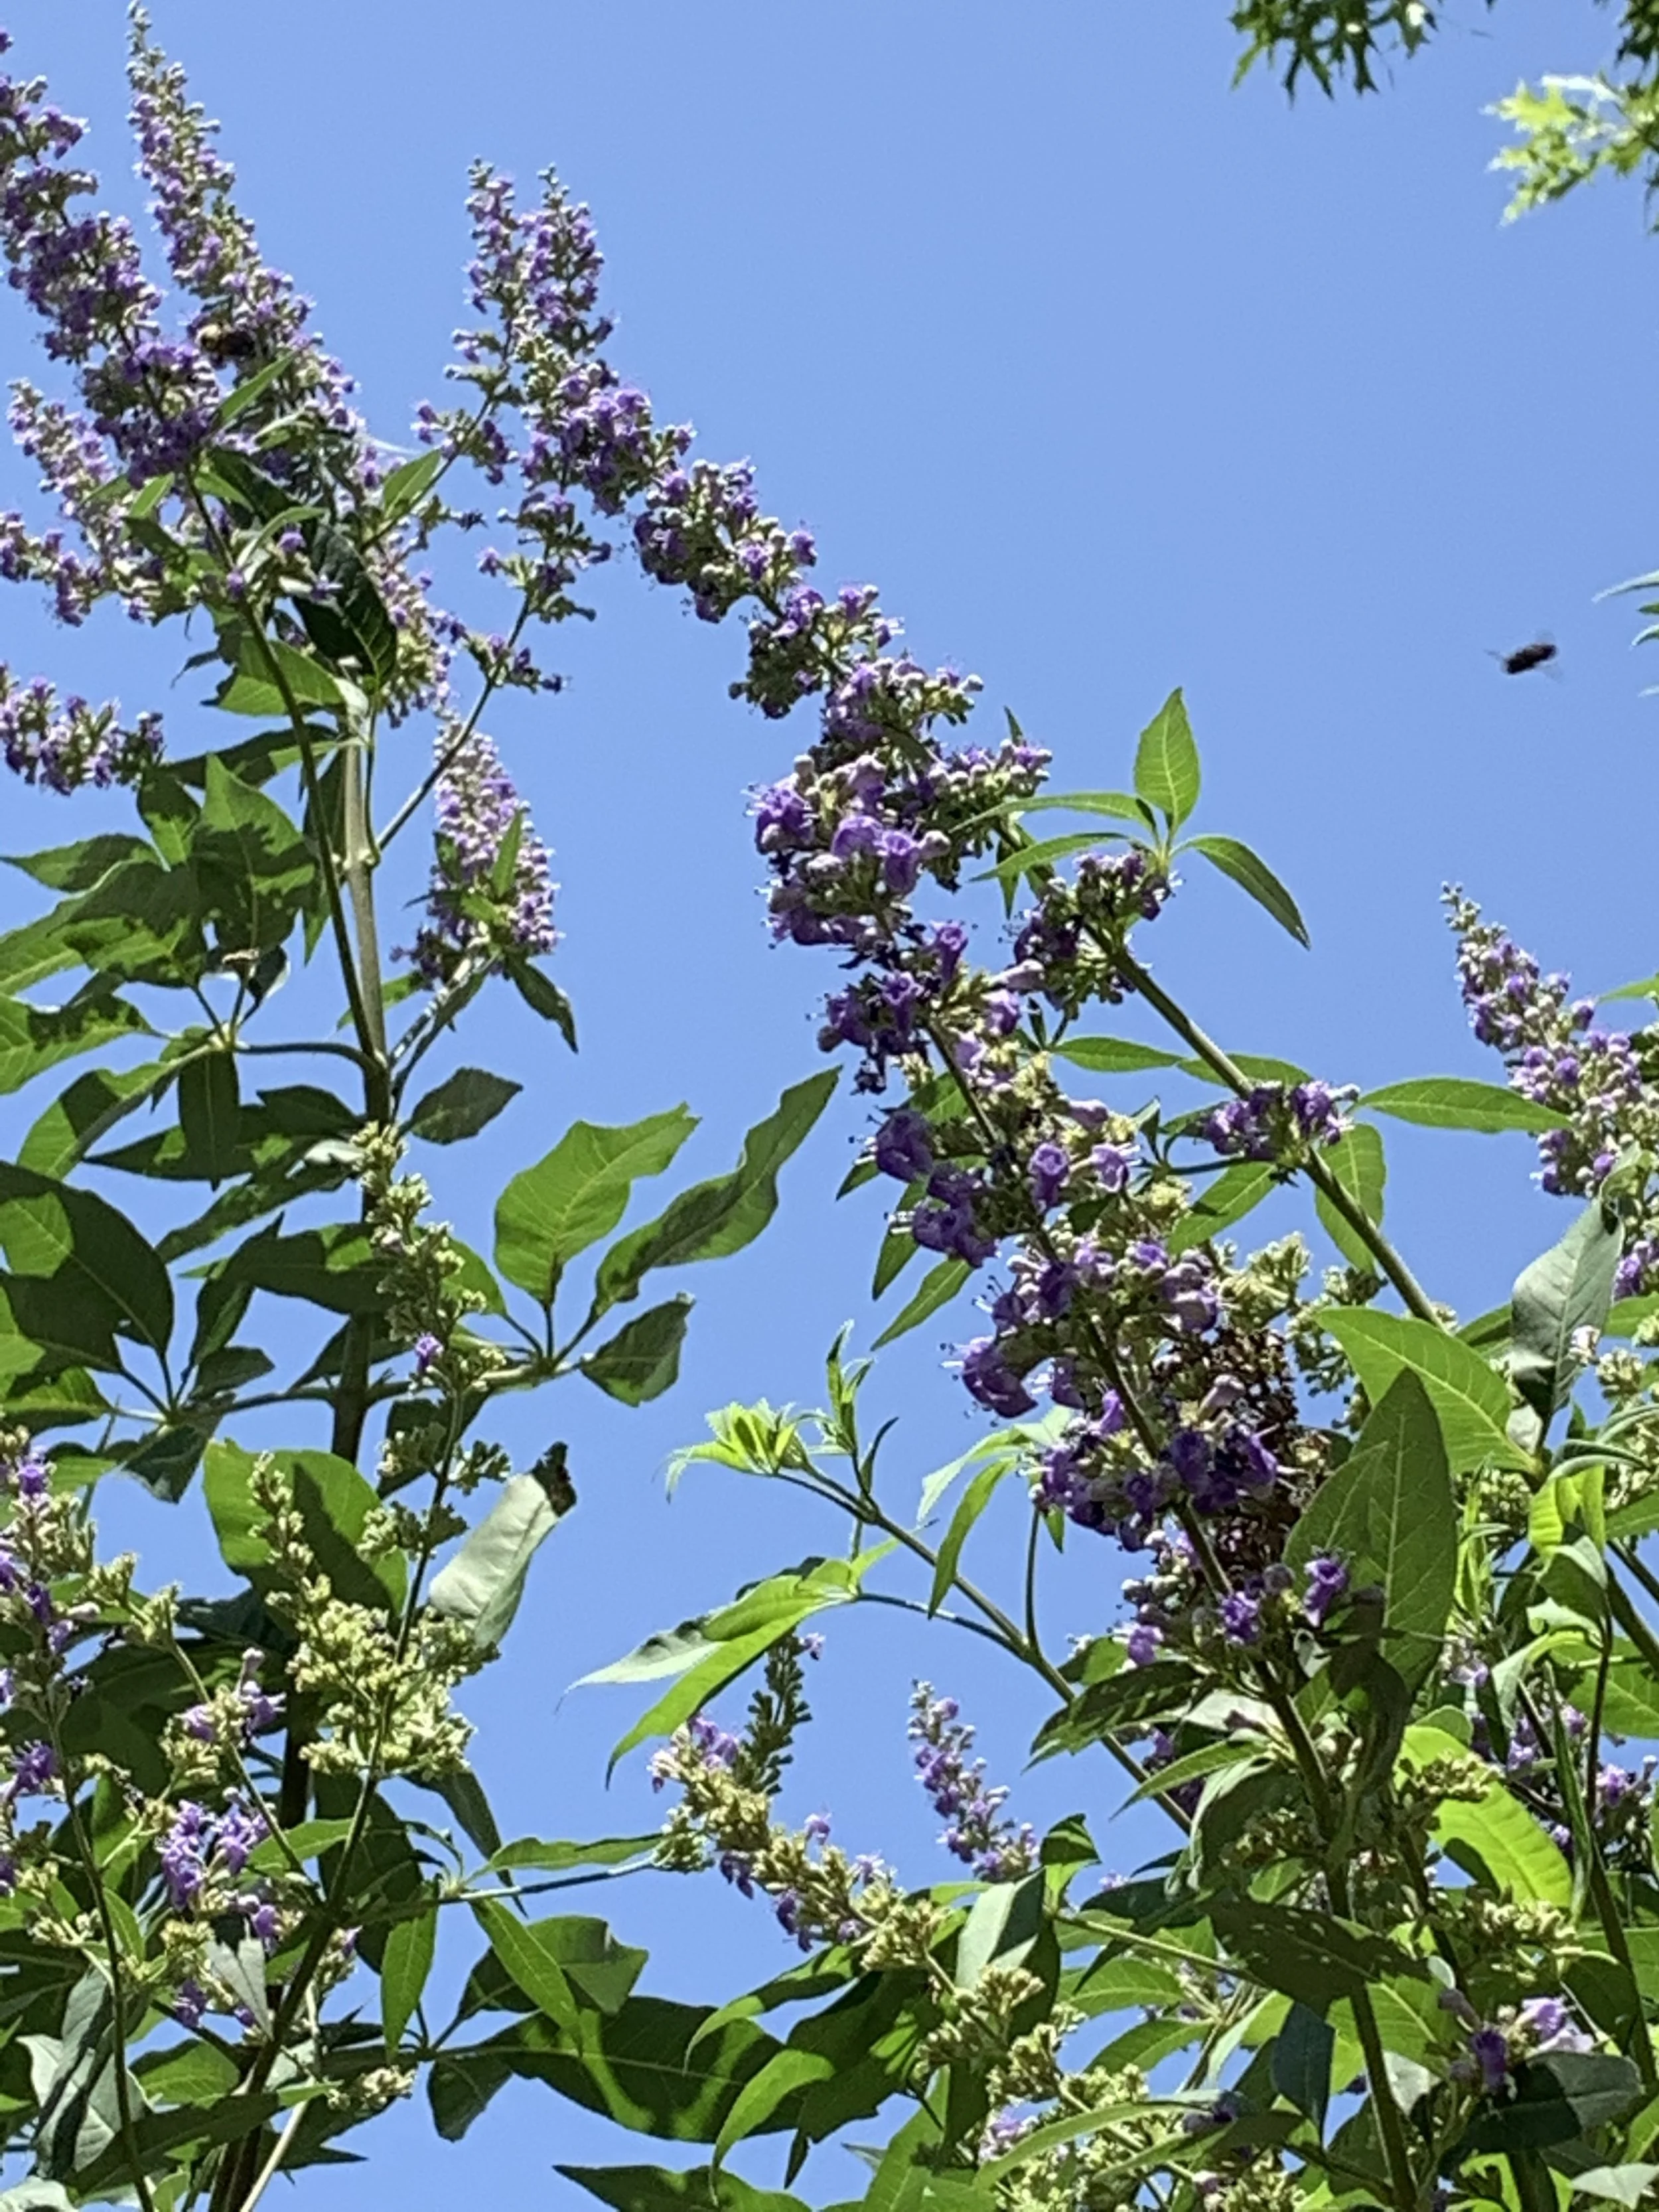
Chaste Tree
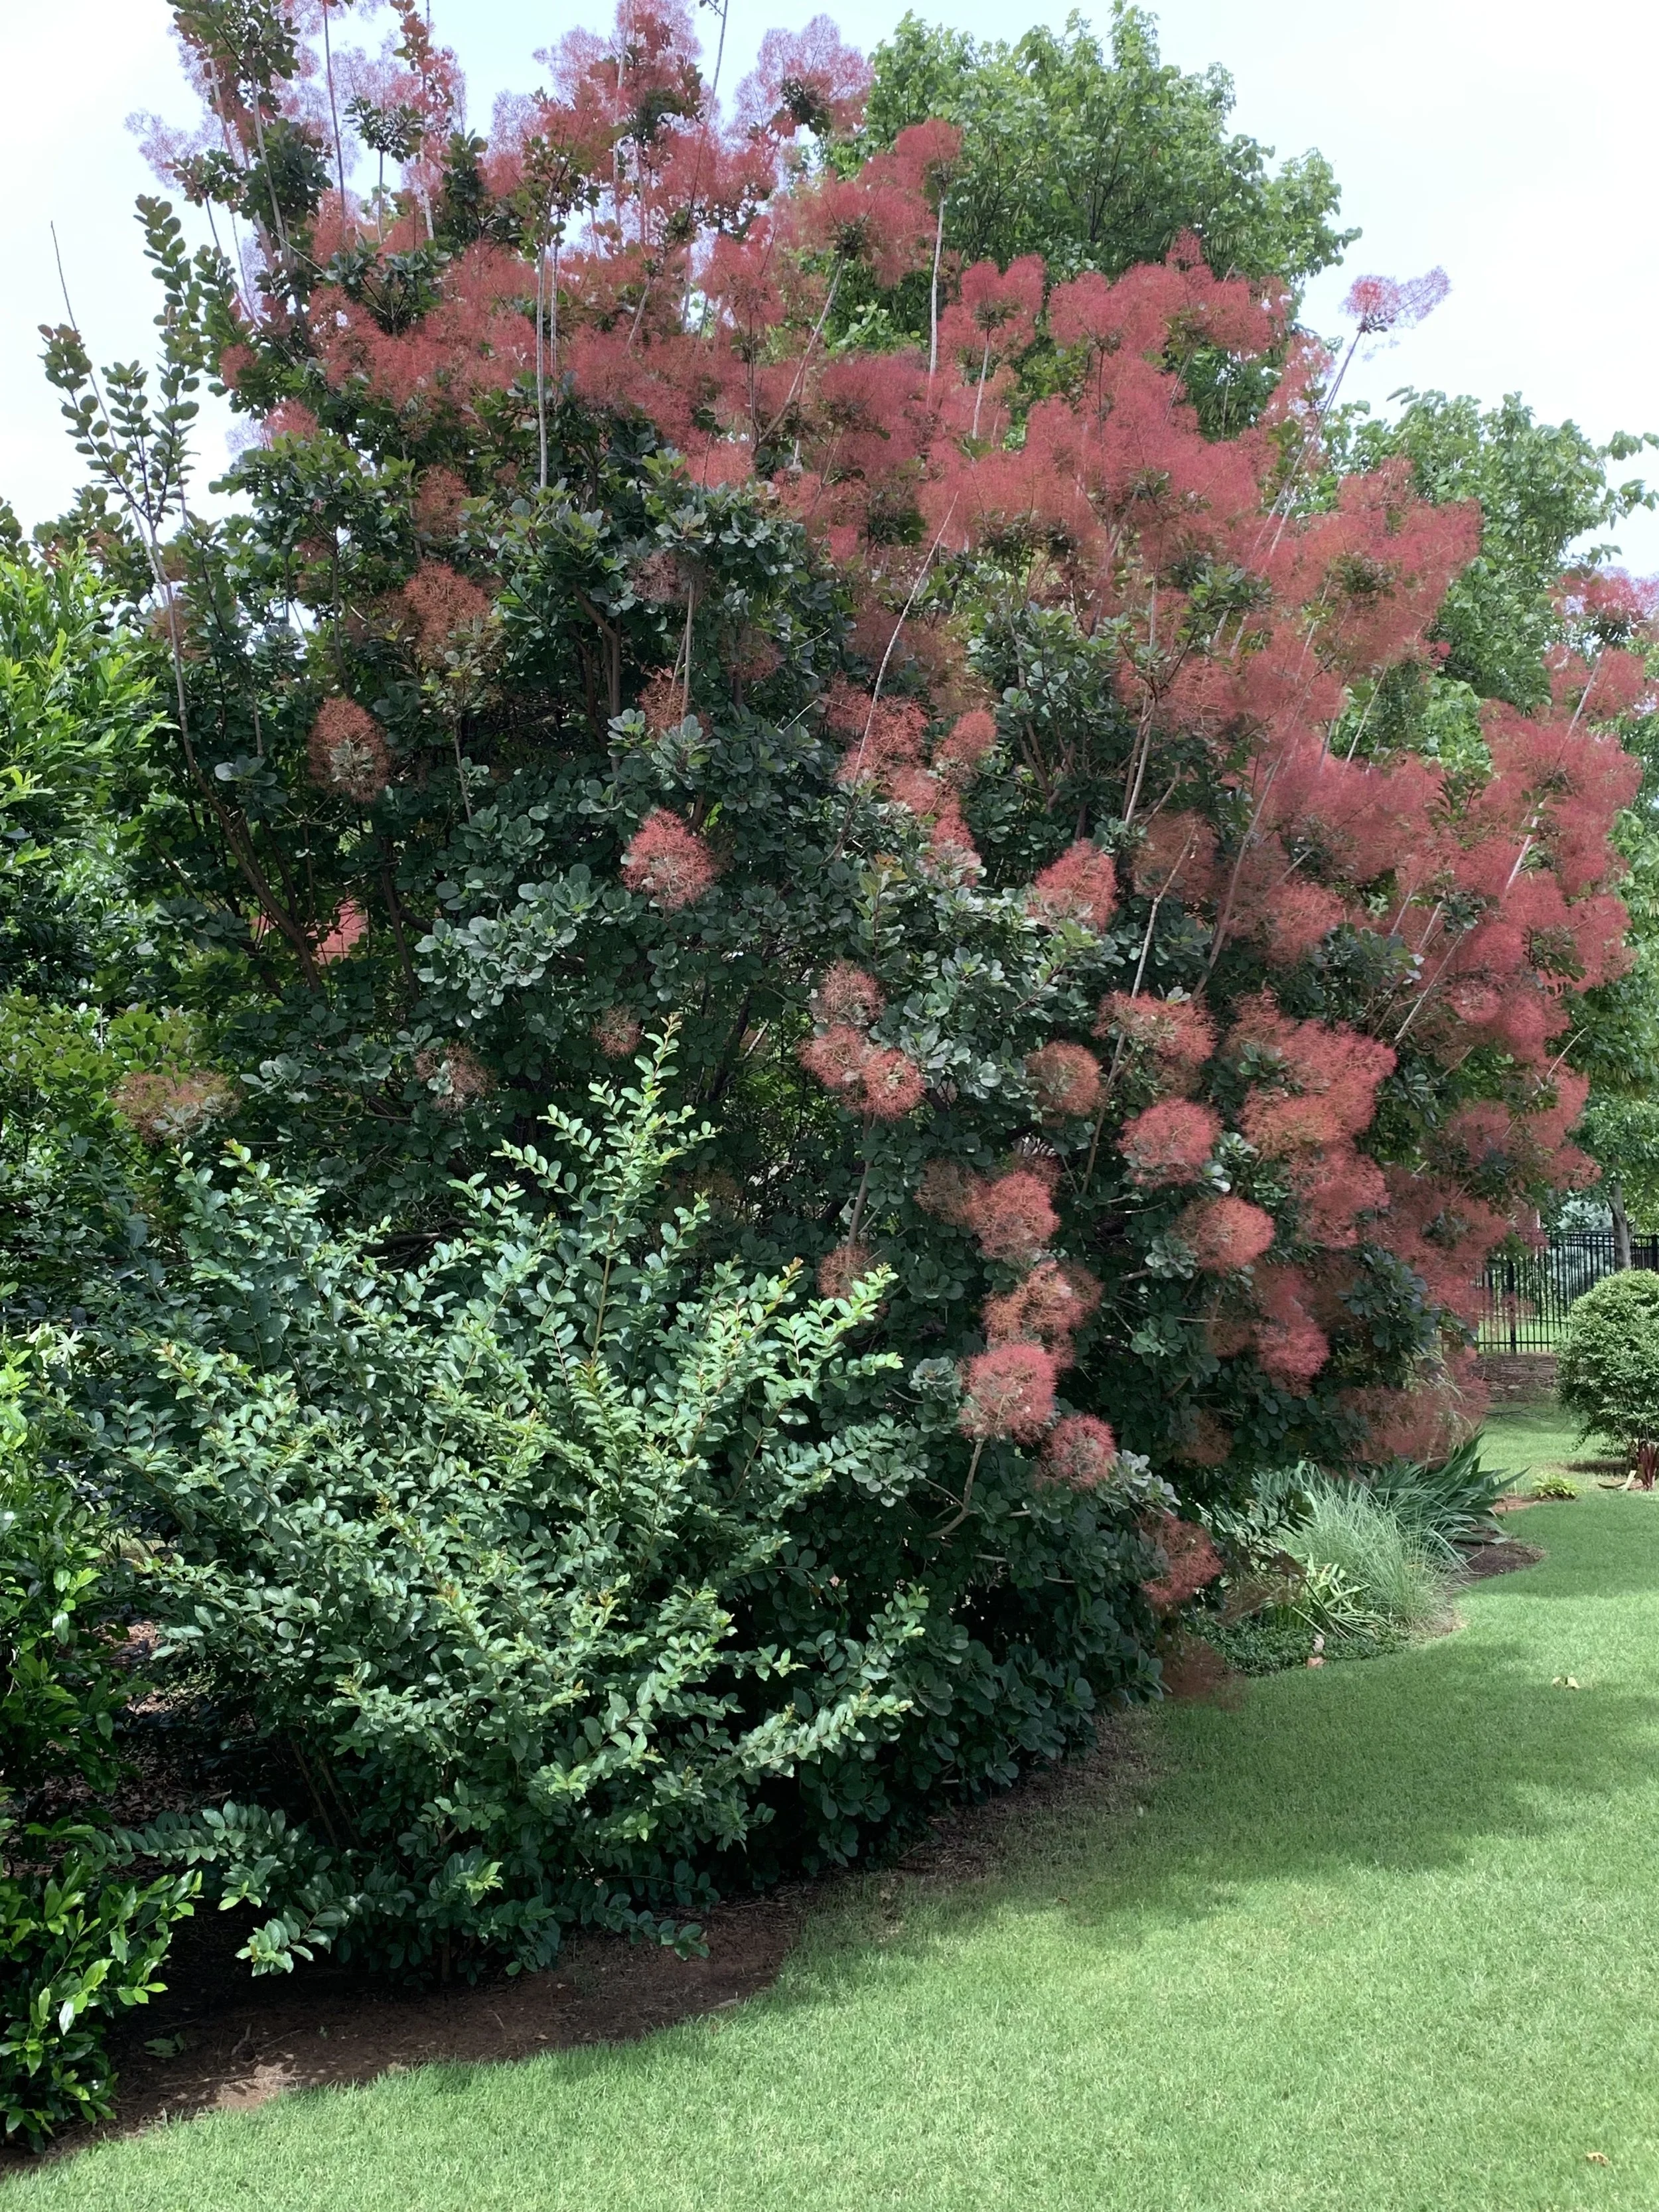
Smoke Tree
Smoke Tree - Varieties of purple or yellow foliage with airy smoke-like plumes in the summer. 15’ tall and 10’ wide.
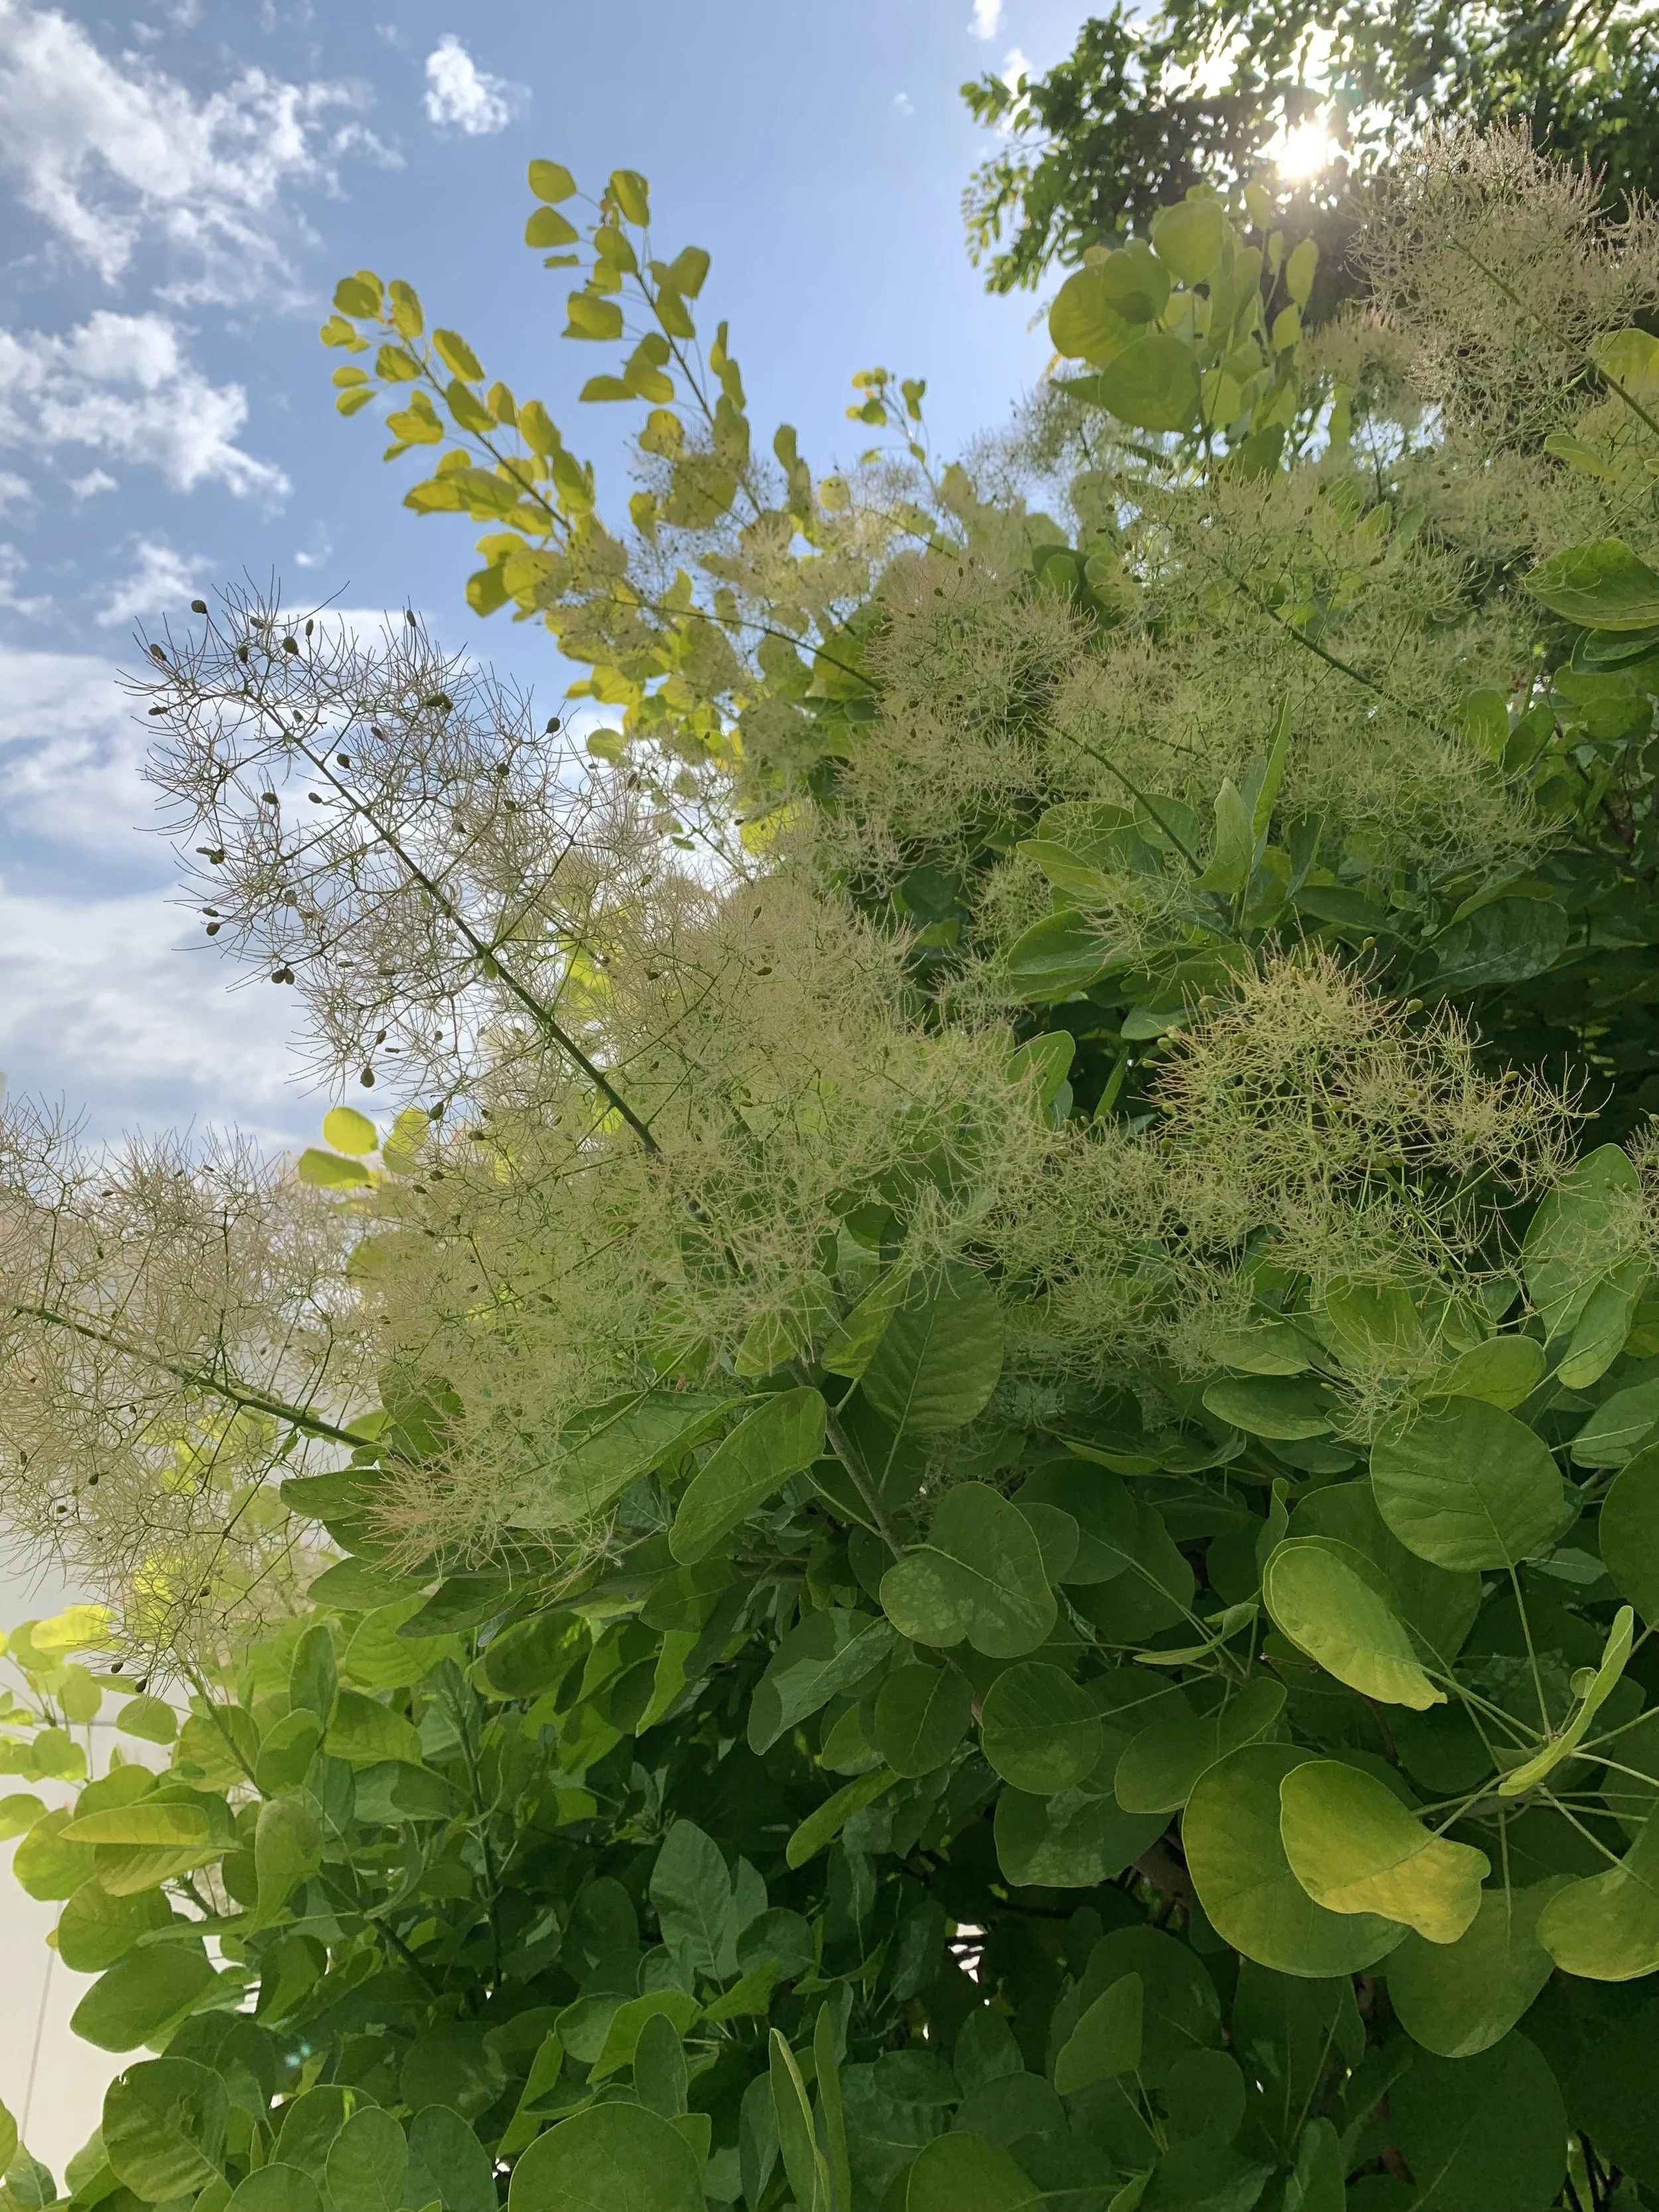
Smoke Tree
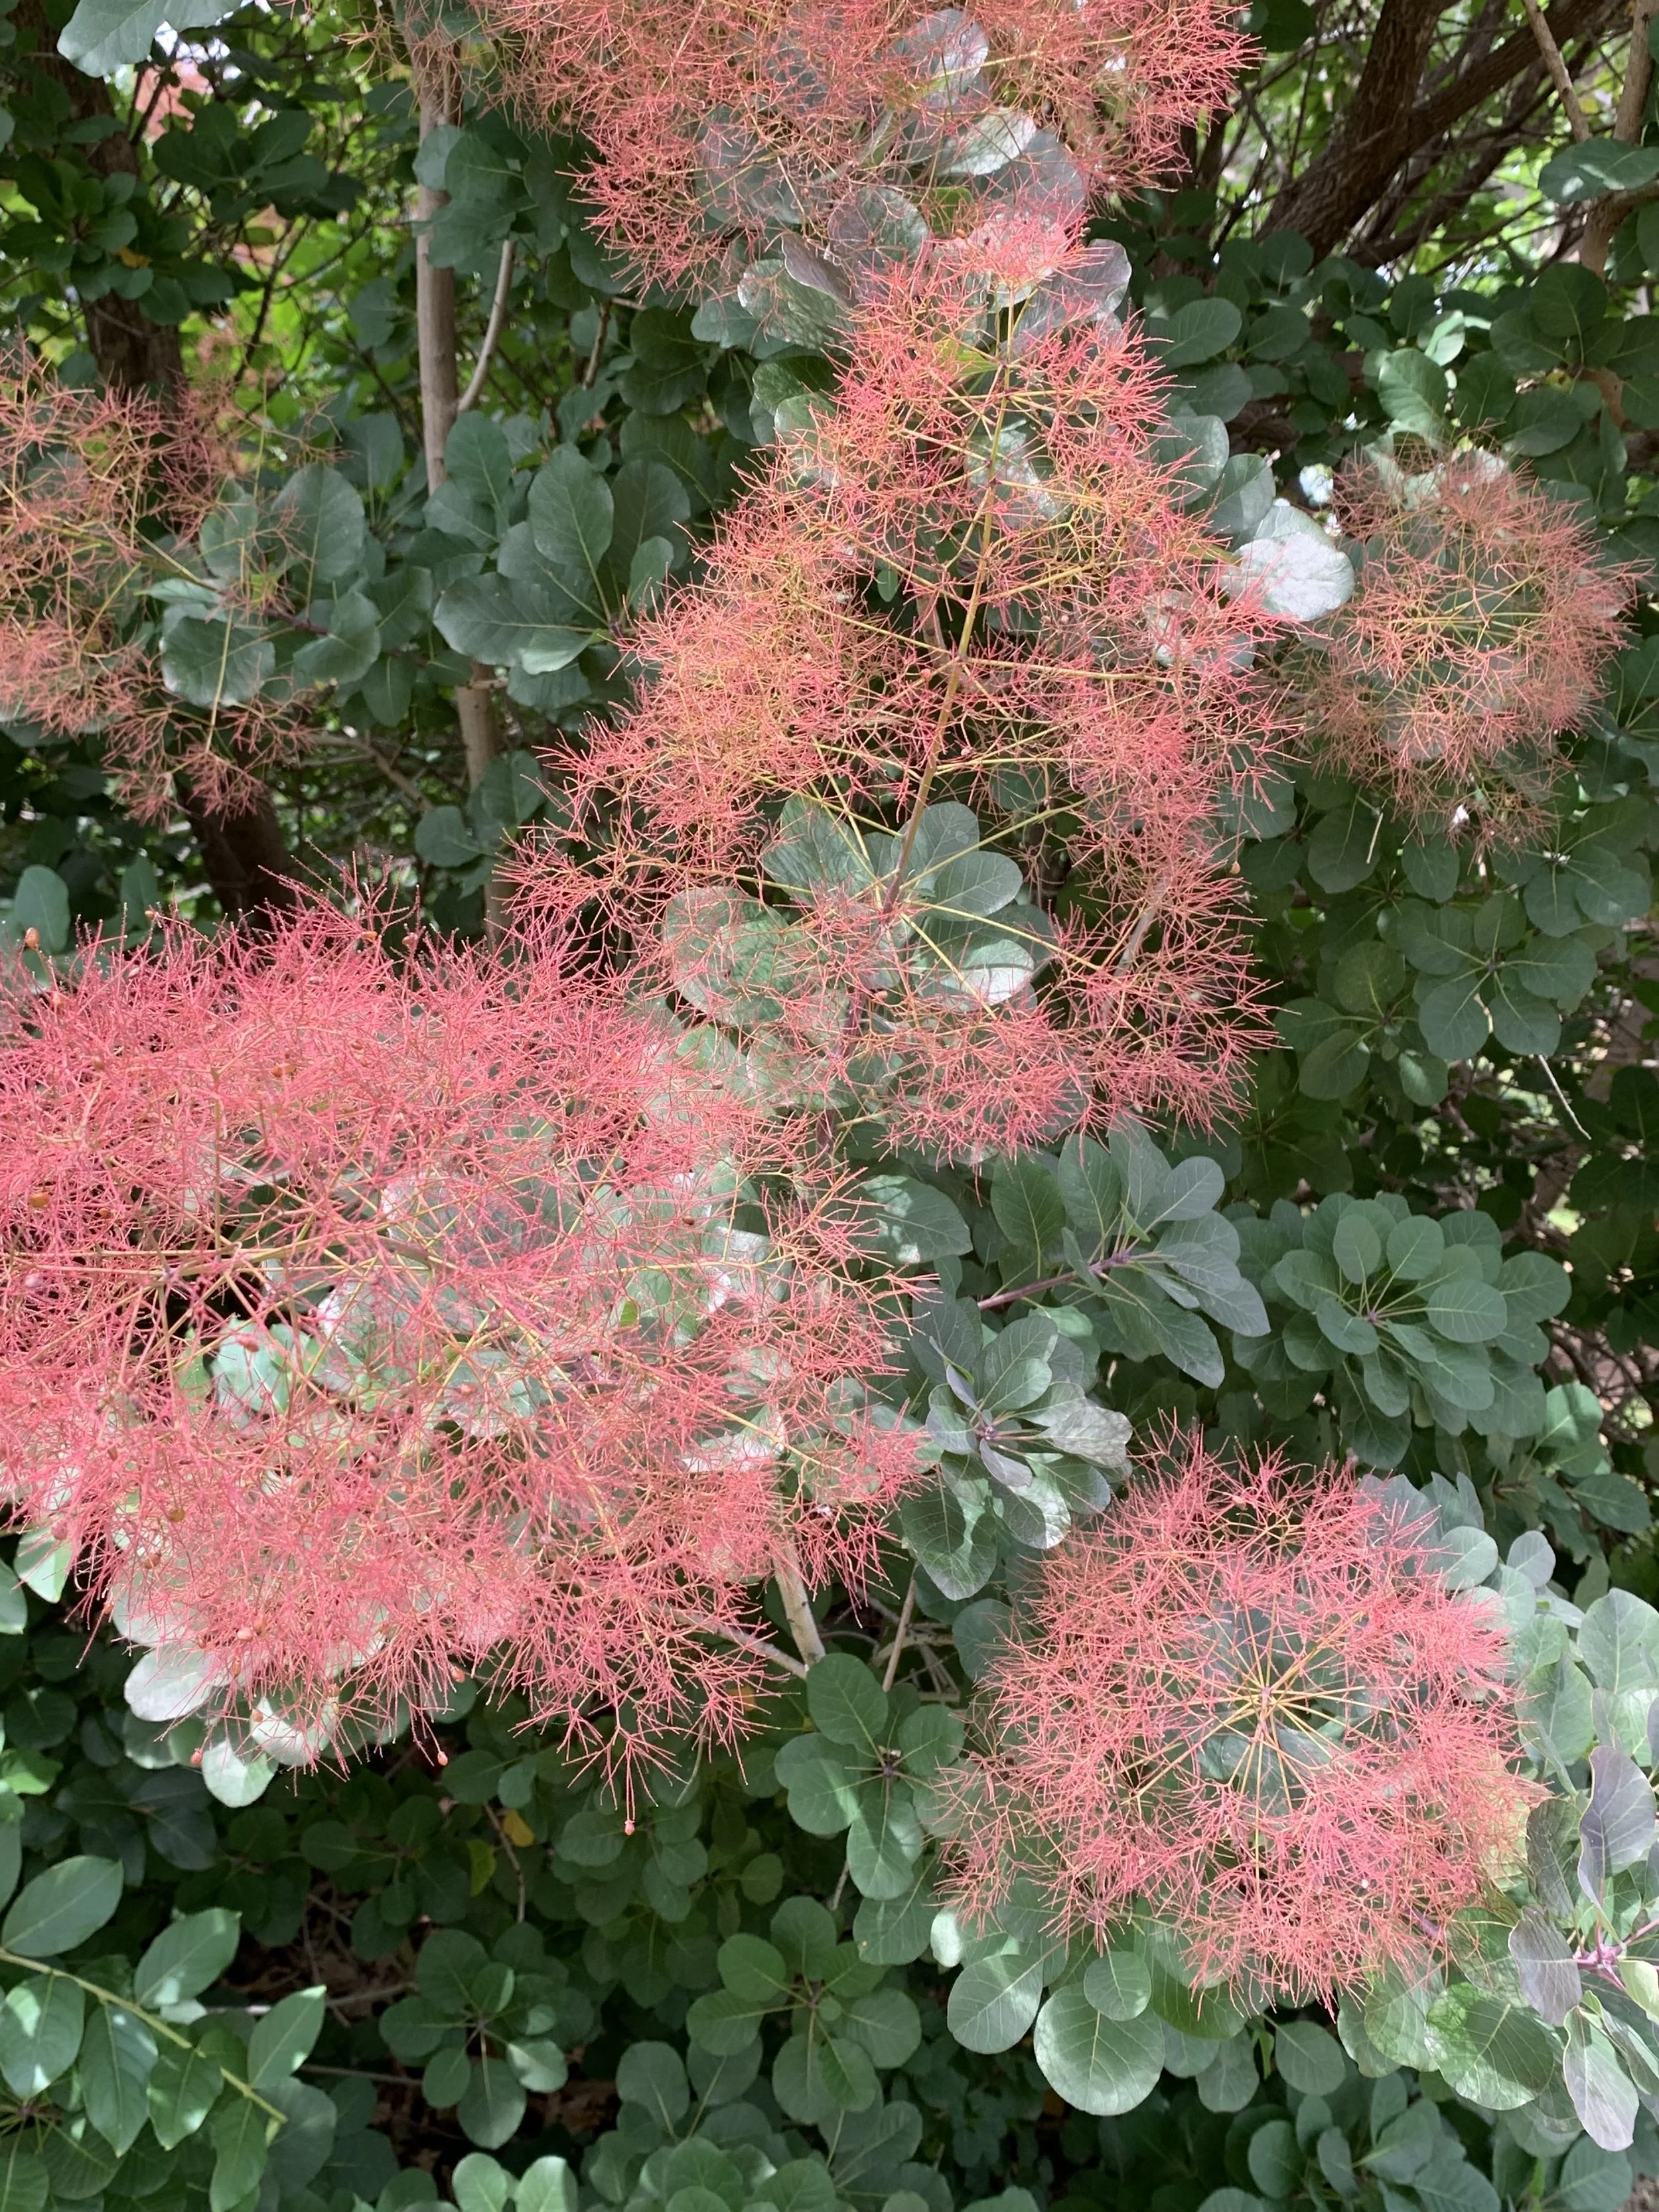
Smoke Tree

Taylor Juniper
Taylor Juniper - Narrow columnar evergreen with bluish-green foliage creating a formal elegant look. Also, can be used to create screening or privacy. 25-30’ tall and only 3’ wide.

Taylor Juniper

Taylor Juniper
These are only a few small trees to consider. The list could go on and on.
How have you used small trees in your landscape?
What small trees do you have in your landscape?
Lorne Hall
Hall | Stewart Lawn + Landscape
(405)367-3873
Thankful v. Grateful

What? Is this the weekly Hall | Stewart post?
I realize you read this every week for the latest lawn and landscape information and the title appears off subject today. It is. You have my permission to go ahead and hit delete now…you won’t hurt my feelings.
This week, Thanksgiving week, had me pondering the difference between ‘being thankful’ vs ‘being grateful’.
I love this time of year. I believe Thanksgiving may be the best holiday on the calendar. It isn’t over-commercialized. It is simple. It is a break in our busyness to spend time with friends and family and give thanks.
Tuesday morning, at our Hall | Stewart Weekly Huddle, we asked the question “What are you thankful for this year?”
The responses ranged from: “My wife!” to “My family!” to “Our team!” to “My newborn baby boy!” to “Our great customers who we get to help have their best lawns!”
However, one team member’s response started me thinking more deeply about thankfulness. Leo said, “I’m thankful for my changed life, my relationship with my Savior, and a life that is on a totally different trajectory than my old life!”
It started me wondering if that was thankfulness or was that gratefulness.
Is there a difference?
A Google search started. Conversations ensued.
Thesaurus.com states that in most cases they are viewed as exact synonyms.
Dictionary.com says they are close synonyms commonly used to mean the same thing.
Exact? Close? Or is there a difference?
I think there is a difference between thankful and grateful.
For me, being thankful is an event. Thankful is when someone does something for you. A gift. A helpful hand. A kind word. It is an acknowledgment of benefits received.
Grateful is something deeper. It is something richer. Gratefulness is felt in the soul. Gratitude comes from the heart. It goes beyond appreciation to a state of being.
I was very thankful to have another Thanksgiving with my mom whose mind has been fading for the past few years. Rarely does it appear she knows who I am anymore, but nonetheless, I was thankful to be with her on Thursday. I am grateful for her impact on my life and my family. She always wanted more for us than she had and encouraged us to achieve far more than we ever thought we could achieve. I am more than thankful for my mom; I have heartfelt gratitude for her.
Another personal example that has me pondering the difference…
A few weeks ago, a DYI home project took a quick turn for the worse resulting in a Saturday afternoon in the emergency room followed by surgery on Monday to put one of my hands back together. I am deeply thankful for the Integris Baptist Emergency Department doctors, nurses, and staff who practiced their craft so wonderfully that afternoon. I am also deeply thankful for a skilled surgeon who had the knowledge and experience to know exactly how to fix my damaged hand. And, the physical therapist who I am spending, and will be spending, way too much time with over the next few weeks, I am tremendously thankful.
But, it is the deepest heartfelt gratefulness I have for my wife who has so patiently woken up to my early schedule every day for the last 5 weeks to help me get ready and tie my shoes. I am more than thankful for her; I am grateful she is by my side as I heal.
It is gratefulness I feel that my dad was with me when the accident happened, got me to the hospital quickly, and then returned to finish my project in the days that followed. It is gratefulness I feel for family and friends who called, texted, prayed and showed up to check on Lori during my surgery. It is gratefulness that I feel for my Hall | Stewart partner and team members who stepped up to cover the workload I couldn’t do with my one un-injured hand.
Grateful is a deeper, stronger, more emotional version of thankful.
Thankful is recognition of a transaction.
Grateful is recognition, an acknowledgment of the difference others make in our lives.
Seth Godin said it well this week in his Thanksgiving Day post, “The magic of gratitude is that it improves everything it touches.”
Gratitude is a state of being. A position of gratitude changes your perspective.
What are your thoughts? Are they the same or is there a difference?
(I promise to return to talking about what we know best – lawns and landscapes!)
May your days be filled with a spirit of gratitude!
Lorne Hall
Hall | Stewart
(405)367-3873